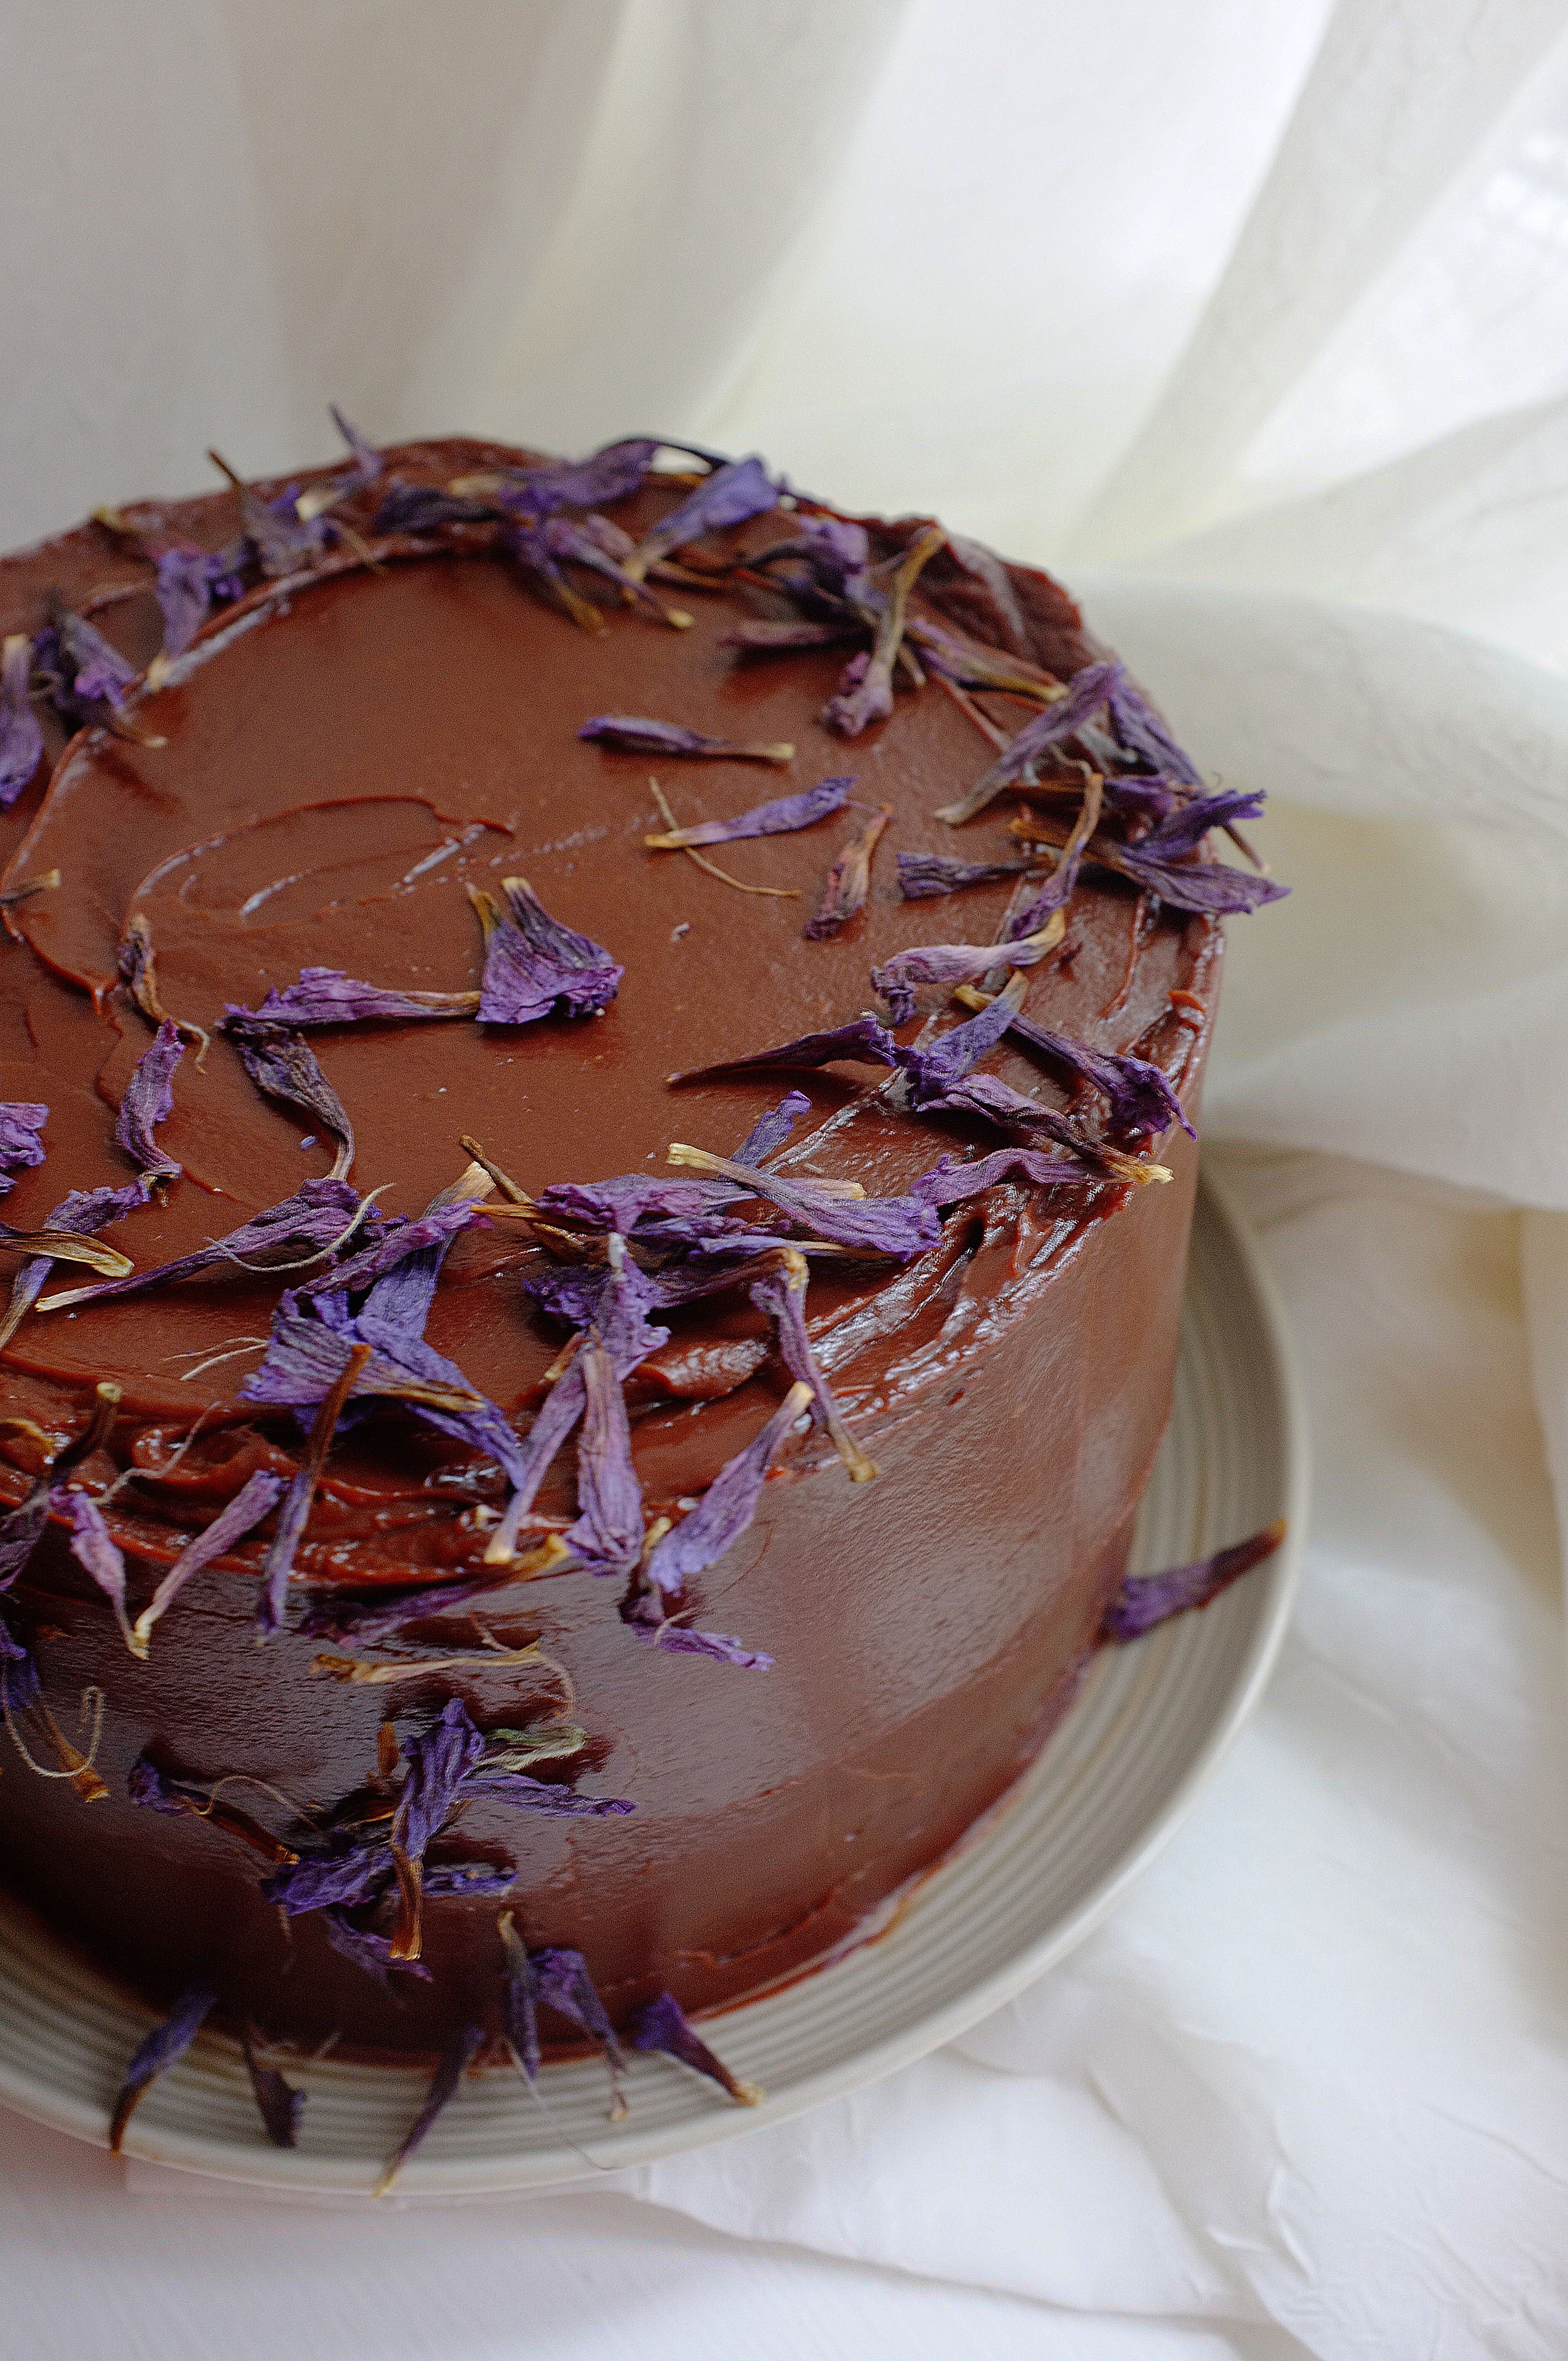
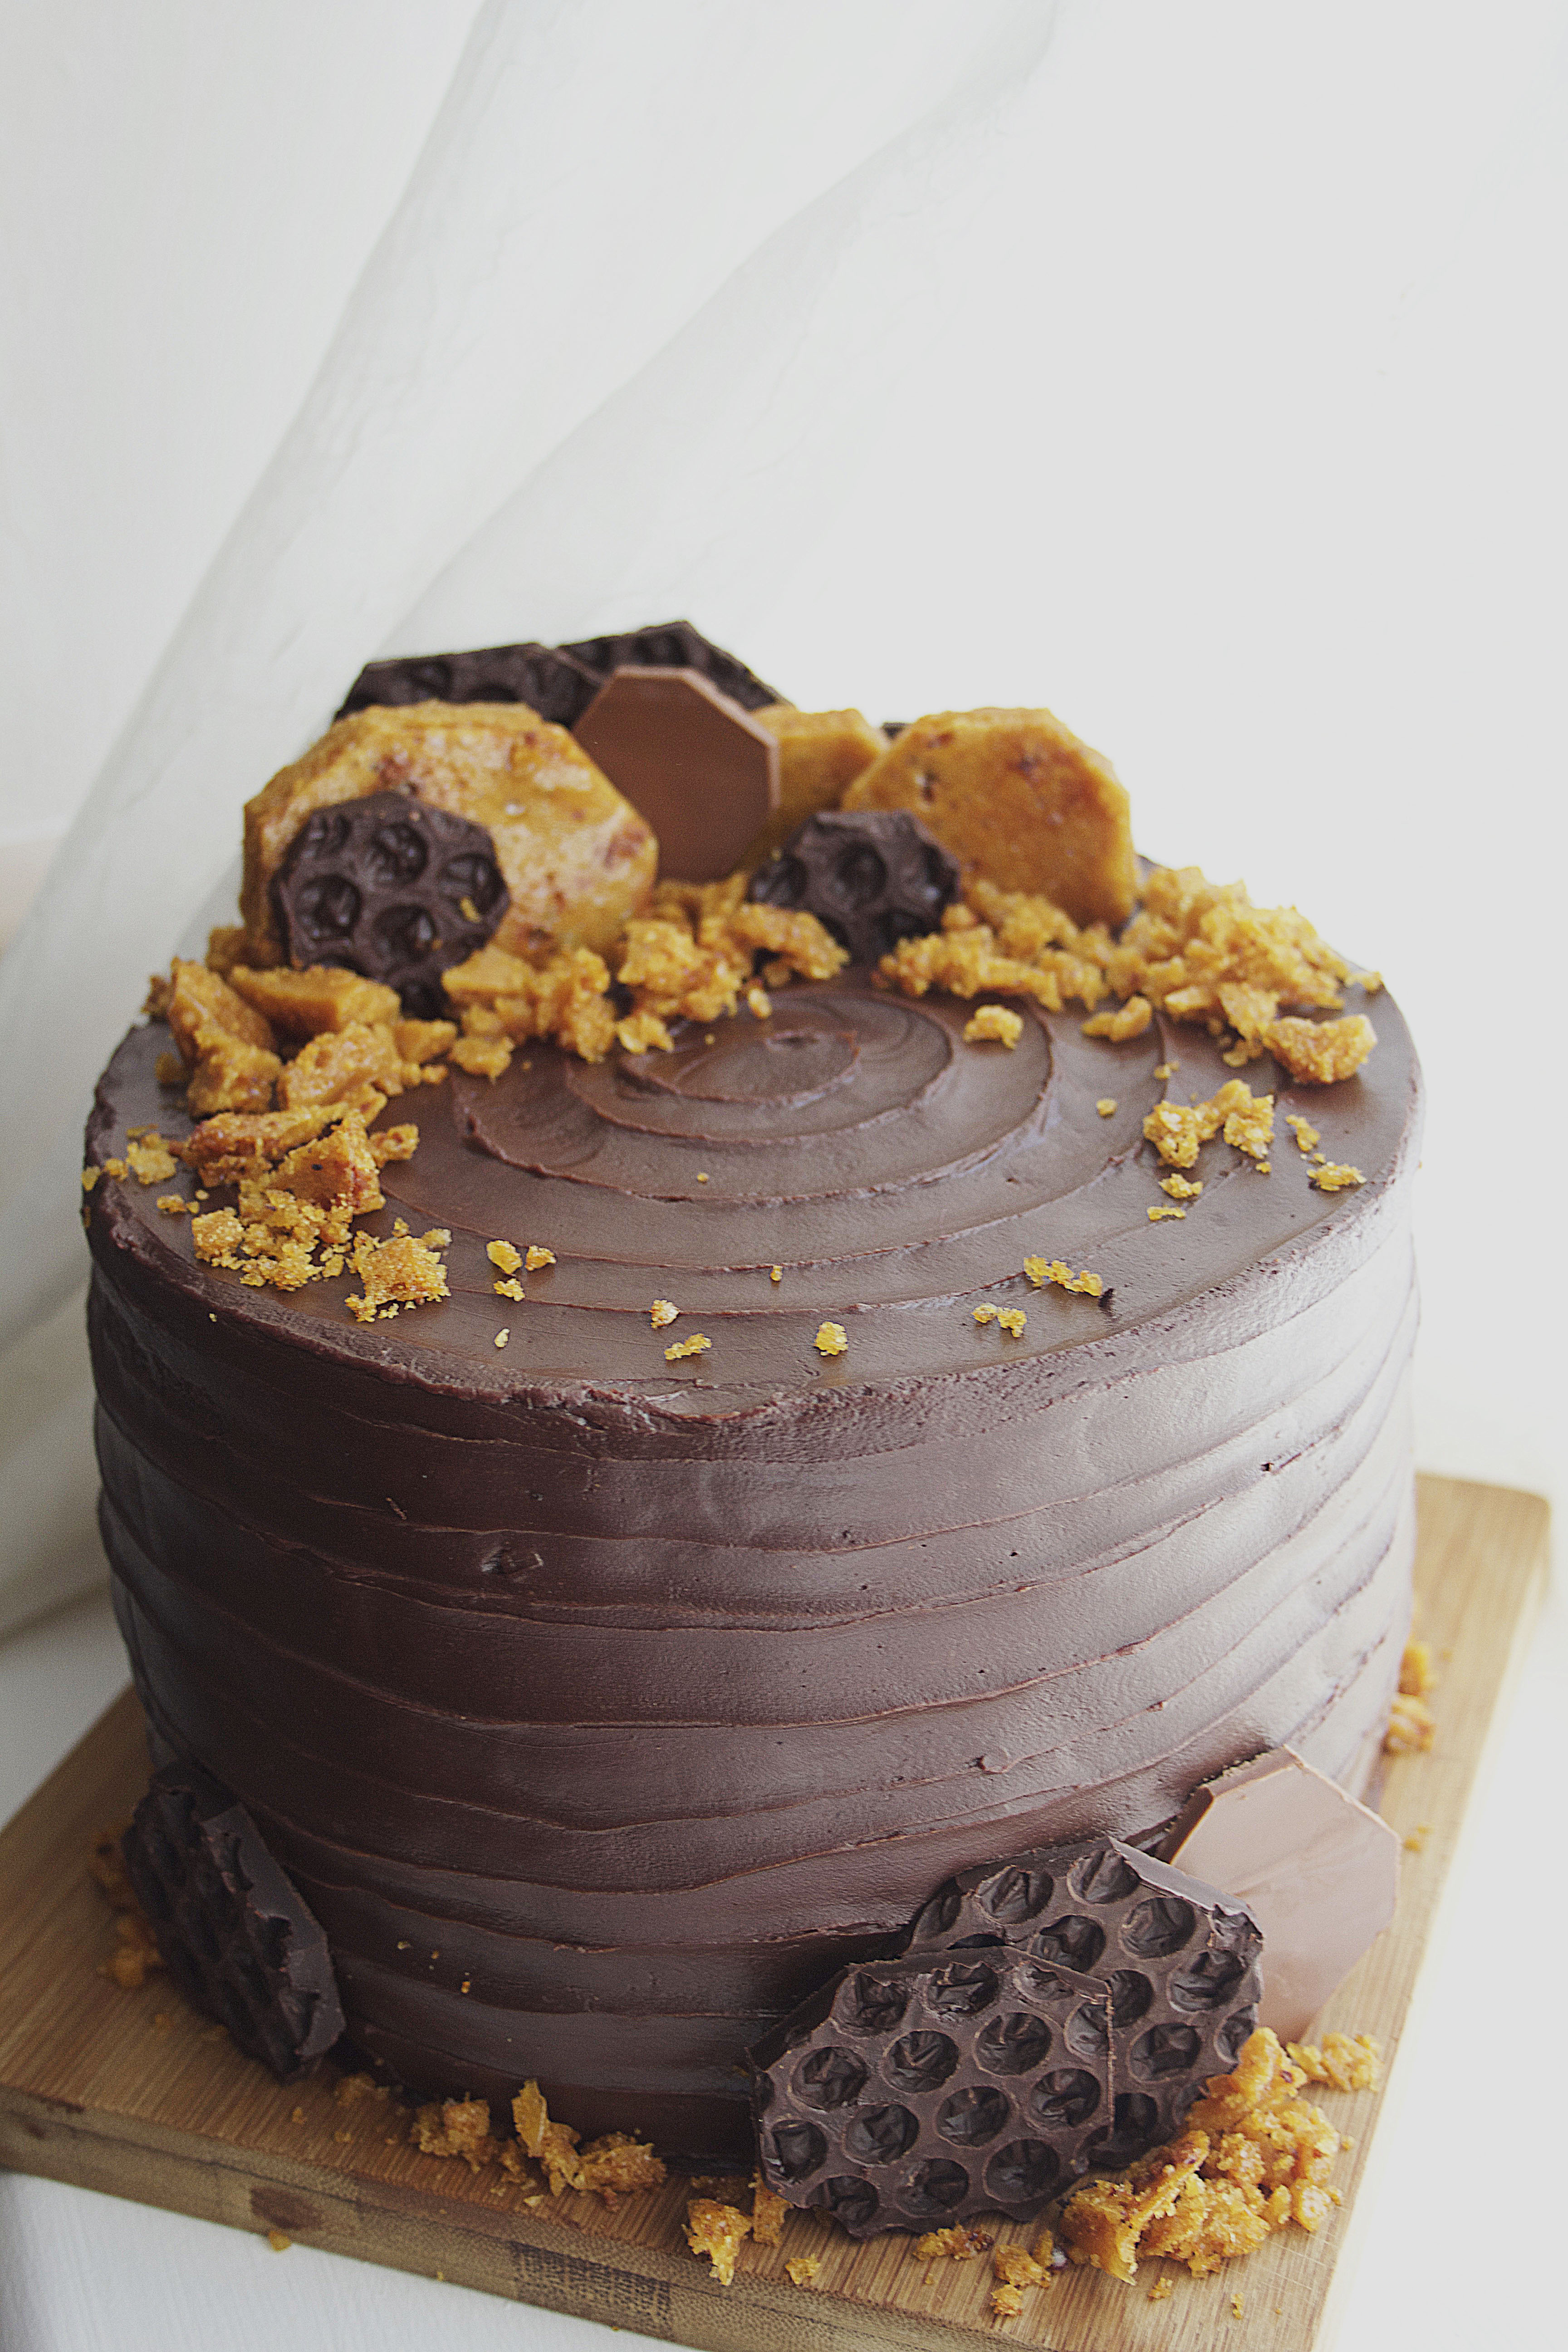
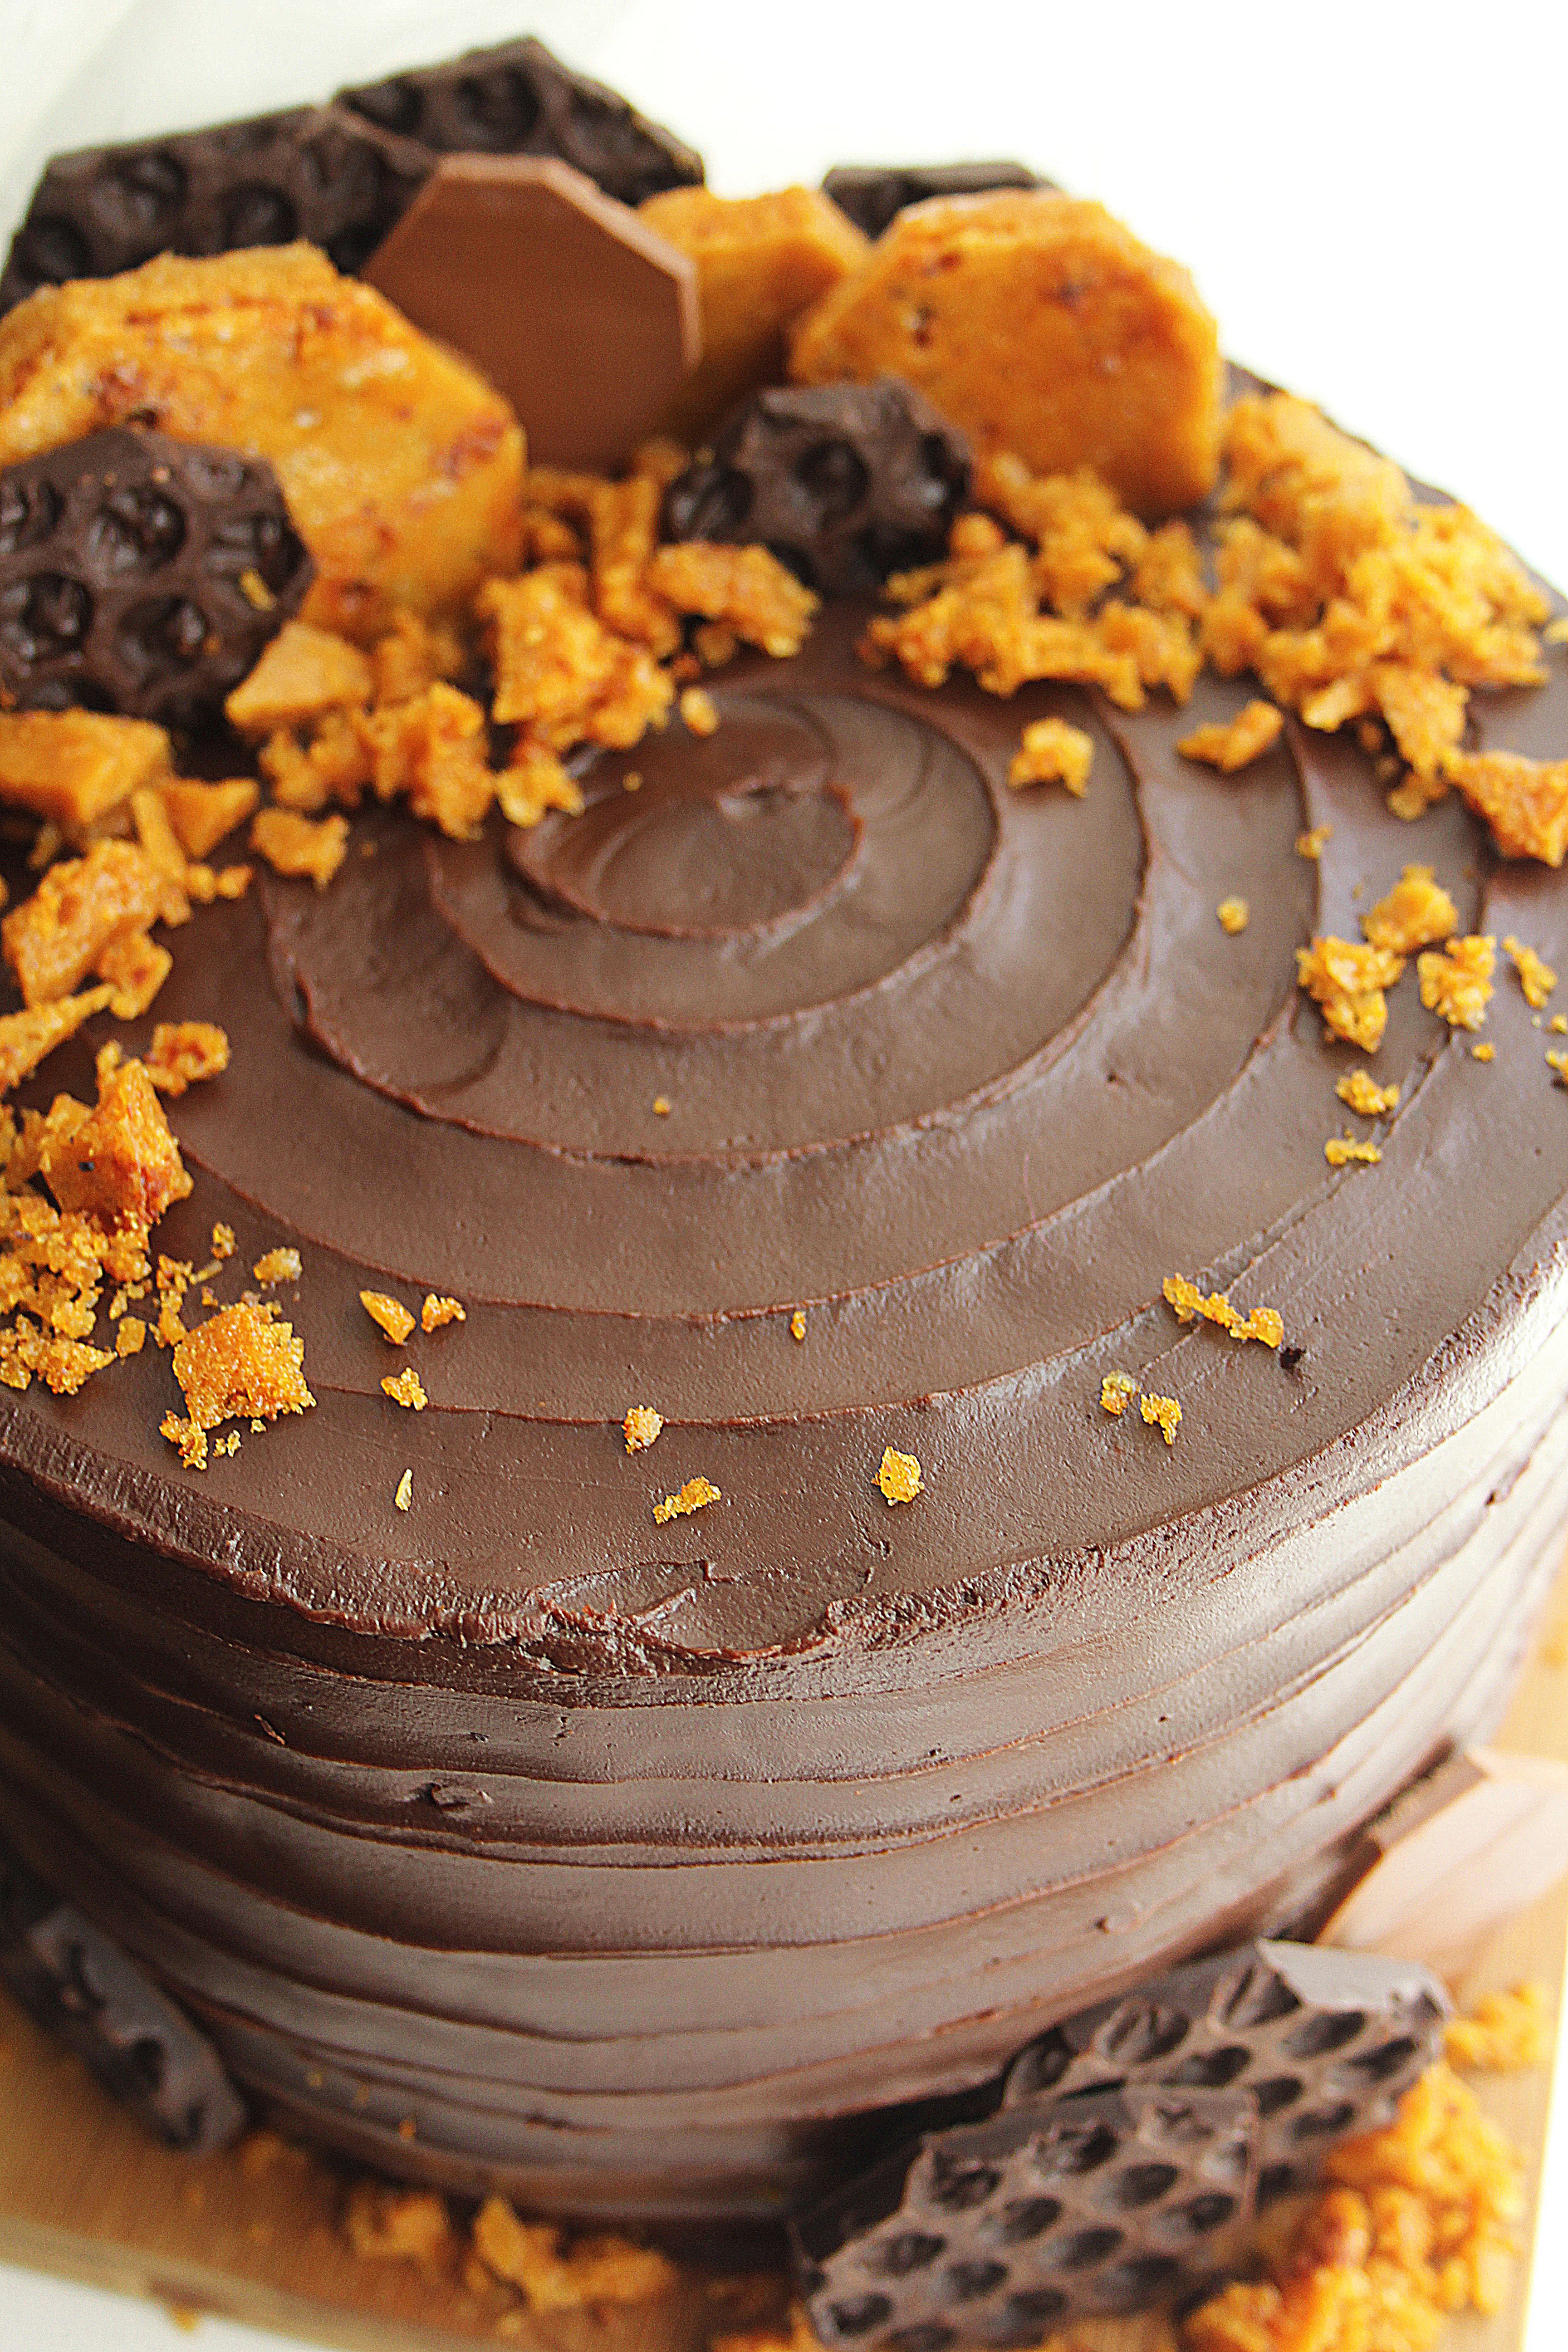
Whenever I bake a chocolate cake (the layered kind, not the flourless, fudgy sort) I’m looking for a sponge which actually tastes of chocolate, is really moist without being overly dense and isn’t too sickly sweet. I’m always tweaking my go to chocolate cake with these characteristics in mind and think I’ve pretty much cracked it with this recipe. I’ve teamed the light chocolate layers with honeycomb toppers, salted toffee cream filling and a rich ganache coating here, but you could definitely fill it with chocolate buttercream if you want a pure chocolate fest.
Note: this cake is so extra and is definitely one for a special occasion- you could half the recipe and just coat with ganache if you’re after something indulgent but a little more modest

Ingredients (makes a tall 8 inch celebration cake- feeds 12-14 people)
For the cake:
- 375g plain flour
- 300g caster sugar
- 85g cocoa powder
- 2tsp baking powder
- 2tsp bicarbonate of soda
- large pinch sea salt
- 3 eggs
- 325ml milk
- 175ml vegetable oil
- 2tsp vanilla extract
- 100g dark chocolate
- 325ml just boiled water
- 2tsp instant coffee granules
For the toffee cream filling:
- 325g soft light brown sugar
- 225ml double cream
- 175g butter
- pinch sea salt
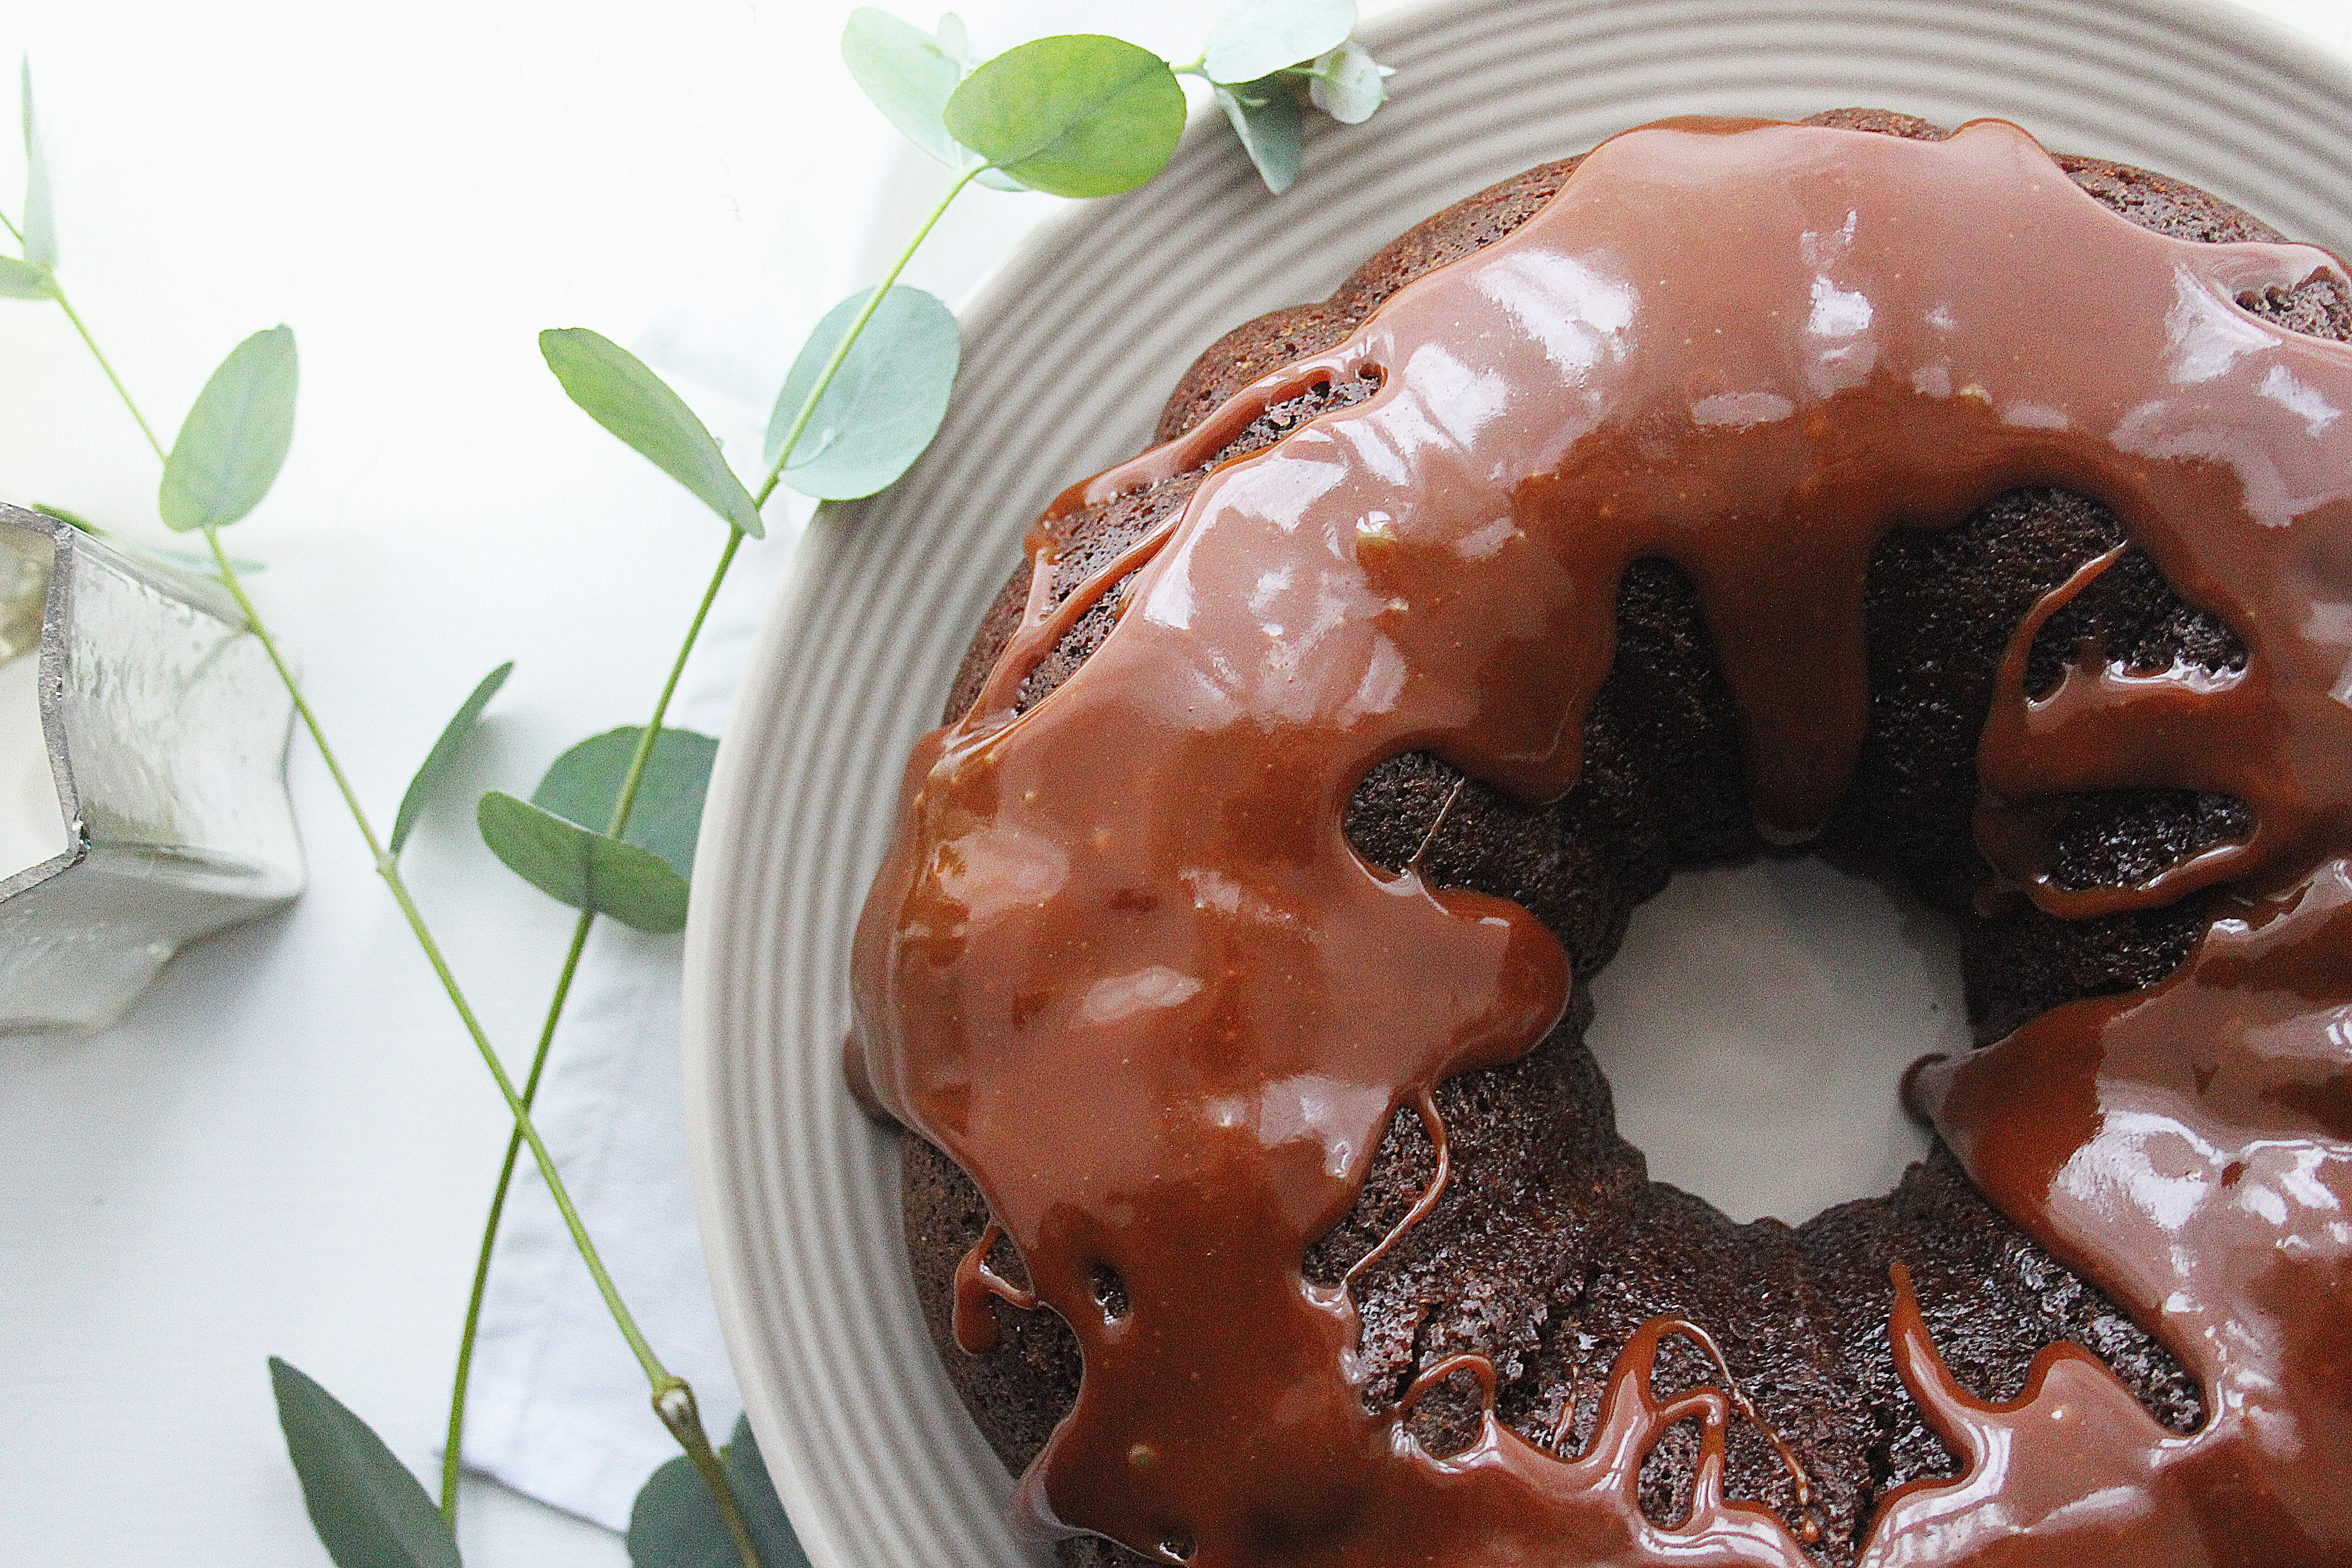
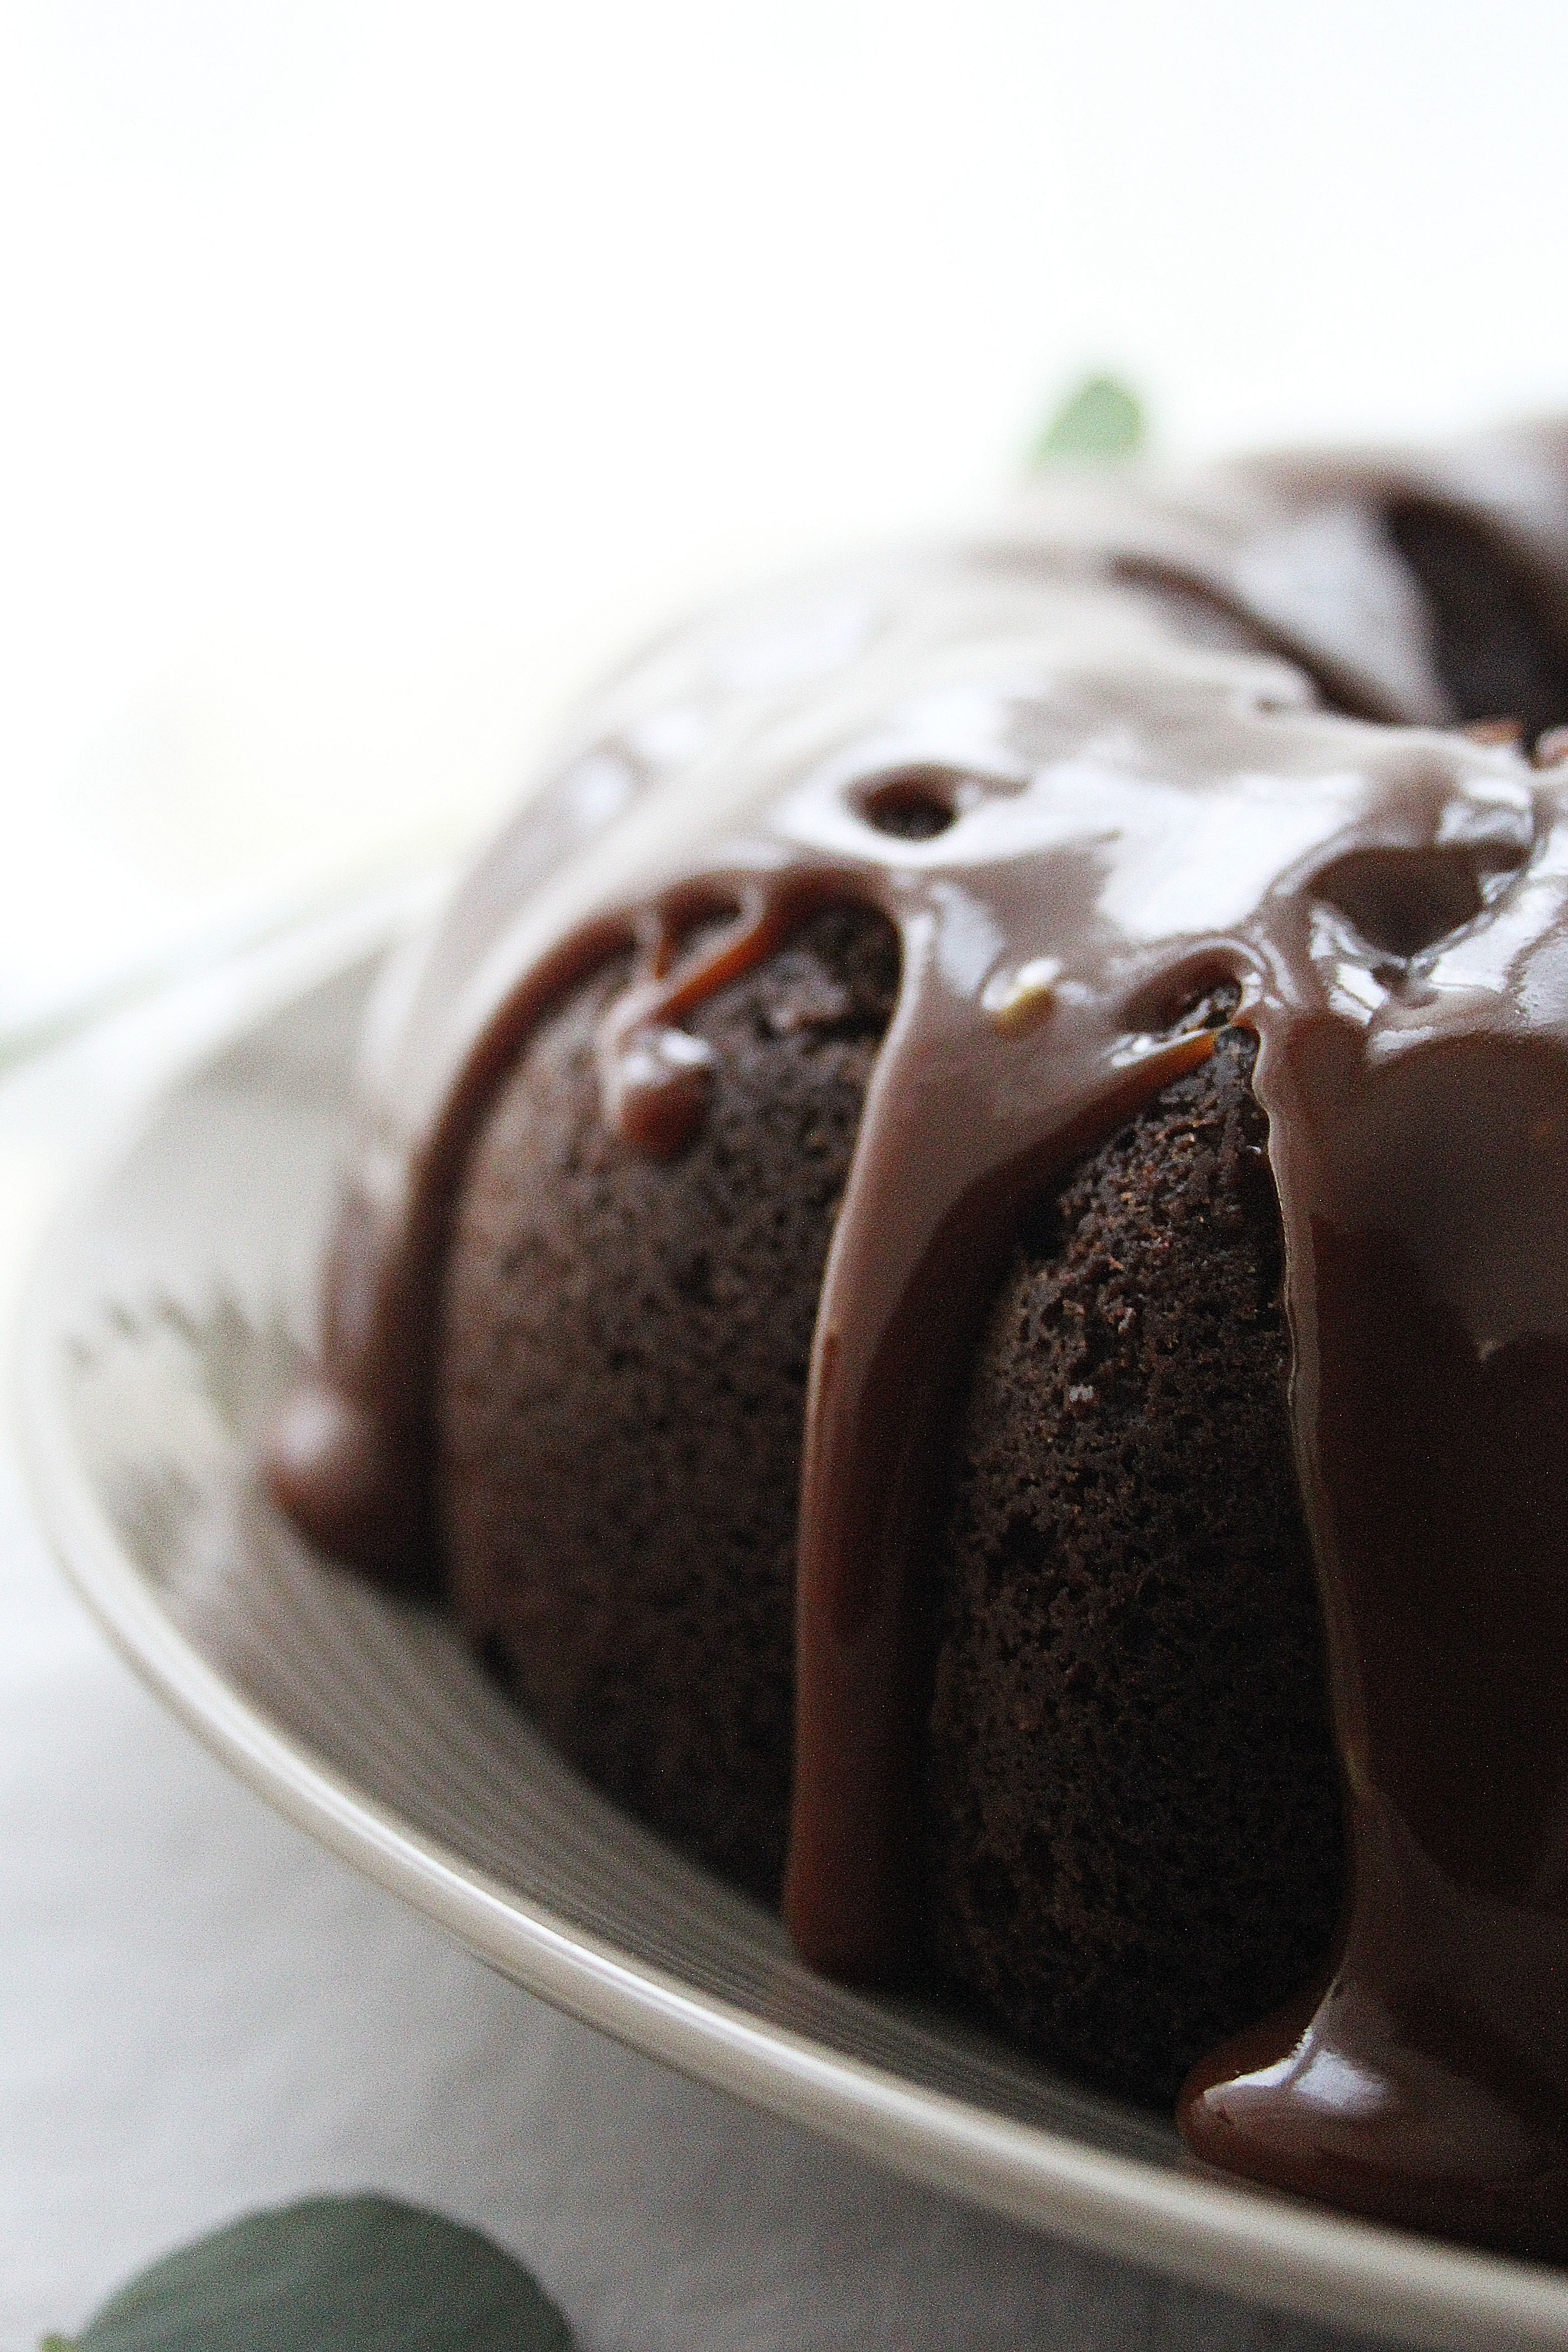
For the ganache:
- 200g dark chocolate
- 150g milk chocolate
- 300ml double cream
For the honeycomb (this makes more than enough- I use about half and store the rest in a jar for my many weak snacking moments):
- 60g butter
- 120g caster sugar
- 60g golden syrup
- 1 1/2tsp bicarbonate of soda

Method
- Preheat the oven to 170c (325F / gas mark 3). Grease and line two 8 inch cake tins.
- Melt the dark chocolate in a heatproof bowl set over a pan of simmering water (or in the microwave in short stints, stirring often). Set aside.
- In a large bowl stir together the flour, caster sugar, cocoa powder, baking powder, bicarbonate of soda and salt. In a jug, lightly whisk the eggs, milk, vegetable oil and vanilla extract. Make a well in the dry ingredients and pour the contents of the jug into it. Stir the wet and dry ingredients together until well combined then add the melted chocolate and stir again (I just use a balloon whisk for this- nothing electric is required as you don’t need to incorporate much air).
- Pour your just boiled water over the instant coffee granules and once they’ve dissolved, gradually add to the chocolate batter, stirring gently with your whisk as you go. The final cake batter will be very thin but don’t worry, it bakes beautifully.
- Split the mix evenly between the prepared tins and bake for 45-55 minutes (until a skewer comes out clean with a few moist crumbs attached). Once baked leave to cool completely in the tins.

- While your cakes are cooking and cooling you can get on with the filling, ganache and honeycomb toppers.
- For the filling, place the cream and sugar in a saucepan and gently heat until the sugar has dissolved and you are left with a smooth caramel coloured cream. Set aside, add the salt (to taste) and cool completely. Once your cream has cooled take the butter and whisk (in a stand mixer or with electric beaters) until it reaches a light, whipped consistency then gradually add your cream mixture. Keep whisking this until it has thickened and is spreadable. Set aside for later.
- For the ganache chop up the chocolate and scrape into a heatproof bowl or jug, then heat the cream until it just reaches boiling point and pour directly on top. Leave for a couple on minutes then stir to make sure the chocolate has melted into the cream leaving you with a smooth ganache. Set aside to cool and thicken.
- For the honeycomb line a baking tray with some lightly oiled baking paper then place the butter, sugar and golden syrup in a saucepan. Gently heat until all the ingredients start melting together then stir to combine. Turn up the heat and leave to bubble until it reaches a deep golden colour then add the bicarbonate of soda and briefly mix to make sure it’s evenly distributed- it should now start bubbling up and becoming lacy in appearance. At this point pour it quickly onto the lined baking tray and leave to set hard.
- Once you’ve made all your elements and they’ve cooled to room temperature you’re ready to assemble the cake. To do this slice any uneven tops off your sponges then slice in half horizontally, leaving you with four layers.
- Sandwich the layers on top of one another, filling with the toffee cream as you go. Once stacked, spread any remaining toffee cream all over the cake and then chill for 10 minutes (this setting time makes it easier to cover the cake neatly in ganache).
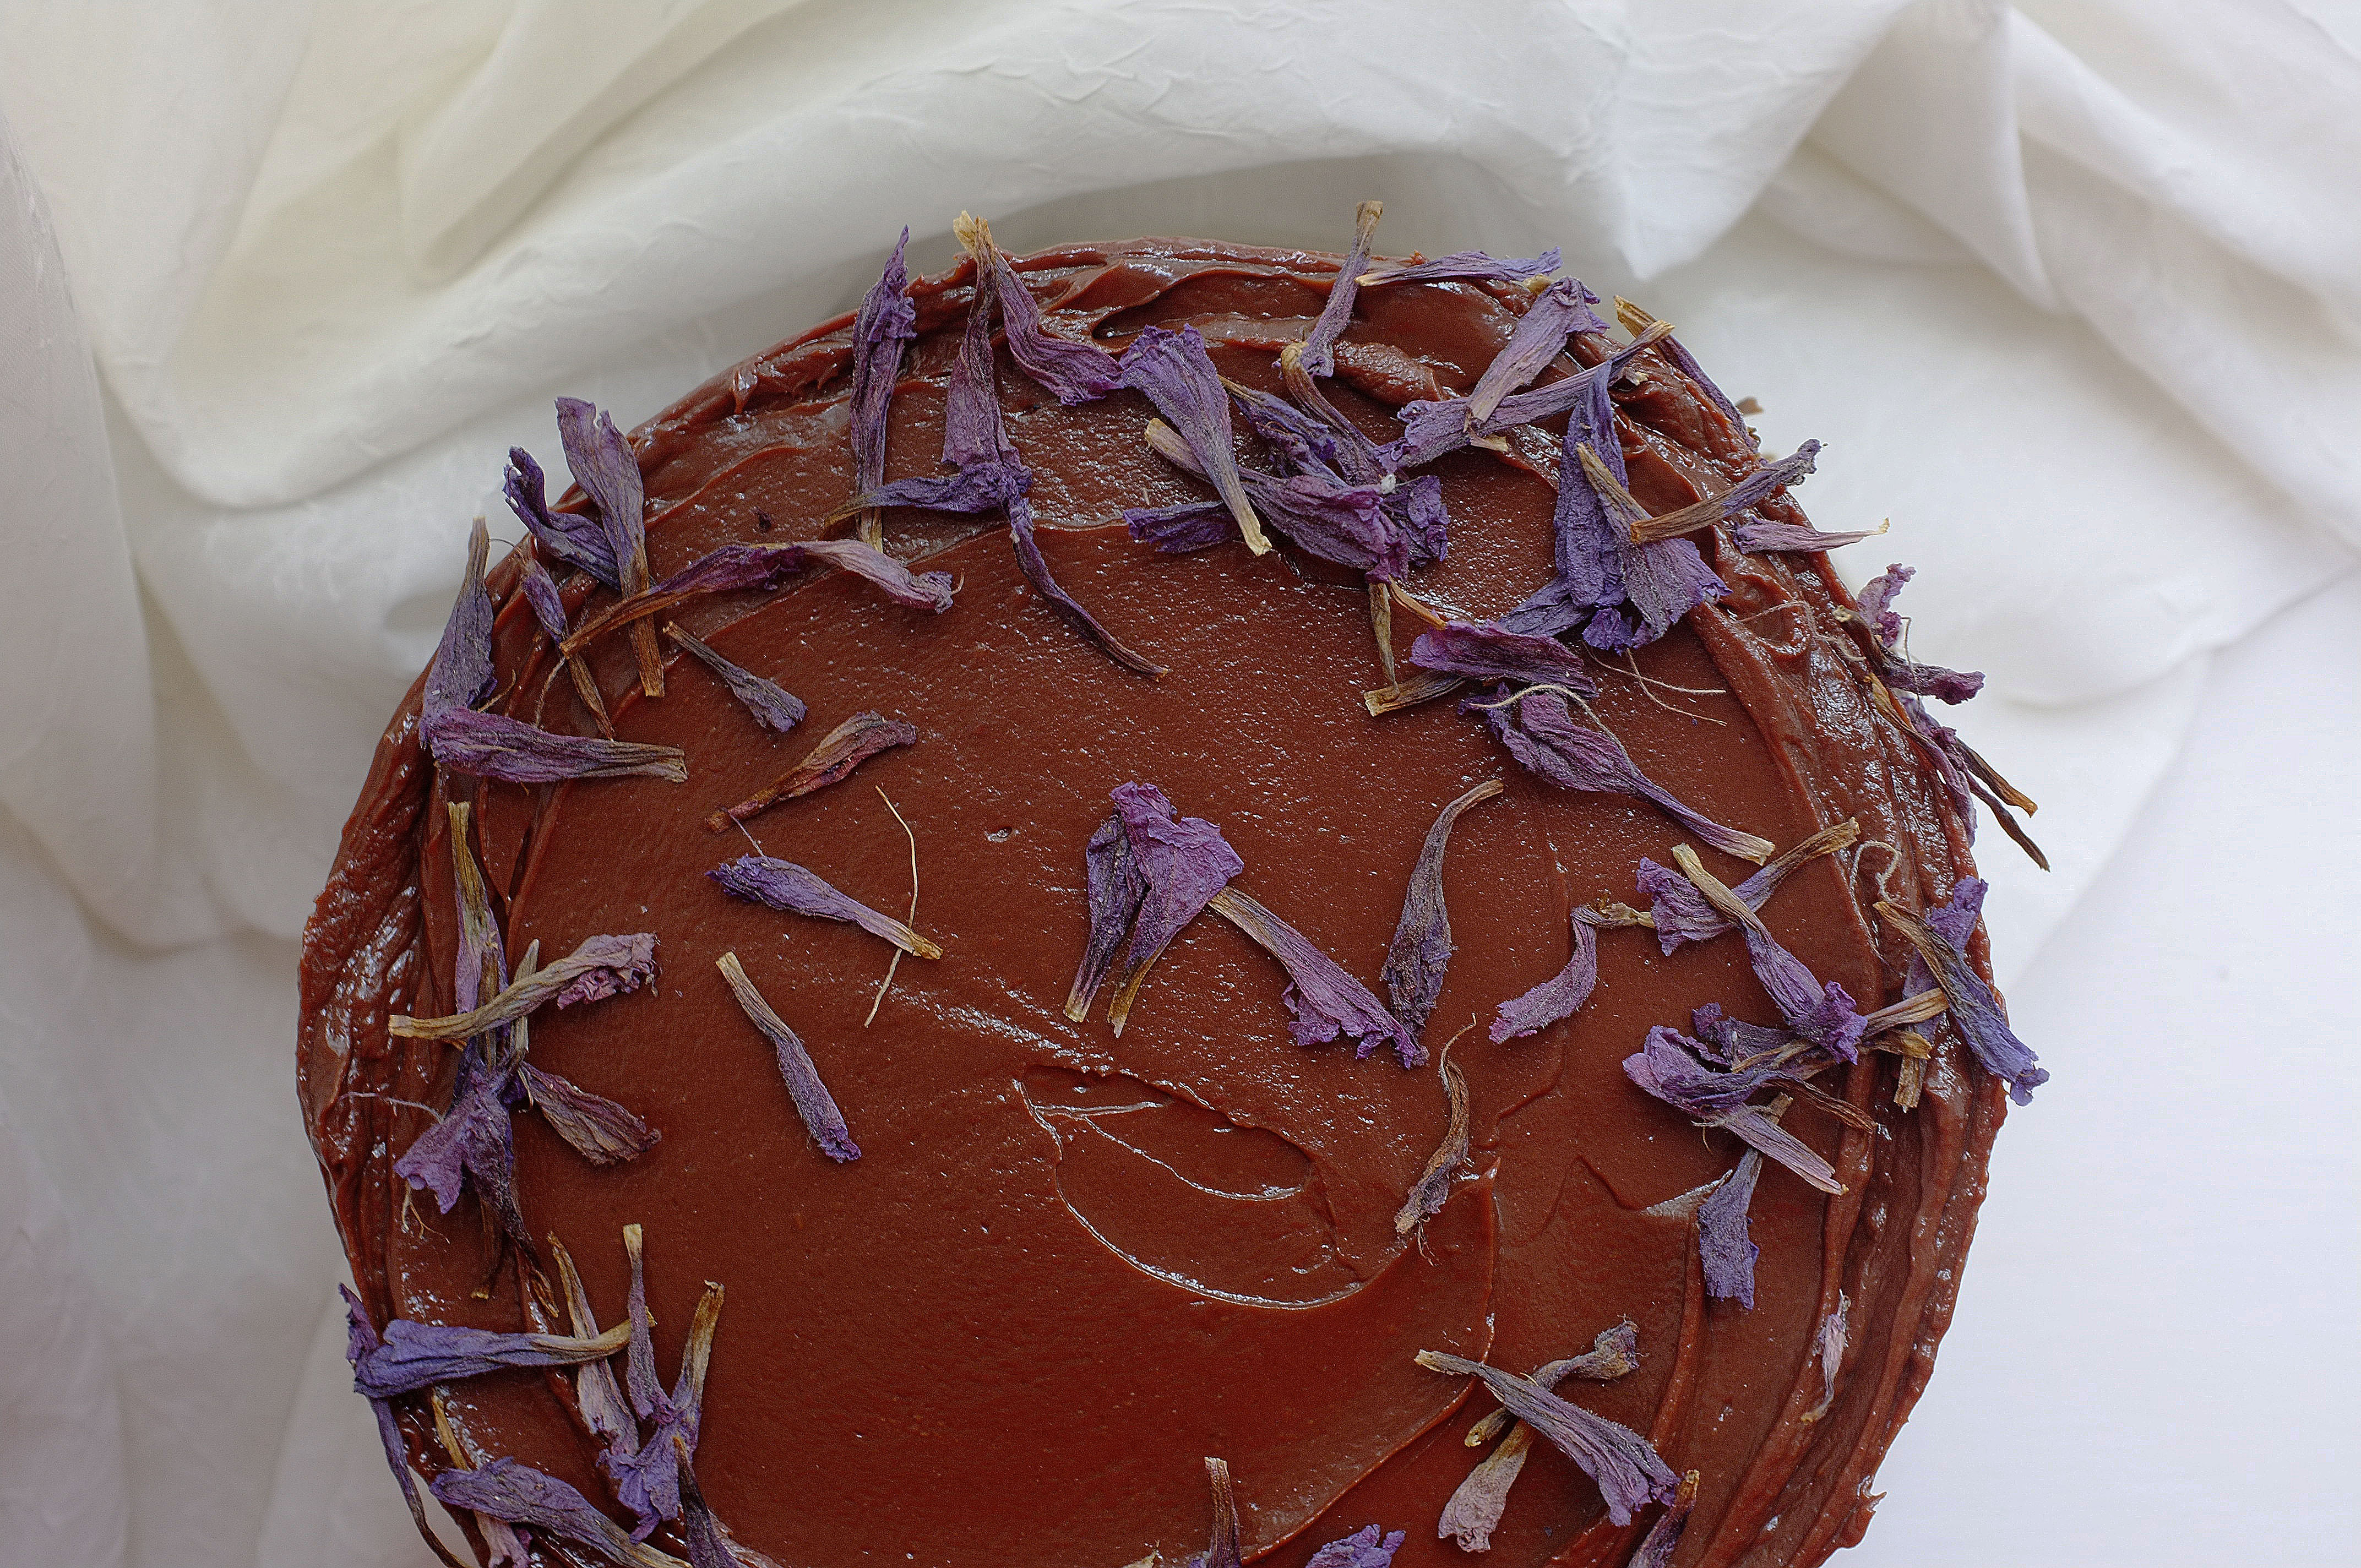
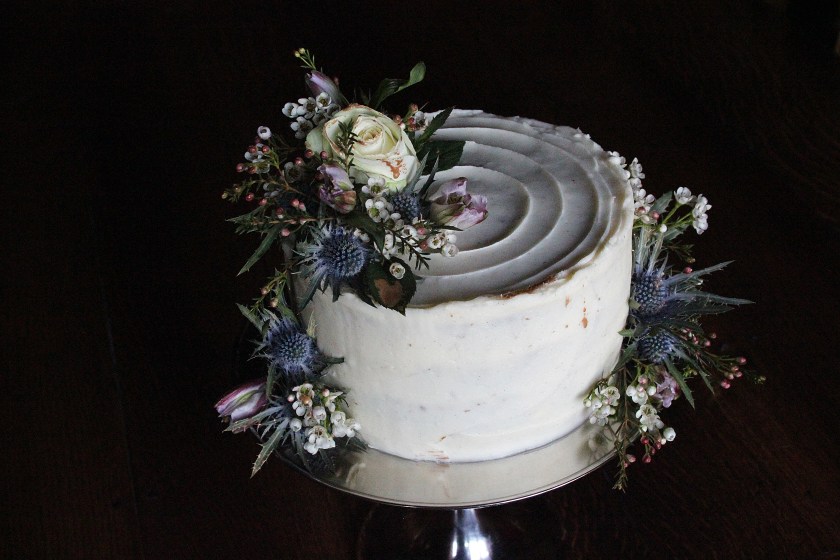
- After chilling the cake spread the ganache all over its surface. I used a palette knife to create a line pattern on my cake to tie in with the honeycomb theme but you could make it super sleek and smooth or go for a really rustic look- it’s up to you. To finish it off break up the honeycomb and use as decorations; I also made some toppers by setting melted chocolate over bubble wrap, but it really isn’t necessary!

I hope you all enjoy this recipe- my family and friends went absolutely mad for it so it’s definitely worth the effort if you’re up for a little bit of a baking project!


 Ingredients: