Winter Citrus Pavlova with Dark Chocolate and Spice

Uncategorized

Pavlova is a Great British classic, and although we usually associate it with summer days and strawberries, it’s a really versatile dessert which can be adapted for any time of year simply by changing up the seasonal fruit toppings. I love this variety as the fresh winter citrus and spiced mascarpone combined with a pop of pomegranate makes for a fresh alternative to a heavy Christmas pudding; perfect after a mammoth Turkey feast.

Ingredients

For the meringue

  • 6 large egg whites
  • 300g golden caster sugar
  • 75g dark brown soft sugar 
  • 1tsp white wine vinegar
  • 1tsp corn flour

For the toppings

  • 400ml double cream
  • 200g mascarpone
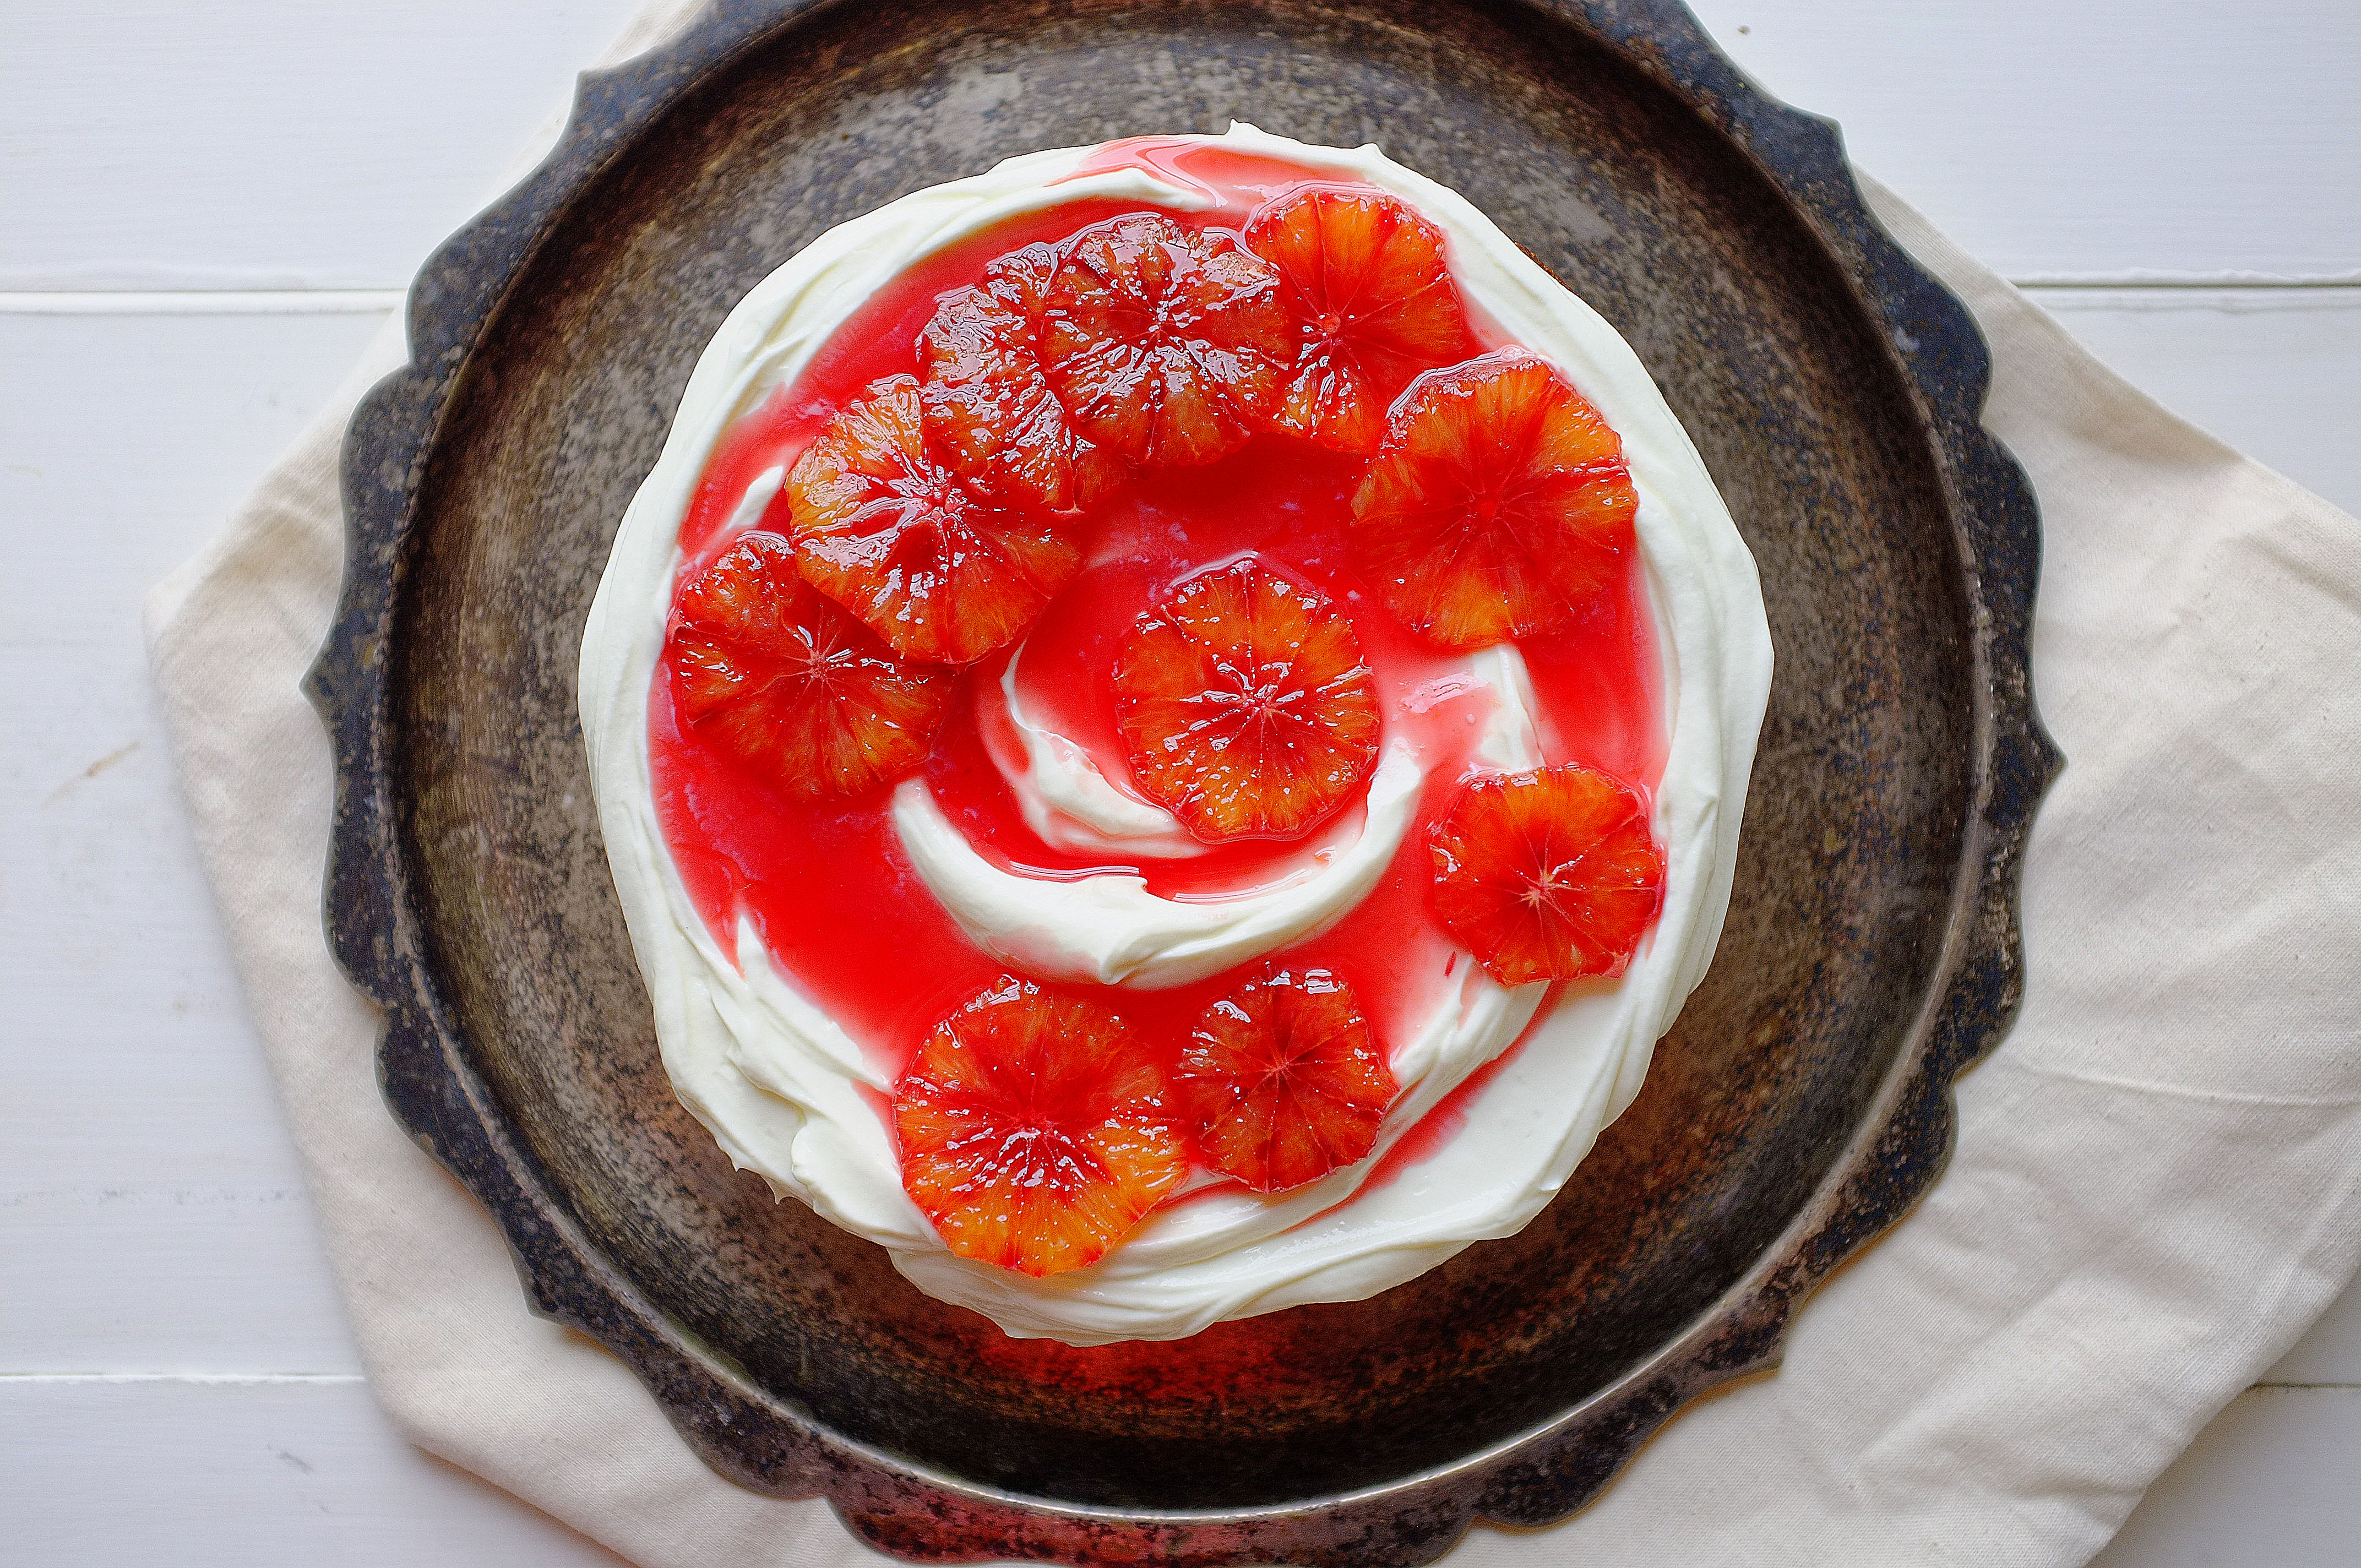
  • 4or 5 clementines, zest and flesh
  • 1 1/2 tsp ground cardamom
  • 1tsp ground cinnamon
  • 3-4tbsp icing sugar
  • 100g dark chocolate
  • 100g pomegranate seeds
  • 75g pistachios, roughly chopped
  • 5-6 figs, sliced (optional)
  • Thyme and rosemary, to garnish (optional)

Method

    1. Preheat the oven to 160c. Line a large baking tray with greaseproof paper.
    2. Place the egg whites in the bowl of a stand mixer with whisk attachment. Whisk to medium peaks and start adding the sugar, a spoonful at a time. Once all the sugar (both brown and caster) has been added whisk until stiff peaks form and you’ve got a glossy, non-granular meringue. Stir the corn flour and white wine vinegar together in a small cup and mix into the meringue.
    3. Pile the meringue onto the prepared baking tray and roughly spread into a 30x20cm rectangle. I think the more wild and asymmetric the better. Place the tray in the oven and reduce the temperature to 120c immediately. Cook for 1 hour or until the outside is crisp, then turn the oven off and leave to cool in there for at least an hour (this prevents the meringue cracking too much which can happen when the temperature suddenly changes).
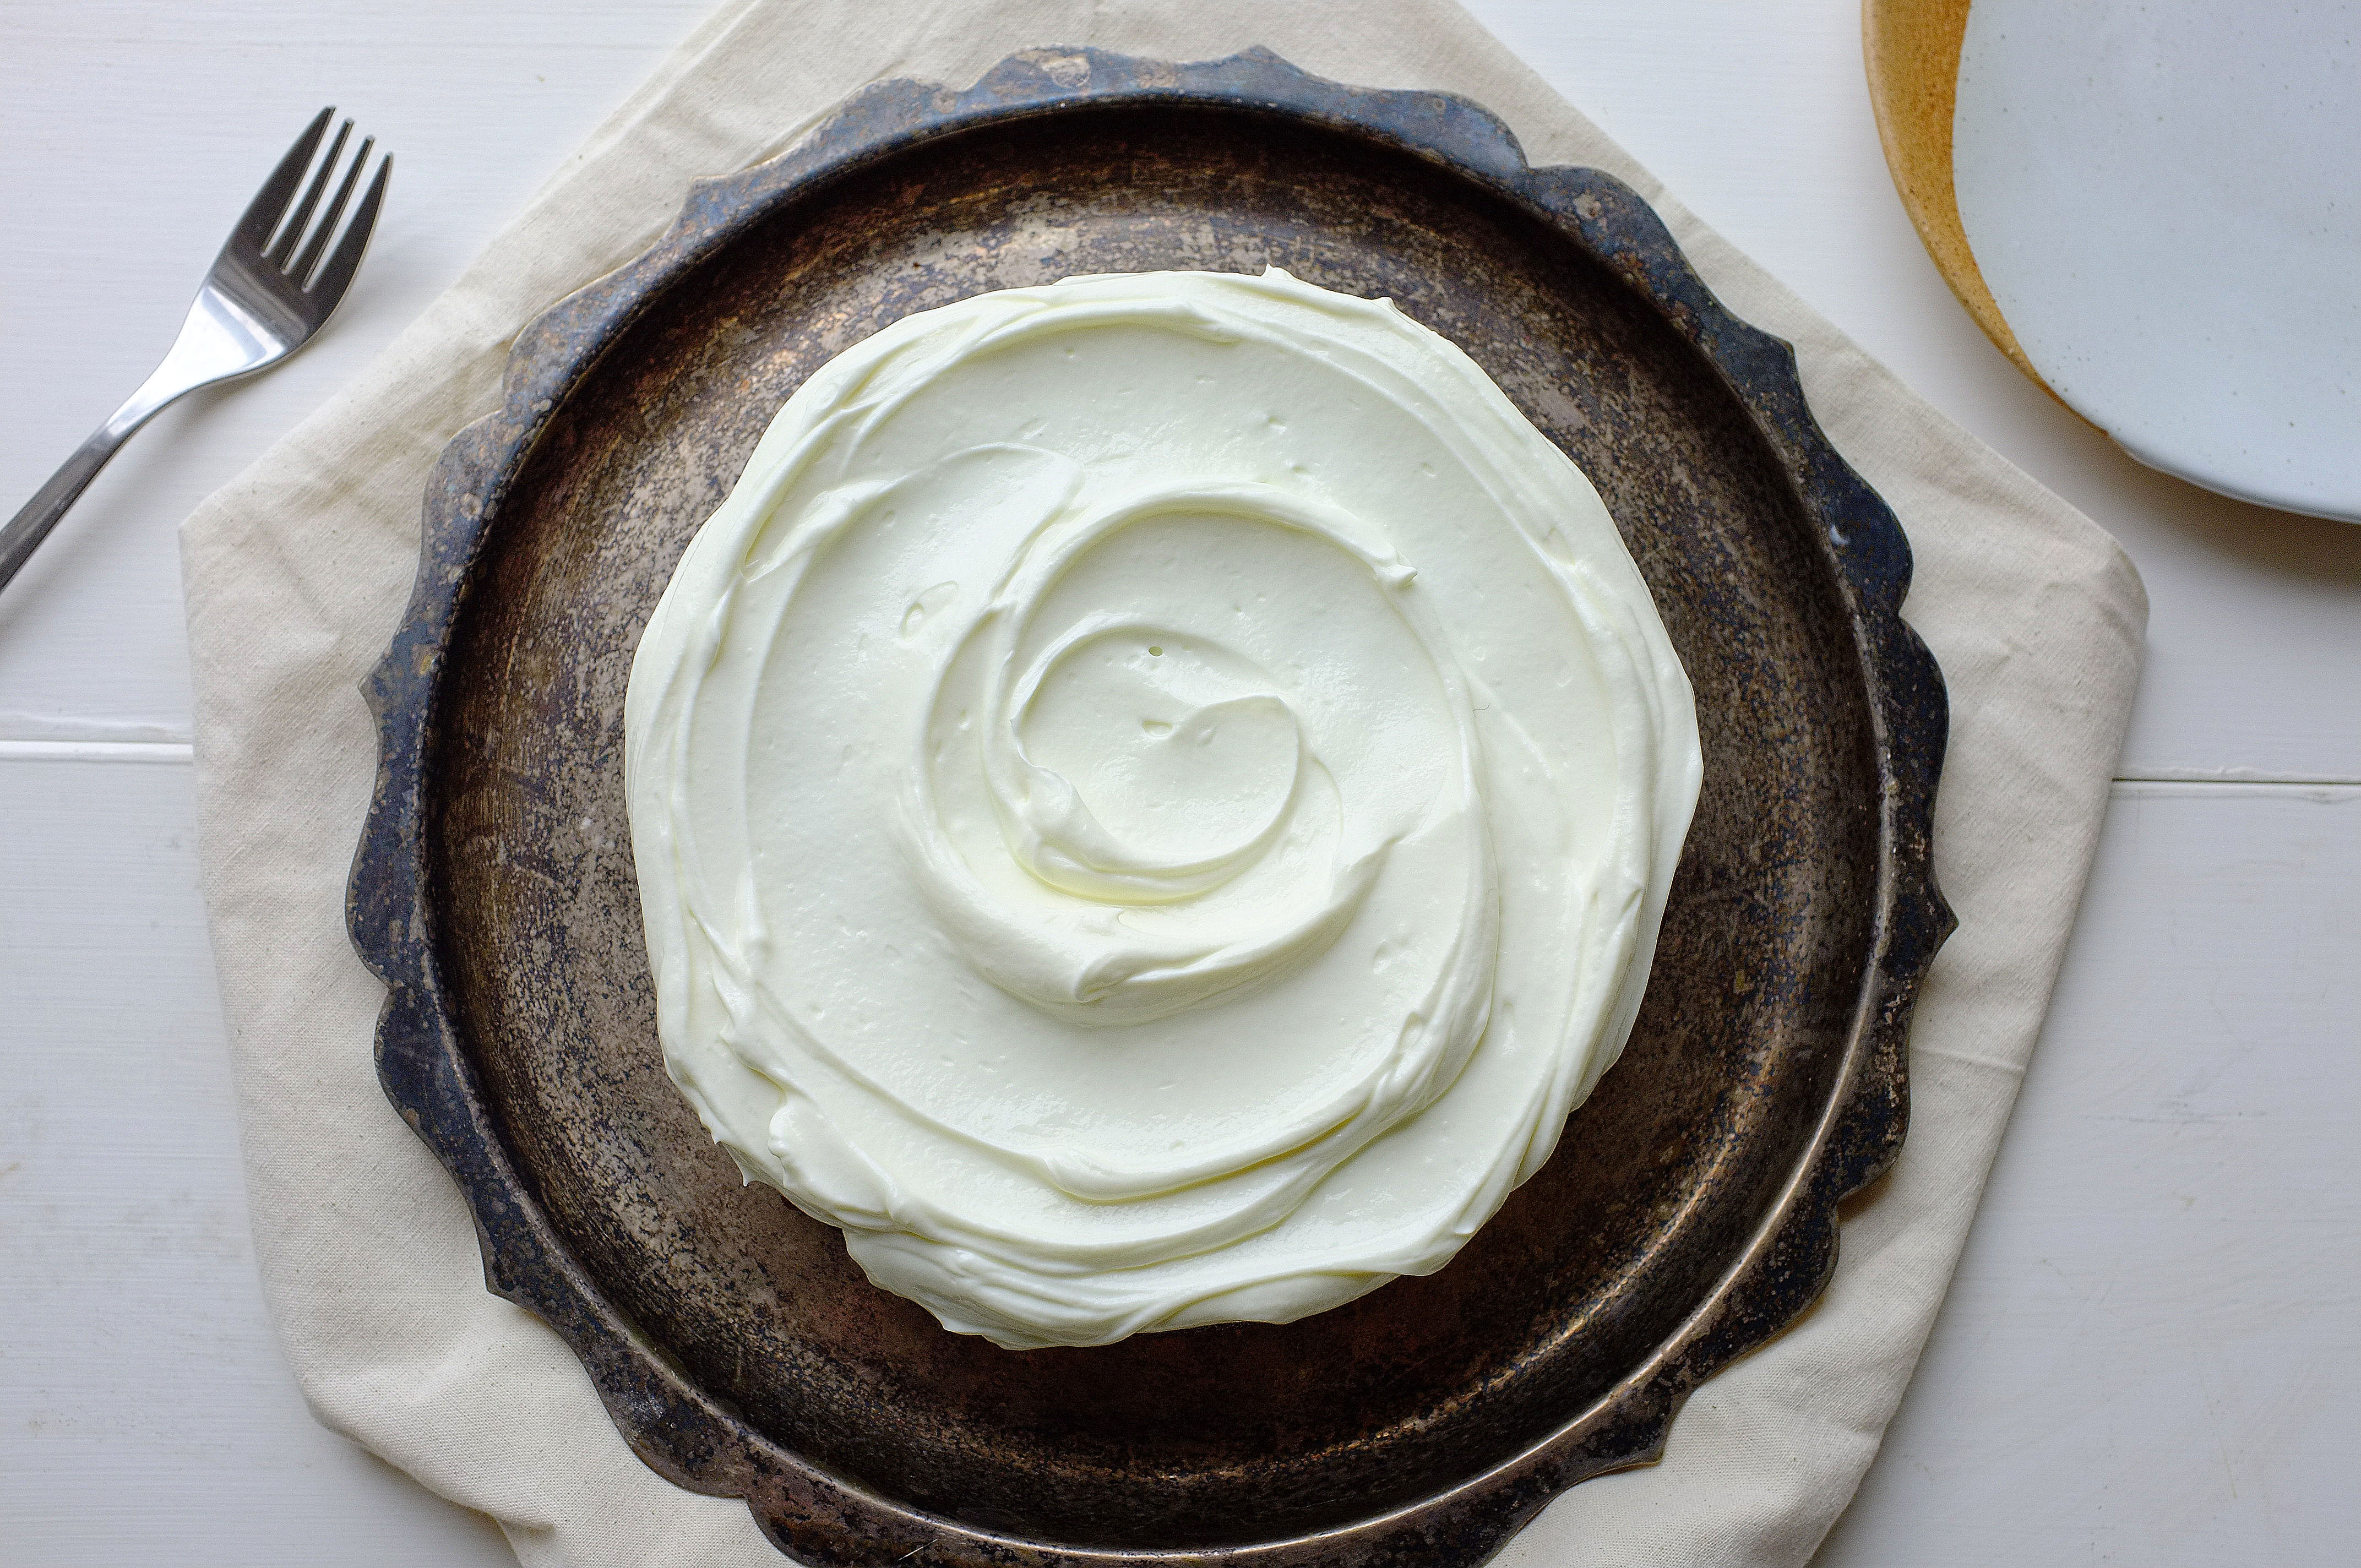
    4. Once cooled, set aside and prepare the toppings. For the cream, whisk together the mascarpone, cream, clementine zest, ground cardamom, ground cinnamon and icing sugar.
    5. Meanwhile melt the dark chocolate gently in a heatproof bowl set over a pan of simmering water. Slice the clementine flesh into rounds.
    6. To assemble the pavlova pile the cream onto the meringue, then arrange the clementine pieces and figs (if using) on top. Drizzle over the dark chocolate then sprinkle on pomegranate seeds and chopped pistachios. Finish with sprigs of rosemary and thyme, if using.


Advertisement

Coffee Halva, Pear and Walnut Loaf Cake with Salted Tahini Butter

Cakes

It’s no secret that I love anything laden with sesame, so was thrilled when Sesame Kingdom sent me some of their delicious coffee halva, halva spread and tahini. I’m going to incorporate each of the products into a bake, and thought I’d start off with the halva, which I’ve used in brownies, ice cream and chocolate cakes before. I thought this time it made sense to try it out with some seasonal fruit and nuts and it works really well in this understated loaf format (especially warm, thickly sliced and smothered in salted tahini butter!).

Ingredients

  • 175g soft unsalted butter
  • 100g light brown soft sugar
  • 75g golden caster sugar
  • 3 eggs
  • 2tbsp instant coffee, dissolved in 2tbsp just-boiled water
  • 175g self raising flour
  • pinch salt
  • 75g walnuts
  • 2 Conference pears, peeled and diced
  • 150g coffee halva, mine was by Sesame Kingdom (plain would work too)

For the tahini butter

  • 75g butter
  • 75g tahini
  • large pinch salt

Method

  1. Preheat the oven to 170c. Grease and line a large loaf tin. 
  2. Place the butter and both sugars in a large bowl (or bowl of a stand mixer with paddle attachment) and cream together until pale and fluffy. Add in the eggs one at a time, beating well between each addition and adding a small amount of the flour if the mix looks like it may curdle. 
  3. Fold in the remaining flour, salt and coffee using a large metal spoon. Add 2/3 of the walnuts and pear pieces and fold again. Scrape half of the batter into the tin then sprinkle over half of the halva. Add the remaining batter then top with the last of the halva, walnuts and pear pieces.
  4. Bake for 34-40 minutes or until a skewer comes out clean when inserted.
  5. Beat the butter, salt and tahini together until light. Serve the loaf warm with a generous helping of tahini butter.


Chai Ice Cream

Uncategorized

As the temperatures drop and the evenings draw in, I’m getting really into making ice cream… I know, such a maverick, what will I do next!? I jest, ice cream can be enjoyed all year round in my opinion, especially when you create flavours which feel Autumnal; this chai variety is a great example of that. It’s cold, of course, but the hint of black tea and hum of warming, peppery spice is really comforting, plus it pairs beautifully with hot puddings, rich chocolate desserts and baked fruit.

Ingredients

  • 600ml double cream
  • 600ml whole milk
  • 225g golden caster sugar
  • 5 black tea bags
  • 10 cardamom pods
  • 1 vanilla pod
  • 2 cinnamon sticks, split in two
  • 1 1/2 tsp black peppercorns, roughly crushed
  • 1tsp fennel seeds, roughly crushed
  • 2 inches fresh ginger, chopped
  • 6 egg yolks
  • pinch salt

Method

  1. Place the cream, milk and 100g of the caster sugar in a large saucepan along with the tea bags, spices, ginger and vanilla. Heat to scalding point (just before it boils) over a medium heat, stirring to ensure the sugar has dissolved, then set aside to cool to room temperature. Once cooled, chill for at least an hour or overnight to allow the flavours to develop.
  2. Drain the infused cream into a large clean saucepan and heat to scalding point once more. Meanwhile, place the egg yolks and remaining 125g caster sugar in a large bowl (or bowl of a stand mixer with whisk attachment) and whisk until pale and thick. Remove the cream mixture from the heat and allow to cool slightly for a few minutes, then pour gradually into the yolks, whisking constantly.
  3. Once the mixture is combined, return to a clean saucepan and set over a low/medium heat. Stir until it has thickened to a custard consistency  (do not be tempted to increase the heat or it will curdle) then leave to cool completely.
  4. Once cooled, churn the custard until thick and creamy (about 25 minutes) then scrape into a container, cover and chill for at least 4 hours.

Autumn Hedgerow Celebration Cake (Apple, Blackberry & Salted Caramel)

Cakes

As someone who is perpetually cold I favour the summer months weather-wise, but when it comes to food seasons, Autumn is the winner for me. Root vegetables, roasts, comforting one-pot dinners and baked fruits, sugared and spiced; you can’t beat them. With this in mind and as an ode to the season and the produce that comes with it, I’ve created a hedgerow-themed celebration cake. Made up of spiced sponges studded with Bramley apple pieces, a tart blackberry compote and smooth salted caramel Swiss meringue buttercream- it’s a bit of a project bake, but so worth the effort.

Ingredients

For the cakes

  • 250g golden syrup
  • 190g unsalted butter
  • 175g light brown soft sugar
  • 375g self raising flour
  • 1 1/2 tsp bicarbonate of soda
  • 1 1/2 tsp ground cinnamon
  • 1 1/2 tsp ground ginger
  • 1tsp mixed spice
  • large pinch salt
  • 3 eggs
  • 260ml semi-skimmed milk
  • 1 very large Bramley apple, peeled, cored and diced
  • 1tsp corn flour

For the blackberry compote

  • 450g fresh blackberries
  • zest and juice 1 lemon
  • 5-6tbsp caster sugar

For the Swiss meringue buttercream (I’d only attempt this with electric whisk/beaters!)

  • 150g caster sugar, 50g butter, 100ml double cream, salt (this is for the caramel which is added to a Swiss meringue buttercream base)
  • 4 egg whites
  • 225g caster sugar
  • 275g unsalted butter, very soft (but not greasy)

To decorate

  • fresh blackberries, hazelnuts, apple crisps, rosemary sprigs

Method

  1. Grease and line two 8 inch cake tins. Preheat the oven to 170c.
  2. Start off by making the cakes. To do this place the syrup, butter and light brown soft sugar in a saucepan and melt over a medium heat. Set aside to cool a little.
  3. In a mixing bowl, stir together the flour, spices, salt and bicarbonate of soda, then make a well in the middle. Break the eggs into a jug and add the milk, then stir together with a fork and add into the well, along with the melted butter mixture. Whisk everything together with a hand whisk until just combined.
  4. Toss the apple pieces in corn flour and fold in, then distribute the batter between the two cake tins. Bake for 30-40 minutes or until a skewer comes out clean when inserted. Once baked let the cakes cool completely in the tins.
  5. Meanwhile, make the blackberry compote by placing the blackberries, lemon juice and zest and sugar in a saucepan set over a medium heat. Cook, stirring often until thickened and jammy. Set aside to cool.
  6. For the buttercream, start off by making a salted caramel sauce.To do this put the sugar in a heavy bottom saucepan and set it over a low heat. Wait until the sugar has all melted (swirl the pan to encourage it to do so but don’t stir!) then up the heat and allow it to reach a deep golden brown. When it gets to this stage, add the butter and stir (it will spit a little), then add the cream and stir again for a couple more minutes until slightly thickened. Remove from the heat and once cool enough to taste add salt to your liking. Set aside to cool completely.
  7. While the caramel is cooling, place the egg whites and caster sugar in a saucepan and whisk together (just a hand whisk will do here). Keep stirring over a medium heat until the mixture is hot to the touch and the sugar has dissolved, then transfer to a large bowl (or bowl of a stand mixer with whisk attachment) and whisk until it’s completely cool and will hold a stiff peak.
  8. Now continue to whisk, adding a heaped tablespoon of the butter every few seconds. Whisk until it’s all come together and is thick and glossy, then add 3-4 heaped tablespoons of your cooled caramel (add a little more or less to taste). Don’t worry if the mix looks curdled at any point, whisking will bring it back together with time. Once it’s ready you can start assembling the cake.
  9. Remove the cakes from the tins. If they’re domed at all, even off the tops, then slice each sponge in half, leaving you with 4 even layers. Place the first layer on your serving plate. Pile half the buttercream into a piping bag and pipe around the edge of the first layer twice (leaving a roughly 1.5 inch wall of buttercream). Fill this with a third of the blackberry compote then repeat the process until all the sponges are used up.
  10. Use the remaining buttercream to cover the whole cake, semi-naked style. Decorate as desired- I like rustic/natural decorations but the world is your oyster!

Spiced Fig Cake with Brown Butter Caramel Sauce

Cakes

Jammy baked figs, warming spices and a slightly nutty, salty-sweet sauce; it’s seasonal bakes like this which make the transition from Summer to Autumn that bit easier (even when the rain is unrelenting, my holiday a distant memory and the sky an ominous shade of purple-grey).

Ingredients

Brown butter caramel

  • 75g butter
  • 200g caster sugar
  • 100ml double cream
  • good pinch salt

Spiced fig cake (makes one 8 inch cake)

  • 175g soft unsalted butter
  • 100g light brown soft sugar
  • 75g caster sugar
  • 3 eggs
  • zest 1 lemon
  • 3tbsp milk
  • 175g self raising flour
  • 1tsp ground cinnamon
  • 1tsp mixed spice
  • 1/2tsp ground cardamom
  • 1/4tsp freshly ground black pepper
  • pinch salt
  • 6-8 figs
  • 1tbsp demerara sugar

Method

  1. Start by making the caramel. Place the butter in a pan and melt down over a low heat. Once melted, increase the heat and foam until browned. Pour into a bowl and leave to cool.
  2. Tip the caster sugar into a heavy bottomed pan and heat gently, swirling occasionally (but not stirring) until it melts. Increase the heat until the caramel reaches a deep golden brown, then add the browned butter and stir (take care, it will spit a little). Once the butter is well incorporated add the cream and stir. Cook for a further couple of minutes until slightly thickened, then add the salt to taste.
  3. Preheat the oven to 170c and grease/line an 8 inch baking tin. Place the butter and sugars in a large bowl (or bowl of a stand mixer with paddle attachment) and cream until light and fluffy. Add the eggs in one at a time, beating well between each addition (add a little of the flour here if the mix looks like it might curdle). Mix in the lemon zest and milk.
  4. Add the flour, spices and salt to the bowl and fold in with a large metal spoon. Dice 2/3 of the figs and fold those into the mixture too, then scrape it all into the prepared tin. Slice the remaining figs into 6ths and arrange on top of the cake, then sprinkle over the demerara sugar.
  5. Bake for 30-35 minutes or until a skewer comes out clean when inserted.
  6. Once baked, leave the cake to cool in the tin for 10 minutes, then remove and transfer to a wire rack. You can serve this cold or warm (I prefer the latter), but either way, warm up the caramel just before serving and drizzle all over the cake slices.

Enjoy!

Greengage, Blackberry and Hazelnut Galette with Spelt Pastry

Uncategorized

Galettes are super versatile, simple to shape and look really impressive. This one is filled with a hazelnut frangipane, greengages tossed in vanilla, and an early crop of blackberries; a delicious celebration of late summer produce, especially when served warm from the oven with a generous helping of ice cream or whipped mascarpone.

Ingredients

For the pastry

  • 150g spelt flour
  • 75g plain flour
  • 30g golden caster sugar
  • pinch salt
  • 100g unsalted butter, chilled
  • 2tsp white wine vinegar
  • 50ml fridge-cold water
  • zest 1 lemon

For the filling

  • 100g unsalted butter, soft
  • 100g golden caster sugar
  • 2 eggs, 1 for the frangipane, 1 for glazing
  • 100g hazelnuts, blitzed until fine
  • 75g plain flour
  • 300g greengages, halved and de-stoned
  • 1/2tbsp corn flour
  • 1 vanilla pod, split
  • handful blackberries
  • 1/2tbsp demerara sugar
  • sprinkling of chopped hazelnuts (optional)

Method

  1. Start off by making the pastry. Place the flours, sugar, salt and butter in a food processor and pulse until it resembles breadcrumbs. At this stage add the water, vinegar and lemon zest and pulse again until the mix just comes together in large lumps (alternatively, rub the butter into the flours, salt and sugar using your fingertips then stir in the water, vinegar and lemon zest using a cutlery knife). Tip the dough out and shape into a disc using your hands. Wrap in cling film and chill for 20 minutes.
  2. While the pastry is chilling, prepare the filling, starting with the hazelnut frangipane. Place the butter and sugar in a bowl (or bowl of a stand mixer with paddle attachment) and beat until light and creamy. Add in one egg and beat again until well incorporated, then fold through the ground hazelnuts and plain flour. Set aside.
  3. Scrape the vanilla seeds from the pod and toss together with the halved greengages and corn flour (corn flour helps soak up any excess juices the greengages might release). Preheat the oven to 180c and place a large baking tray on the oven shelf (this ensures that the base of the galette cooks through and is crisp- no soggy bottoms here!).
  4. Once your pastry has firmed up a little, roll into a large 3mm thick circle on a lightly floured surface. Transfer to a piece of baking paper. Dollop the frangipane into the centre of the pastry, then spread out evenly, leaving a border of roughly 3 inches. Arrange the greengages on top of the frangipane, followed by the blackberries. Fold the edges of the pastry loosely over the filling, then brush with the remaining egg. Finish by sprinkling the demerara sugar all over the pastry and filling.
  5. Transfer the galette onto the hot baking tray and bake for 30-35 minutes or until the pastry is golden and crisp, and the frangipane is cooked through.
  6. To serve, sprinkle the galette with toasted chopped hazelnuts. Serve warm with ice cream or slightly sweetened mascarpone (it is also delicious cold!).


Strawberry and Elderflower Sorbet

Uncategorized

London has reached a Monica’s-massive-hair level of humid, so sorbet seems like the only sensible thing to make. Strawberries are a must this month (I know they’re linked with Wimbledon- that’s where my knowledge of tennis starts and ends), so I’ve used them to create a fresh puree which forms the base of this sorbet, along with elderflower cordial.

Ingredients

  • 800g fresh strawberries, stalks removed
  • 100g caster sugar
  • 50ml elderflower cordial
  • 20ml water

Method

  1. Blitz the strawberries with a hand blender or in a food processor, then pass through a sieve. Discard the seeds. Weigh out 650ml of puree.
  2. Place the caster sugar, cordial and water in a small saucepan and heat until the sugar dissolves. Pop the syrup and the puree in the fridge until both are chilled, then stir together.
  3. Taste and add stir in a little more elderflower cordial, if necessary. Tip into an ice cream churner and churn until smooth and thick.
  4. Decant the sorbet into an airtight container and leave to freeze for at least 3 hours. Take the sorbet out of the freezer around 10 minutes before you’d like to serve it.

Espresso, Pecan & Dark Chocolate Ice Cream Sandwiches

Biscuits, Uncategorized

These cookie sandwiches are a culmination of my three favourite things; coffee, chocolate and ice cream. The pecans add crunch, and the bitter note of espresso prevents the result from being overly sweet. There’s not a lot else to say- other than go forth and make them (but proceed with caution, they’re like crack).

Ingredients (makes 10-12 cookie sandwiches, with a little extra cookie dough which will freeze well)

For the ice cream

  • 400ml double cream
  • 400ml whole milk
  • 8 egg yolks
  • 150g caster sugar
  • pinch salt
  • 30g good quality instant coffee

For the cookies

  • 225g soft unsalted butter
  • 125g caster sugar
  • 175g dark brown soft sugar
  • 2 eggs
  • 1tsp bicarbonate of soda
  • generous pinch salt
  • 150g plain flour
  • 125g rye flour
  • 75g roughly chopped pecans
  • 100g roughly chopped dark chocolate (70%)

Method

  1. Start off by making the ice cream. To do this, pour the double cream, milk and instant coffee into a saucepan and set over a medium heat. Meanwhile, place the egg yolks, sugar and salt in a large bowl (or bowl of a stand mixer with whisk attachment) and whisk until pale and thick. Once the instant coffee has dissolved into the cream mixture, bring it to a simmer then take off the heat and gradually add into the eggs and sugar, whisking constantly until well combined.
  2. Pass the mixture through a sieve into a clean saucepan, then heat gently, stirring until thick (make sure the custard doesn’t get too hot, or you’ll be left with something that looks a bit like scrambled eggs!). Pass the thickened custard through a sieve into a bowl, then close cover with cling film and leave to cool completely (I like to chill the custard at this point to make sure it’s as cold as possible before churning, but it’s not absolutely necessary).
  3. Once cooled, pour the custard into an ice cream maker and churn until creamy and thick. Line a shallow square/rectangular baking tin (about 2-3cm deep) with cling film and scrape the churned ice cream into it. Level off, cover with cling film and place in the freezer for at least 4 hours, until fully set. At this point you can cut the ice cream into rounds using a 3-4 inch cookie cutter, then cover and return the rounds to the freezer until required.
  4. For the cookies, place the butter and both sugars in a large bowl (or bowl of a stand mixer with paddle attachment) and beat until pale and fluffy. Add in the eggs one at a time, beating well between each addition. Add the bicarbonate of soda, salt and both flours and very briefly mix again until combined. Now stir in the pecans and chocolate with a wooden spoon. Chill the cookie dough for 10 minutes.
  5. Preheat the oven to 180c. Line a couple of baking trays with greaseproof paper and space tablespoons of cookie dough over them, allowing plenty of room for spreading. Bake for 12-15 minutes or until soft in the middle but golden in colour. At about 8-10 minutes into baking, take the baking tray and bang it on the work top in one sharp movement. This allows the cookie to spread a little and ensures the perfect thickness. Repeat the process until you’ve used up the cookie dough, then leave the cookies to cool.
  6. For a neat result, you can cut the cookies into perfect circles with the cutter you used for the ice cream, but this isn’t essential.
  7. Once the cookies have cooled, sandwich two together with a round of espresso ice cream.

Enjoy!

Rhubarb, Cardamom and White Chocolate Frangipane Tart

Pastry, Uncategorized

Tart rhubarb and sweet white chocolate is a delicious flavour pairing, and one I will keep returning to for the duration of the rhubarb season. In this bake I’ve applied the combination to a classic frangipane tart, using rhubarb compote in place of jam, and a filling studded with chocolate chunks and flavoured with cardamom. It’s a winner, and in my opinion, better than the standard strawberry variety (controversial).

Ingredients (enough for one 7.5 inch wide/ roughly 2 inch deep tart tin- serves 8)

For the pastry (there will be some leftover which will freeze well)

  • 250g plain flour
  • 140g unsalted butter
  • pinch salt
  • 30g caster sugar
  • 2 egg yolks

For the rhubarb filling

  • 400g rhubarb, sliced into 2 inch batons
  • juice and zest 1 orange
  • 30g caster sugar

For the almond frangipane

  • 120g soft unsalted butter
  • 120g caster sugar
  • 2 large eggs
  • 120g ground almonds
  • 1tsp ground cardamom
  • 100g white chocolate, roughly chopped
  • 30g roughly chopped almonds

Method

  1. Start off by making the pastry. Place the flour, butter, sugar and salt in a food processor and pulse until it resembles breadcrumbs. At this stage add the egg yolks  and pulse again until the mix comes together in large lumps (alternatively, rub the butter into the flour, salt and sugar using your fingertips then stir in the yolks using a cutlery knife). Tip the dough out and shape into a disc using your hands. Wrap in cling film and chill for 20 minutes.
  2. While the pastry is chilling start on the rhubarb compote filling. To do this simply put 300g of the rhubarb (reserve the other batons for the top of the tart), the orange juice and zest in a saucepan along with the caster sugar. Heat gently, stirring often, until the rhubarb has broken down and reduced to a thick compote consistency. Set aside to cool.
  3. Lightly grease an 7.5 (or 8) inch straight sided tart tin. Retrieve your pastry from the fridge and roll out to around 3mm thick and line the tin, pushing it right into the corners and trimming any excess. Prick the base all over with a fork and chill for 20 minutes or until firm. Preheat the oven to 190c.
  4. Line the pastry case with baking paper and fill with baking beans. Bake for 15-20 minutes or until the walls of the pastry are cooked and supporting themselves. Remove the beans and baking paper and return to the oven until the base is crisp and cooked through (about 10 minutes). Set aside to cool.
  5. While the pastry is baking, toss the reserved rhubarb batons in 1tbsp caster sugar and place on a tray- bake for 10 minutes.
  6. Now it’s time to make the frangipane. To do this simply cream together the butter and sugar until pale, light and fluffy, then add in the eggs one at a time, beating well between each addition. Finally, tip in the cardamom, salt and almonds and briefly mix once more until combined. Reduce the oven temperature to 170c.
  7. Now it’s time to assemble the tart. Spread the rhubarb compote over the base in one even layer, then add half the frangipane and sprinkle over half the chopped white chocolate pieces. Add the remaining frangipane and top with the rest of the white chocolate, chopped almonds and roasted rhubarb batons.
  8. Bake for 35-40 minutes or until golden brown and cooked through. Serve hot or cold.

Sticky Ginger Cake with Labneh Icing and Blood Orange Syrup

Cakes

As much as I love a stacked sponge showstopper, sandwiched with buttercream and impeccably preened, there’s something deeply comforting about a single layered wedge of cake, rustically finished with dollops of tangy icing and a bit of fruit. This cake undoubtedly falls into the comfort category, and it’s now one of my favourites; ginger cake itself feels nostalgic to me*, but the slightly tangy labneh icing and citrus syrup topping make this one feel a little more modern.

*I don’t know why, I have no emotive family story to share about a recipe passed down through a long line of bakers- my Granny used to feed me M&S sandwich cakes straight from the freezer. I’ll bank that as character building.

Ingredients

For the labneh icing

  • 500ml Greek yoghurt
  • 3tbsp icing sugar
  • 1tsp vanilla extract

For the cake

  • 250g self-raising flour
  • 2tsp ground ginger
  • 1tsp ground cinnamon
  • 1tsp bicarbonate of soda
  • pinch salt
  • 175g golden syrup
  • 3tbsp ginger syrup (from a stem ginger jar)
  • 125g butter
  • 4 balls stem ginger, diced
  • 125g light soft brown sugar
  • 2 eggs
  • 250ml milk

For the blood orange compote

  • 90ml blood-orange juice
  • 50g caster sugar
  • 2tbsp water
  • 1 vanilla pod
  • 2 additional blood oranges

Method

  1. Line a sieve with a muslin cloth and sit over a large bowl. Scrape the yoghurt into the sieve and loosely tie the muslin around it. Leave this in the fridge overnight for the liquid in the yoghurt to drain (this will leave you with a thickened mixture- labneh).
  2. Preheat the oven to 180c. Grease and line a high sided 9inch cake tin.
  3. Stir together the flour, ginger, cinnamon, bicarbonate of soda and salt in a large bowl. In a saucepan melt together the golden syrup, ginger syrup, butter, diced stem ginger and sugar. Bring to the boil for a minute then make a well in the dry ingredients and add the melted mixture. Stir together to eliminate any lumps then whisk the eggs and milk in a jug and add those in too and beat once more.
  4. Tip the mixture into the prepared tin and bake for 50-60 minutes or until a skewer comes out clean when inserted.
  5. Leave the cake to cool completely in the tin.
  6. Meanwhile, make the blood orange syrup. To do this simply place the juice, sugar and water in a small saucepan and gently heat until the sugar has dissolved. At this stage split the vanilla pod and add in, then simmer for 3-4 minutes or until syrupy. Set aside to cool a little, then slice the 2 blood oranges into rounds, discarding the pith and skin. Add the slices into the syrup and stir. Leave to cool completely.
  7. Tip the strained yoghurt into a bowl and add the vanilla extract. Sift in the icing sugar and stir everything together until smooth.
  8. To assemble the cake, turn it out of the tin and roughly cover with the sweet labneh. Just before serving, arrange the blood orange slices on top and drizzle the syrup over.

Enjoy!