Sea Salt and Caramelised Almond Brownies (Vegan/GF)

Chocolate

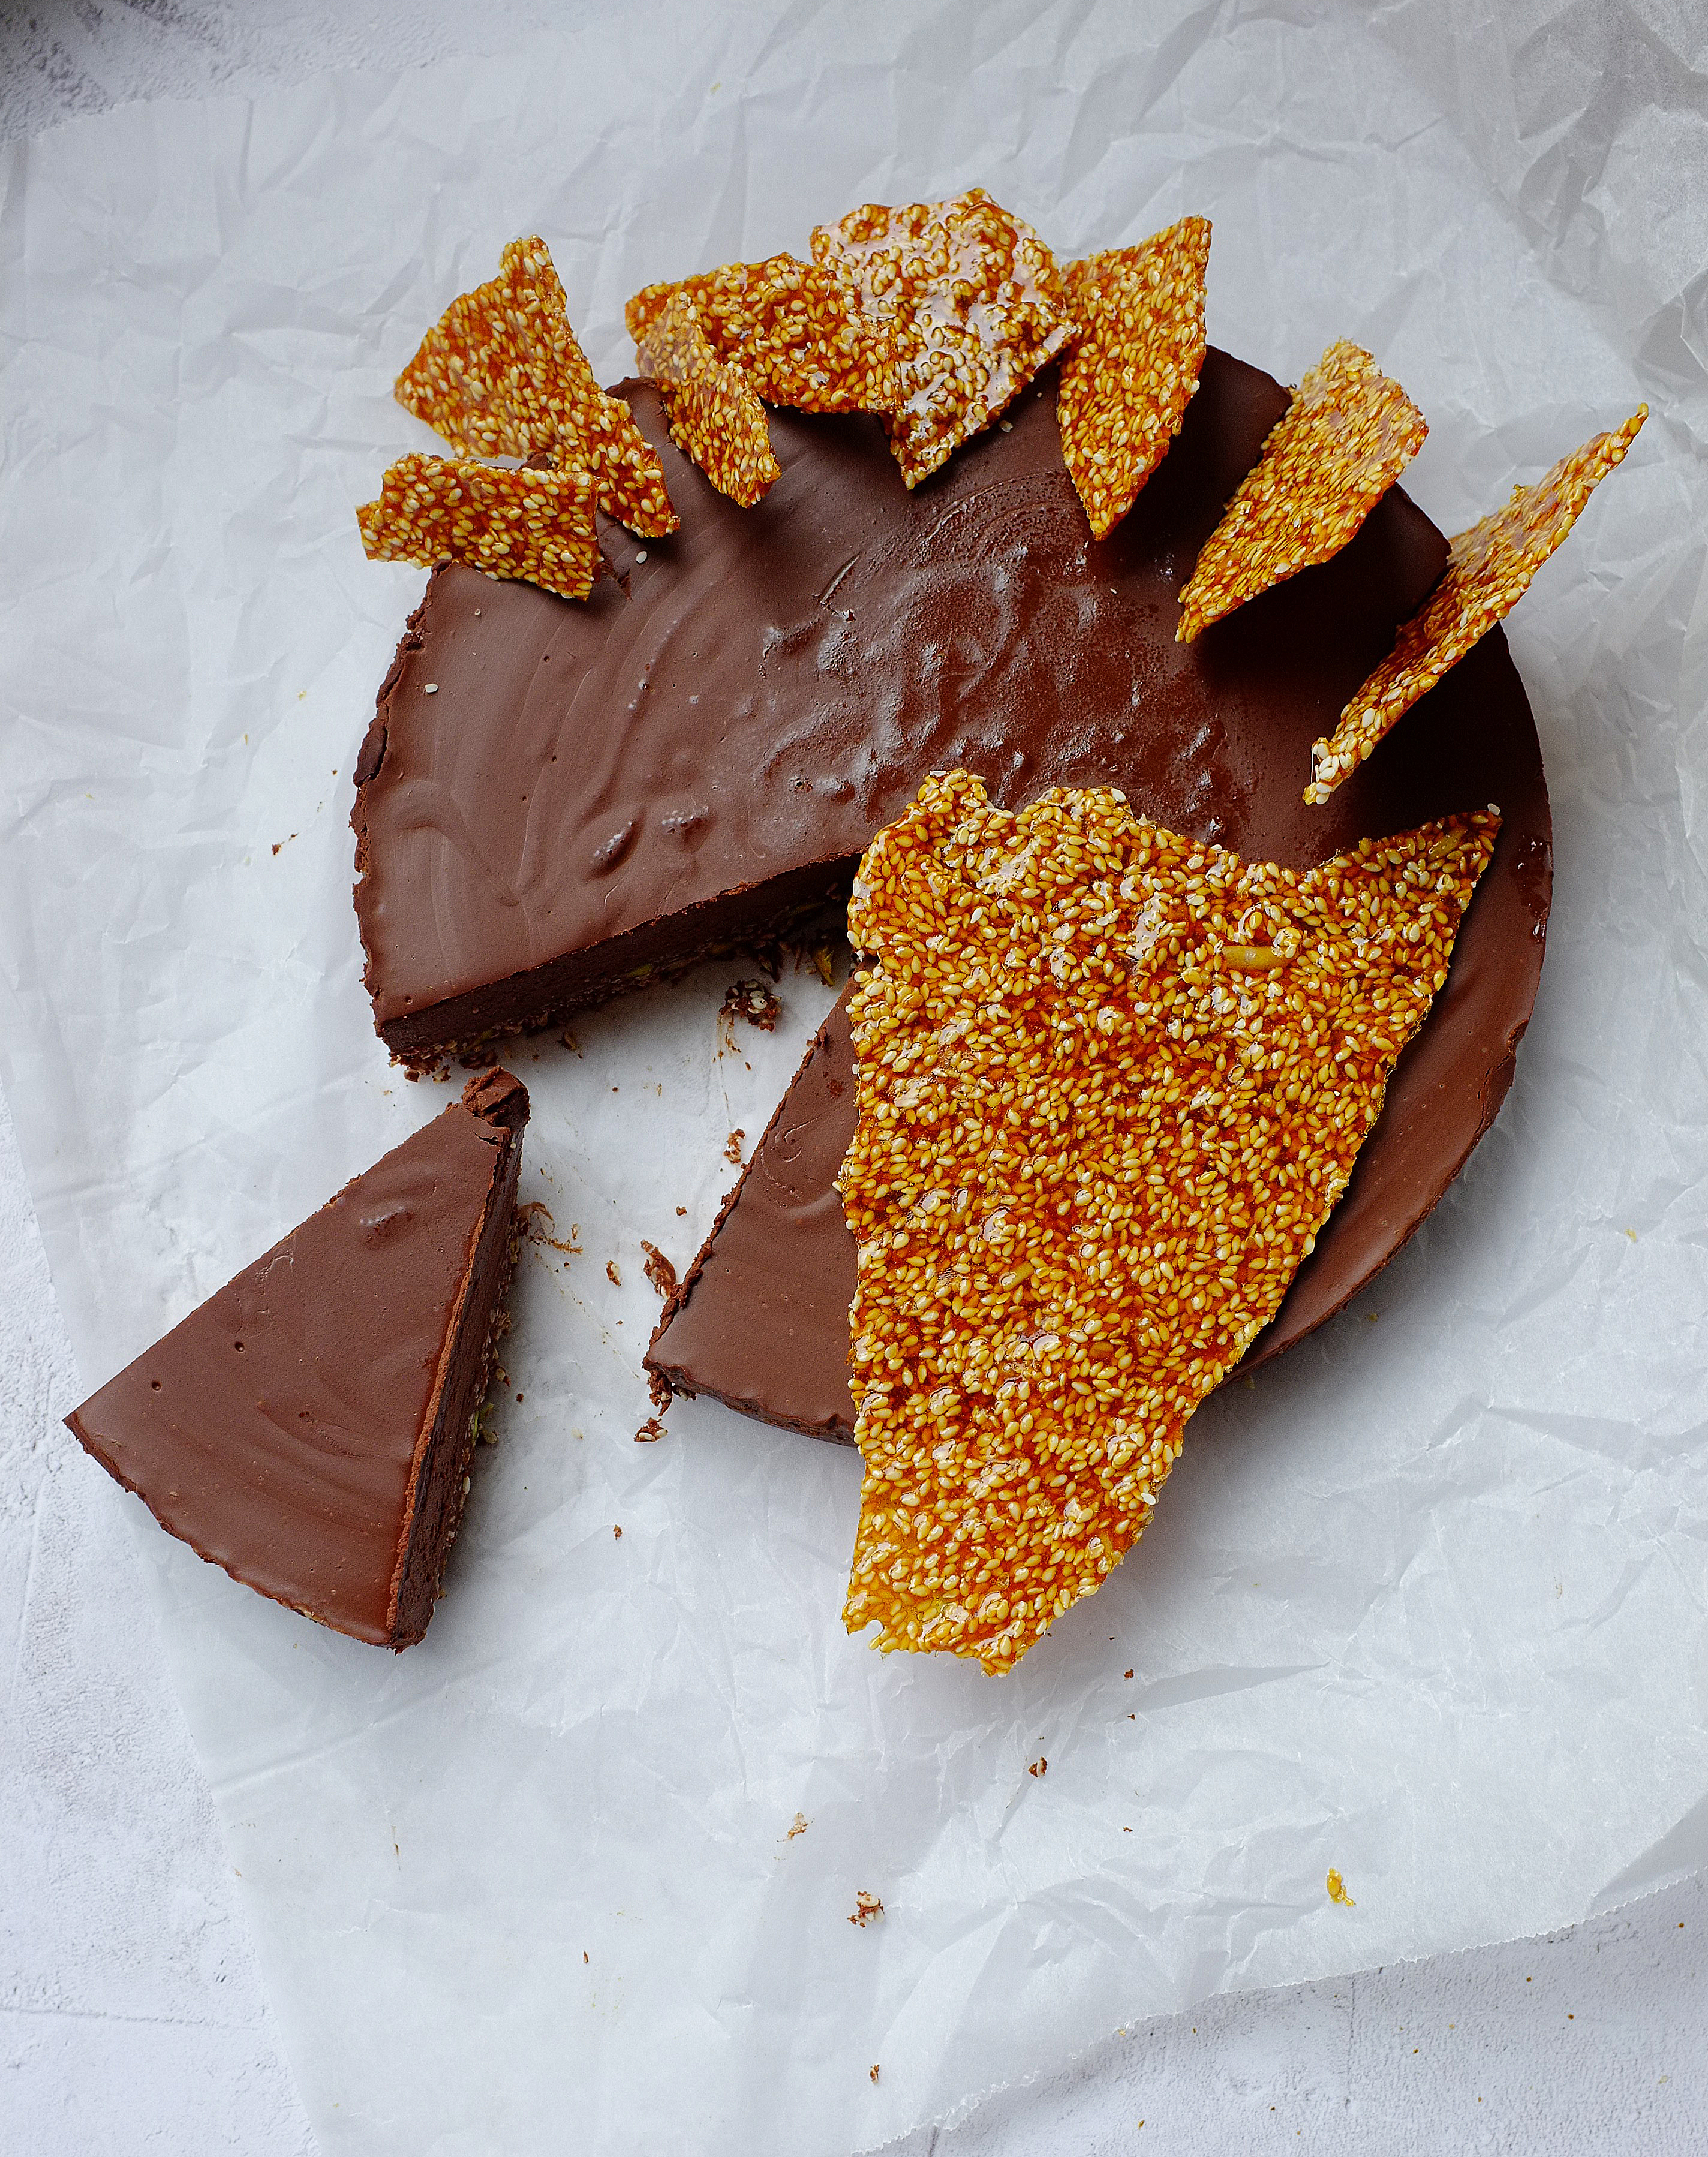
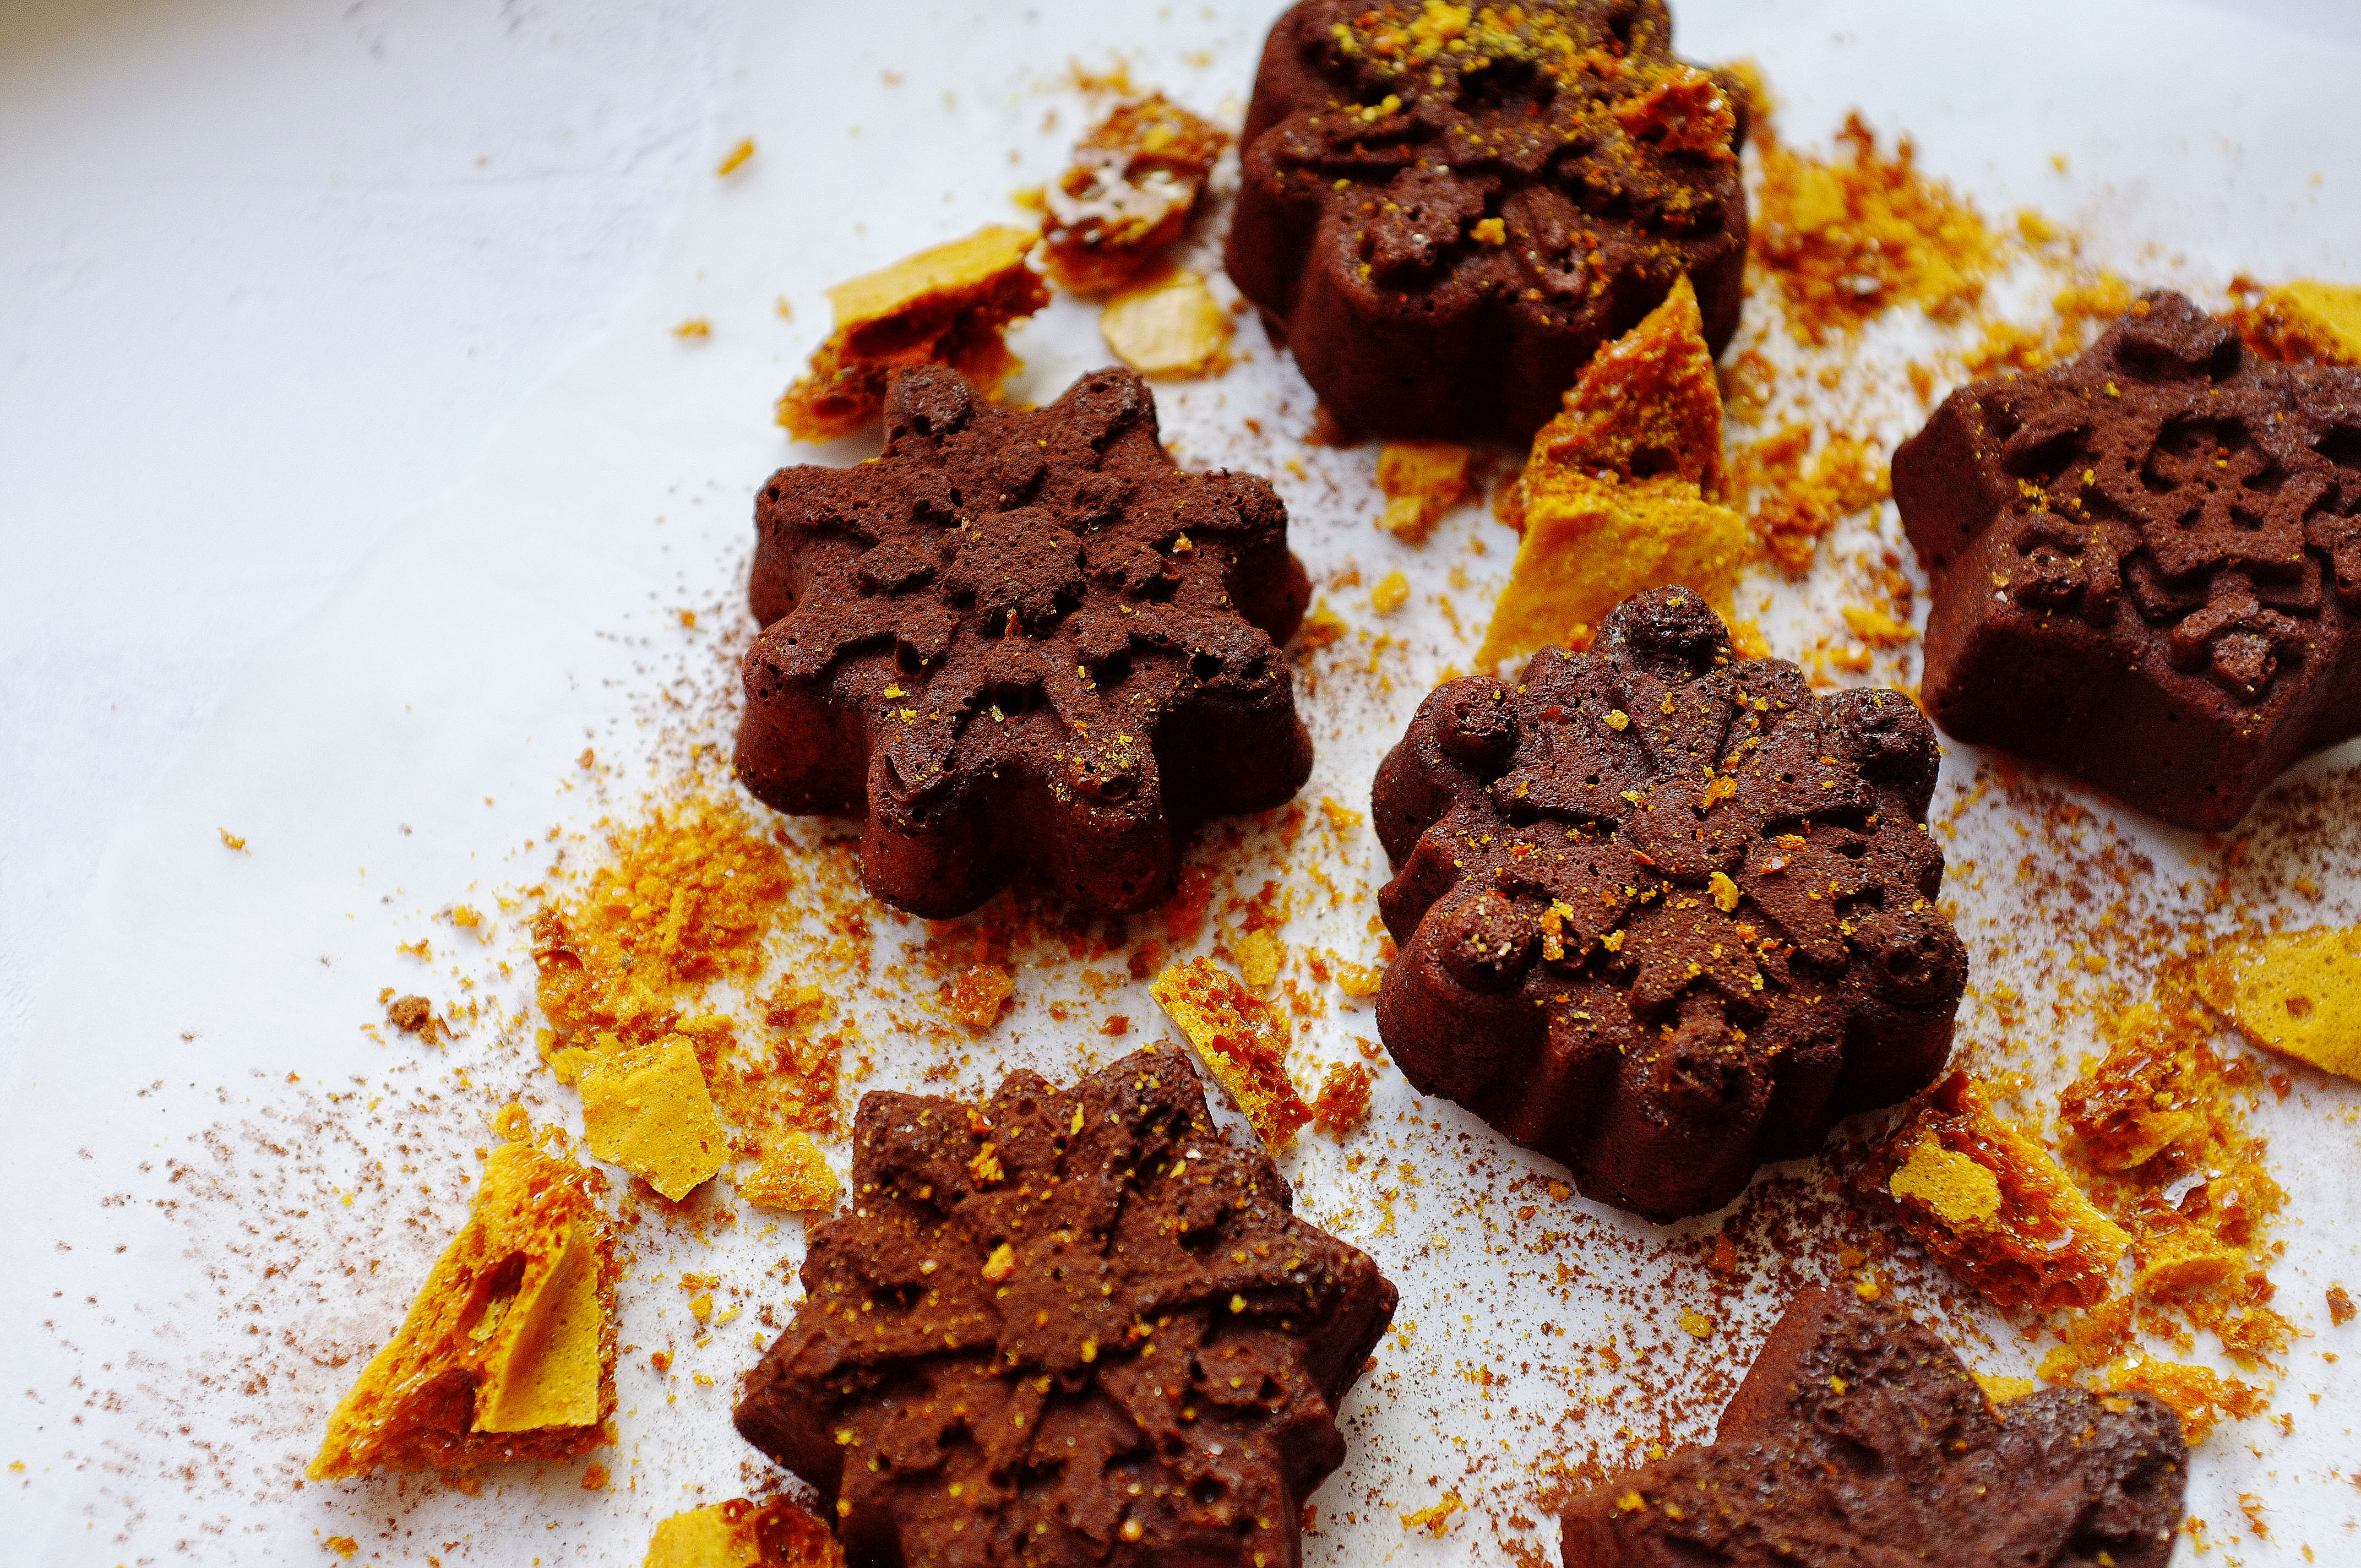
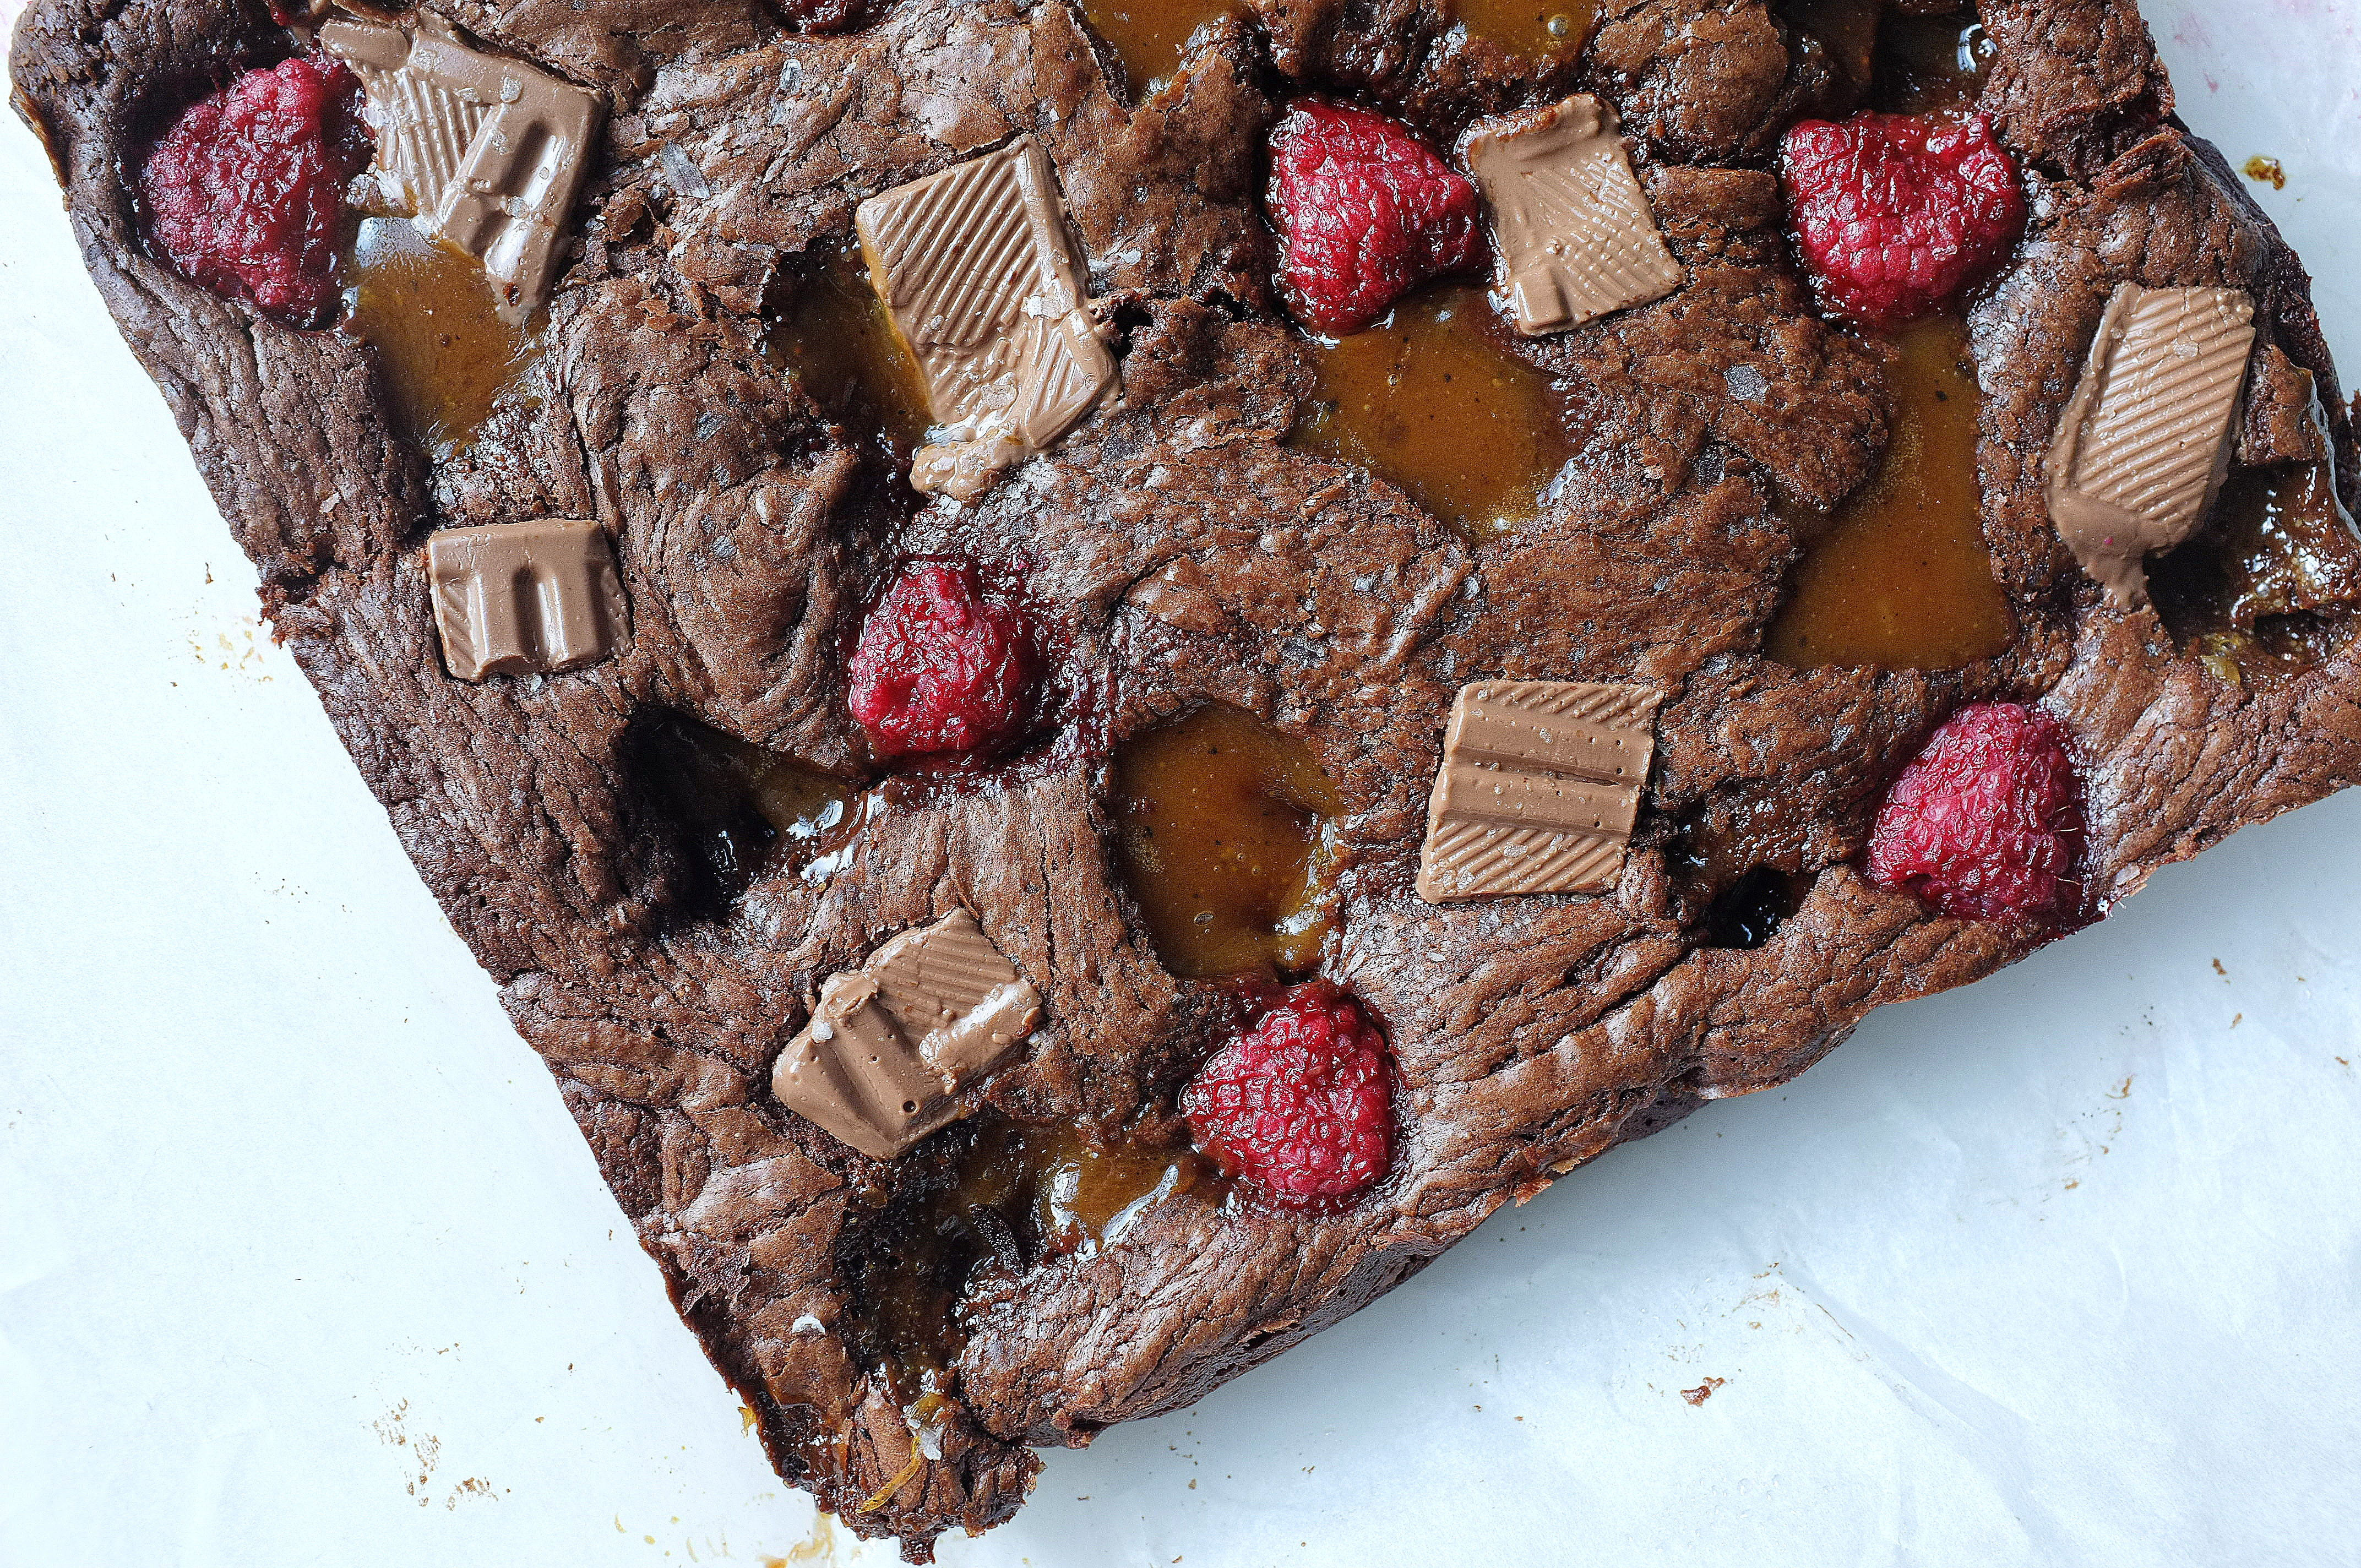
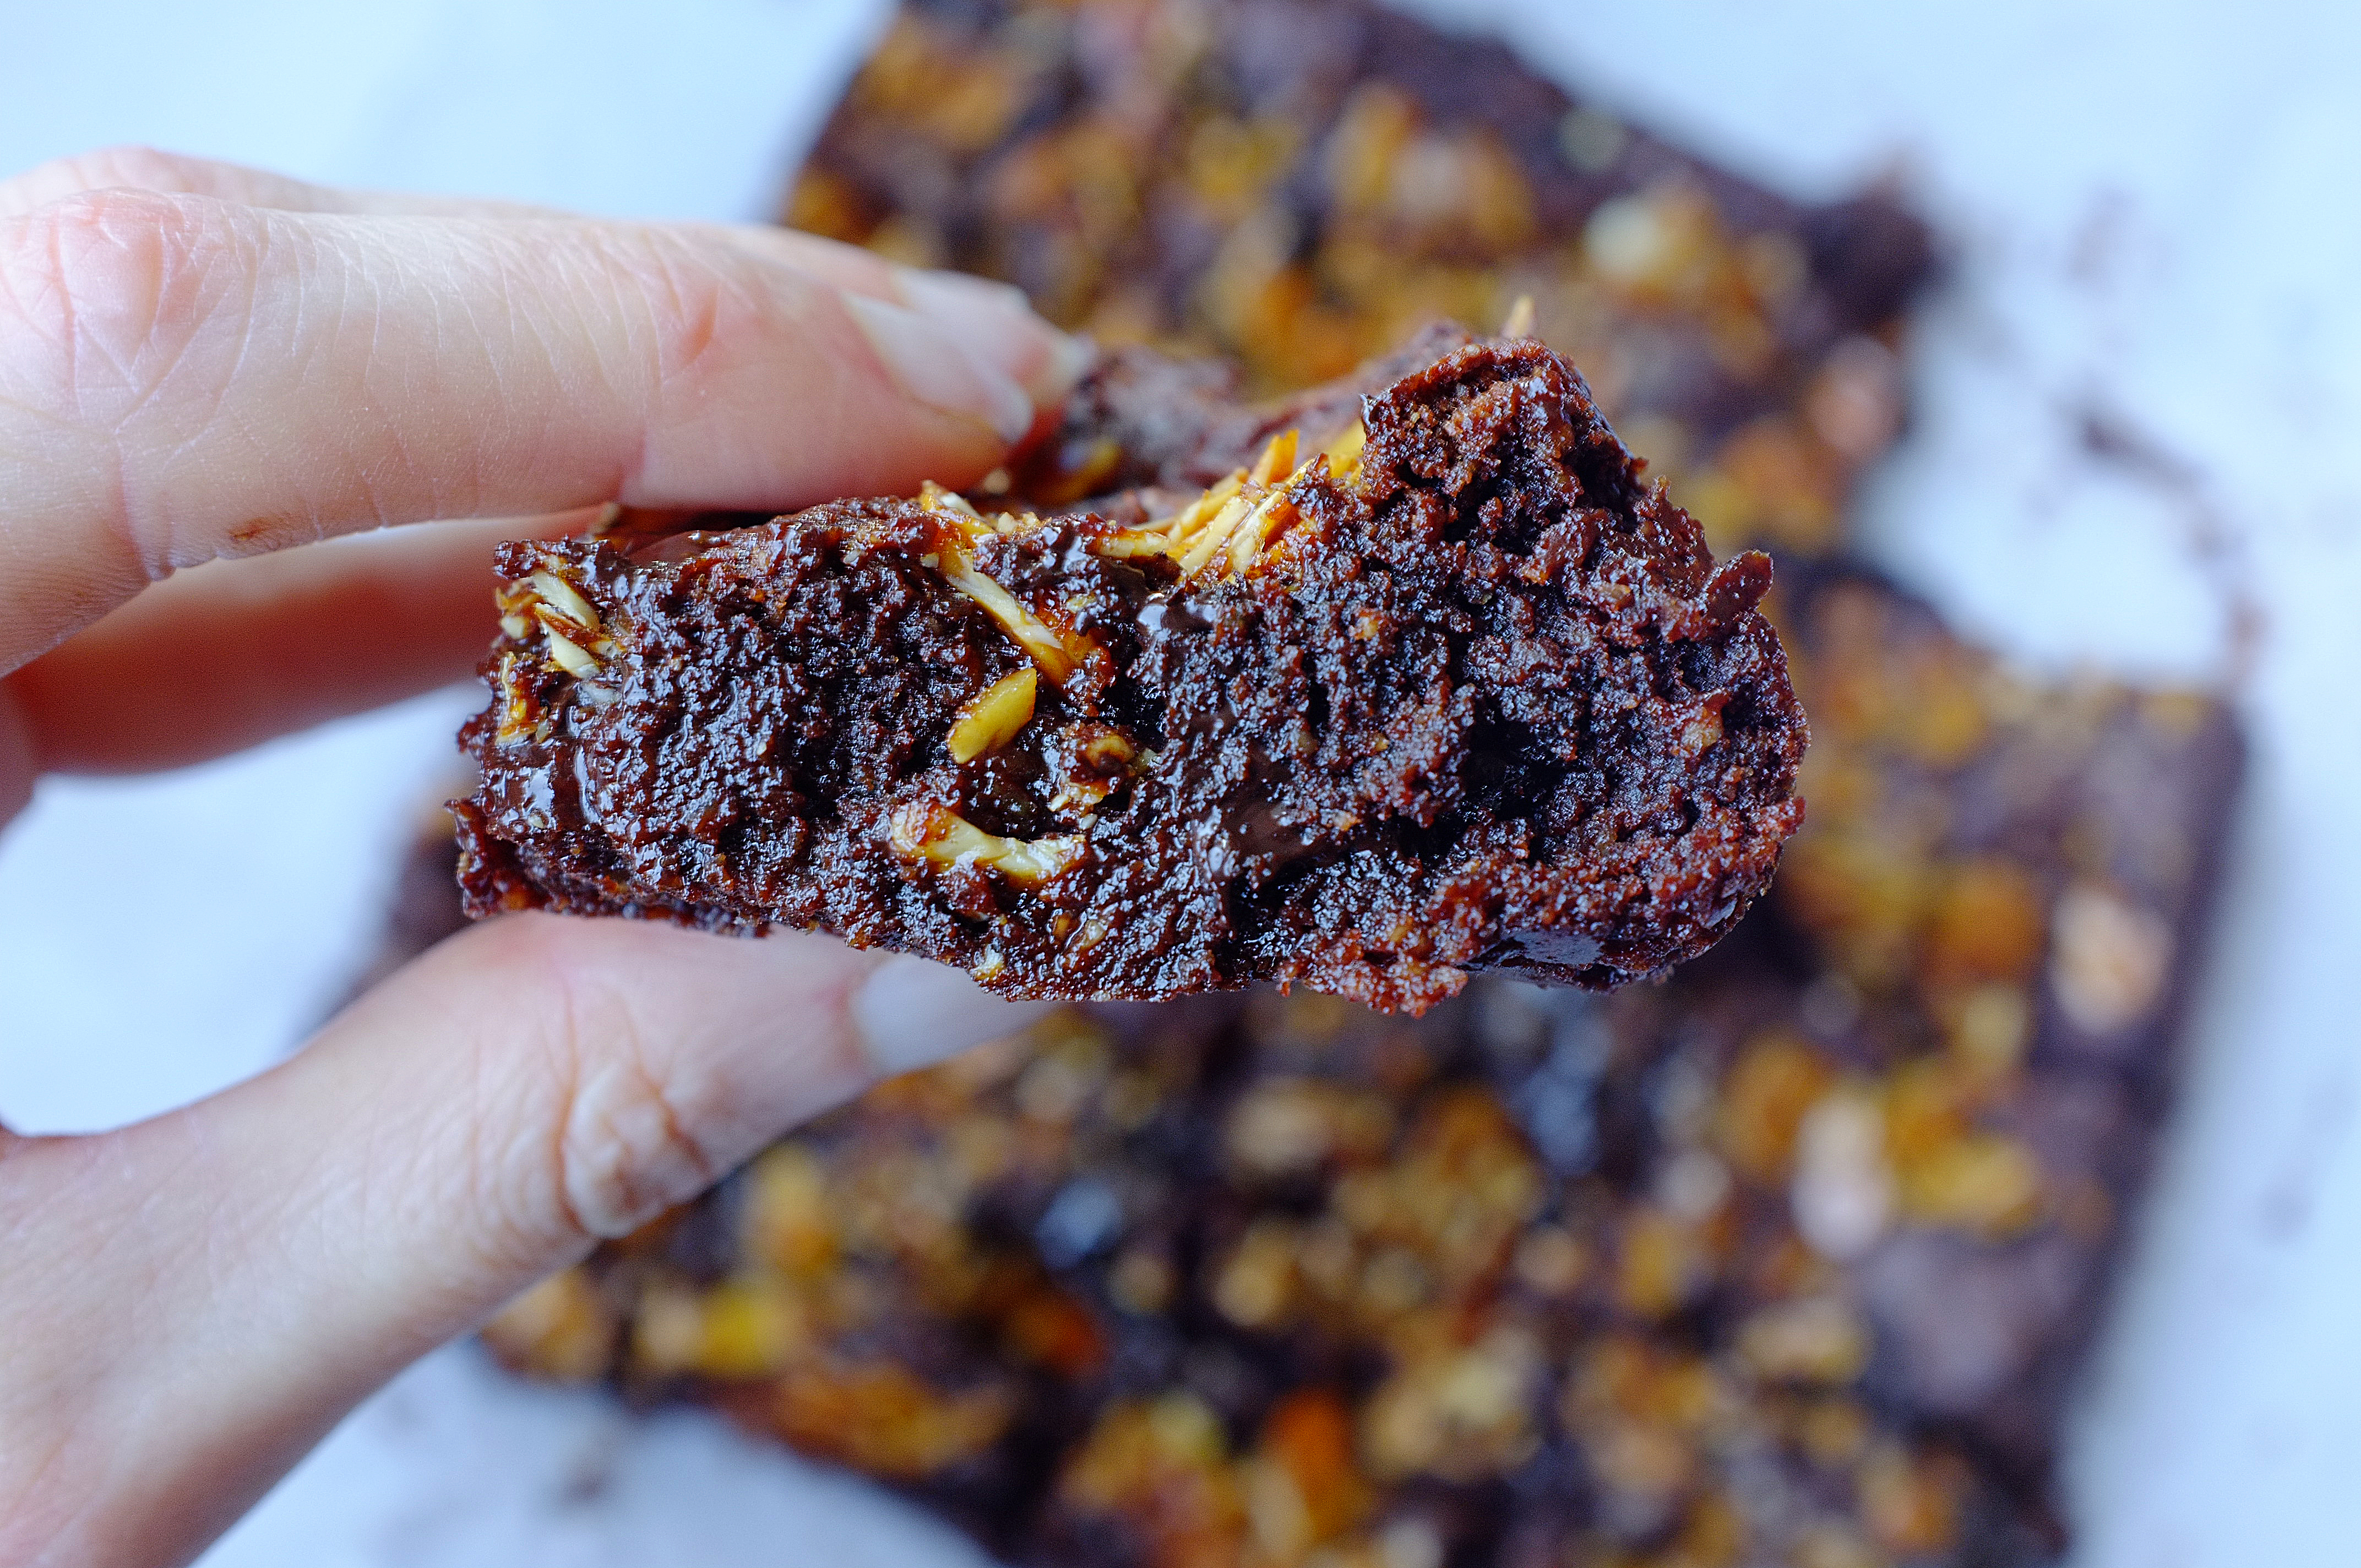
Eggs and flour have been hard to come by since the UK entered the lockdown zone, so I’ve been working on a few bakes free from both. I thought brownies would be a good place to start and after a few variations, I decided that this caramelised almond version was far superior to any others I’d tried (and actually one of the best brownies I’ve made, regardless of ingredients). If you don’t like almonds this will be a bit of a non-starter as I’ve used almond butter in place of dairy, ground almonds in place of flour and flaked caramelised almonds as a crispy, almost florentine-esque topping, otherwise please do try; they’re moist (sorry) and incredibly moreish.

Ingredients (makes 12-16 brownies in a roughly 9×9 inch tin)

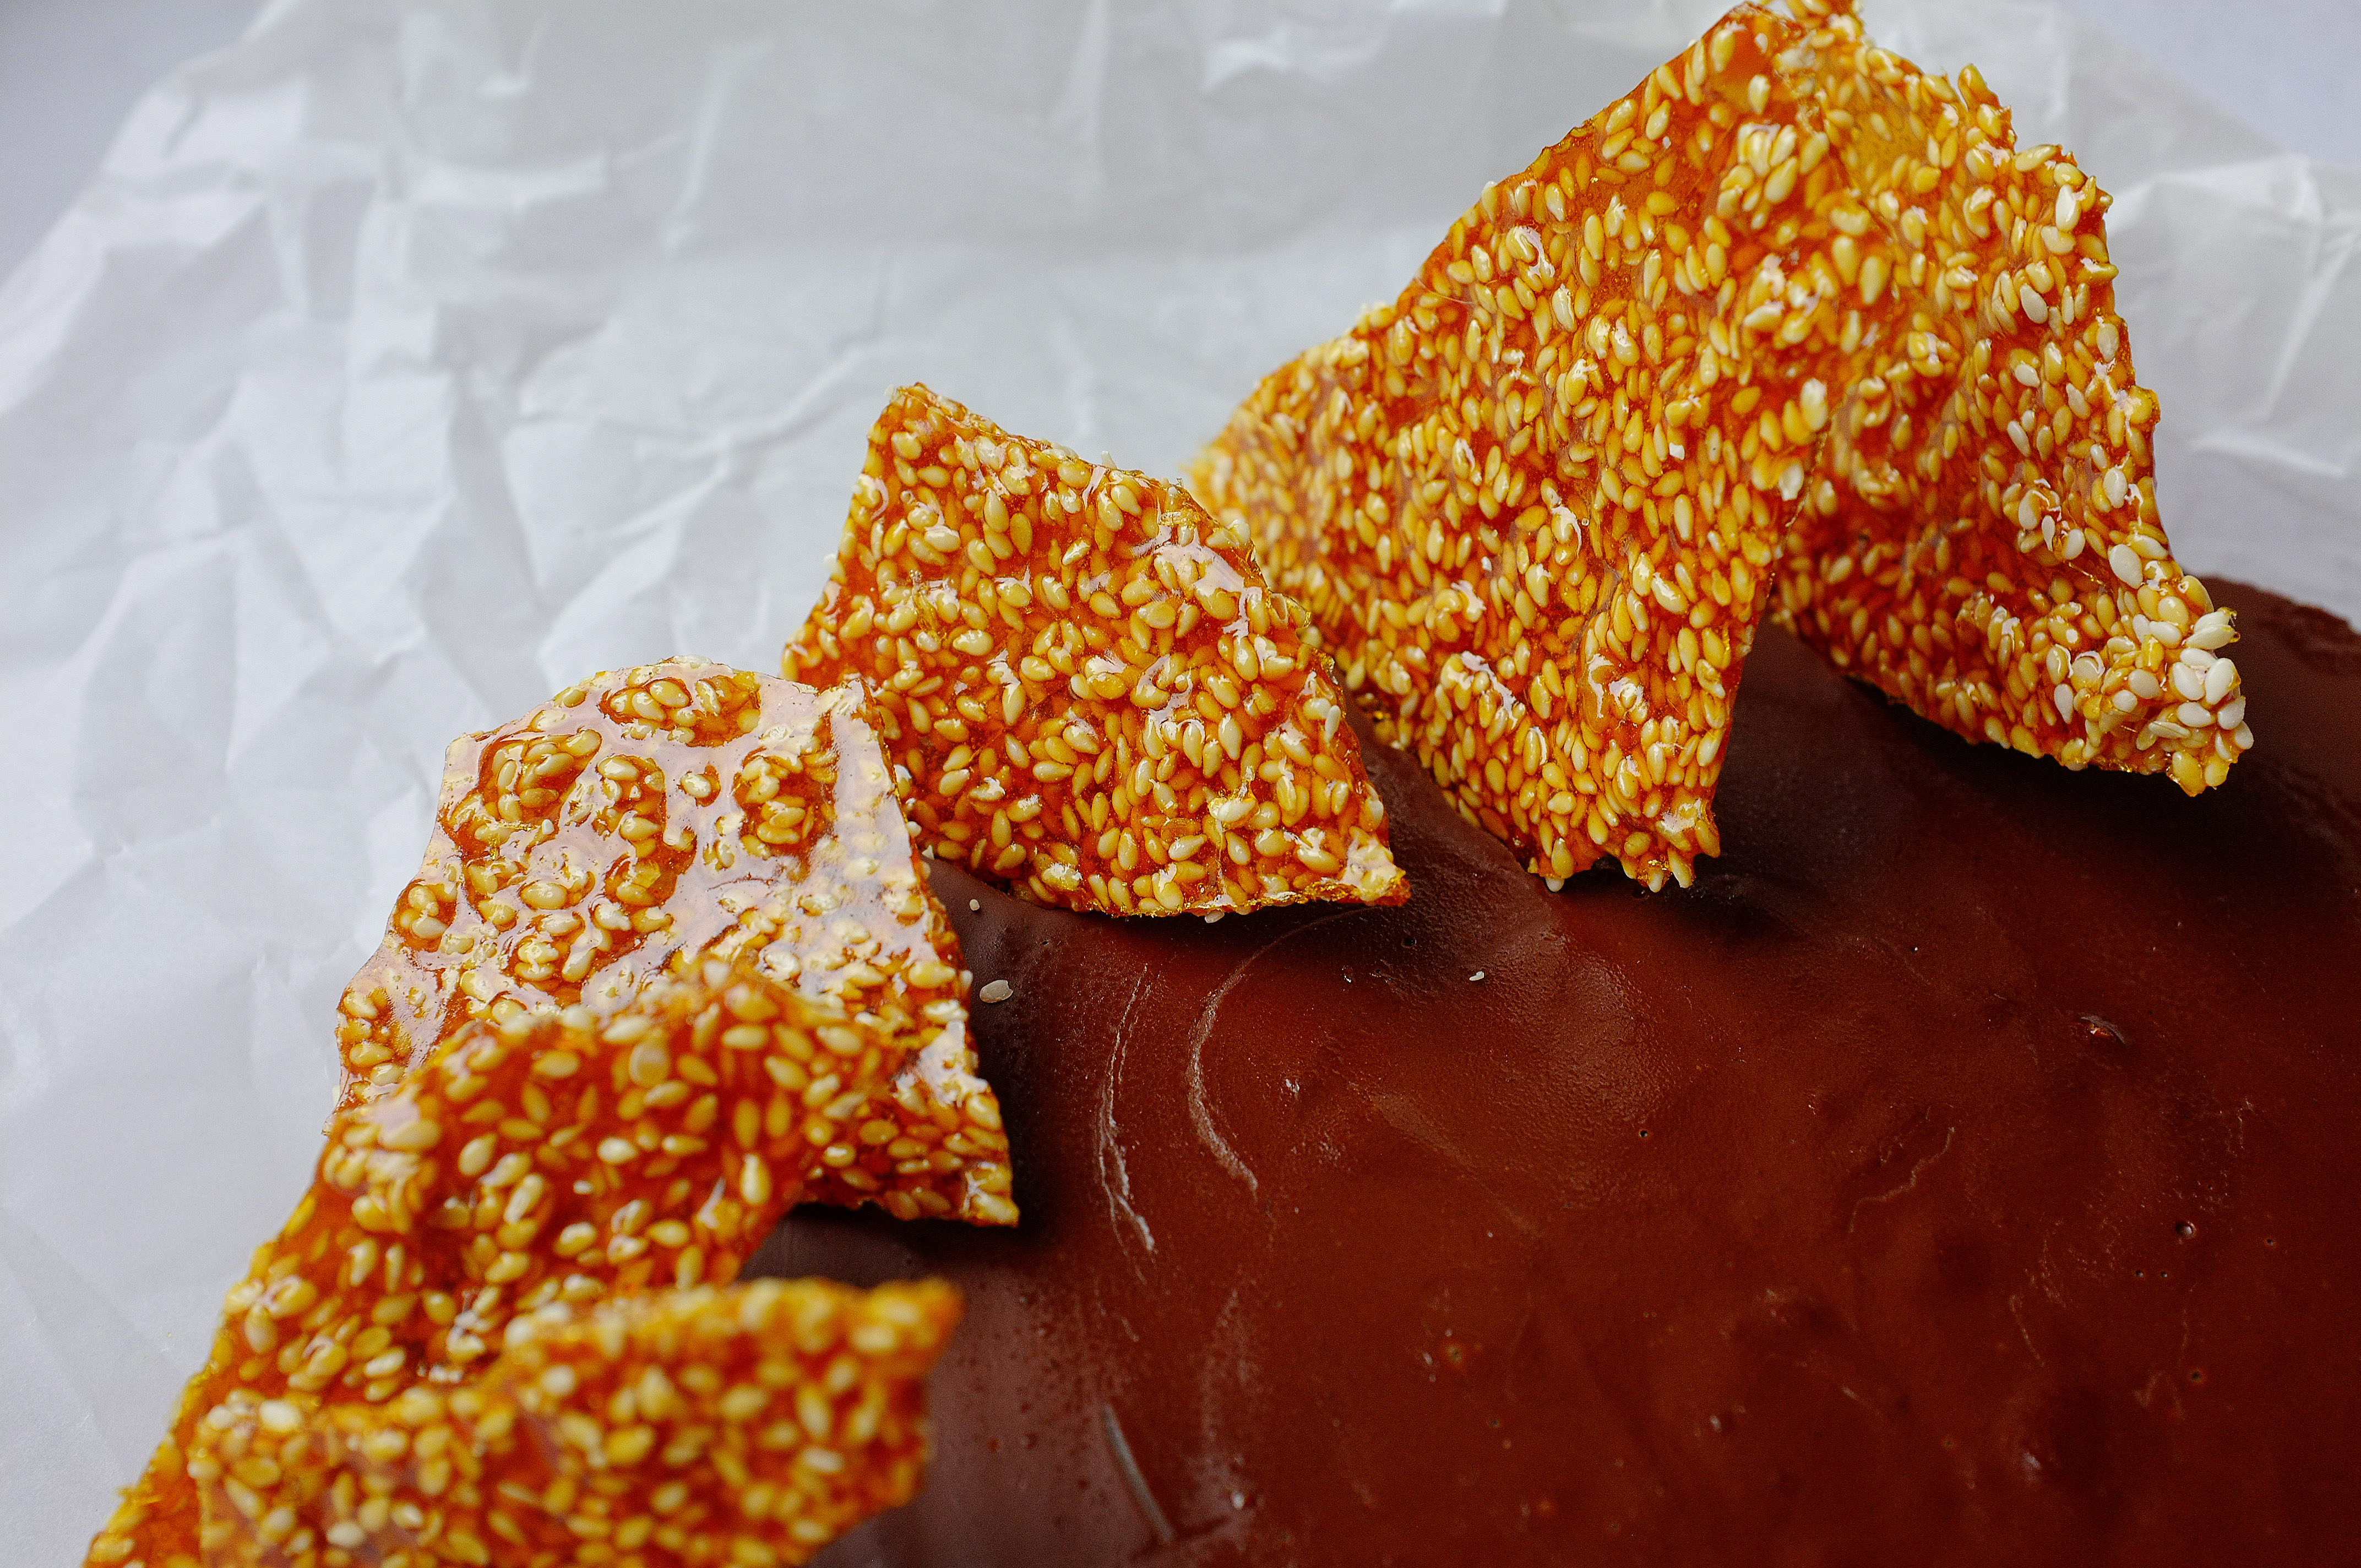
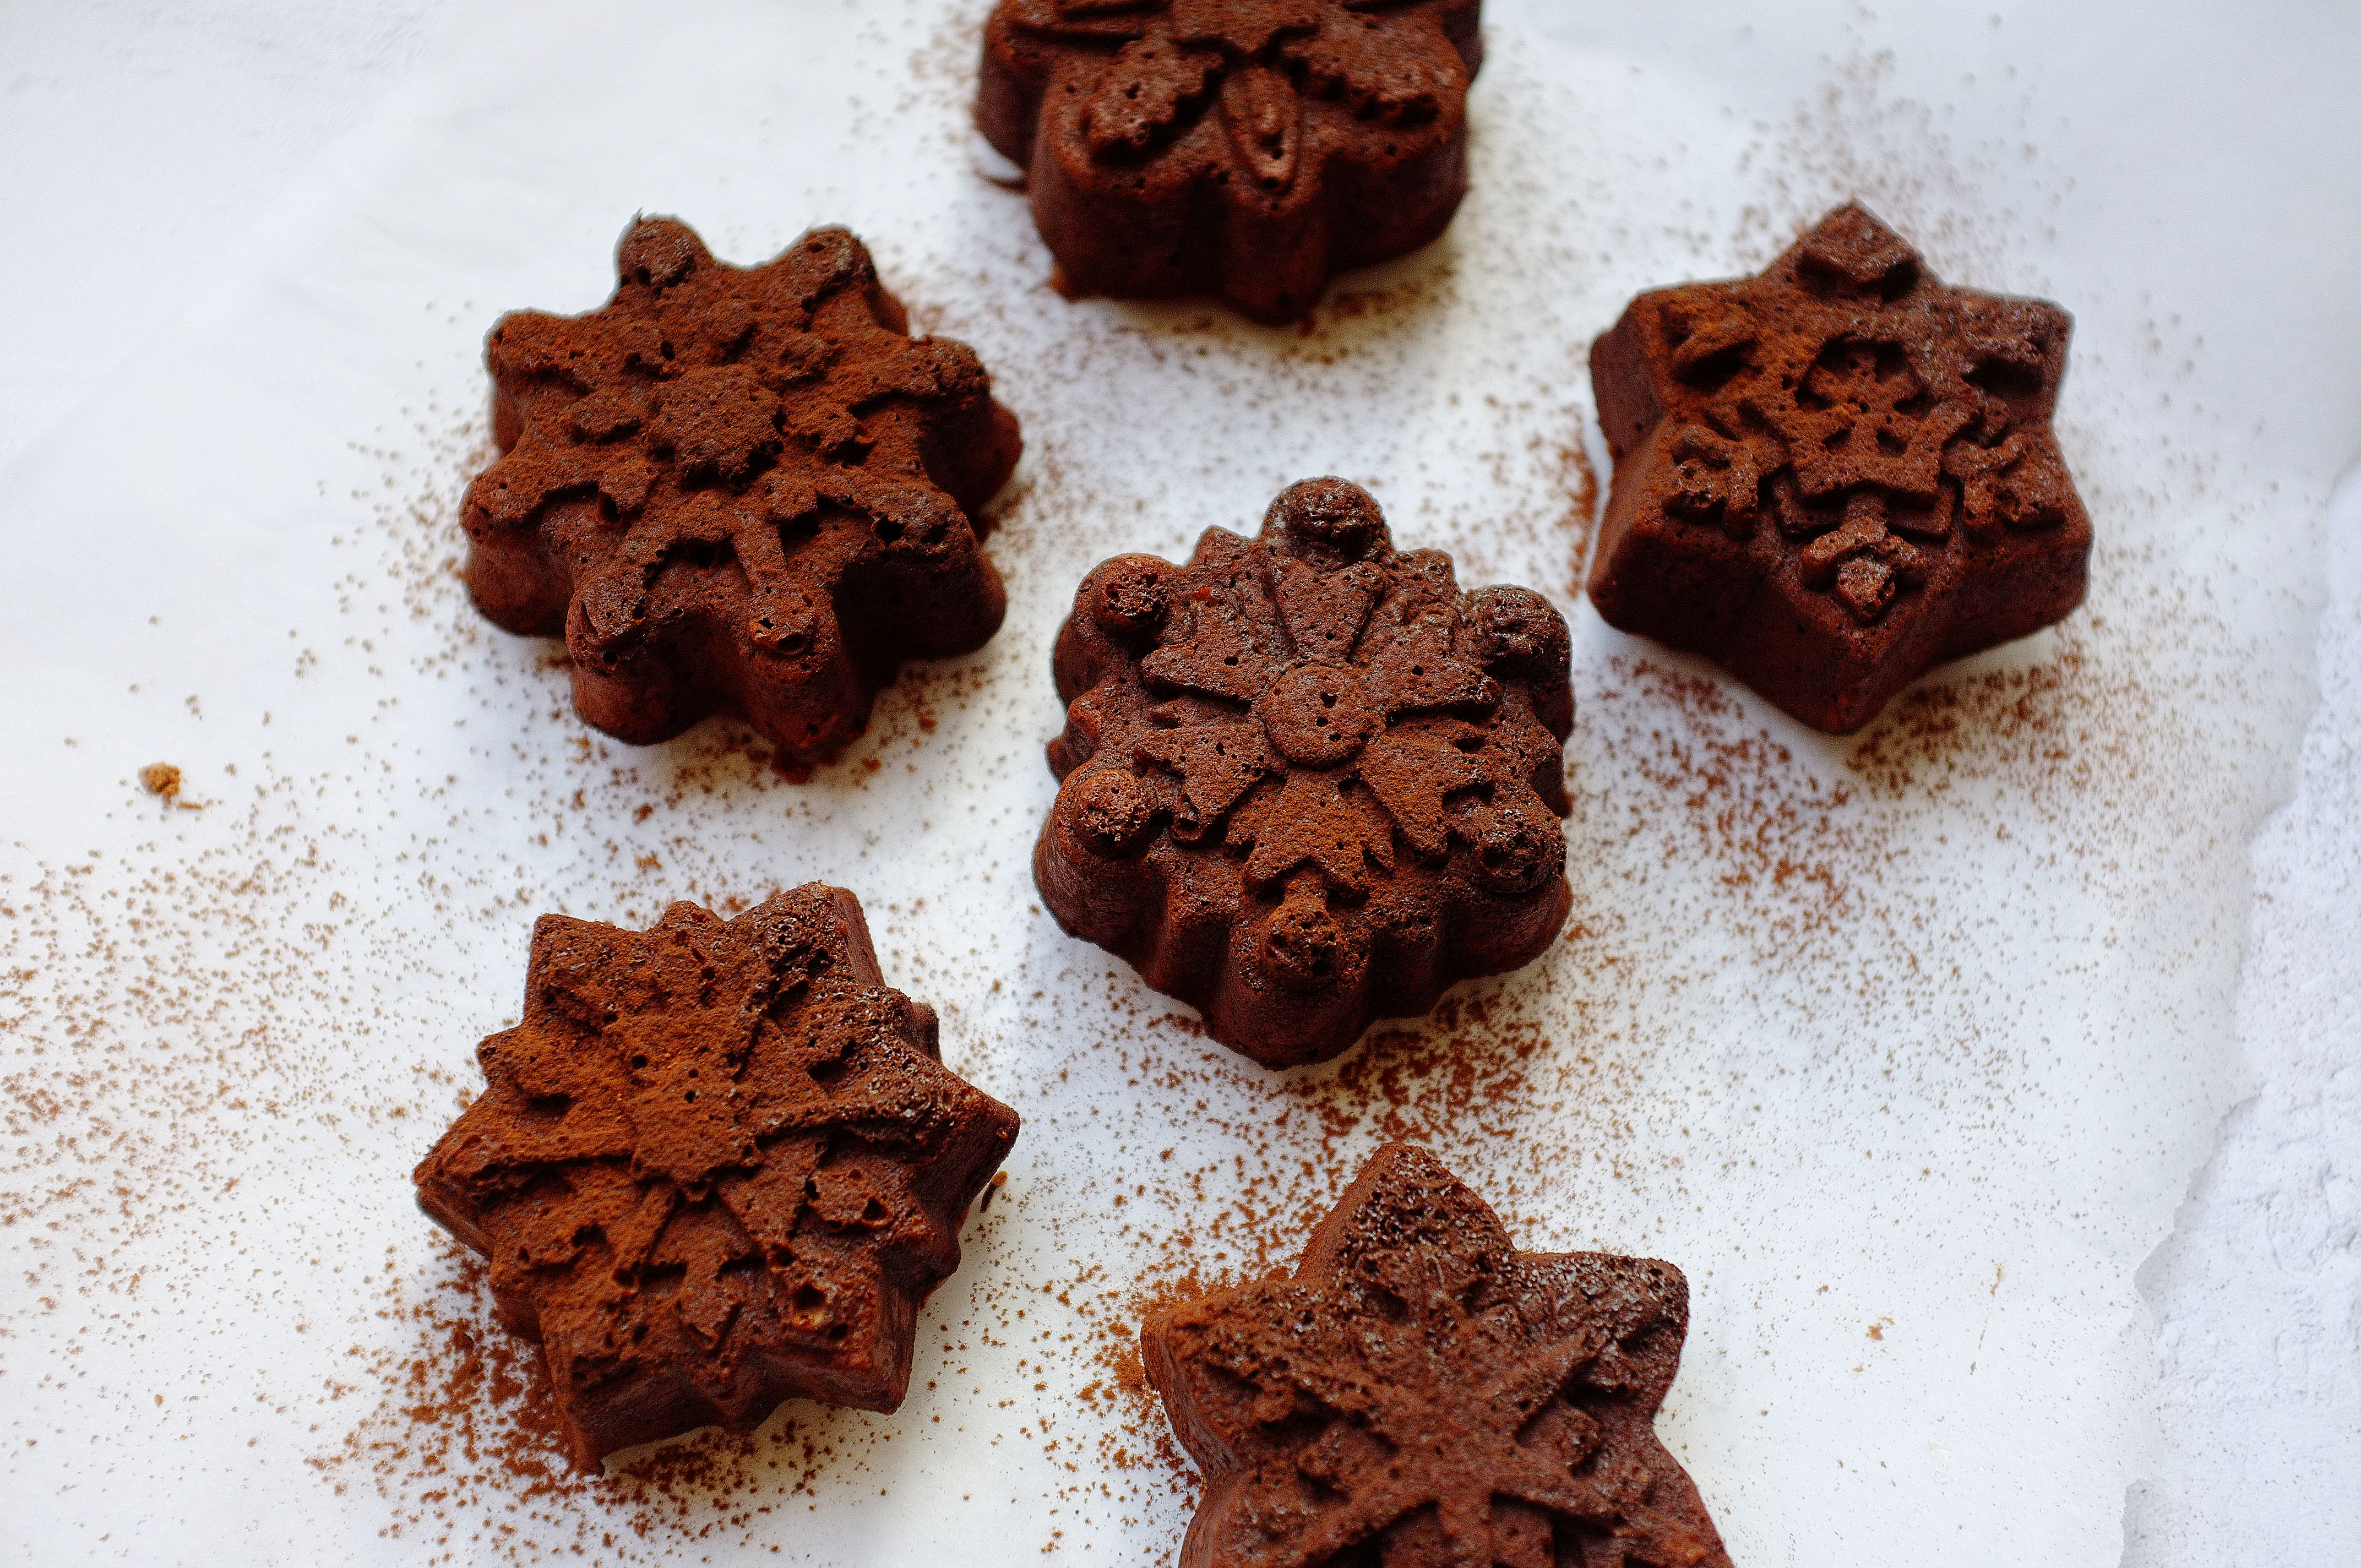
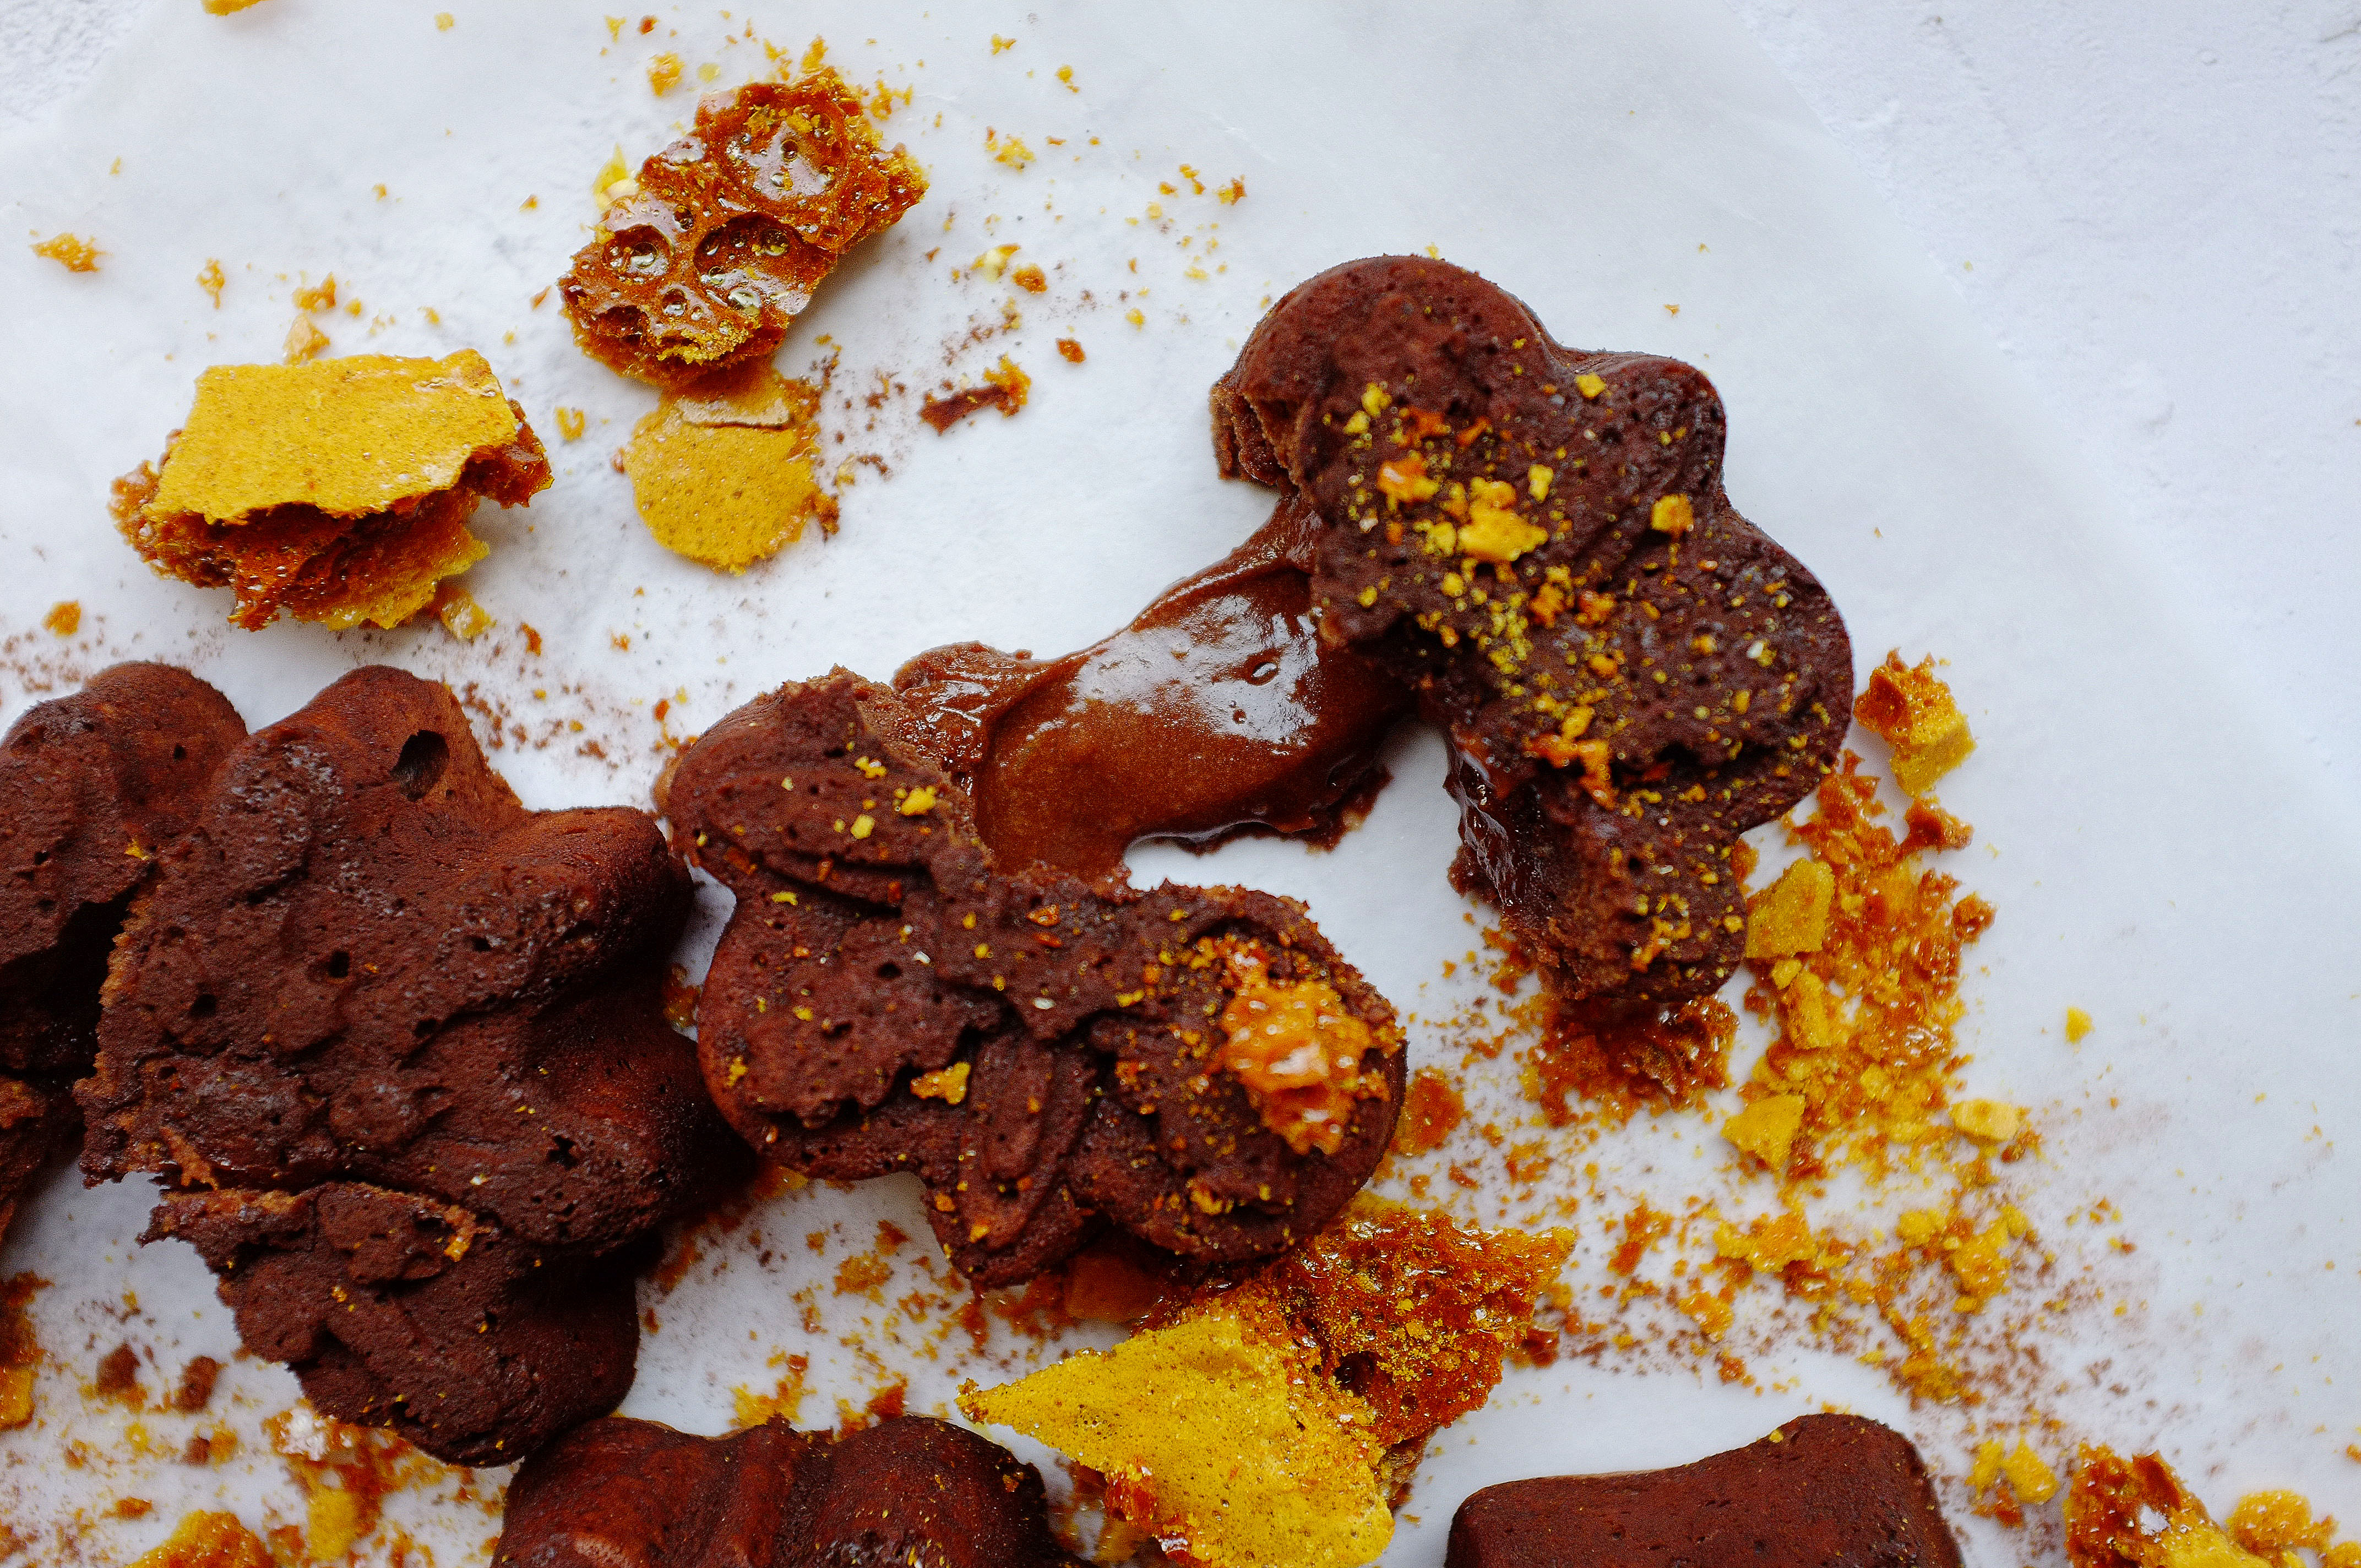
Caramelised almonds (you can omit these if you like, although I think the texture contrast and salt/nutty flavour is delicious!)

  • 75g flaked almonds (or any other nuts you like)
  • 75g caster sugar
  • generous pinch sea salt

Brownie batter

  • 3tbsp ground flaxseed
  • 250g dark chocolate
  • 170g almond butter (or your favourite nut butter, or tahini)
  • 50g vegan margarine/butter
  • 120ml aquafaba (the water from a can of chickpeas)
  • 100g light brown soft sugar
  • 75g caster sugar
  • 100g ground almonds (or blitz up 100g oats into a flour)
  • generous pinch sea salt
  • An additional 100g dark chocolate, roughly chopped (optional- I like adding chocolate chunks to brownies as I don’t understand the concept of too much chocolate, but you can leave this out if you’d rather)

Method

  1. Preheat the oven to 170c. Grease and line a 9×9 brownie tin.
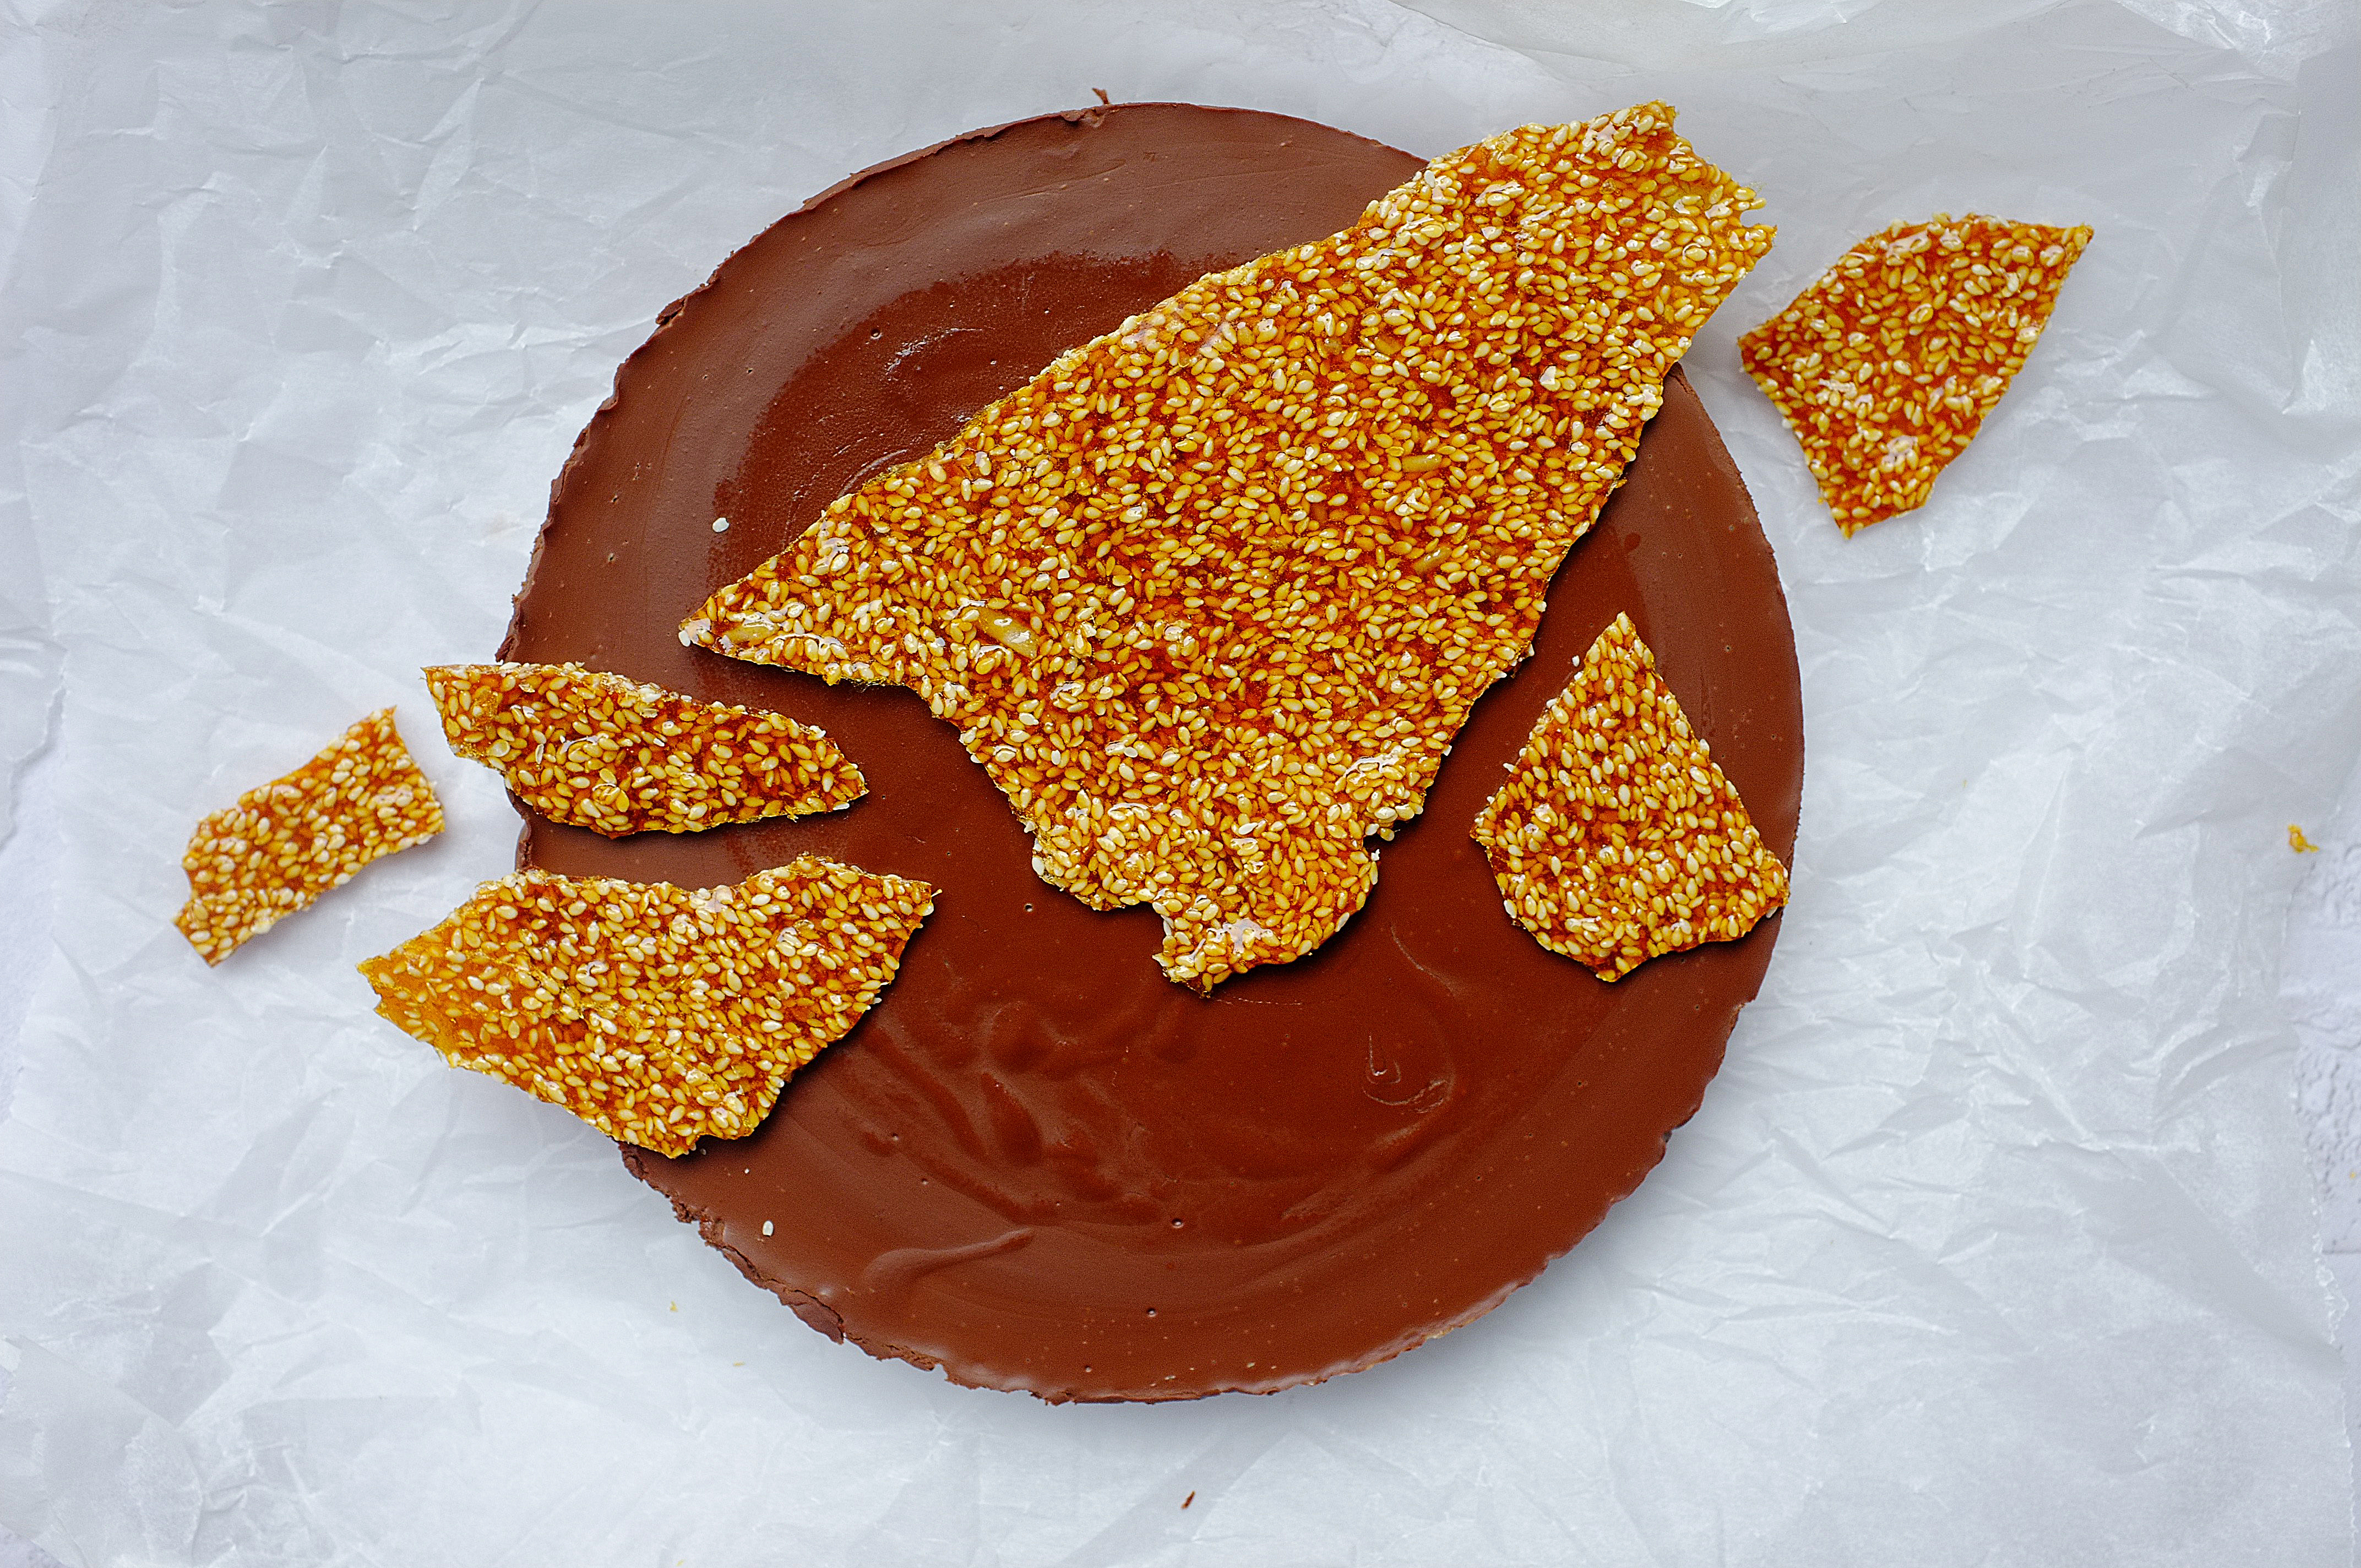
  2. Start by making the almond brittle. To do this place a piece of baking paper on a heatproof work top or baking tray. Put the sugar in a small saucepan and allow it to melt, swirling the pan occasionally until the sugar has completely dissolved. Once the caramel reaches a golden colour, stir through the flaked almonds and salt, then tip onto the paper and spread out into as thin a layer as you can. Leave to set hard while you make the batter.
  3. Put the flaxseed in a small bowl with 5tbsp water. Stir and set aside. Put the chocolate, almond butter and vegan butter in a heatproof bowl and set over a pan of gently simmering water (don’t let the base of the bowl touch the water). Let the ingredients melt together, stirring occasionally.
  4. Meanwhile, place the aquafaba in the bowl of a stand mixer with whisk attachment (or use an electric whisk and large mixing bowl). Whisk the aquafaba until stiff peaks form (about 10-15 minutes). By this point the chocolate mix will be glossy and smooth- set aside to cool.
  5. Now add the sugars and flax mix to the aquafaba and whisk to create a glossier texture (about 2-3 minutes). Scrape the cooled chocolate mixture into the aquafaba and briefly whisk again until it’s combined, then fold the ground almonds and salt in with a large metal spoon.
  6. Spoon half the batter into the prepared tin then scatter over half of the roughly chopped chocolate (if using). Now add the remaining batter and level off. Break up the almond brittle into uneven pieces and scatter all over the top of the brownie along with the remaining chocolate. Bake for 35-40 minutes (longer than a regular brownie) or until there is just a slight wobble left in the middle. Once baked, leave to cool completely in the tin before slicing up and serving.


Advertisement

Sesame, Miso and Chocolate Tart (Vegan)

Uncategorized

This tart (using ‘tart’ as a loose term for this- there’s no pastry or baking involved) is so easy to put together but makes for a really delicious plant based dessert. The crunchy base is laced with tahini and sesame seeds so the earthy flavour really comes through, and the filling has a savoury note thanks to miso paste, and is super smooth and creamy courtesy of my favourite plant based brand- Oatly.

Ingredients

Base

  • 100g dark chocolate
  • 75g tahini
  • 1tbsp maple syrup
  • large pinch sea salt
  • 100g sesame seeds
  • 50g finely chopped mixed nuts (I used cashews and pistachios)

Filling

  • 225g dark chocolate
  • 30g vegan butter (I used Stork)
  • 300ml Oatly cream alternative
  • 3tbsp maple syrup
  • large pinch sea salt
  • 3tbsp white miso paste

Sesame shards

  • 75g sesame seeds
  • 100g caster sugar

Method

  1. Grease and line an 8 inch cake tin. For the base, place the chocolate, tahini, maple and salt in a heatproof bowl set over a saucepan of simmering water (don’t allow the base of the bowl to touch the water or the chocolate may burn). Gently melt all the ingredients together then stir through the sesame seeds and chopped nuts. Scrape this mixture into the lined cake tin and spread out into one even layer. Place this in the fridge to set for at least 30 minutes.
  2. For the filling, roughly chop the chocolate and place in a heatproof bowl along with the vegan butter. Set aside. Put the Oatly cream, maple, salt and miso paste in a saucepan and, stirring often, heat to just below boiling point. Pour this mixture over the chocolate and butter and allow it to sit for a moment before stirring together to form a smooth glossy ganache. Let this cool then pour it over the chilled base. Transfer to the fridge again and chill for another hour or until set.
  3. While the tart is chilling, make the sesame shards. Before you start, place a piece of greaseproof paper on a large baking tray. Now put the sugar in a small saucepan. Allow the sugar to melt, swirling the pan occasionally, then, once the caramel is golden take off the heat, stir in the sesame seeds and spread into an even layer on the greaseproof paper. Leave to cool and harden, then break into shards.
  4. Slice up the tart and serve with shards of sesame caramel and a sprinkling of sea salt.

Melting Chocolate and Clementine Snowflakes with Salted Cardamom Honeycomb

Uncategorized

I’m not usually one for novelty shapes but when Nordic Ware sent me a six hole snowflake baking tin I couldn’t resist (it is Christmas after all). Chocolate fondants never fail to make me happy so I thought a simple festive twist on the classic melt-in-the-middle puddings was in order; the snowflakes themselves taste predominantly of dark chocolate, spiked with a little clementine zest, but the honeycomb really makes for a well rounded dessert full of flavour and texture. Add ice cream too for optimum indulgence.

Ingredients

Makes 6-8 puddings

  • 1-2tbsp cocoa powder, for dusting
  • 140g 70% dark chocolate
  • 140g butter, plus extra for greasing
  • 140g golden caster sugar
  • 3 eggs, 2 egg yolks
  • 125g plain flour
  • Zest 3 clementines

For the honeycomb

  • 100g caster sugar
  • 2 1/2 tbsp golden syrup
  • 1tsp ground cardamom
  • pinch salt
  • 1tsp bicarbonate of soda

Method

  1. Brush the moulds inside with melted butter then coat in cocoa powder, tap out any excess and set aside.
  2. Melt the chocolate and butter in a heatproof bowl set over a pan of simmering water, then leave to cool a little.
  3. Place the eggs, yolks, sugar and clementine zest in a large bowl or bowl of a stand mixer with whisk attachment and whisk until pale and thick.
  4. Add the flour and mix together briefly, then add the chocolate mix, a quarter at a time. Mix well between each addition. Split the mix between the moulds then chill for 15 minutes. Preheat the oven to 180c.
  5. Meanwhile, make the honeycomb. To do this line a medium high sided baking tray with baking paper then place the sugar, syrup, salt and ground cardamom in a small saucepan. Heat until the sugar has dissolved and you have a golden, slightly simmering liquid, then add the bicarbonate of soda, remove from the heat and mix (just a few seconds, until the bicarbonate of soda has disappeared.). It will rise up quickly and go foamy. Tip into the prepared tin and leave to set hard.
  6. Take the puddings from the fridge and bake for 9-11 minutes for the perfect saucy middle. Break up the honeycomb and serve a few shards with each pudding.


Winter Citrus Pavlova with Dark Chocolate and Spice

Uncategorized

Pavlova is a Great British classic, and although we usually associate it with summer days and strawberries, it’s a really versatile dessert which can be adapted for any time of year simply by changing up the seasonal fruit toppings. I love this variety as the fresh winter citrus and spiced mascarpone combined with a pop of pomegranate makes for a fresh alternative to a heavy Christmas pudding; perfect after a mammoth Turkey feast.

Ingredients

For the meringue

  • 6 large egg whites
  • 300g golden caster sugar
  • 75g dark brown soft sugar 
  • 1tsp white wine vinegar
  • 1tsp corn flour

For the toppings

  • 400ml double cream
  • 200g mascarpone
  • 4or 5 clementines, zest and flesh
  • 1 1/2 tsp ground cardamom
  • 1tsp ground cinnamon
  • 3-4tbsp icing sugar
  • 100g dark chocolate
  • 100g pomegranate seeds
  • 75g pistachios, roughly chopped
  • 5-6 figs, sliced (optional)
  • Thyme and rosemary, to garnish (optional)

Method

    1. Preheat the oven to 160c. Line a large baking tray with greaseproof paper.
    2. Place the egg whites in the bowl of a stand mixer with whisk attachment. Whisk to medium peaks and start adding the sugar, a spoonful at a time. Once all the sugar (both brown and caster) has been added whisk until stiff peaks form and you’ve got a glossy, non-granular meringue. Stir the corn flour and white wine vinegar together in a small cup and mix into the meringue.
    3. Pile the meringue onto the prepared baking tray and roughly spread into a 30x20cm rectangle. I think the more wild and asymmetric the better. Place the tray in the oven and reduce the temperature to 120c immediately. Cook for 1 hour or until the outside is crisp, then turn the oven off and leave to cool in there for at least an hour (this prevents the meringue cracking too much which can happen when the temperature suddenly changes).
    4. Once cooled, set aside and prepare the toppings. For the cream, whisk together the mascarpone, cream, clementine zest, ground cardamom, ground cinnamon and icing sugar.
    5. Meanwhile melt the dark chocolate gently in a heatproof bowl set over a pan of simmering water. Slice the clementine flesh into rounds.
    6. To assemble the pavlova pile the cream onto the meringue, then arrange the clementine pieces and figs (if using) on top. Drizzle over the dark chocolate then sprinkle on pomegranate seeds and chopped pistachios. Finish with sprigs of rosemary and thyme, if using.


Maple Pecan Brownies

Chocolate

These Autumnal brownies start with my usual base of good quality chocolate, rye flour and browned butter, but I’ve added a salted maple pecan crumble (for want of a better word) into them for a nod to Thanksgiving (I’m based in the UK but we’re adopting Thanksgiving flavours and traditions more every year!).

Ingredients

  • 200g pecans
  • 4tbsp maple syrup, I used Billingtons Amber Maple
  • 250g unsalted butter
  • 250g good quality dark chocolate (70%)
  • 3 eggs, 1 egg yolk
  • 100g light brown soft sugar
  • 75g caster sugar
  • large pinch of salt, plus more for finishing
  • 100g rye flour

Method

  1. Preheat the oven to 180c. Grease a large brownie tin and line with greaseproof paper.
  2. Place the pecans in a dry pan and toast for a few minutes, then add the maple and a pinch of salt and toss to coat. Stir for a few minutes on the heat until the nuts are sticky then tip onto a piece of greaseproof paper to cool.
  3. Once cooled, whizz the nuts into a rough crumb (it will be quite moist).
  4. Roughly chop the chocolate and tip into a heatproof bowl. Place the butter in a saucepan set over a medium heat and once melted, up the heat and wait for it to foam and smell nutty. Once you reach this stage, pour it over the chocolate. Leave it to sit for a moment then stir together to form a glossy mix.
  5. Meanwhile, whisk the eggs, yolk and both sugars until pale and voluminous (this is what gives you a glossy crisp top). Tip the chocolate down the side of the bowl and add the flour, then fold until everything is well combined.
  6. Tip half the brownie batter in the prepared tin, then evenly distribute the pecan crumb on top, followed by the remaining batter. Sprinkle with salt and bake for 25-30 minutes. When they’re ready, leave to cool completely then slice up and serve.

Pecan Popcorn Custers with Smoked Salt, Dark Chocolate and Caramel

Uncategorized

These popcorn clusters are really simple to put together and would make for an apt post-firework snack (in fact, covered entirely in chocolate they could look a little like coal!). Think of them as the boujee sister of the rice crispie cake, with bonfire night inspired flavours making them feel a little more grown up.

  • Roughly 125g corn kernels (or 90g plain popcorn- popped weight)
  • 2tbsp sunflower or vegetable oil (omit this if you’re using ready popped corn)
  • 175g caster sugar
  • 40g unsalted butter
  • 75g pecans
  • 200g dark chocolate
  • generous pinch smoked salt

Method

  1. Line a large baking tray with greaseproof paper. Have another piece of greaseproof paper handy,
  2. If you’re popping your own kernels, put a large lidded pan on a medium/high heat and add the oil. Once the oil is hot, put a couple of kernels in and wait for them to pop. Once they’ve popped you know your oil is ready, so add the remaining kernels and put the lid on. You’ll hear lots of popping for a few minutes, but once it slows turn the heat off and set aside until it completely stops, then remove the lid and leave to cool. It’s a good idea to shake the pan occasionally during the popping process to avoid any catching on the base of the pan.
  3. Put the sugar in a heavy bottomed pan and heat gently until completely melted, swirling (but not stirring) the pan occasionally. Once the sugar has melted increase the heat and take the caramel to a golden brown colour, then add in the butter and melt until combined (careful, it will spit a little!). Set aside to cool slightly, then transfer the popcorn into a large mixing bowl along with the pecans and a generous pinch of smoked salt. Mix briefly. Tip the caramel into the bowl and, working quickly, stir to coat the popcorn and pecans before tipping the mix onto the prepared tray.
  4. Press the mix down using the spare greaseproof paper and a tea towel (it will be quite hot) to make a compact even layer. Set aside to cool and firm up.
  5. Once crisp, break the popcorn into rough pieces. Melt the chocolate in a bowl set over a pan of simmering water (don’t let the bowl touch the water) then dip the pieces in, or drizzle it over, if you prefer. Finish with a little more smoked salt then leave to set for about half an hour. Enjoy!

Burnt Butter Caramel and Raspberry Brownies

Chocolate, Uncategorized

Another iteration of my all-time favourite bake, this time with fresh raspberries offset by oozing pockets of burnt butter caramel (inspired by Chin Chin Lab’s burnt butter caramel nitro ice cream). Brownies might not seem like the obvious thing to make mid-summer, but as these are studded with some token summer berries and can therefore be deemed seasonal, you should probably make them.

Ingredients

For the caramel

  • 100g caster sugar
  • 50g butter
  • 60ml double cream
  • Pinch salt

For the brownie

  • 250g butter
  • 150g 80% dark chocolate
  • 100g 70% dark chocolate
  • 3 eggs, 1 egg yolk
  • 100g light brown soft sugar, 75g caster sugar
  • Generous pinch salt
  • 100g rye flour
  • 100g good quality milk chocolate, roughly chopped
  • 250g fresh raspberries

Method

  1. Start off by making the caramel. To do this place the sugar in a saucepan and heat gently. Meanwhile, place the butter in a small pan and melt until just past browned (it should be foaming and have little brown specks in the bottom), then take off the heat.
  2. At this point the sugar will have started to dissolve. Swirl the pan until the sugar melts entirely, then allow it to reach a deep golden brown colour. Now add in the burnt butter and cream, stirring until it comes together. Remove from the heat and add the salt. Pour the caramel into a baking paper-lined container and leave to firm up for around half an hour. Preheat the oven to 180c and line a brownie tin with baking paper.
  3. While the caramel is setting, make the brownie batter. Roughly chop the dark chocolate and tip into a heatproof bowl. Place the butter in a saucepan and heat gently until melted. Up the heat and brown until foaming (as before), then pour directly over the chocolate. Let it sit for a moment, then stir to create a smooth glossy mixture.
  4. Meanwhile, place the eggs and egg yolk, both sugars and salt in a large bowl (or bowl of a stand mixer with paddle attachment) and beat until pale and voluminous.
  5. Pour the chocolate down the side of the bowl and fold in, then add the flour and fold again.
  6. Chop the set caramel into rough pieces and set aside. Scape half the brownie batter into the lined tin and level out. Evenly distribute half the caramel pieces, chocolate chunks and raspberries then scrape over the remaining chocolate. Repeat the process with the caramel, chocolate and raspberries then bake for 25-35 minutes or until crisp and flaky on top but still fudgy (with a slight wobble) in the middle.
  7. Leave to cool completely in the tin then slice up an serve.

Espresso, Pecan & Dark Chocolate Ice Cream Sandwiches

Biscuits, Uncategorized

These cookie sandwiches are a culmination of my three favourite things; coffee, chocolate and ice cream. The pecans add crunch, and the bitter note of espresso prevents the result from being overly sweet. There’s not a lot else to say- other than go forth and make them (but proceed with caution, they’re like crack).

Ingredients (makes 10-12 cookie sandwiches, with a little extra cookie dough which will freeze well)

For the ice cream

  • 400ml double cream
  • 400ml whole milk
  • 8 egg yolks
  • 150g caster sugar
  • pinch salt
  • 30g good quality instant coffee

For the cookies

  • 225g soft unsalted butter
  • 125g caster sugar
  • 175g dark brown soft sugar
  • 2 eggs
  • 1tsp bicarbonate of soda
  • generous pinch salt
  • 150g plain flour
  • 125g rye flour
  • 75g roughly chopped pecans
  • 100g roughly chopped dark chocolate (70%)

Method

  1. Start off by making the ice cream. To do this, pour the double cream, milk and instant coffee into a saucepan and set over a medium heat. Meanwhile, place the egg yolks, sugar and salt in a large bowl (or bowl of a stand mixer with whisk attachment) and whisk until pale and thick. Once the instant coffee has dissolved into the cream mixture, bring it to a simmer then take off the heat and gradually add into the eggs and sugar, whisking constantly until well combined.
  2. Pass the mixture through a sieve into a clean saucepan, then heat gently, stirring until thick (make sure the custard doesn’t get too hot, or you’ll be left with something that looks a bit like scrambled eggs!). Pass the thickened custard through a sieve into a bowl, then close cover with cling film and leave to cool completely (I like to chill the custard at this point to make sure it’s as cold as possible before churning, but it’s not absolutely necessary).
  3. Once cooled, pour the custard into an ice cream maker and churn until creamy and thick. Line a shallow square/rectangular baking tin (about 2-3cm deep) with cling film and scrape the churned ice cream into it. Level off, cover with cling film and place in the freezer for at least 4 hours, until fully set. At this point you can cut the ice cream into rounds using a 3-4 inch cookie cutter, then cover and return the rounds to the freezer until required.
  4. For the cookies, place the butter and both sugars in a large bowl (or bowl of a stand mixer with paddle attachment) and beat until pale and fluffy. Add in the eggs one at a time, beating well between each addition. Add the bicarbonate of soda, salt and both flours and very briefly mix again until combined. Now stir in the pecans and chocolate with a wooden spoon. Chill the cookie dough for 10 minutes.
  5. Preheat the oven to 180c. Line a couple of baking trays with greaseproof paper and space tablespoons of cookie dough over them, allowing plenty of room for spreading. Bake for 12-15 minutes or until soft in the middle but golden in colour. At about 8-10 minutes into baking, take the baking tray and bang it on the work top in one sharp movement. This allows the cookie to spread a little and ensures the perfect thickness. Repeat the process until you’ve used up the cookie dough, then leave the cookies to cool.
  6. For a neat result, you can cut the cookies into perfect circles with the cutter you used for the ice cream, but this isn’t essential.
  7. Once the cookies have cooled, sandwich two together with a round of espresso ice cream.

Enjoy!

Rhubarb & Caramelised White Chocolate Choux Nuts

Pastry

Crisp choux pastry, sharp roast rhubarb with a hint of vanilla, and butterscotch-sweet caramelised white chocolate cream; a delicious combination you’ve got to try, and a great way to celebrate seasonal British produce (and millennial pink… *sigh*).

Ingredients (makes 10-12)

For the choux

  • 85g unsalted butter
  • 220ml water
  • 100g plain flour
  • 3 eggs
  • pinch of salt

For the filling

  • 250g white chocolate (make sure it’s at least 30% cacao)
  • 300ml double cream
  • Pinch salt
  • 4 thick stems rhubarb
  • 3tbsp caster sugar
  • 2 vanilla pods or 1tsp vanilla extract
  • Juice and zest 1 lemon

For the topping

  • 100g icing sugar
  • Enough of the rhubarb syrup (leftover from roasting the rhubarb) to create an icing with a drizzle-consistency
  • Dried rose petals (optional)
  • Candied rhubarb ribbons (optional) (I make these by creating ribbons of rhubarb with a peeler, which I then simmer in a simple 2 parts sugar: 1 part water syrup for 5 minutes before draining off any excess liquid and cooking at 160c for 10-15 minutes, or until dried out, on a lined baking tray)

Method

  1. To make the choux put the water, butter and salt in a saucepan set over a medium heat (do not let it boil at this stage). Meanwhile, sieve the flour to remove any lumps. When the butter has melted into the water, increase the heat and bring to a rolling boil, then tip in the flour and stir vigorously until you have a smooth paste-like mix which comes away from the edges of the pan. Continue to stir for another minute to cook out the rawness of the flour, then tip into a clean bowl and close cover with cling film (this eggless stage is known as a ‘panade’). Leave to cool to room temperature.
  2. Preheat the oven to 190c. Line 2 large baking trays with greaseproof paper.
  3. Once the panade has cooled it’s time to add the eggs; whisk in a jug to break them up then very gradually add into the panade while beating with electric beaters. Stop adding the egg (you might have a little leftover) when the smooth, lump-free mixture reluctantly drops off the end of a spoon. Pile the choux mix into a piping bag, fitted with a large round nozzle.
  4. Pipe 10-12 doughnut shapes onto the prepared baking trays, leaving room for expansion. Bake the choux for 20-25 minutes or until crisp and golden, then skewer each one and return to the oven for around 10 minutes or until the middles have completely dried out. Set aside to cool and reduce the oven temperature to 180c.
  5. Slice the rhubarb into batons and toss in the caster sugar, lemon juice and zest and vanilla. Roast for 10-15 minutes in a high sided baking tray until the pieces are tender but still retain their shape. Set aside to cool and reduce the oven temperature to 120c.
  6. Chop up the white chocolate and scatter on a lined baking tray in an even layer. Place in the oven to allow the chocolate to melt for 10 minutes, then stir/turn and return to the oven for another 10 minutes. Repeat this step 2-3 more times until the chocolate reaches a deep golden colour, then scrape into a bowl and mix in a splash of cream to loosen the consistency (it can get a little grainy at this stage so pass through a sieve if necessary). Leave to cool.
  7. Once the white chocolate has cooled, place in a bowl (or bowl of a stand mixer with whisk attachment) and add in the cream and salt. Whisk until pipe-able.
  8. Slice the cooled choux nuts in half horizontally and pipe in a generous helping of caramelised white chocolate cream. Slice the roast rhubarb pieces thinly and arrange these on top of the cream, then pop the choux lid on top.
  9. For the pink icing, pour the cooking syrup from the rhubarb tray into the icing sugar and mix to create a smooth drizzle-like consistency (add in a little water if you don’t have enough syrup). Spoon this over the filled choux-nuts and garnish with edible petals and rhubarb ribbons.
Enjoy!

Sea Salt, Dark Chocolate & Almond Butter Cookies (Vegan)

Biscuits

In the spirit of Veganuary, I thought I’d keep my recipes plant based this month. I’m not vegan myself, but am completely on board with reducing my consumption of animal products, so should probably reflect this in my baking. This week I tackled a home baking classic: the chocolate chip cookie. I’m pretty smug about the result; you would never guess they contained neither eggs nor dairy as the texture is buttery and chewy and the flavour rich, nutty and indulgent. Definitely give them a try, I’ve had great feedback from my (very willing) testers!

Ingredients

  • 150g vegan butter ( I used Naturli’s Vegan Baking Block)
  • 150g smooth almond butter
  • 75ml almond milk
  • 175g light brown soft sugar
  • 150g caster sugar
  • 1tsp vanilla extract
  • 150g rye flour
  • 200g plain flour
  • 1tsp bicarbonate of soda
  • 1/2tsp baking powder
  • 300g 70% dark chocolate, roughly chopped
  • 75g almonds, roughly chopped
  • Sea salt

Method

  1. Preheat the oven to 170c. Place the vegan butter, almond butter, almond milk, both sugars and vanilla in a heatproof bowl and set over a pan of simmering water (ensuring that the water does not touch the base of the bowl). Heat, stirring occasionally, until all the ingredients have melted to form a smooth mixture. Set aside to cool for 10 minutes.
  2. In a large mixing bowl, stir together the rye flour, plain flour, bicarbonate of soda, baking powder and a pinch of salt. Add in the wet ingredients and mix with a wooden spoon until a soft dough has formed. Now evenly distribute 3/4 of the chocolate chunks and all the almonds through the mixture.
  3. Line 2 or 3 large baking trays with greaseproof paper. Using an ice cream scoop shape even balls of dough and arrange on the trays, allowing space for spreading ( I put up to 6 cookies on each tray). Take a couple of your reserved chocolate chunks and press into the top of each ball of dough, then sprinkle with some sea salt.
  4. Bake for 10 minutes, then carefully take the trays out and bang them sharply on a worktop. Pop them back in the oven for 3 minutes then bang once more and leave to cool. This technique is favoured by lots of bakers as it stops the cookies from puffing up too much and creates that wrinkly finish (you’ll probably need to bake the cookies in batches as this recipe will make 18-22).
  5. Leave the cookies to cool on the trays or serve warm. Best enjoyed freshly baked.

Enjoy!