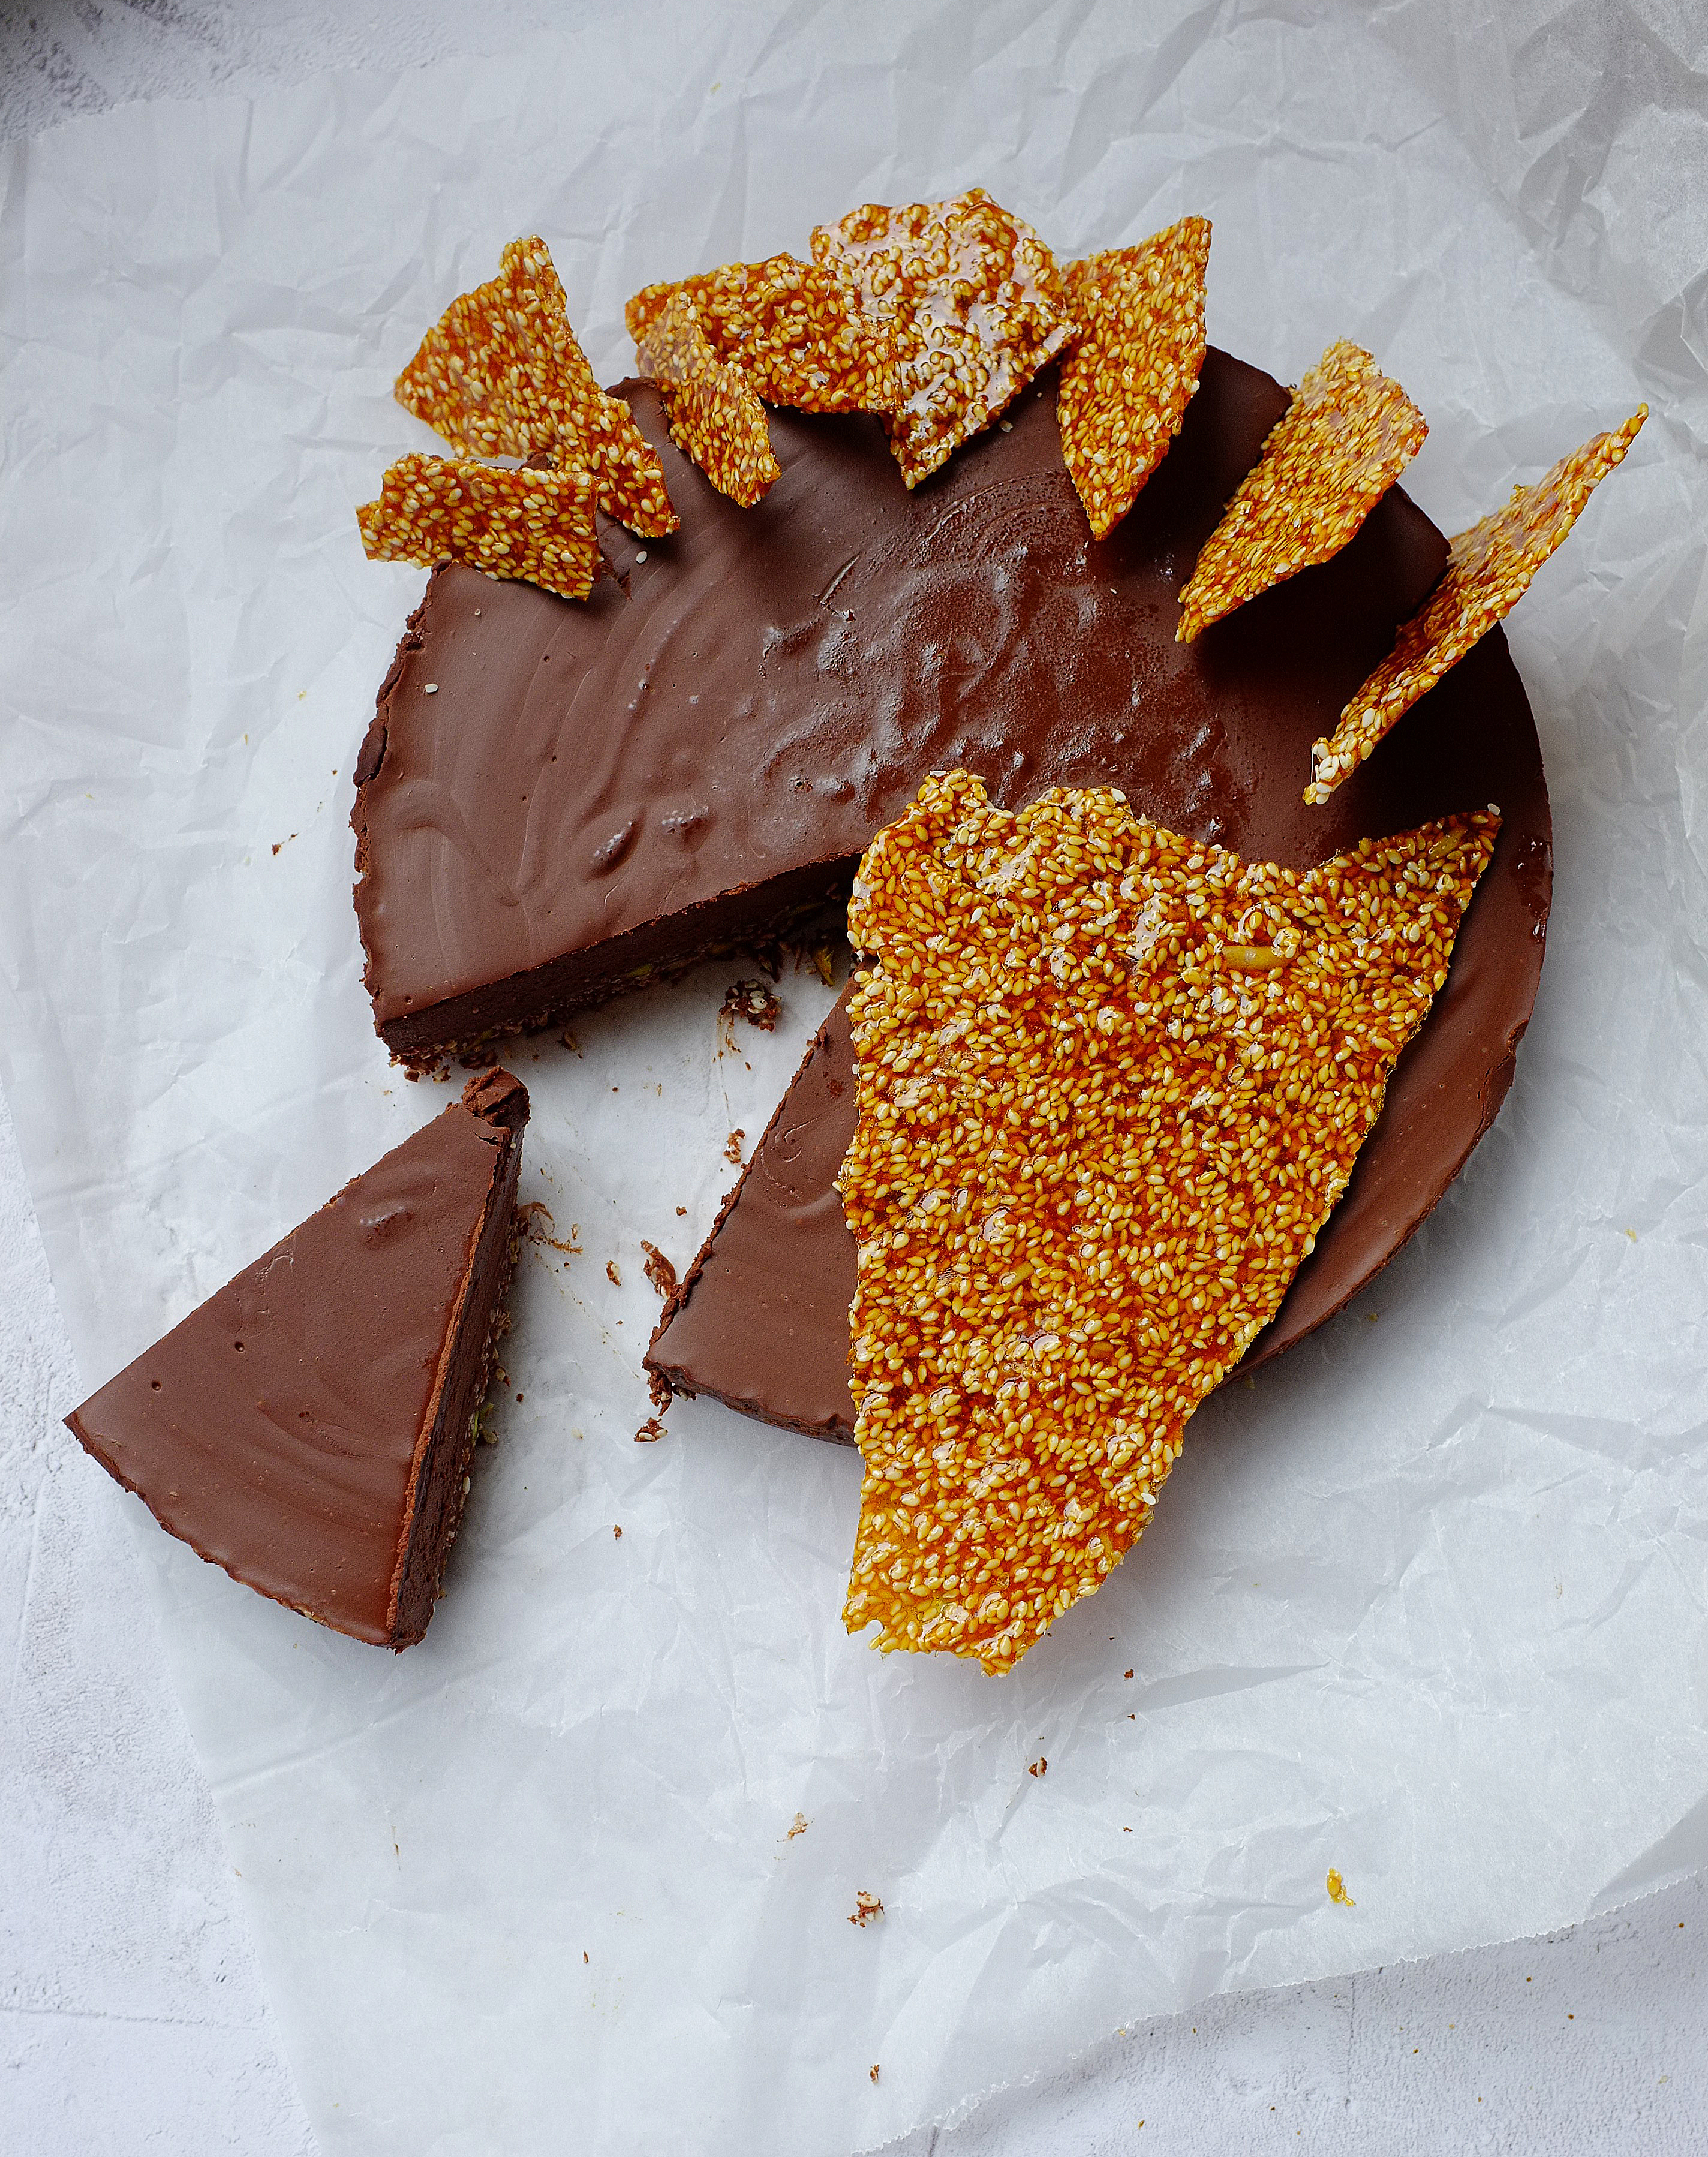
This tart (using ‘tart’ as a loose term for this- there’s no pastry or baking involved) is so easy to put together but makes for a really delicious plant based dessert. The crunchy base is laced with tahini and sesame seeds so the earthy flavour really comes through, and the filling has a savoury note thanks to miso paste, and is super smooth and creamy courtesy of my favourite plant based brand- Oatly.
Ingredients
Base
- 100g dark chocolate
- 75g tahini
- 1tbsp maple syrup
- large pinch sea salt
- 100g sesame seeds
- 50g finely chopped mixed nuts (I used cashews and pistachios)
Filling
- 225g dark chocolate
- 30g vegan butter (I used Stork)
- 300ml Oatly cream alternative
- 3tbsp maple syrup
- large pinch sea salt
- 3tbsp white miso paste
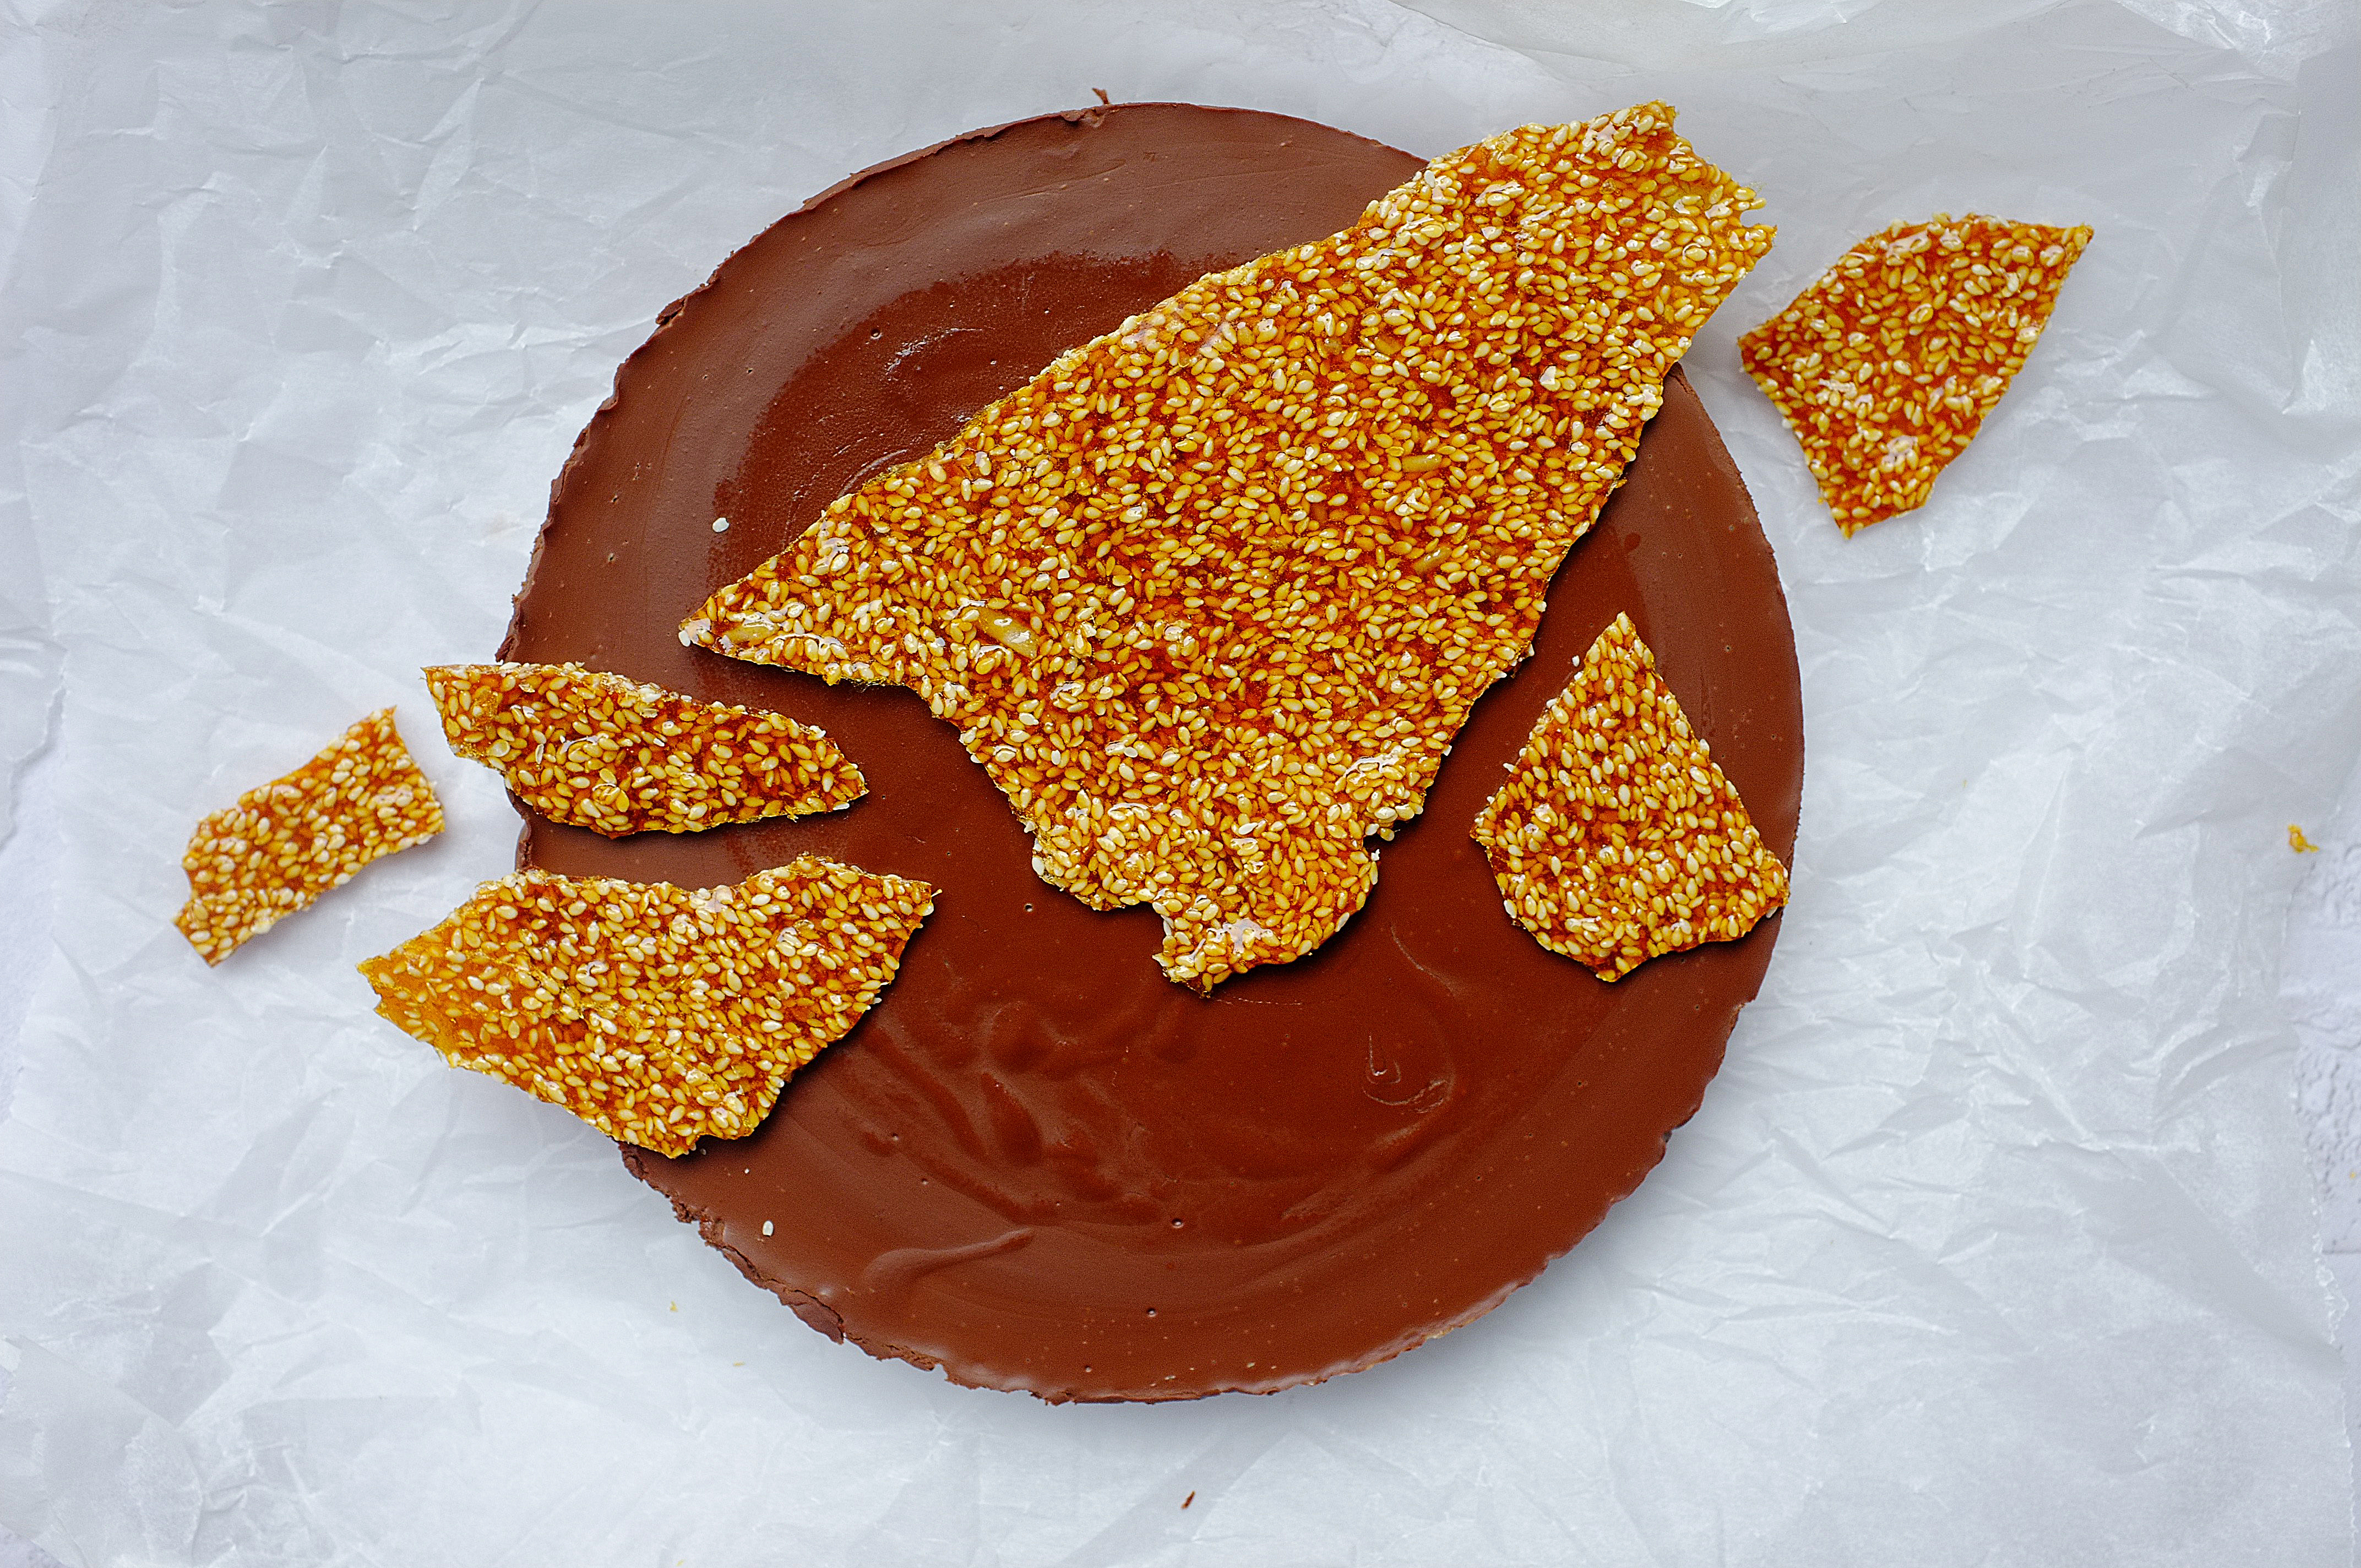
Sesame shards
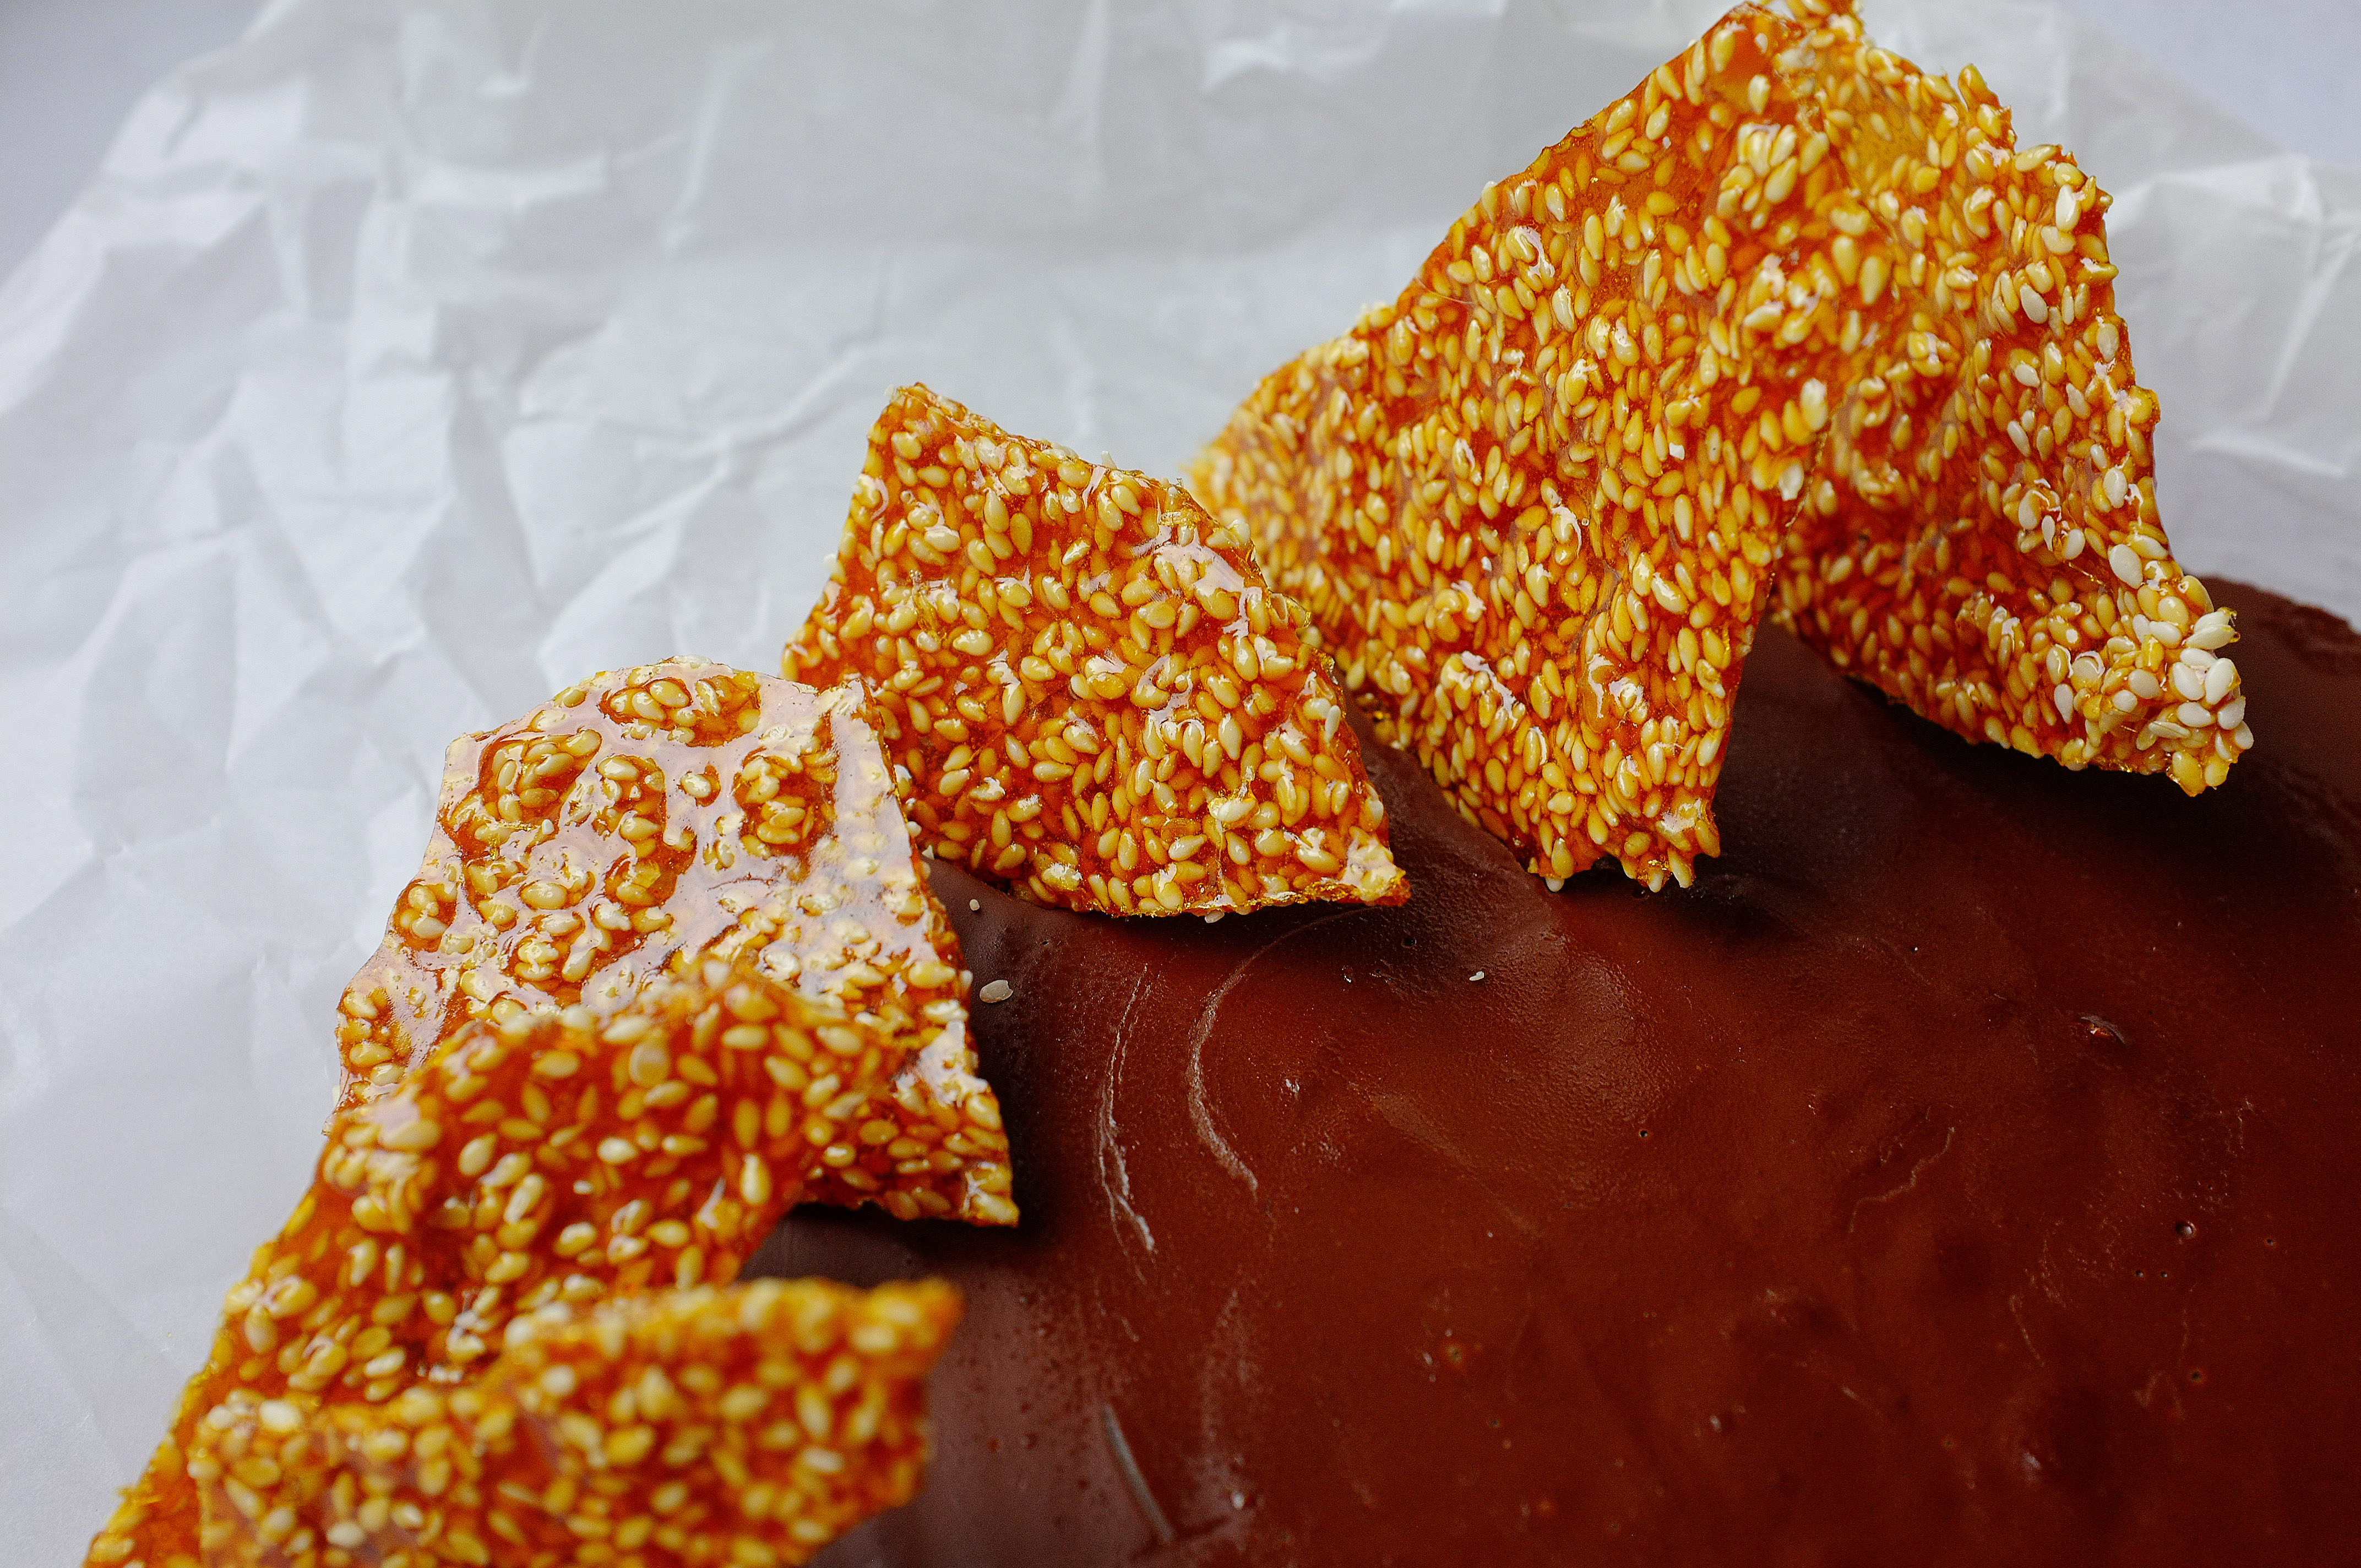
- 75g sesame seeds
- 100g caster sugar
Method
- Grease and line an 8 inch cake tin. For the base, place the chocolate, tahini, maple and salt in a heatproof bowl set over a saucepan of simmering water (don’t allow the base of the bowl to touch the water or the chocolate may burn). Gently melt all the ingredients together then stir through the sesame seeds and chopped nuts. Scrape this mixture into the lined cake tin and spread out into one even layer. Place this in the fridge to set for at least 30 minutes.
- For the filling, roughly chop the chocolate and place in a heatproof bowl along with the vegan butter. Set aside. Put the Oatly cream, maple, salt and miso paste in a saucepan and, stirring often, heat to just below boiling point. Pour this mixture over the chocolate and butter and allow it to sit for a moment before stirring together to form a smooth glossy ganache. Let this cool then pour it over the chilled base. Transfer to the fridge again and chill for another hour or until set.
- While the tart is chilling, make the sesame shards. Before you start, place a piece of greaseproof paper on a large baking tray. Now put the sugar in a small saucepan. Allow the sugar to melt, swirling the pan occasionally, then, once the caramel is golden take off the heat, stir in the sesame seeds and spread into an even layer on the greaseproof paper. Leave to cool and harden, then break into shards.
- Slice up the tart and serve with shards of sesame caramel and a sprinkling of sea salt.