Coffee Halva, Pear and Walnut Loaf Cake with Salted Tahini Butter

Cakes

It’s no secret that I love anything laden with sesame, so was thrilled when Sesame Kingdom sent me some of their delicious coffee halva, halva spread and tahini. I’m going to incorporate each of the products into a bake, and thought I’d start off with the halva, which I’ve used in brownies, ice cream and chocolate cakes before. I thought this time it made sense to try it out with some seasonal fruit and nuts and it works really well in this understated loaf format (especially warm, thickly sliced and smothered in salted tahini butter!).

Ingredients

  • 175g soft unsalted butter
  • 100g light brown soft sugar
  • 75g golden caster sugar
  • 3 eggs
  • 2tbsp instant coffee, dissolved in 2tbsp just-boiled water
  • 175g self raising flour
  • pinch salt
  • 75g walnuts
  • 2 Conference pears, peeled and diced
  • 150g coffee halva, mine was by Sesame Kingdom (plain would work too)

For the tahini butter

  • 75g butter
  • 75g tahini
  • large pinch salt

Method

  1. Preheat the oven to 170c. Grease and line a large loaf tin. 
  2. Place the butter and both sugars in a large bowl (or bowl of a stand mixer with paddle attachment) and cream together until pale and fluffy. Add in the eggs one at a time, beating well between each addition and adding a small amount of the flour if the mix looks like it may curdle. 
  3. Fold in the remaining flour, salt and coffee using a large metal spoon. Add 2/3 of the walnuts and pear pieces and fold again. Scrape half of the batter into the tin then sprinkle over half of the halva. Add the remaining batter then top with the last of the halva, walnuts and pear pieces.
  4. Bake for 34-40 minutes or until a skewer comes out clean when inserted.
  5. Beat the butter, salt and tahini together until light. Serve the loaf warm with a generous helping of tahini butter.


Advertisement

Autumn Hedgerow Celebration Cake (Apple, Blackberry & Salted Caramel)

Cakes

As someone who is perpetually cold I favour the summer months weather-wise, but when it comes to food seasons, Autumn is the winner for me. Root vegetables, roasts, comforting one-pot dinners and baked fruits, sugared and spiced; you can’t beat them. With this in mind and as an ode to the season and the produce that comes with it, I’ve created a hedgerow-themed celebration cake. Made up of spiced sponges studded with Bramley apple pieces, a tart blackberry compote and smooth salted caramel Swiss meringue buttercream- it’s a bit of a project bake, but so worth the effort.

Ingredients

For the cakes

  • 250g golden syrup
  • 190g unsalted butter
  • 175g light brown soft sugar
  • 375g self raising flour
  • 1 1/2 tsp bicarbonate of soda
  • 1 1/2 tsp ground cinnamon
  • 1 1/2 tsp ground ginger
  • 1tsp mixed spice
  • large pinch salt
  • 3 eggs
  • 260ml semi-skimmed milk
  • 1 very large Bramley apple, peeled, cored and diced
  • 1tsp corn flour

For the blackberry compote

  • 450g fresh blackberries
  • zest and juice 1 lemon
  • 5-6tbsp caster sugar

For the Swiss meringue buttercream (I’d only attempt this with electric whisk/beaters!)

  • 150g caster sugar, 50g butter, 100ml double cream, salt (this is for the caramel which is added to a Swiss meringue buttercream base)
  • 4 egg whites
  • 225g caster sugar
  • 275g unsalted butter, very soft (but not greasy)

To decorate

  • fresh blackberries, hazelnuts, apple crisps, rosemary sprigs

Method

  1. Grease and line two 8 inch cake tins. Preheat the oven to 170c.
  2. Start off by making the cakes. To do this place the syrup, butter and light brown soft sugar in a saucepan and melt over a medium heat. Set aside to cool a little.
  3. In a mixing bowl, stir together the flour, spices, salt and bicarbonate of soda, then make a well in the middle. Break the eggs into a jug and add the milk, then stir together with a fork and add into the well, along with the melted butter mixture. Whisk everything together with a hand whisk until just combined.
  4. Toss the apple pieces in corn flour and fold in, then distribute the batter between the two cake tins. Bake for 30-40 minutes or until a skewer comes out clean when inserted. Once baked let the cakes cool completely in the tins.
  5. Meanwhile, make the blackberry compote by placing the blackberries, lemon juice and zest and sugar in a saucepan set over a medium heat. Cook, stirring often until thickened and jammy. Set aside to cool.
  6. For the buttercream, start off by making a salted caramel sauce.To do this put the sugar in a heavy bottom saucepan and set it over a low heat. Wait until the sugar has all melted (swirl the pan to encourage it to do so but don’t stir!) then up the heat and allow it to reach a deep golden brown. When it gets to this stage, add the butter and stir (it will spit a little), then add the cream and stir again for a couple more minutes until slightly thickened. Remove from the heat and once cool enough to taste add salt to your liking. Set aside to cool completely.
  7. While the caramel is cooling, place the egg whites and caster sugar in a saucepan and whisk together (just a hand whisk will do here). Keep stirring over a medium heat until the mixture is hot to the touch and the sugar has dissolved, then transfer to a large bowl (or bowl of a stand mixer with whisk attachment) and whisk until it’s completely cool and will hold a stiff peak.
  8. Now continue to whisk, adding a heaped tablespoon of the butter every few seconds. Whisk until it’s all come together and is thick and glossy, then add 3-4 heaped tablespoons of your cooled caramel (add a little more or less to taste). Don’t worry if the mix looks curdled at any point, whisking will bring it back together with time. Once it’s ready you can start assembling the cake.
  9. Remove the cakes from the tins. If they’re domed at all, even off the tops, then slice each sponge in half, leaving you with 4 even layers. Place the first layer on your serving plate. Pile half the buttercream into a piping bag and pipe around the edge of the first layer twice (leaving a roughly 1.5 inch wall of buttercream). Fill this with a third of the blackberry compote then repeat the process until all the sponges are used up.
  10. Use the remaining buttercream to cover the whole cake, semi-naked style. Decorate as desired- I like rustic/natural decorations but the world is your oyster!

Rhubarb & Caramelised White Chocolate Choux Nuts

Pastry

Crisp choux pastry, sharp roast rhubarb with a hint of vanilla, and butterscotch-sweet caramelised white chocolate cream; a delicious combination you’ve got to try, and a great way to celebrate seasonal British produce (and millennial pink… *sigh*).

Ingredients (makes 10-12)

For the choux

  • 85g unsalted butter
  • 220ml water
  • 100g plain flour
  • 3 eggs
  • pinch of salt

For the filling

  • 250g white chocolate (make sure it’s at least 30% cacao)
  • 300ml double cream
  • Pinch salt
  • 4 thick stems rhubarb
  • 3tbsp caster sugar
  • 2 vanilla pods or 1tsp vanilla extract
  • Juice and zest 1 lemon

For the topping

  • 100g icing sugar
  • Enough of the rhubarb syrup (leftover from roasting the rhubarb) to create an icing with a drizzle-consistency
  • Dried rose petals (optional)
  • Candied rhubarb ribbons (optional) (I make these by creating ribbons of rhubarb with a peeler, which I then simmer in a simple 2 parts sugar: 1 part water syrup for 5 minutes before draining off any excess liquid and cooking at 160c for 10-15 minutes, or until dried out, on a lined baking tray)

Method

  1. To make the choux put the water, butter and salt in a saucepan set over a medium heat (do not let it boil at this stage). Meanwhile, sieve the flour to remove any lumps. When the butter has melted into the water, increase the heat and bring to a rolling boil, then tip in the flour and stir vigorously until you have a smooth paste-like mix which comes away from the edges of the pan. Continue to stir for another minute to cook out the rawness of the flour, then tip into a clean bowl and close cover with cling film (this eggless stage is known as a ‘panade’). Leave to cool to room temperature.
  2. Preheat the oven to 190c. Line 2 large baking trays with greaseproof paper.
  3. Once the panade has cooled it’s time to add the eggs; whisk in a jug to break them up then very gradually add into the panade while beating with electric beaters. Stop adding the egg (you might have a little leftover) when the smooth, lump-free mixture reluctantly drops off the end of a spoon. Pile the choux mix into a piping bag, fitted with a large round nozzle.
  4. Pipe 10-12 doughnut shapes onto the prepared baking trays, leaving room for expansion. Bake the choux for 20-25 minutes or until crisp and golden, then skewer each one and return to the oven for around 10 minutes or until the middles have completely dried out. Set aside to cool and reduce the oven temperature to 180c.
  5. Slice the rhubarb into batons and toss in the caster sugar, lemon juice and zest and vanilla. Roast for 10-15 minutes in a high sided baking tray until the pieces are tender but still retain their shape. Set aside to cool and reduce the oven temperature to 120c.
  6. Chop up the white chocolate and scatter on a lined baking tray in an even layer. Place in the oven to allow the chocolate to melt for 10 minutes, then stir/turn and return to the oven for another 10 minutes. Repeat this step 2-3 more times until the chocolate reaches a deep golden colour, then scrape into a bowl and mix in a splash of cream to loosen the consistency (it can get a little grainy at this stage so pass through a sieve if necessary). Leave to cool.
  7. Once the white chocolate has cooled, place in a bowl (or bowl of a stand mixer with whisk attachment) and add in the cream and salt. Whisk until pipe-able.
  8. Slice the cooled choux nuts in half horizontally and pipe in a generous helping of caramelised white chocolate cream. Slice the roast rhubarb pieces thinly and arrange these on top of the cream, then pop the choux lid on top.
  9. For the pink icing, pour the cooking syrup from the rhubarb tray into the icing sugar and mix to create a smooth drizzle-like consistency (add in a little water if you don’t have enough syrup). Spoon this over the filled choux-nuts and garnish with edible petals and rhubarb ribbons.
Enjoy!

Salted Chocolate Cake with Coffee Mascarpone & Hazelnut Praline Caramel

Cakes

I made this cake last weekend for my Dad’s birthday and it went down a storm. Granted, the flavours aren’t subtle and it’s not for the faint hearted (which neatly mirrors my Dad’s personality actually), but the punchy combination of bitter coffee, nutty hazelnut, rich but surprisingly light chocolate sponge and salted milk chocolate ganache just work (duh- that amount of cream, sugar, salt and chocolate is always going to be delicious).

Ingredients (serves 12-14)

For the hazelnut praline caramel

  • 100g blanched hazelnuts, toasted
  • 100g caster sugar
  • 100ml double cream
  • Generous pinch sea salt

For the sponges

  • 375g plain flour
  • 300g caster sugar
  • 85g cocoa powder
  • 2tsp baking powder
  • 2tsp bicarbonate of soda
  • large pinch sea salt
  • 3 eggs
  • 325ml milk
  • 175ml vegetable oil
  • 2tsp vanilla extract
  • 100g dark chocolate
  • 325ml just boiled water
  • 2tsp instant coffee

For the salted milk chocolate ganache

  • 200g milk chocolate
  • 75g dark chocolate
  • 275ml double cream
  • Generous pinch sea salt

For the coffee mascarpone filling

  • 2tbsp instant coffee
  • 2tbsp caster sugar
  • 200g mascarpone
  • 100ml double cream

  1. Start off by making the hazelnut praline caramel.To do this simply place the caster sugar in a heavy bottom pan over a medium heat and swirl the pan until it melts. Once melted, up the heat until the sugar reaches a deep golden brown. At this stage add the toasted hazelnuts, stir to coat then tip onto a baking paper lined baking tray. Leave to set hard, then blitz into a paste. Set aside. Pour the cream into a saucepan and gently heat. Once the cream is gently simmering add in the praline paste and stir to create a caramel. Cook down for a few minutes until thickened, then set aside to cool.
  2. Preheat the oven to 170c. Grease and line two 8 inch baking tins. Melt the dark chocolate in a heatproof bowl set over a pan of simmering water (or in the microwave in short stints, stirring often). Set aside.
  3. In a large bowl stir together the flour, caster sugar, cocoa powder, baking powder, bicarbonate of soda and salt. In a jug, lightly whisk the eggs, milk, vegetable oil and vanilla extract. Make a well in the dry ingredients and pour the contents of the jug into it. Stir the wet and dry ingredients together until well combined then add the melted chocolate and stir again (I just use a balloon whisk for this- nothing electric is required as you don’t need to incorporate much air).
  4. Pour your just boiled water over the instant coffee granules and once they’ve dissolved, gradually add to the chocolate batter, stirring gently with your whisk as you go. The final cake batter will be very thin but don’t worry, it bakes beautifully.
  5. Split the mix evenly between the prepared tins and bake for 45-55 minutes (until a skewer comes out clean with a few moist crumbs attached). Once baked leave to cool completely in the tins.
  6. While the cakes are cooling make the ganache. Chop the chocolate into small pieces and place in a heatproof bowl. Heat the cream in a saucepan until it meets scalding point then pour over the chocolate. Allow the cream to melt the chocolate for a few minutes then stir until smooth and glossy. Add salt to taste then set aside to cool.
  7. For the coffee mascarpone crush the coffee into a fine powder then just whisk together all the ingredients until smooth.
  8. When all the elements are cool you’re ready to assemble the cake. Your cakes will probably have a domed top, so trim these off then divide each one into two even layers (leaving you with 4 layers overall).
  9. Scrape the hazelnut praline caramel into a piping bag. Split the mascarpone into thirds. Spread one third of the mascarpone over the first sponge layer then pipe over a third of the caramel in a zigzag (so that each slice will have some caramel inside!). Repeat this step until you’ve used up the sponges, then rustically cover the whole cake in the thickened ganache.
  10. Garnish with edible dried flower petals.

Spiced Christmas Buns with Cranberry and White Chocolate

Bread, Uncategorized

In the words of Jez (Peep Show reference, sorry if you don’t watch it), ‘I am a Christmassist’. I love everything associated this time of year; heady spices, mulled anything, twinkling lights, the smell of fir, infinite chocolate, roll necks and nostalgic films. With that in mind, I’ve got lots of festive recipes lined up for December, kicking off with these spiced buns, packed full of orange-soaked fruit and white chocolate- delicious warm from the oven with a strong coffee.

Ingredients

For the dough

  • 75g butter, plus extra for greasing
  • 220ml milk
  • 50g caster sugar
  • 1tsp sea salt
  • 500g strong white bread flour
  • 2 sachets fast action dried yeast (14g)
  • 2 eggs (1 for the dough and 1 for glazing)

For the filling

  • 75g dried cranberries, roughly chopped
  • 50g sultanas, roughly chopped
  • Zest and juice 2 oranges
  • 125g butter, softened
  • 125g dark brown soft sugar
  • 1tsp ground cinnamon
  • 1tsp ground ginger
  • 1/2 tsp mixed spice
  • 100g white chocolate, roughly chopped

For the topping

  • The reserved orange juice, plus 3tbsp caster sugar
  • A few extra cranberries, roughly chopped (optional)
  • 75g white chocolate, melted (optional)

Method

  1. Start off by making the dough. Put the butter and milk into a saucepan and very gently heat until the butter melts, then set aside until lukewarm. Stir together the sugar, salt, yeast and flour in a large bowl (or bowl of a stand mixer with dough hook attached) then make a well and add in the lukewarm milk/butter and one of the eggs. Mix the wet ingredients into the dry, first using a wooden spoon to bring everything together, then using your hands to form a soft dough (alternatively, do this by setting your dough hook to a low speed).
  2. Once you have a soft dough, turn it out onto a very lightly floured surface and knead for about 10 minutes (or just keep the dough in your stand mixer bowl and increase the speed of your dough hook for 6-8 minutes) or until your dough is smooth, stretchy and elastic.
  3. Now tip the dough into an oiled bowl, cover with oiled cling film and leave to prove for about an hour and a half, or until doubled in size.
  4. For the bun filling, place the cranberries, sultanas, orange zest and orange juice in a bowl and leave to soak for half an hour. Meanwhile, beat together the butter, sugar, cinnamon, ginger and mixed spice until smooth. Grease a high sided 20x30cm rectangular tin or 25x25cm square tin and line with greaseproof paper.
  5. Once the dough has proved, tip out onto a lightly floured surface and roll into a rectangle, about 5mm thick. Spread the cinnamon butter mixture across the surface of the rectangle in an even layer, ensuring that you go all the way to the edges. Now strain the orange juice away from the dried fruits into a saucepan (save this for later). Sprinkle the fruits over the cinnamon butter then lastly distribute the chopped white chocolate.
  6. Now, with the long side facing you, roll the rectangle up like a roulade. Slice into 12 even slices if you’re using a rectangular tin (about 2cm wide) or 9 even slices if you’re using a square (about 2.5cm wide). Arrange the pieces, swirl side up, in the prepared tin and cover with a piece of lightly oiled cling film. Leave to prove for 30-40 minutes or until well risen and springy (before this prove there will be little gaps between the buns, but they should be just touching when ready to bake). Preheat the oven to 180c.
  7. Once risen, whisk the remaining egg and brush all over the tops of the buns. Bake for 40-45 minutes or until golden and cooked through. Meanwhile, place the reserved orange juice and caster sugar in a saucepan and heat gently, until the sugar dissolves and the mixture is syrupy. When the buns are baked, brush the syrup all over the tops, then drizzle on the white chocolate and finish with chopped cranberries, if you like.

Pecan Pie Cheesecake with Brown Butter Pastry and a Caramel Core

Uncategorized

I’m under no illusion that this bake is a bit of a project and should probably come with a health warning, but I can honestly say that the the result it delivers is well worth the effort and extra 4539 calories (joking about the calories… although probably not far off). I’ve gone for a brown butter rye pastry in place of a biscuit base here, which might sound controversial (maverick), but it matches up to the nutty pecan topping really well and acts as a great textural contrast to the smooth, caramel-cored cheesecake filling. Give it a go, but be warned, it’s been described as ‘like crack’ by my eloquent taste-testers (who aren’t and never have been ‘on crack’, for the record).

Ingredients

For the base

  • 150g butter
  • 175g plain flour
  • 75g rye flour
  • 1tsp cinnamon
  • 50g icing sugar
  • 2 egg yolks
  • 2tbsp milk

For the caramel core

  • 100g caster sugar
  • 25ml water
  • 50ml double cream
  • pinch sea salt
  • 2tbsp rum or bourbon (optional)

For the filling

  • 600g full fat cream cheese
  • 150g caster sugar
  • 2tbsp corn flour
  • 2 eggs
  • 180ml soured cream
  • pinch salt

For the topping

  • 1 egg
  • 50g dark brown soft sugar
  • 3tbsp golden syrup or honey
  • 1tbsp butter, melted
  • 1tbsp plain flour
  • 100g pecan halves, lightly toasted

Method

  1. Start off by browning the butter for the pastry. To do this simply melt it in a pan until it’s gently foaming, smells nutty and is a light golden brown colour. At this stage pour the butter in a heatproof bowl and pop in the fridge or freezer to set hard.
  2. While the butter is firming up, make the caramel core. Place the sugar and water in a pan and gently heat until the sugar has completely dissolved and you are left with a clear syrup, then increase the heat and boil until it reaches a deep golden brown. Add in the cream (be careful as it will spit!) and stir for a further two minutes on the heat, then remove from the heat and add the salt and rum to taste. Set aside until needed.
  3. Back to the pastry; once your butter has firmed up, chop into cubes and tip into a food processor along with the flours, cinnamon and sugar. Pulse until it resembles breadcrumbs, then add in the milk and egg yolks. Pulse again a few times until the mix comes together in large lumps, then tip out onto your work surface and shape into a disc. Wrap in cling film and chill for 10 minutes. Preheat the oven to 180c. Grease a 2.5inch tall/ 8inch wide spring form cake tin with butter and place a disc of greaseproof paper in the base.
  4. Roll out the pastry to about 3mm thick on a floured work surface then line the prepared tin, pushing the pastry into the corners as you go (I actually find it easier to cut out a circle of pastry for the base and 2 long rectangles for the walls when I’m using a cake tin for pies and tarts- just make sure you blend the joins between the pieces together and don’t leave any gaps). Trim away any excess from the top of the tin, prick a fork all over the base (not all the way through) to prevent air bubbles, then chill for 10 minutes, or until very firm. If you like you can cut out some leaves for decoration at this stage.
  5. Once firm, line the pastry case with baking paper and fill with baking beans (ensuring that they come all the way to the top of the walls), then blind bake for about 15 minutes, or until the walls are supporting themselves. At this stage, remove the paper and beans and return to the oven for another 10-15 minutes, or until the pastry is cooked through and golden. Set aside. Reduce the oven temperature to 120c.
  6. For the cheesecake filling simply whisk together the cream cheese, sugar and corn flour until smooth, then add in the eggs one at a time, beating well between each addition. Lastly, whisk in the soured cream and salt. Tip half of this mixture into the pastry case then drizzle over the caramel. Top with the remaining cheesecake mix (this should come to about an inch below the rim of the pastry case). Bake for 50-55 minutes, or until the middle retains a little wobble. Set aside and allow to settle and cool down slightly. Increase the oven temperature to 170c.
  7. While the cheesecake is baking, mix together all the topping ingredients, except the pecans,until smooth. Once your cheesecake has cooled to a point where it’s no longer hot to the touch, arrange the pecan halves across the surface, then pour over the syrupy mixture. Return to the oven for 10-15 minutes until the topping has thickened slightly. Set aside to cool then chill to set up for at least 4 hours (ideally overnight). When you’re ready to serve, run a knife around the edge of the tin and gently release the cheesecake, then slice up and enjoy!

Miso Caramel Chocolate Fondants with Salted Cashew Crunch

Uncategorized

A classic, but better; think filthy dark chocolate fondant with an oozing liquid centre, then throw in the addition of pooling, hot, slightly-savoury miso caramel sauce and a salted, nutty crunch topping. Need I say more?

Ingredients (these quantities yielded 6 large fondants but would make 8 smaller ones)

For the miso caramel

  • 100g caster sugar
  • 25ml water
  • 50ml double cream
  • 2tbsp white miso
  • pinch salt

For the chocolate fondant base

  • 180g butter, plus a little more for greasing
  • A little cocoa powder, for dusting
  • 250g dark chocolate
  • 275g golden caster sugar
  • 4 eggs
  • 175g plain flour

For the salted cashew crunch

  • 75g cashews, toasted
  • 100g caster sugar
  • Generous pinch salt
  • 1tbsp sesame seeds

Method

  1. Before you make the chocolate mix, make the miso caramel. To do this place the sugar and water in a saucepan and heat gently until the sugar has completely dissolved, then increase the heat and boil until it reaches a deep golden colour. At this stage, add the double cream and stir for another minute before taking the saucepan off the heat and adding the miso paste and salt. Stir until smooth, taste and adjust the level of salt then pour into a heatproof tub and chill until firm.
  2. For the salted cashew crunch place the sugar in a pan and melt, then allow it to turn golden brown and add the cashews, sesame seeds and salt. Stir to coat the cashews with the caramel then tip onto a piece of greaseproof paper and leave to set hard, then roughly chop into a coarse crumb.
  3. Preheat the oven to 180c. Grease the insides of the fondant moulds with the extra butter, then dust with cocoa, shaking to coat. Tip out any excess then place all the moulds on a baking tray, ready to be filled.
  4. For the chocolate mix, place the chocolate and butter in a large heatproof bowl set over a pan of simmering water. Stir occasionally until smooth then set aside to cool a little. Whisk in the sugar (using a good old fashioned hand whisk will do) then the eggs, one at a time. Fold in the flour and once you’ve got a smooth mix split half of it between the moulds. Now create a little indent in the middle of the chocolate in each mould and scrape in a heaped tablespoon of your caramel. Top up with the remaining chocolate mix until each mould is filled to about 2cm below the rim.
  5. Bake the fondants for 17-22 minutes or until they are set on top and around the sides but still have a slight wobble in the middle (this time will vary from oven to oven and mould to mould so keep an eye on them- bare in mind my moulds have a 2inch wide base/3 inch wide rim/are 2 inches in height, and the fondants took 22 minutes in my old school oven!).
  6. Once the fondants are ready, leave to sit for a minute or two then run a knife around the edge of each mould. Carefully turn the fondants out onto serving plates and sprinkle with some salted cashew crunch. Serve with vanilla ice cream for added indulgence.


Enjoy!

Craquelin Choux Buns with Honeyed Walnuts, Mascarpone and Orange

Pastry, Uncategorized

A couple of months ago I bought, then promptly forgot about, some delicious pine honey which I intended to use as the central flavour in a pastry-based recipe. Now that it’s been retrieved from the depths of my cupboard it has well and truly fulfilled that destiny in these crisp craquelin choux buns. Simply filled with honeyed orange mascarpone and walnuts (also baked in the honey and a little salt) these make for a delicious treat, but served alongside honey butterscotch sauce and they’re next level- perfect for a fancy Autumnal dessert.

Ingredients

For the craquelin top

  • 55g unsalted butter, cubed, at room temperature
  • 65g soft light brown sugar
  • 65g plain flour

For the choux

  • 85g butter
  • 220ml water
  • 100g plain flour
  • 3 eggs (plus 1 extra for glazing)
  • pinch of salt

For the filling

  • 300g mascarpone
  • 200ml double cream
  • 2tbsp (heaped) good quality honey (I used Greek Pine Honey)
  • Zest of 2 oranges

For the honeyed walnuts

  • 100g walnuts
  • 2tbsp (heaped) good quality honey (as before)
  • good pinch salt

For the sauce (optional)

  • 75ml honey
  • Juice 1/2 orange
  • 25g butter
  • 100ml double cream
  • Generous pinch salt

Method

  1. Start off by making the craquelin topping (when baked, this forms a crispy sweet layer). To do this simply mix the butter, sugar and flour in a large bowl (or in the bowl of a stand mixer with paddle attachment on a slow speed) until it starts to form large lumps, then bring it together with your hands. Place the dough on a large piece of baking paper, top with another piece of baking paper, and roll out to about 3mm thick. Pop this onto a tray and leave in the freezer to solidify.
  2. To make the choux, put the water, butter and salt in a saucepan set over a medium heat (do not let it boil at this stage). Meanwhile, sieve the flour to remove any lumps. When the butter has melted into the water, increase the heat and bring to a rolling boil, then tip in the flour and stir vigorously until you have a smooth paste-like mix which comes away from the edges of the pan. Continue to stir for another minute to cook out the rawness of the flour, then tip into a clean bowl and close cover with cling film (this eggless stage is known as a ‘panade’). Leave to cool to room temperature.
  3. Preheat the oven to 190c. Line 2 large baking trays with greaseproof paper.
  4. Once the panade has cooled it’s time to add the eggs; whisk in a jug to break them up then very gradually add into the panade while beating with electric beaters. Stop adding the egg (you might have a little leftover) when the smooth, lump-free mixture reluctantly drops off the end of a spoon. Pile the choux mix into a piping bag, fitted with a large round nozzle.
  5. Pipe rounds of about 4cm wide onto the prepared baking trays, leaving plenty of room for expansion. Whisk the remaining egg in a bowl and brush a small amount onto each mound, smoothing down the tip. Take your craquelin sheet and stamp out 3cm circles. Place one on top of each choux mound (the egg will help secure it in place). Bake the choux for around 35 minutes, then skewer a small hole in each bun and return to the oven for a further 5 minutes, to dry out the middles. Once baked, they should be crisp and golden brown with a crackled appearance on top. Cool while you make the other elements.
  6. Toss the walnuts in the honey and salt and spread out on a baking tray. Cook for around 10 minutes or until caramelised then set aside to cool. Once cooled, roughly chop.
  7. For the filling, just whisk together the mascarpone, cream, honey and orange zest until light and smooth. Pile into a piping bag. Finally, for the sauce heat the honey and orange juice in a saucepan and simmer for a couple of minutes, add in the butter and stir until it’s melted, then add the cream and salt. Keep gently simmering, stirring occasionally, until slightly thicker (a few minutes should be fine), then set aside.
  8. To assemble the choux buns, slice each one in half and pipe some mascarpone cream into the base. Top with a sprinkling of walnuts and a little sauce, then place the lid on. Serve with some extra sauce.

Enjoy!

Dark Chocolate, Olive Oil and Espresso Torte

Cakes, Uncategorized

No intricate decorations, fillings or tiers here, just one humble layer of ludicrously fudgy, crinkly chocolate joy (which is, entirely by chance, dairy and gluten free). For a real depth of flavour and the perfect balance of bitter and sweet, take note of my chocolate recommendations and use a good quality olive oil (this recipe idea actually stemmed from a yearning to bake with a deliciously floral, wincingly expensive extra virgin oil I picked up in Greece last month*).

* Disclaimer: don’t judge, I was in that holiday headspace where you flash your card with the sort of cavalier attitude usually reserved for Monopoly money… sufficed to say, I could do with passing GO right now

Ingredients

  • 200g 50% dark chocolate
  • 200g 80% dark chocolate
  • 200ml good quality olive oil
  • 275g light brown soft sugar
  • 75ml strong espresso
  • 5 eggs
  • Generous pinch sea salt

Method

  1. Preheat the oven to 170c. Grease and line a 9 or 10 inch cake tin.
  2. Roughly chop all the chocolate and place it in a heatproof bowl along with the olive oil. Put the sugar and coffee in a saucepan and gently heat until the sugar has completely dissolved (avoid bringing it to the boil at this stage).
  3. Once the sugar has dissolved increase the heat and bring to the boil to form a syrup, then pour over the chocolate. Leave for a few minutes while the chocolate melts, then stir everything (chocolate, olive oil, sugar, espresso) together to form a smooth, glossy liquid. Set aside to cool to room temperature, then stir in the egg yolks.
  4. Place the egg whites in a large bowl with the salt (or bowl of a stand mixer) and whisk to stiff peaks. Carefully fold the whites into the chocolate mixture in two batches using a large metal spoon, then scrape the mixture into the prepared cake tin (make sure you don’t scrape from a height or you’ll knock out some of that air you’ve just put into the whites!).
  5. Bake for 50-60 minutes, then leave to cool completely in the tin. When cooling, the top of the cake will dip and crack- don’t worry, it’s a smooth, flourless torte, not a sponge cake! Once cool, slice up and finish with a dusting of cocoa powder. Serve with creme fraiche, if you like.


Pistachio and Lemon Cake with Raspberry and Rose Cream

Cakes

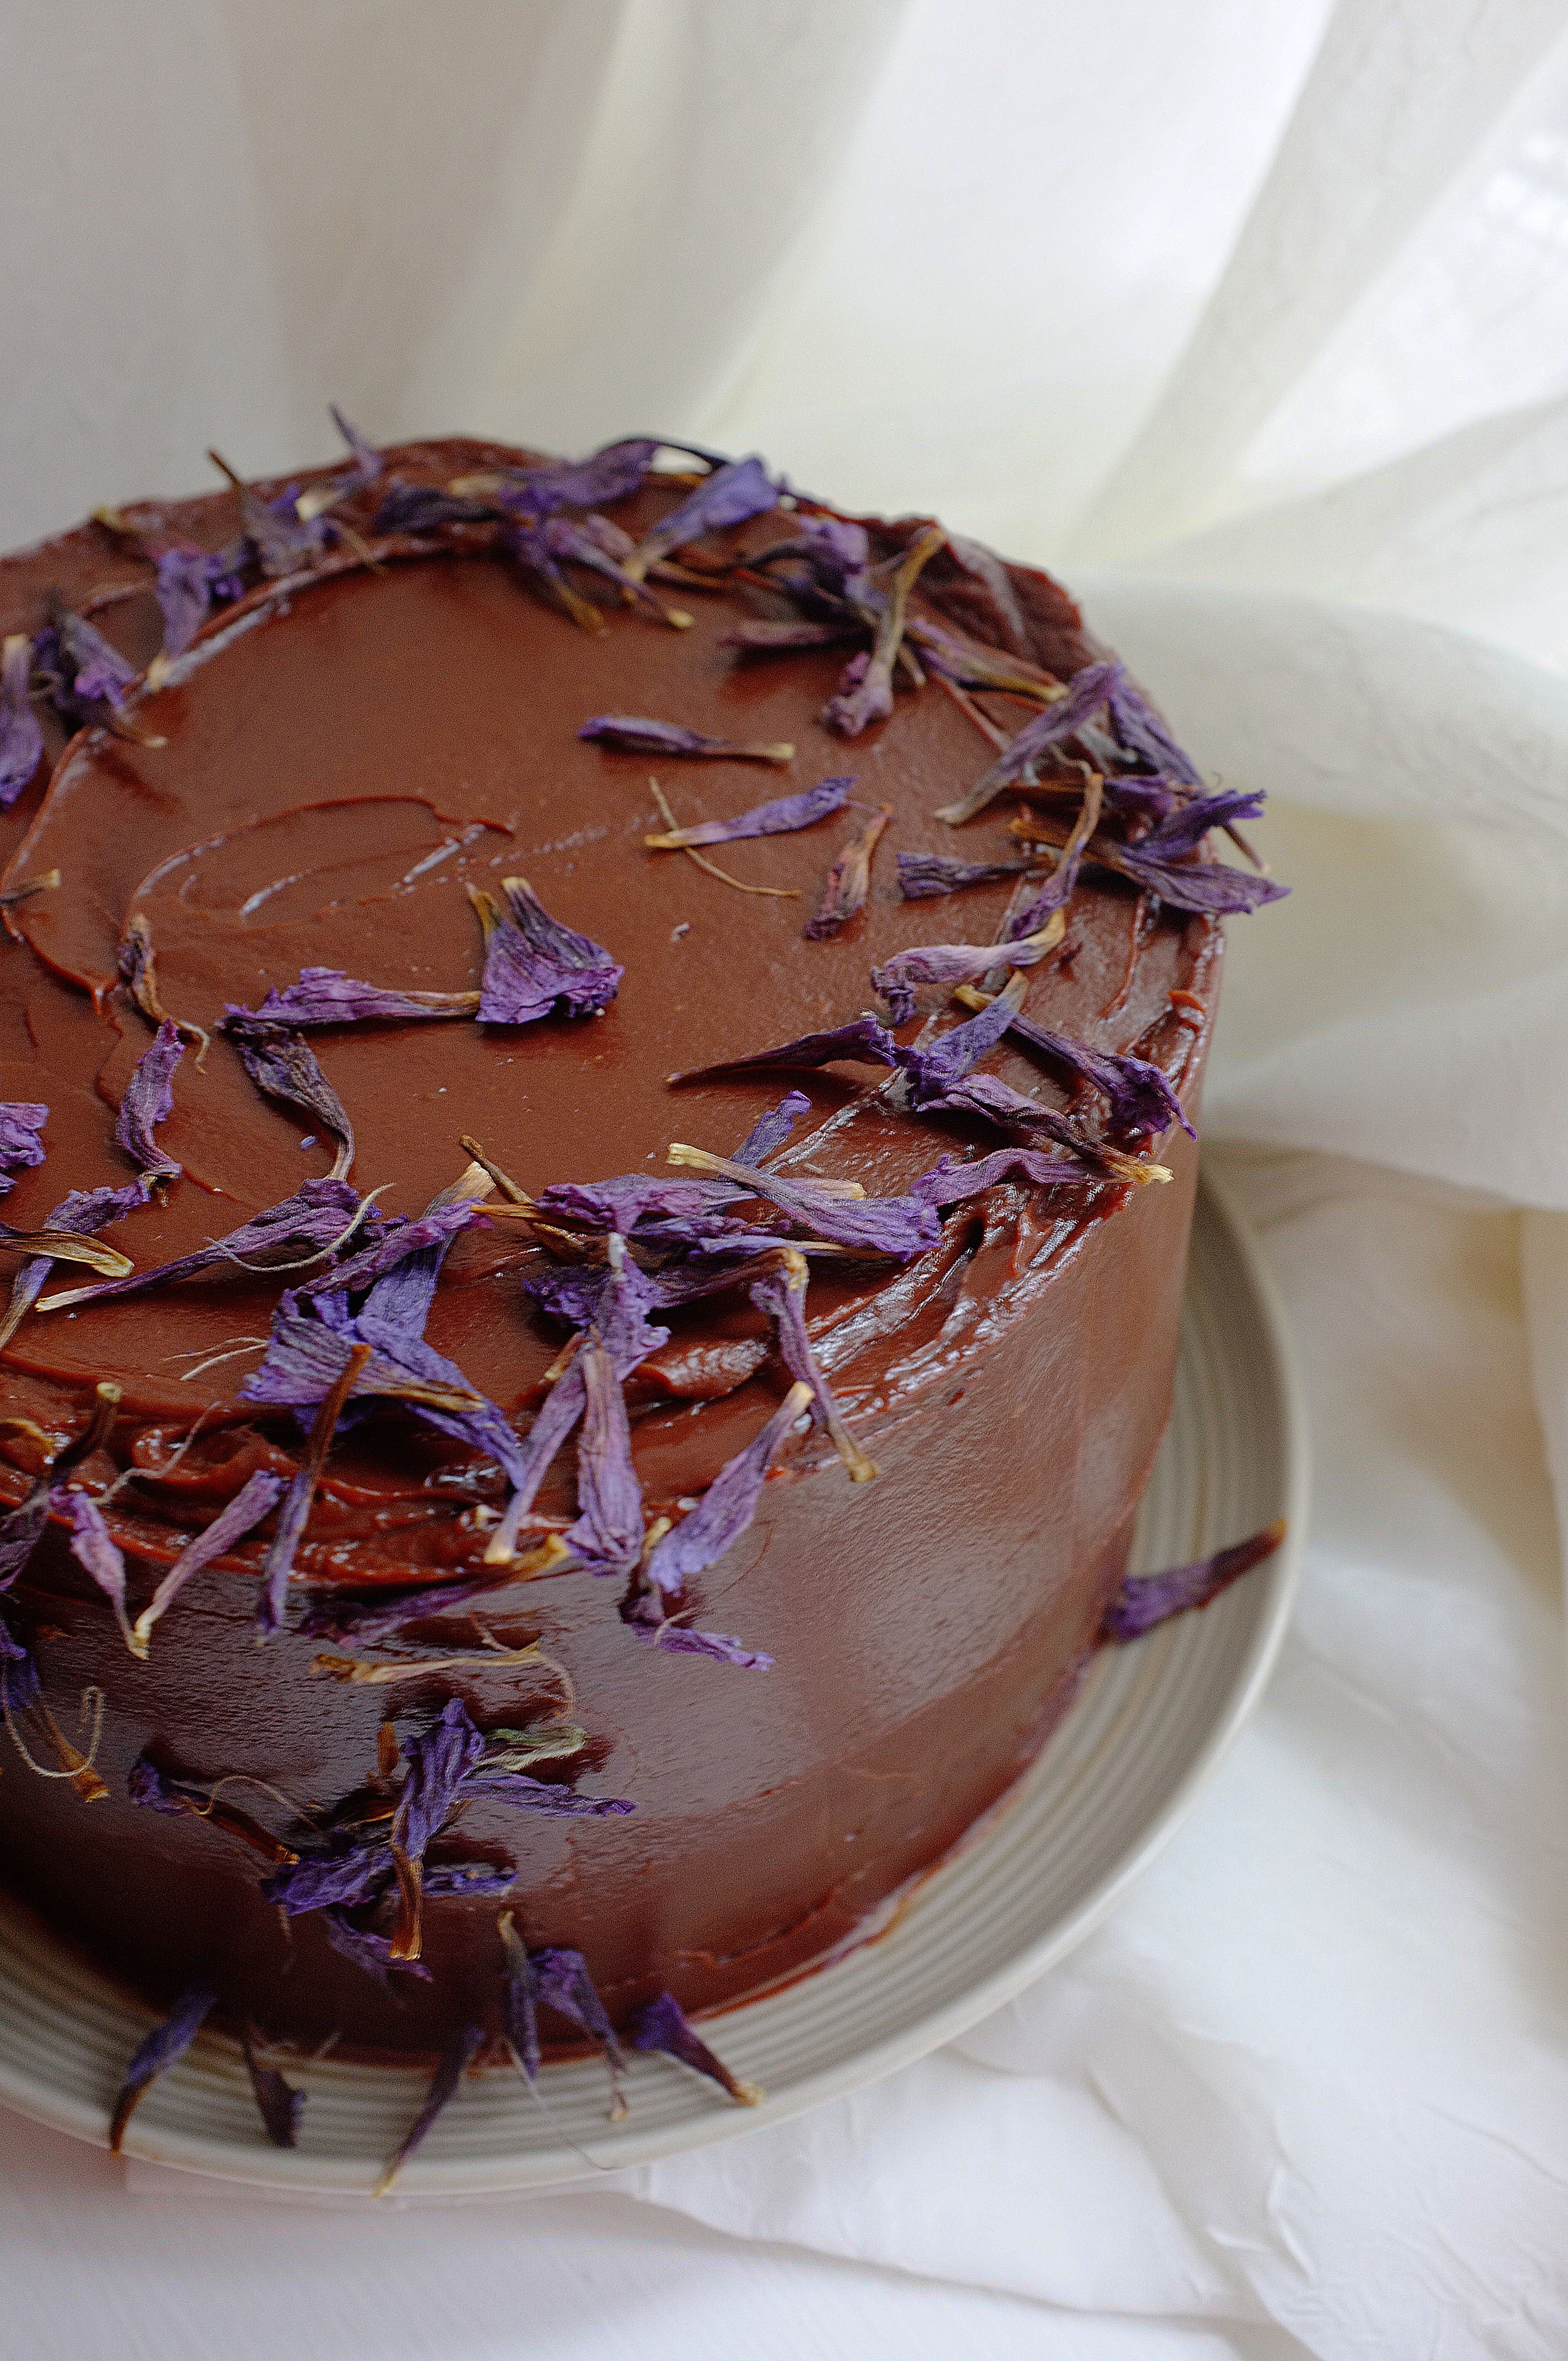
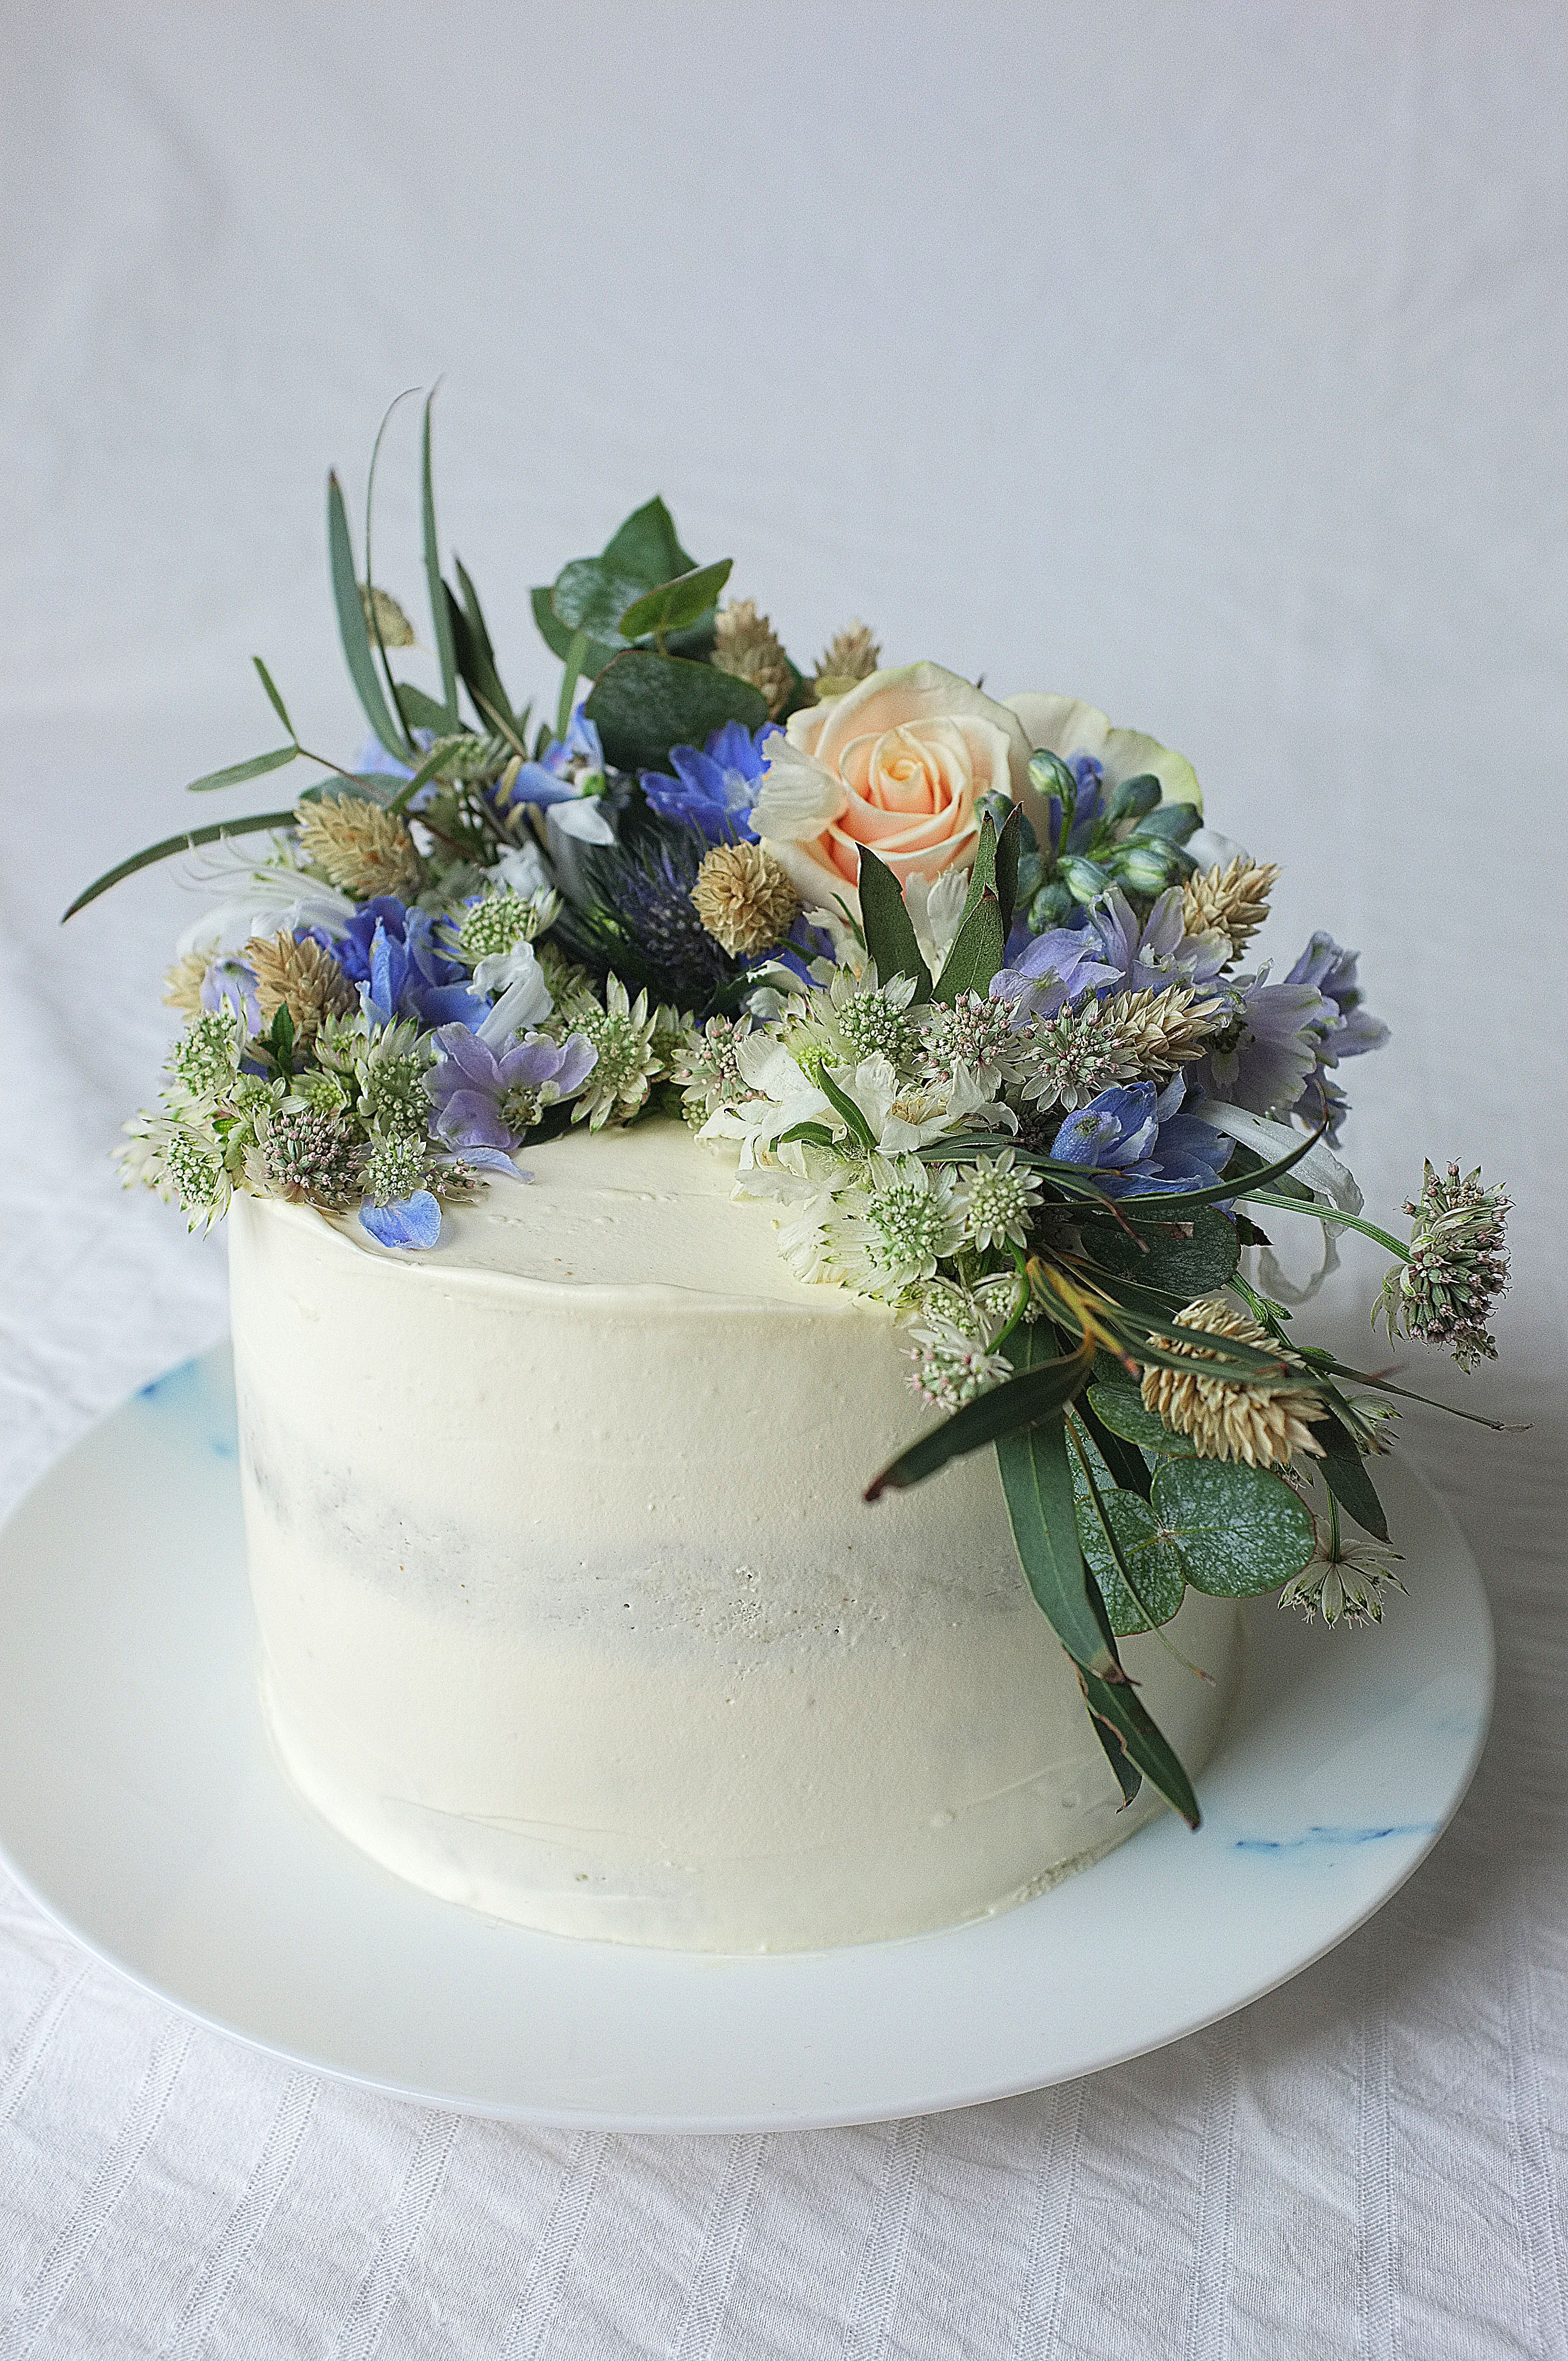
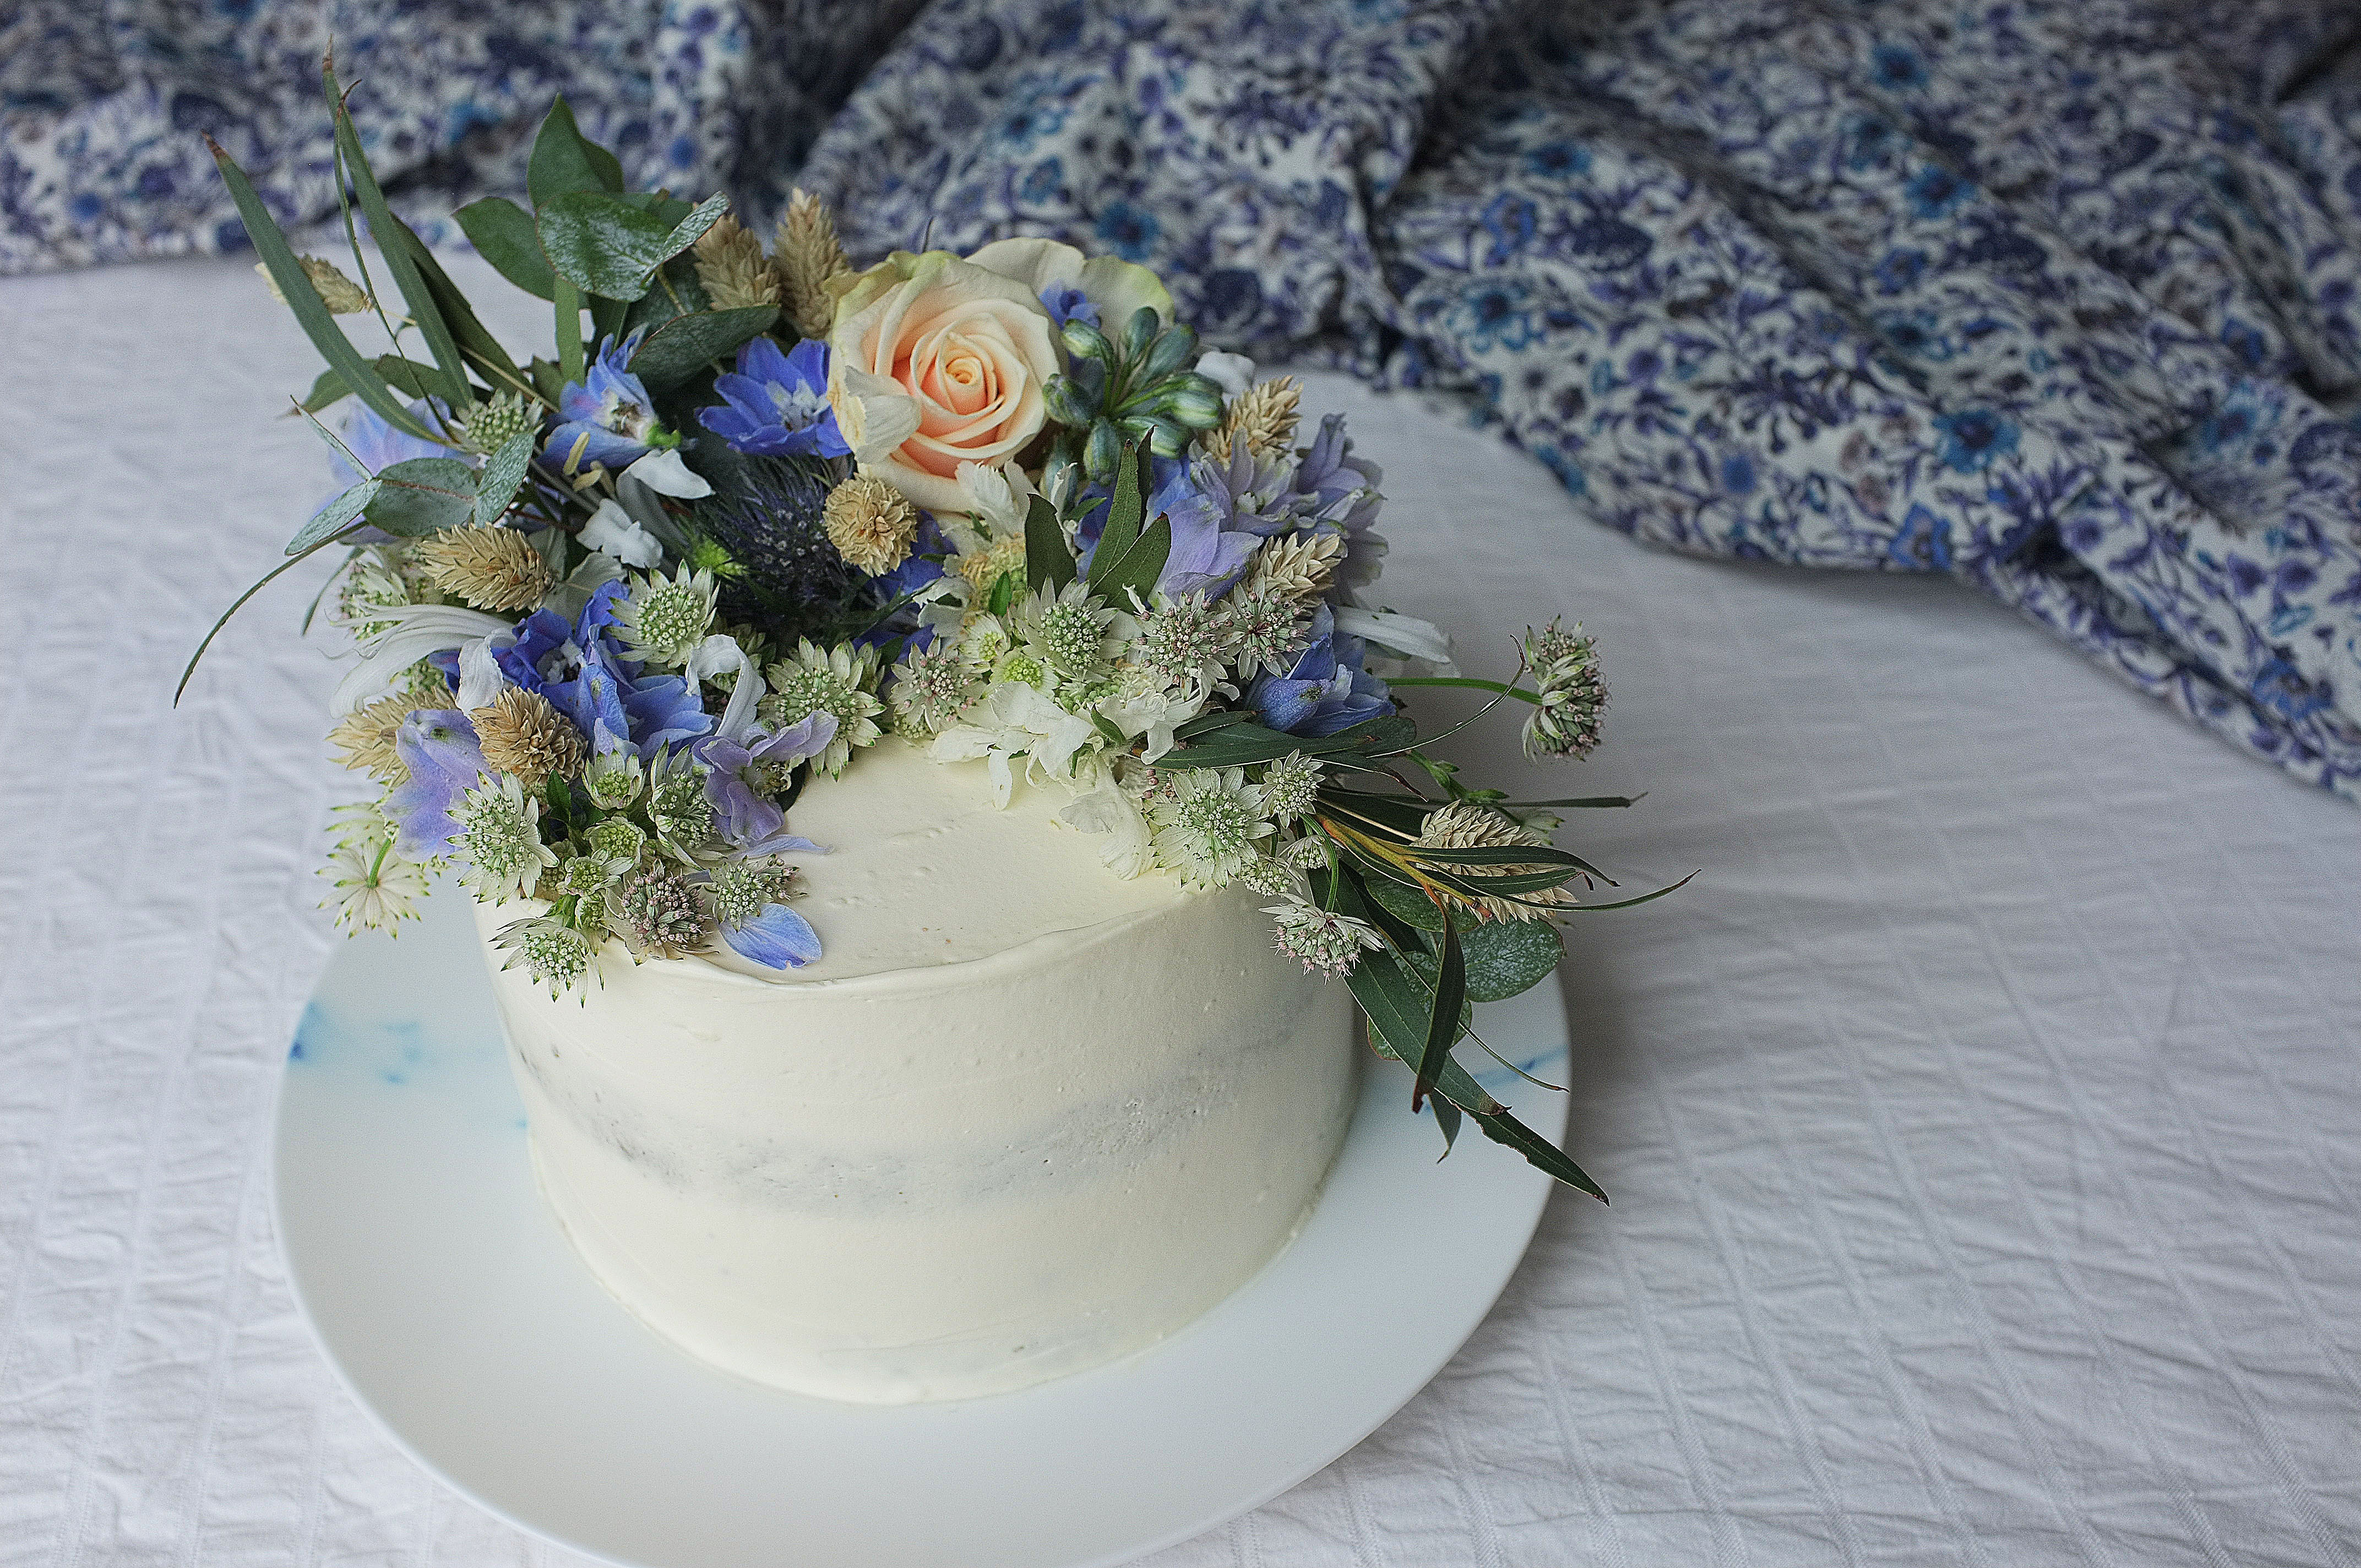
Bloom and Wild have just released a beautiful range of bouquets for Autumn/Winter, in collaboration with infamous London department store, Liberty. Each bouquet has been artfully designed to reflect some of the most coveted prints in the Liberty archive, from the vintage look 1910 Elysian Day, to the vibrant 60s Ciara. This week marks 5 years of letterbox flowers from Bloom & Wild, and to mark the occasion they asked me to create a very special birthday cake which encapsulates the style of the Bloom and Wild X Liberty collection.

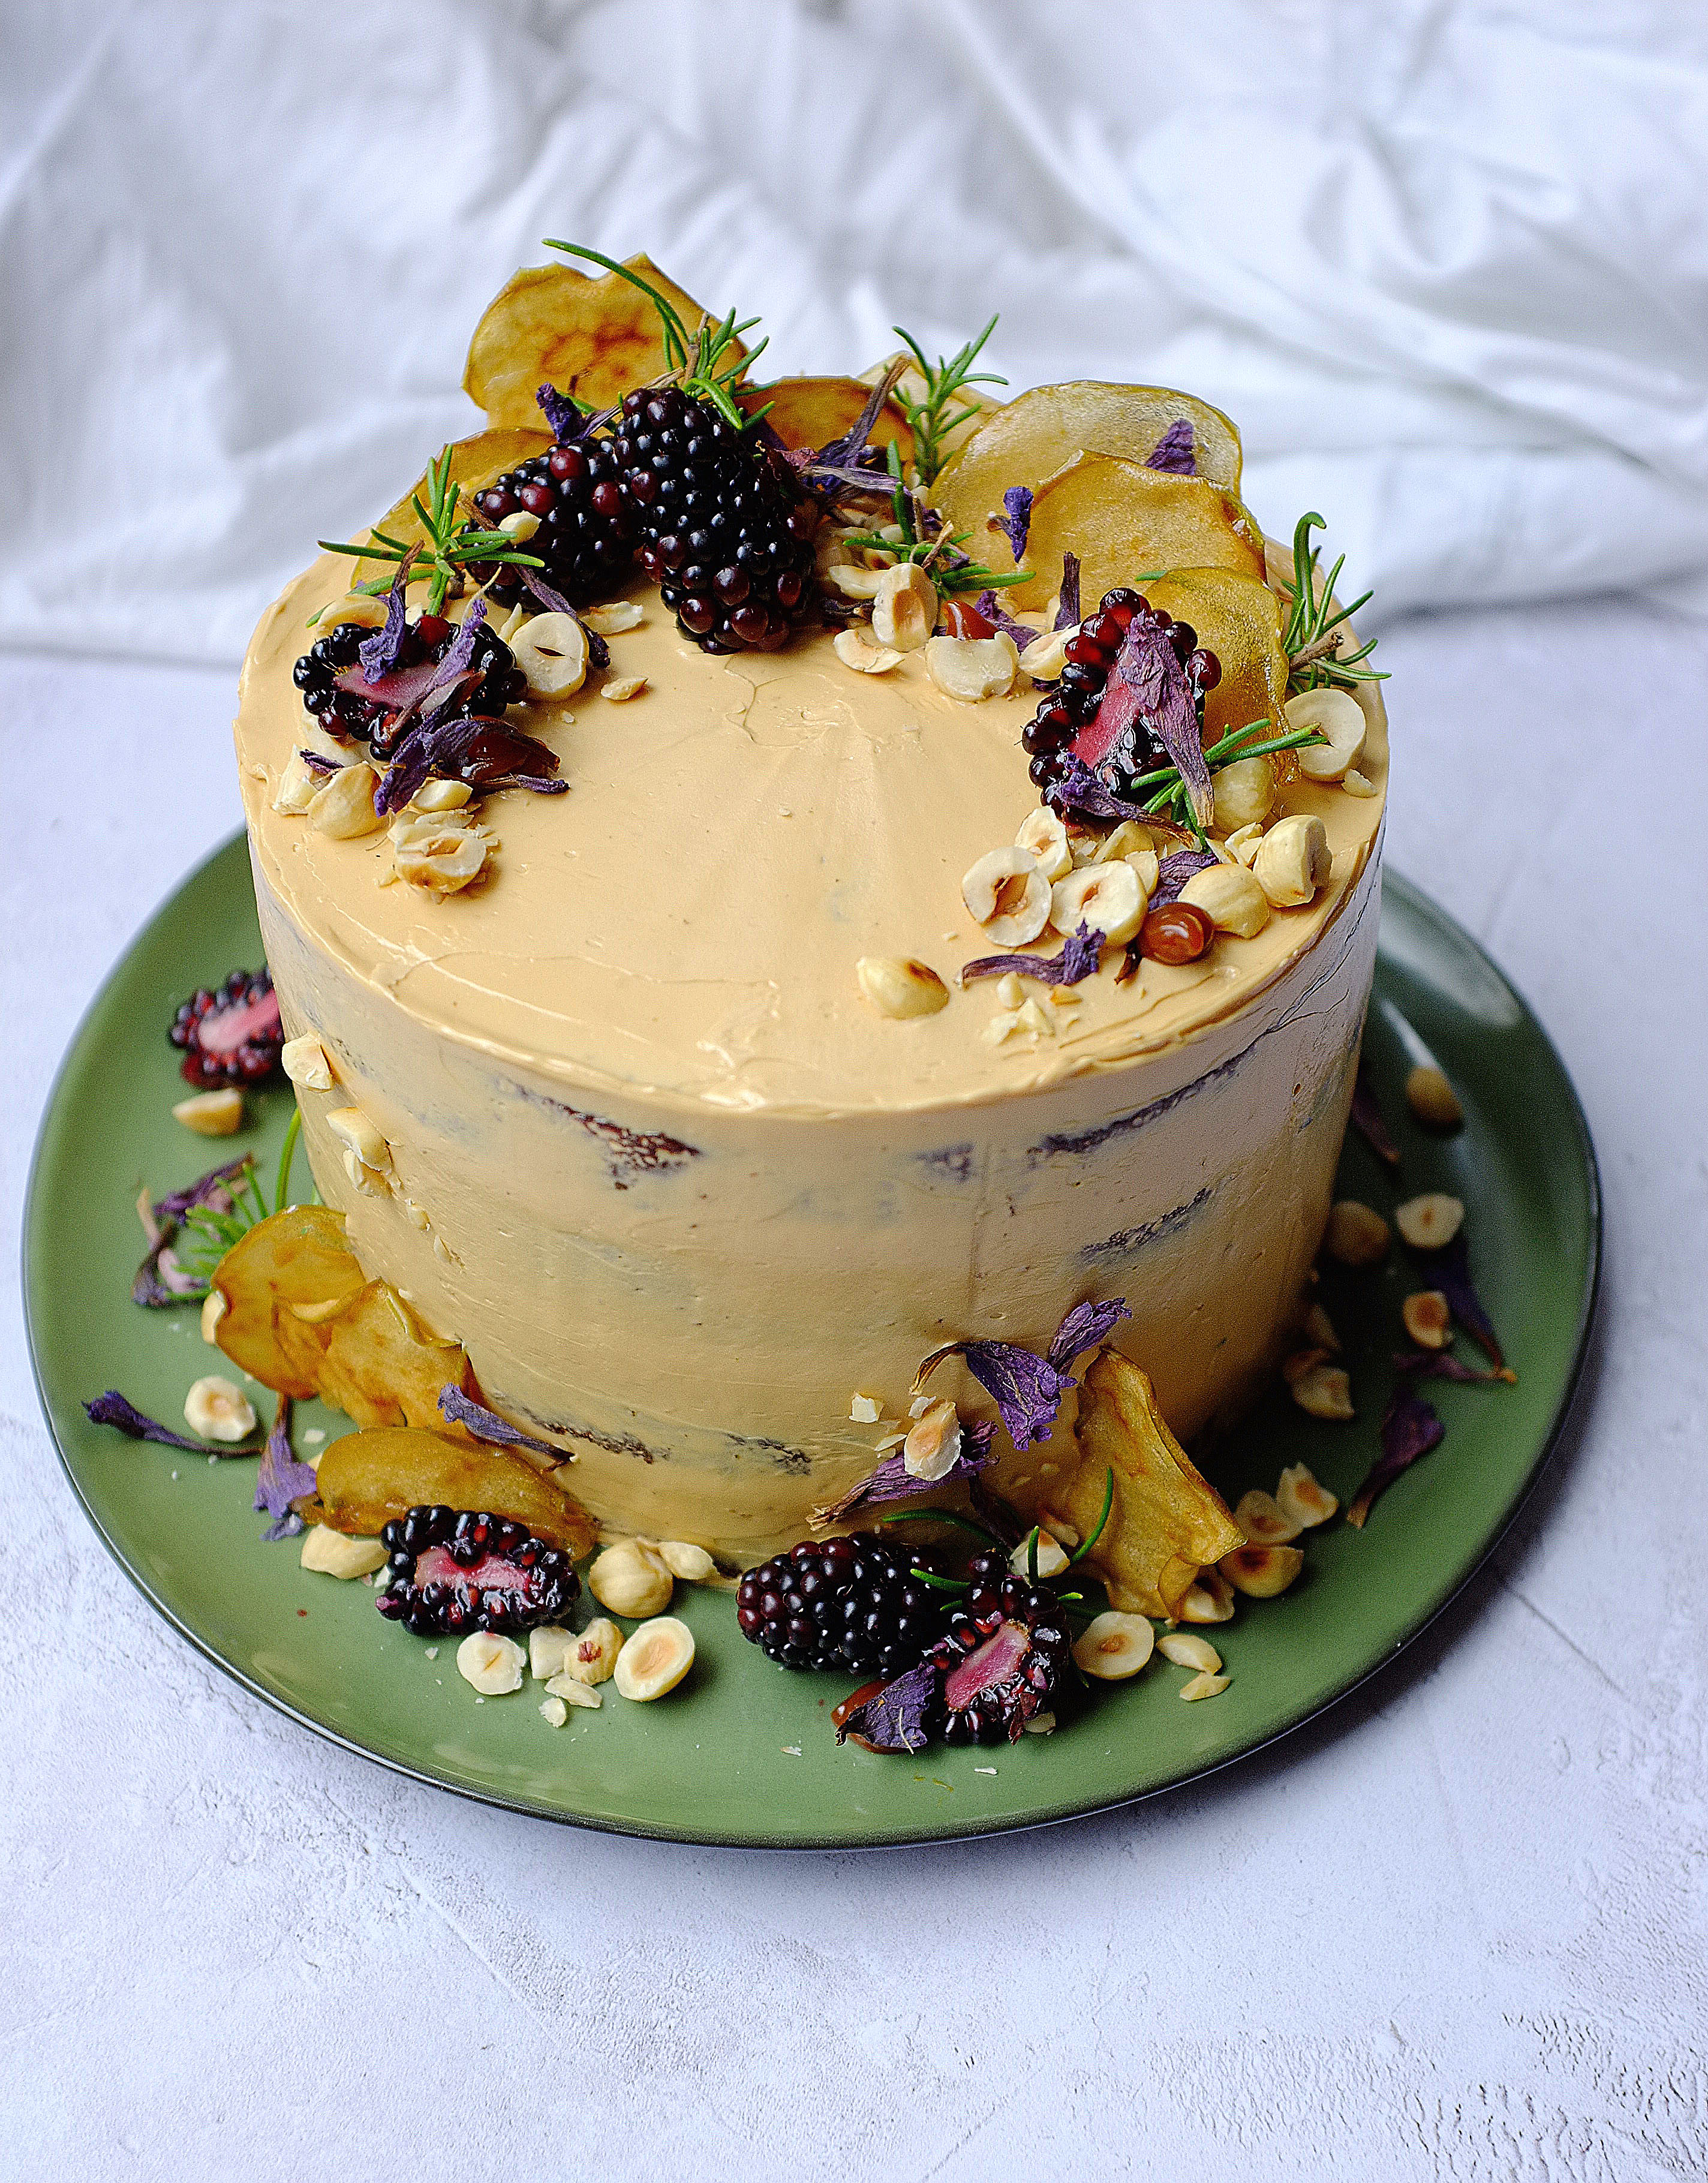
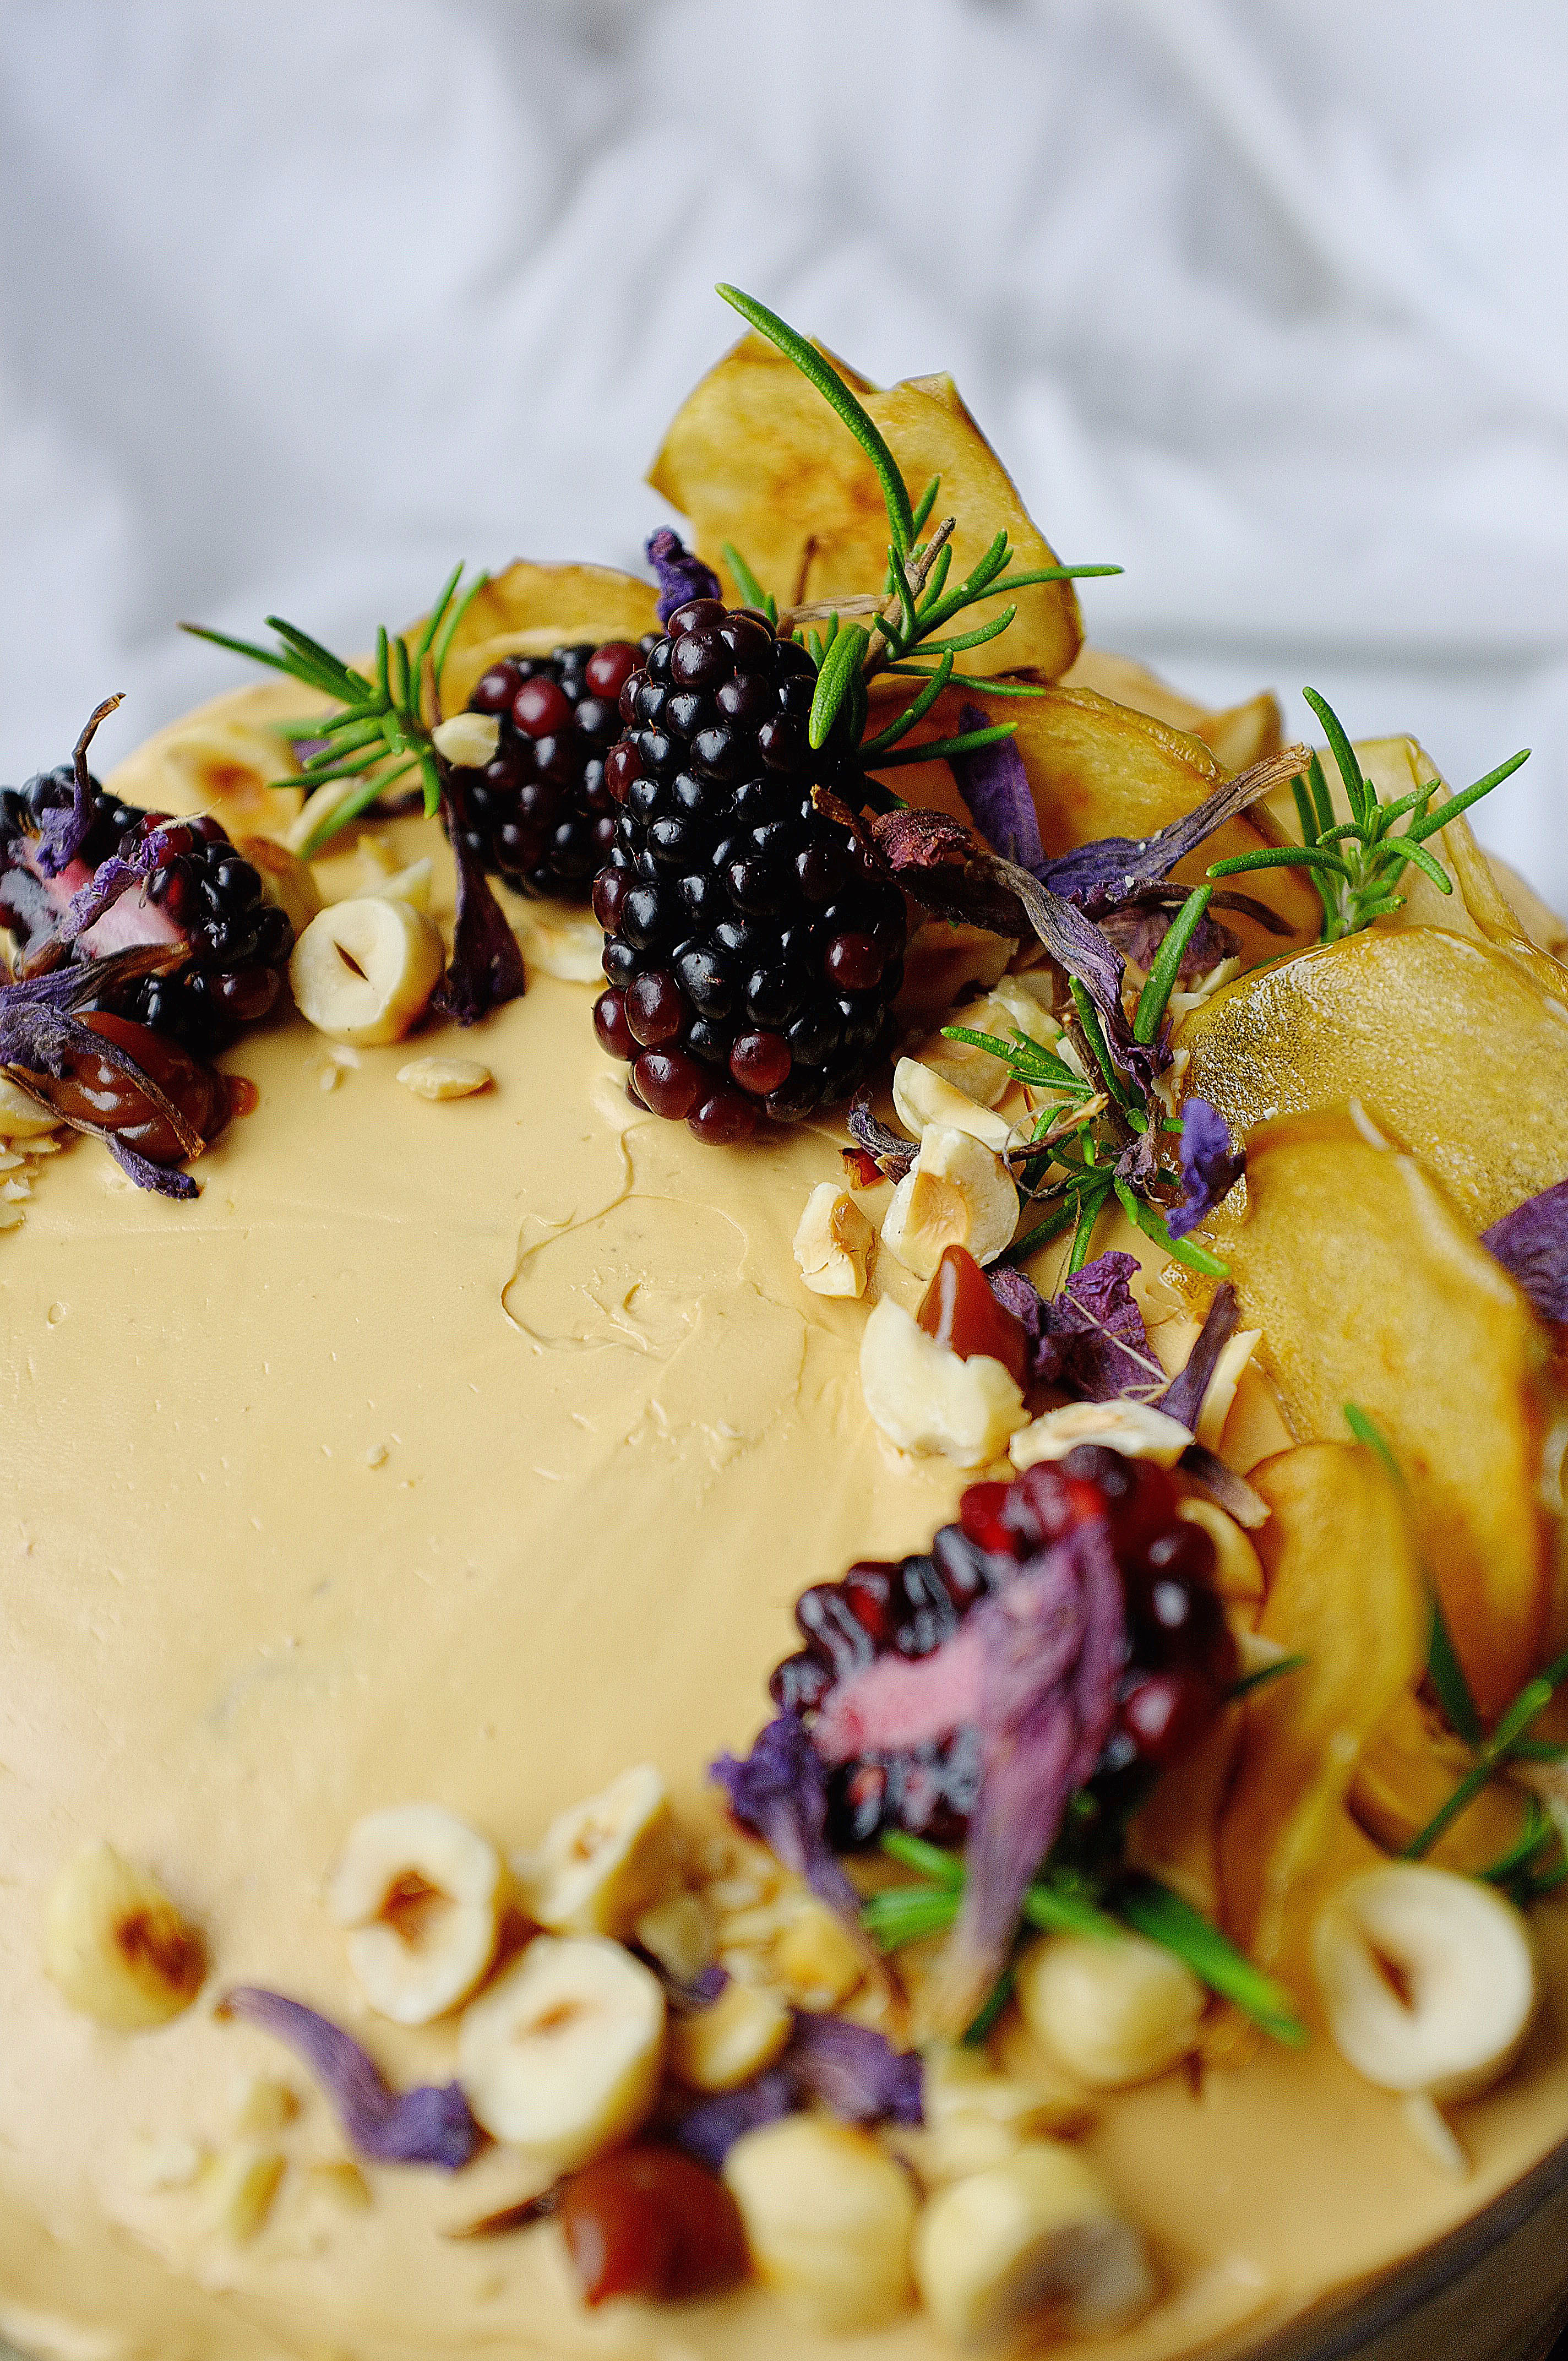
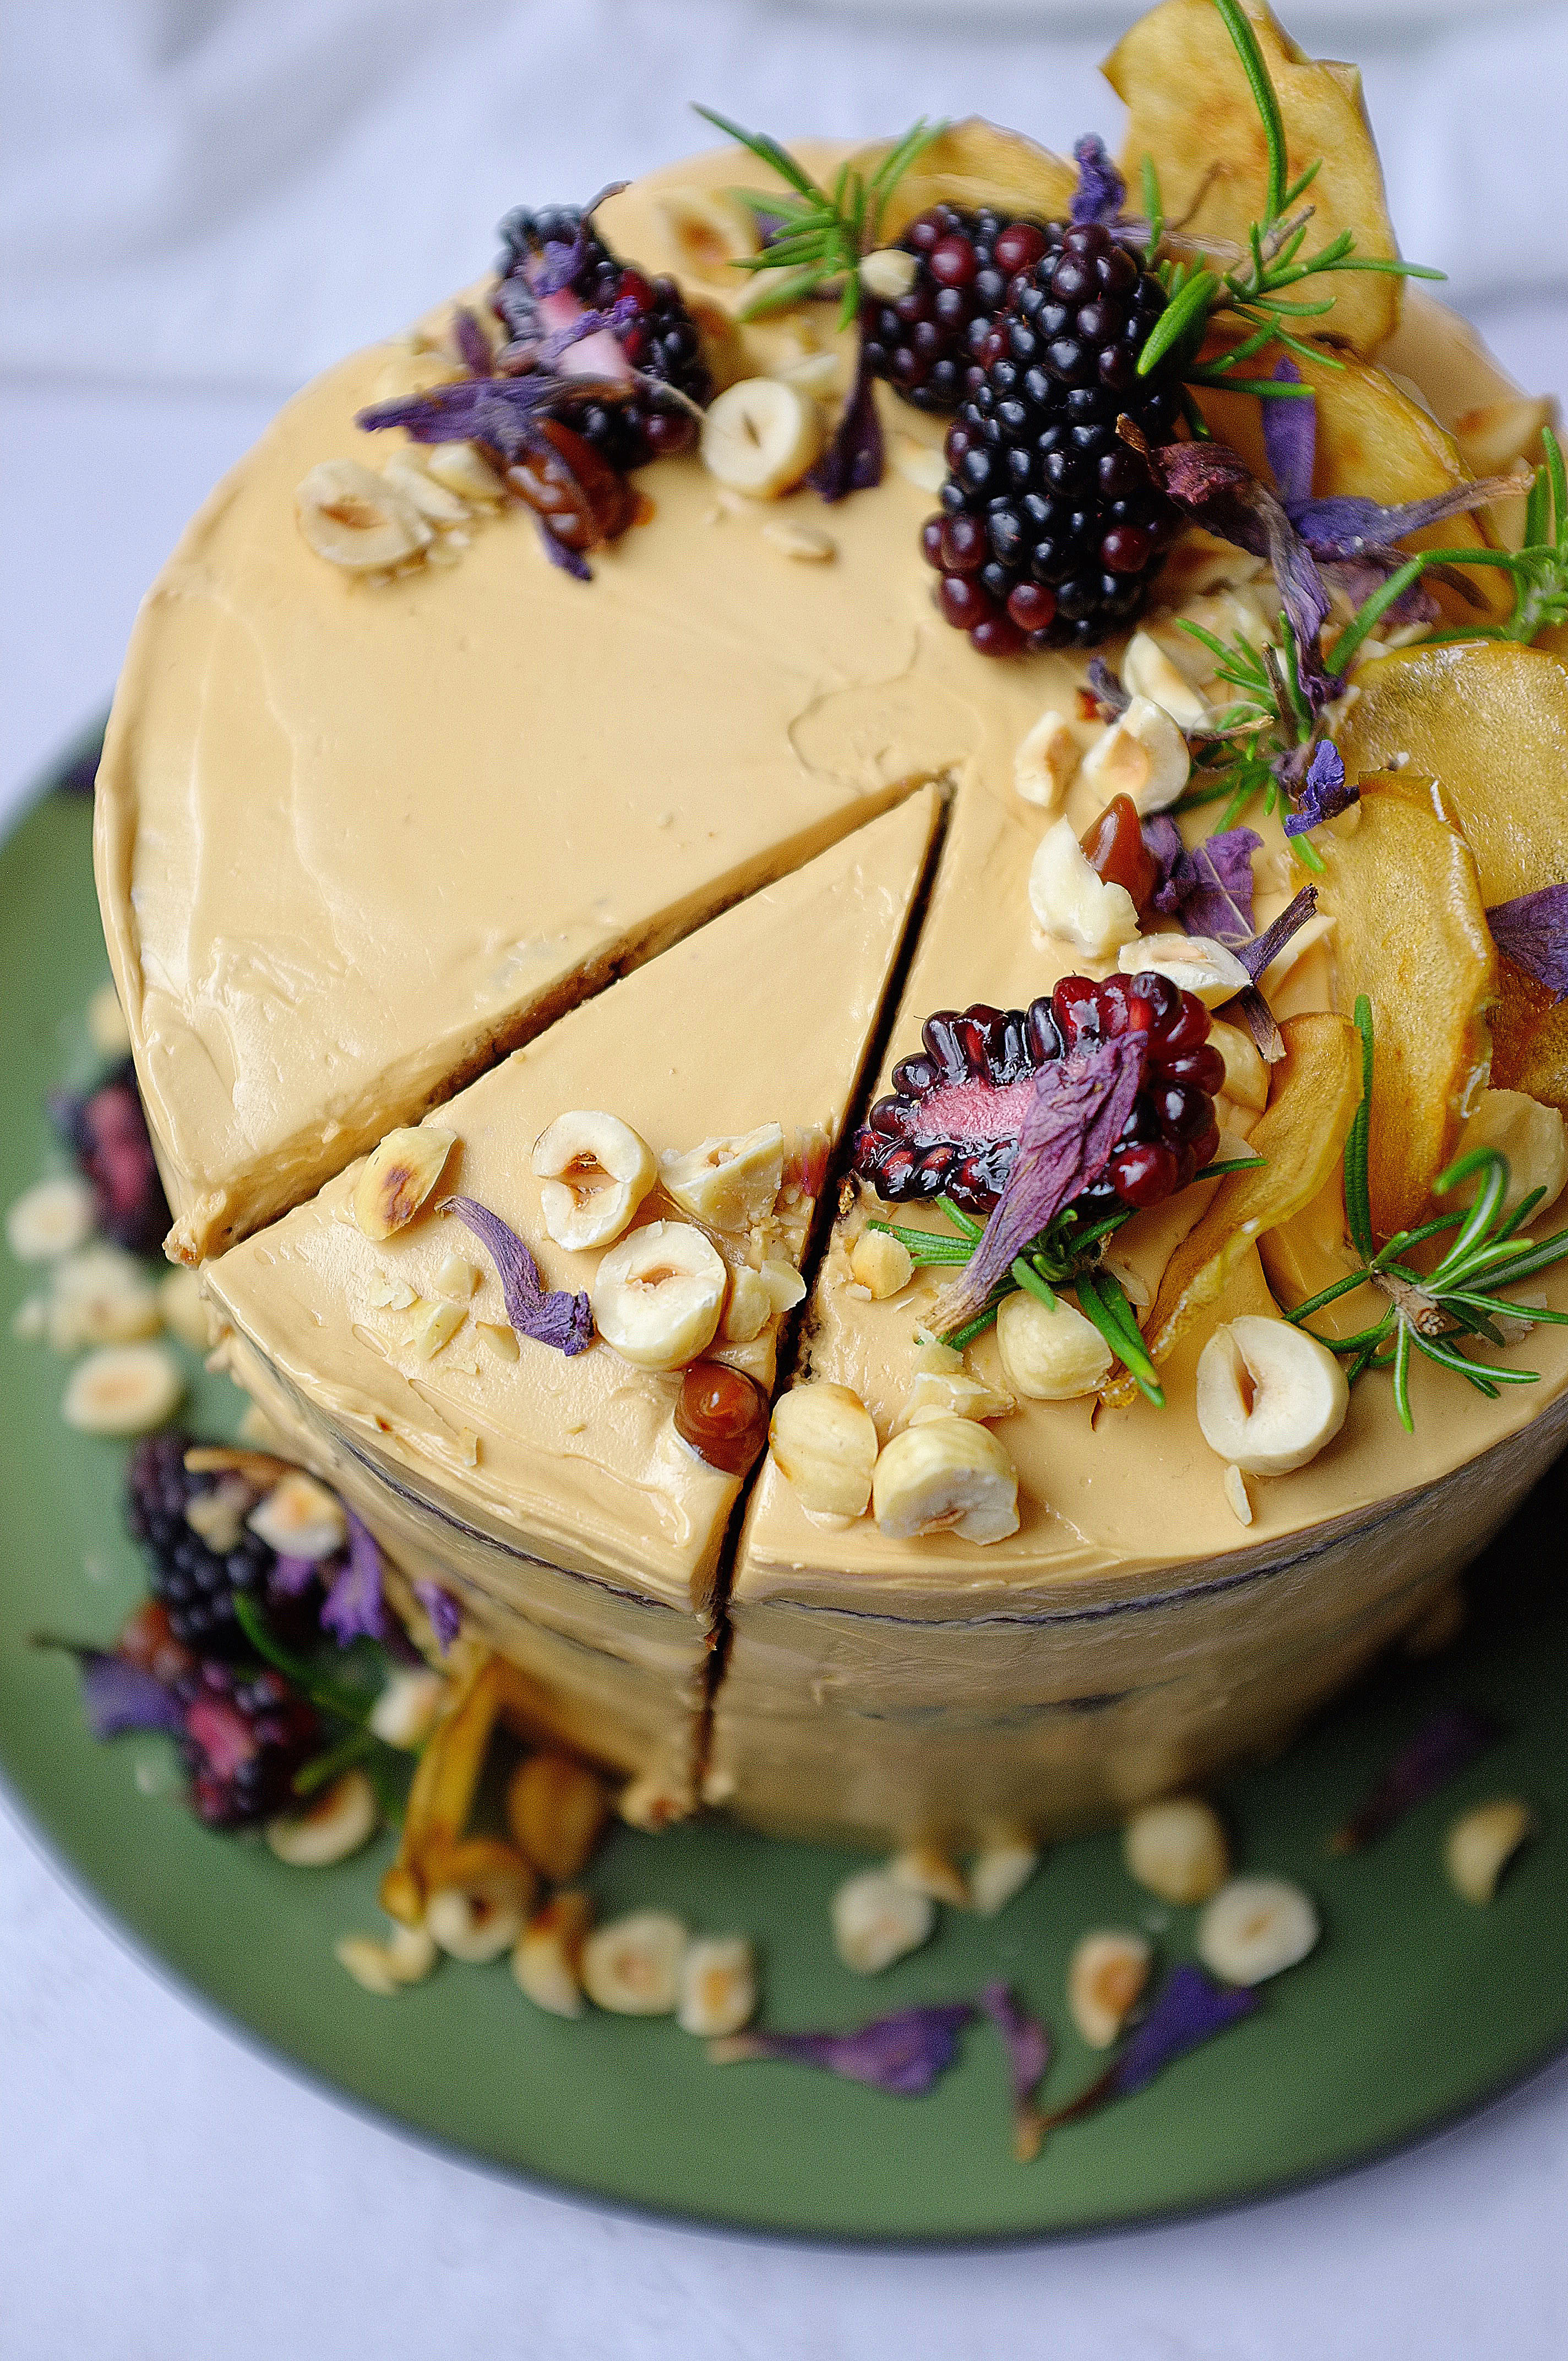
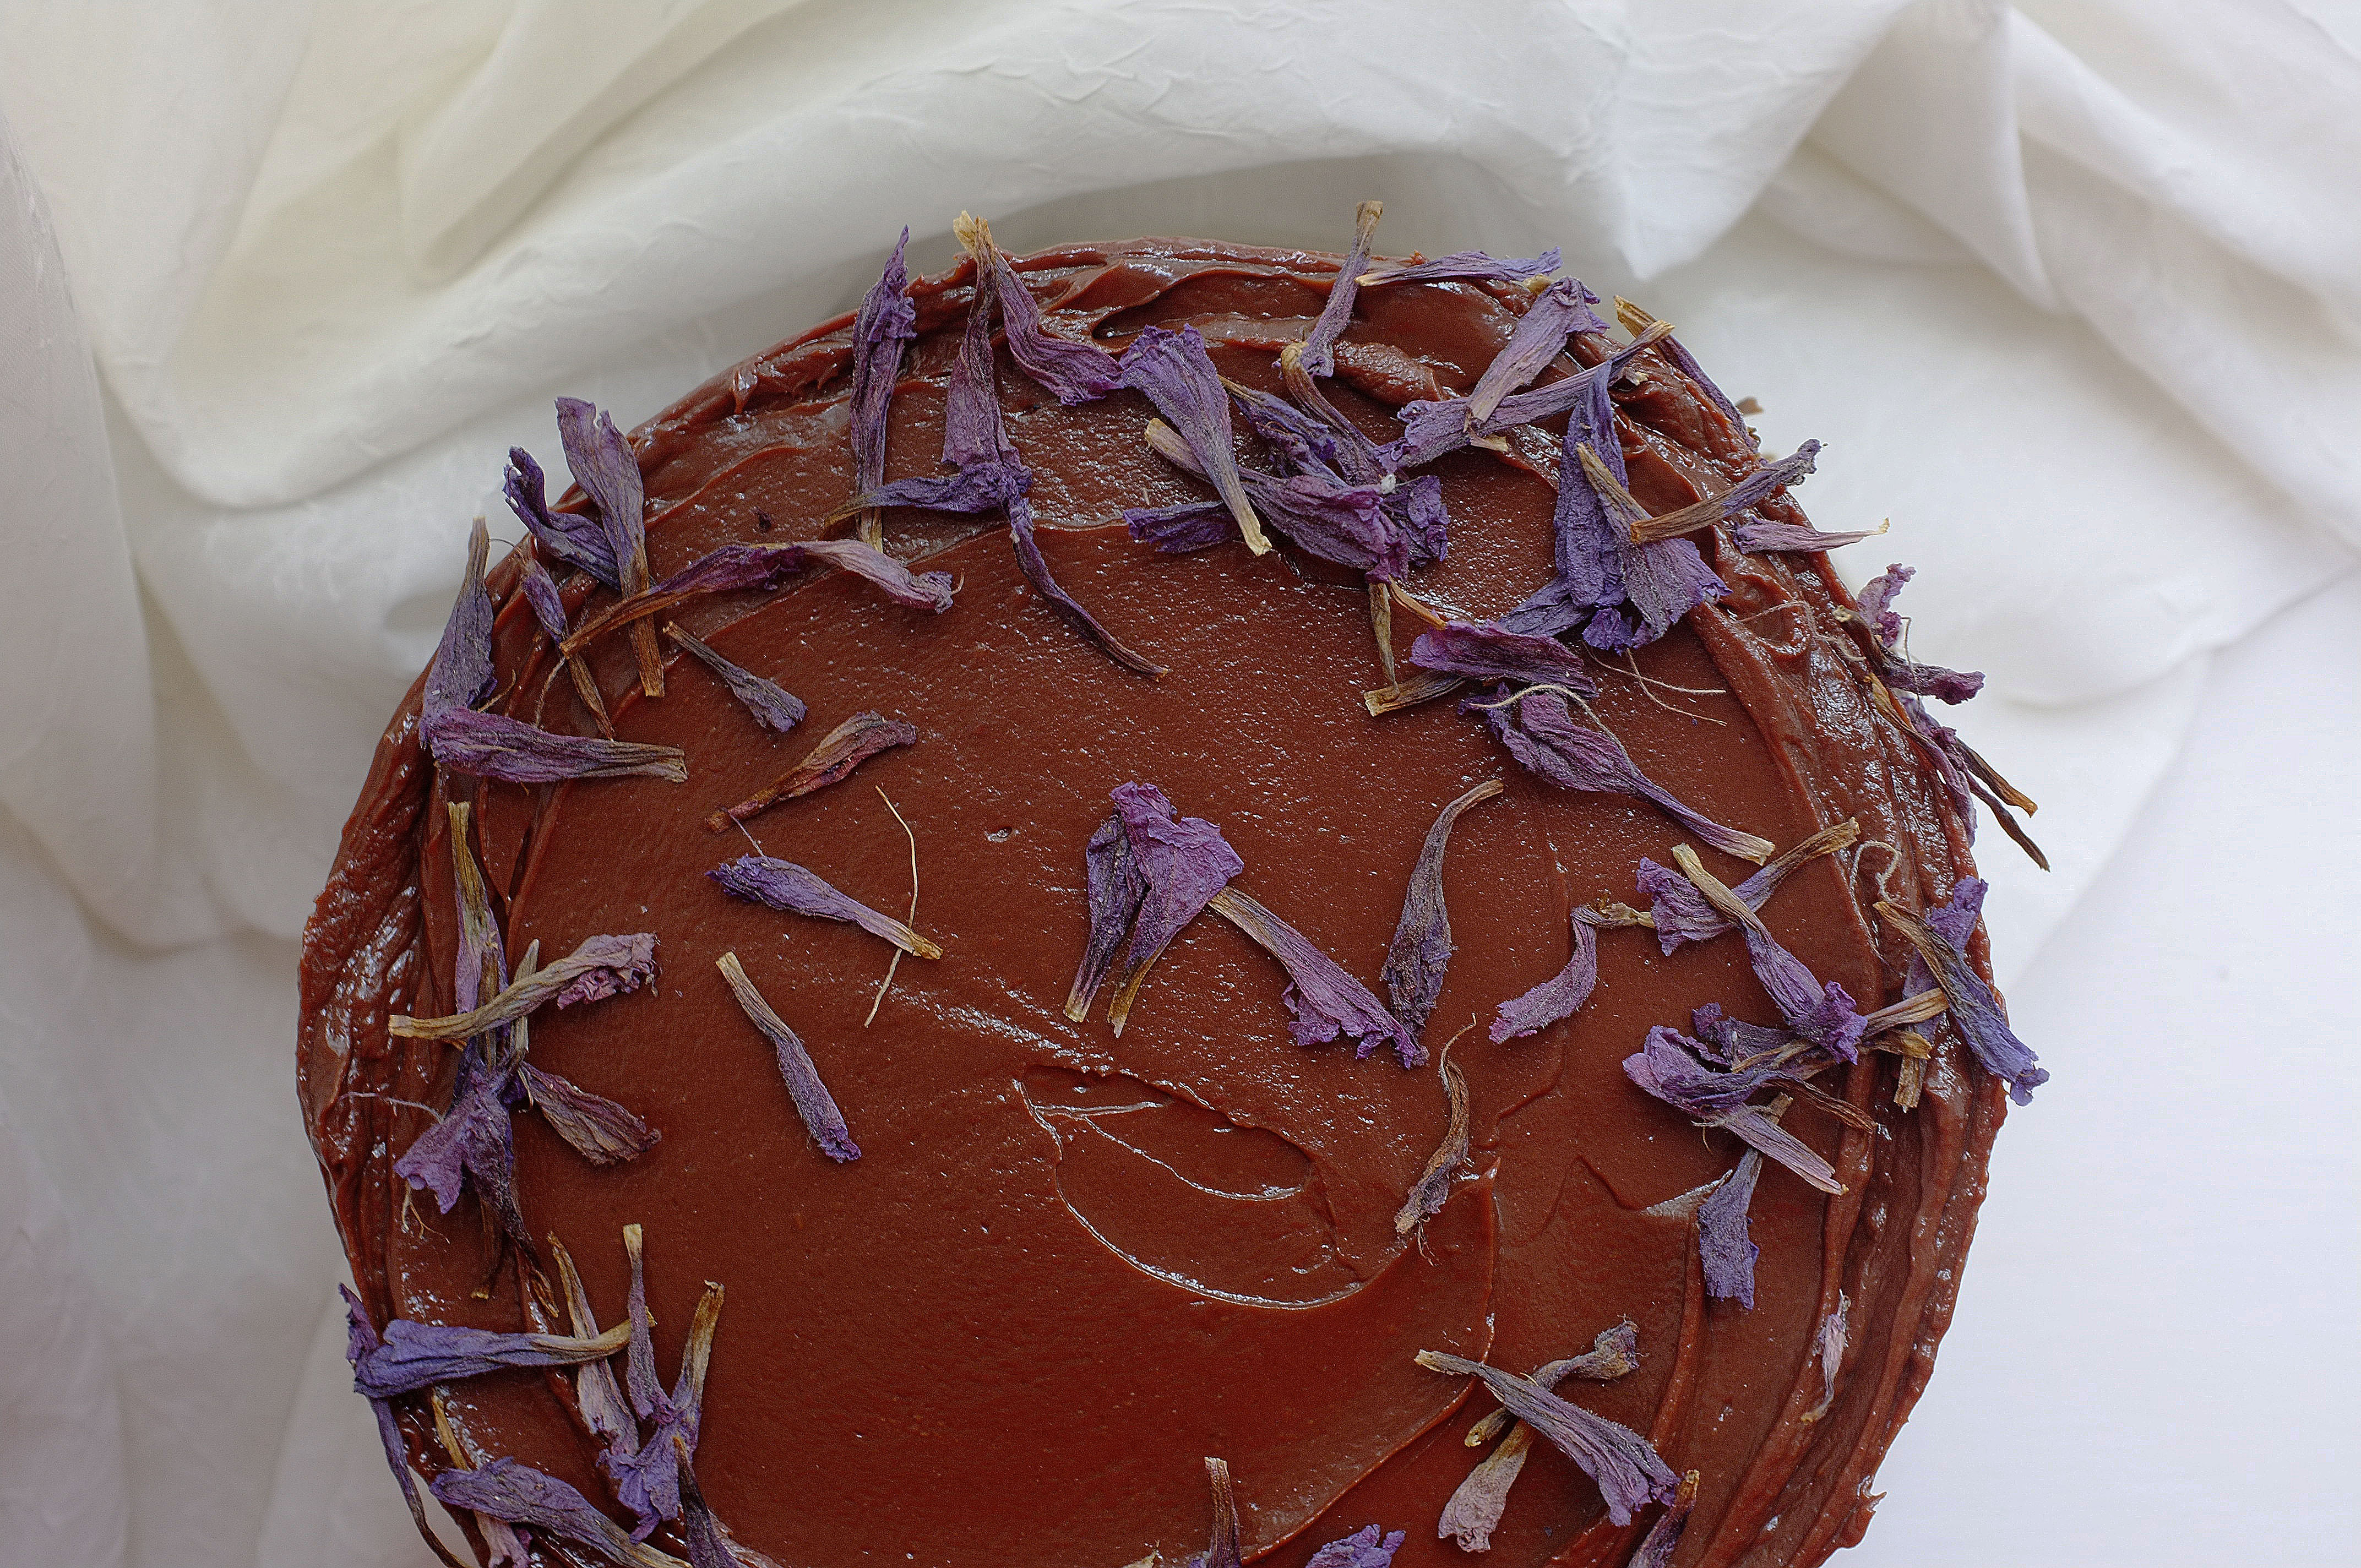
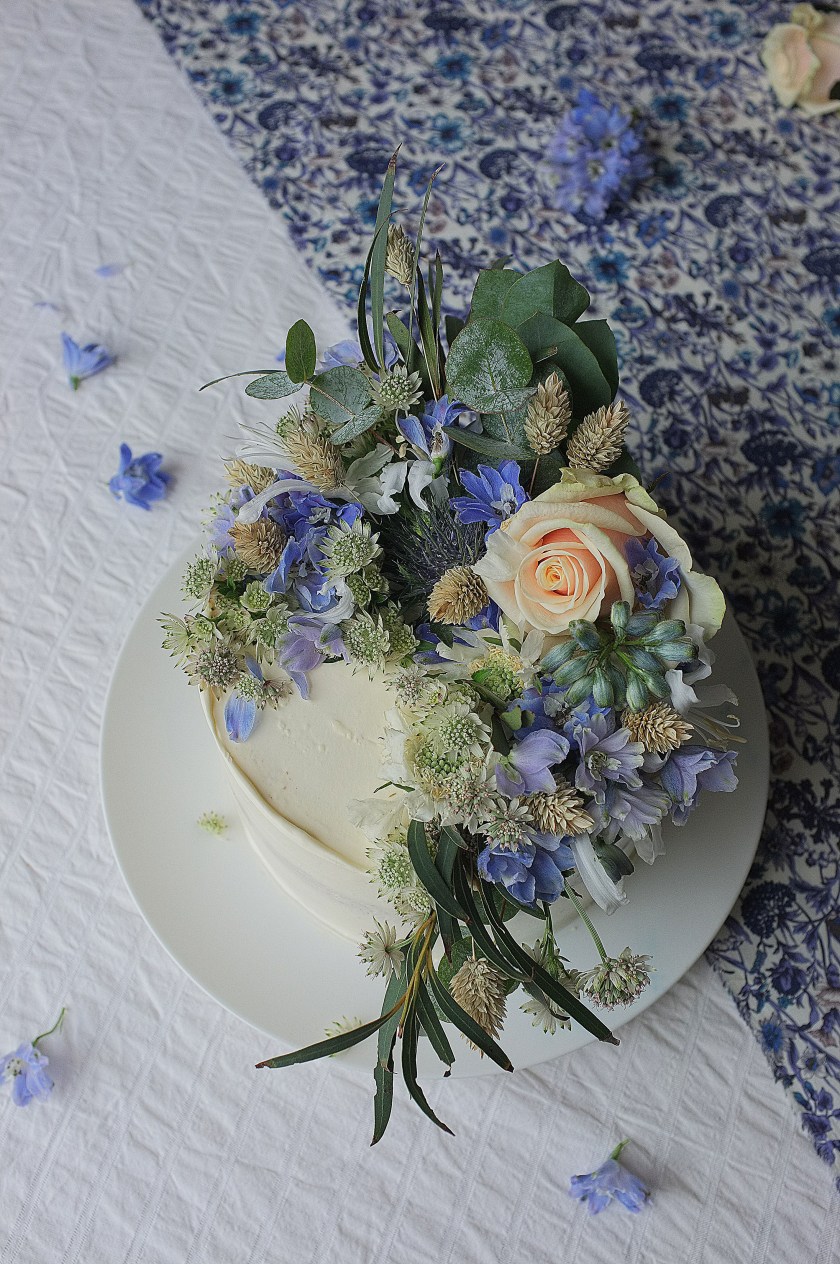
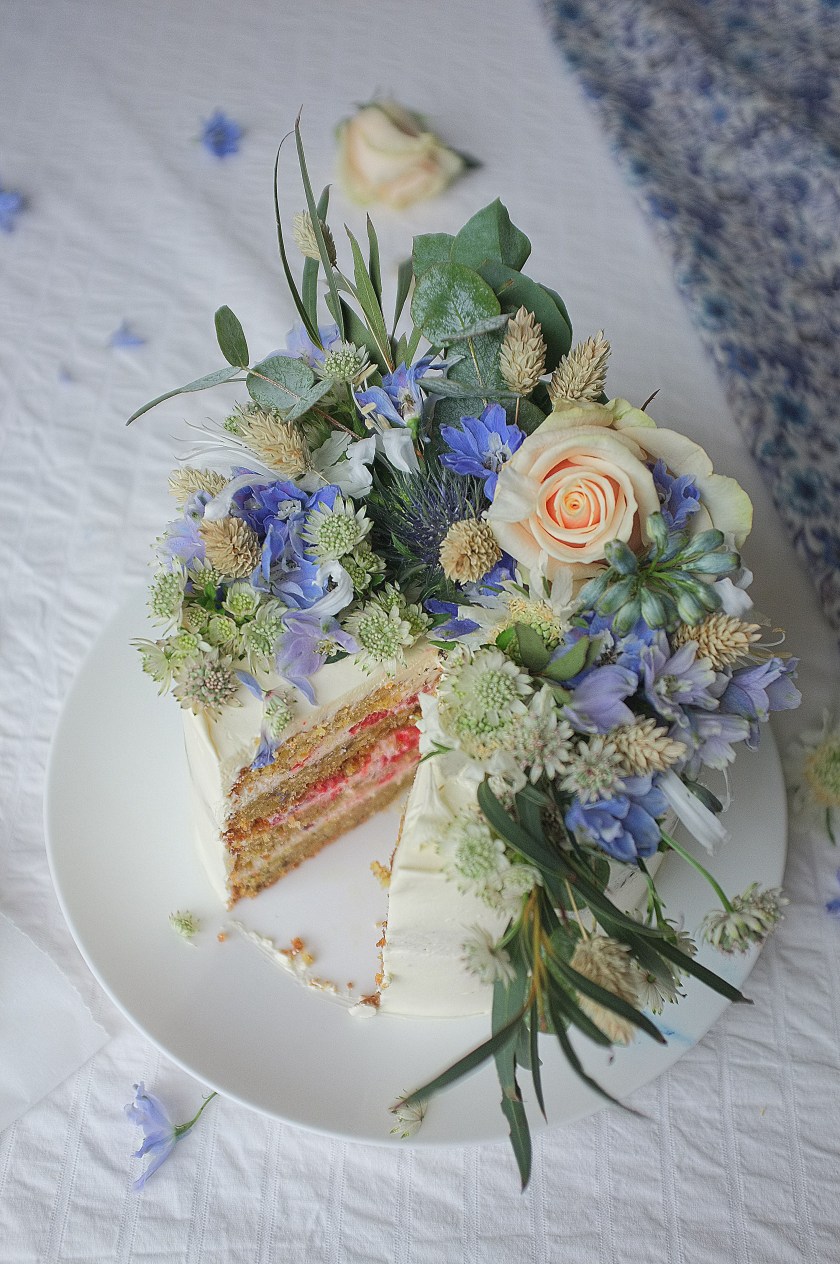
To make this celebratory cake really striking, I’ve decorated it with meadowy blooms and wild greenery from the Rachel Deluxe bouquet, which is inspired by a 1988 Liberty print. To keep things simple but delicious, the sponge I’ve developed is light and zesty, with a hum of pistachio. For the filling I’ve gone with a raspberry and rose cream, in part because the bouquet boasts stunning quicksand roses but also because British raspberries are nearing the end of their season, so we need to make the most of them while we can. To apply the flowers, I trimmed and sealed the stems, then arranged them in as natural a way as possible, staying true to the print. I hope you all like what I came up with and enjoy the recipe- it’s perfect for late summer celebrations!

Ingredients

For the sponges

  • 350g soft unsalted butter
  • 325g golden caster sugar
  • Zest 2 lemons
  • 6 eggs
  • 200g ground pistachios (just blitz 200g shelled pistachios in a food processor until fine)
  • 150g plain flour
  • 2tsp baking powder
  • Pinch salt

For the rose and raspberry cream

  • 400g double cream
  • 200g mascarpone
  • 2-3tbsp rose water (add this in small amounts, tasting between each addition)
  • 2-3tbsp icing sugar (to taste)
  • 200g fresh raspberries, lightly crushed with a fork

To finish (optional)

  • Bloom and Wild Rachael bouquet, or pistachios and crystallised rose petals

Method

  1. Preheat the oven to 170c. Grease and line two 7 inch cake tins.
  2. Place the butter, sugar and lemon zest in a large bowl (or bowl of a stand mixer) and beat until very light, pale and fluffy (this can take about 10 minutes). Add in the eggs, one at a time, beating well between each addition (add a little bit of the flour with each egg if you’re worried about curdling). Once all the eggs are well incorporated, add the rest of the flour, ground pistachios, salt and baking powder and fold in using a large metal spoon.
  3. Once you have a light, lump free cake batter, split between the two tins and level off the tops. Bake for 35-45 minutes or until a skewer comes out clean when inserted.
  4. Once baked, leave the cakes to cool in the tins for 10 minutes, then remove and place on a wire rack to cool completely.
  5. While the cakes are cooling make the filling. To do this simply whisk together the cream, icing sugar, mascarpone and rose water until spreadable. Take 2/3 of this filling and ripple through the raspberries. Put the remaining 1/3 to the side (this is for coating the outside of the cake).
  6. When you cakes are completely cool, slice in half horizontally so that you have four even layers. Place the first layer on your serving plate and spread over 1/3 of the raspberry cream, then repeat until you’ve stacked all four.
  7. Take the remaining rose cream and spread a very thin layer over the cake to seal in any crumbs. Chill for 10 minutes to firm up a little, then cover with the last bit of rose cream (use a palette knife or cake scraper to do this). This stage is optional, you can leave the sides bare if you like.
  8. To finish the cake, arrange fresh flowers all over the top (ensuring that you seal any ends and remove them from the cake before consumption!). Alternatively, decorate with lemon zest, pistachios and rose petals.

Enjoy!