Chai Ice Cream

Uncategorized

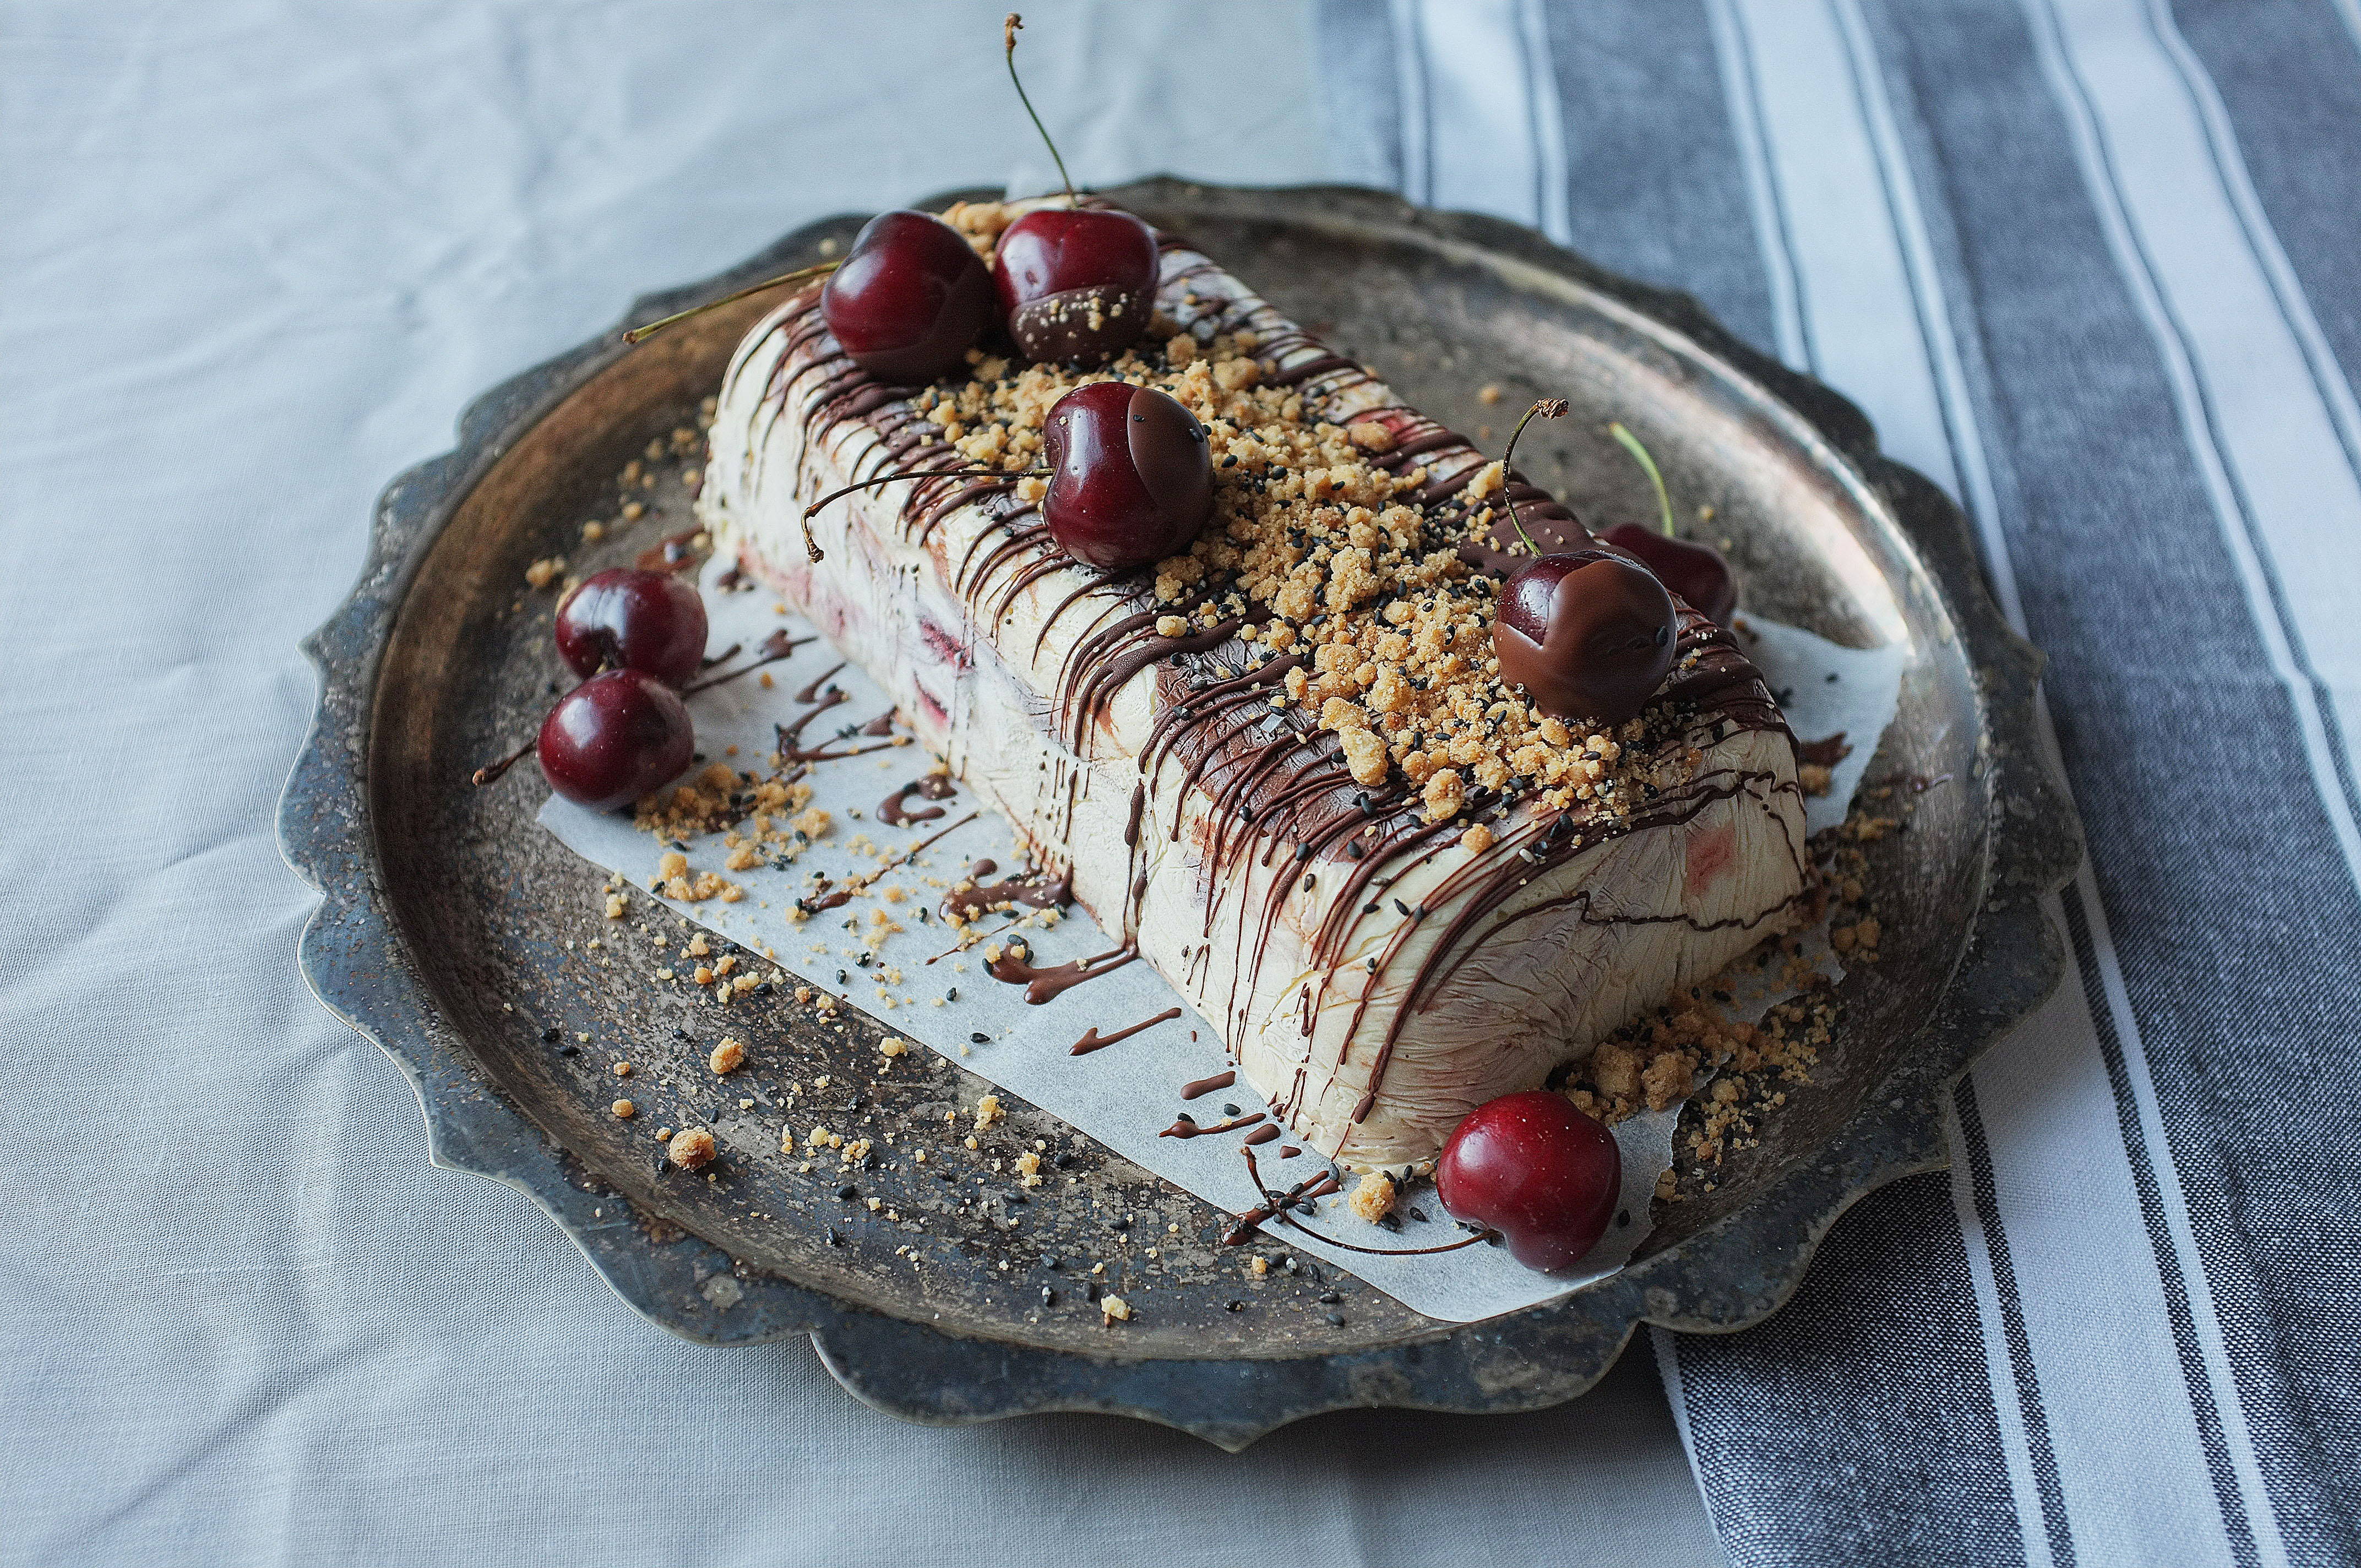
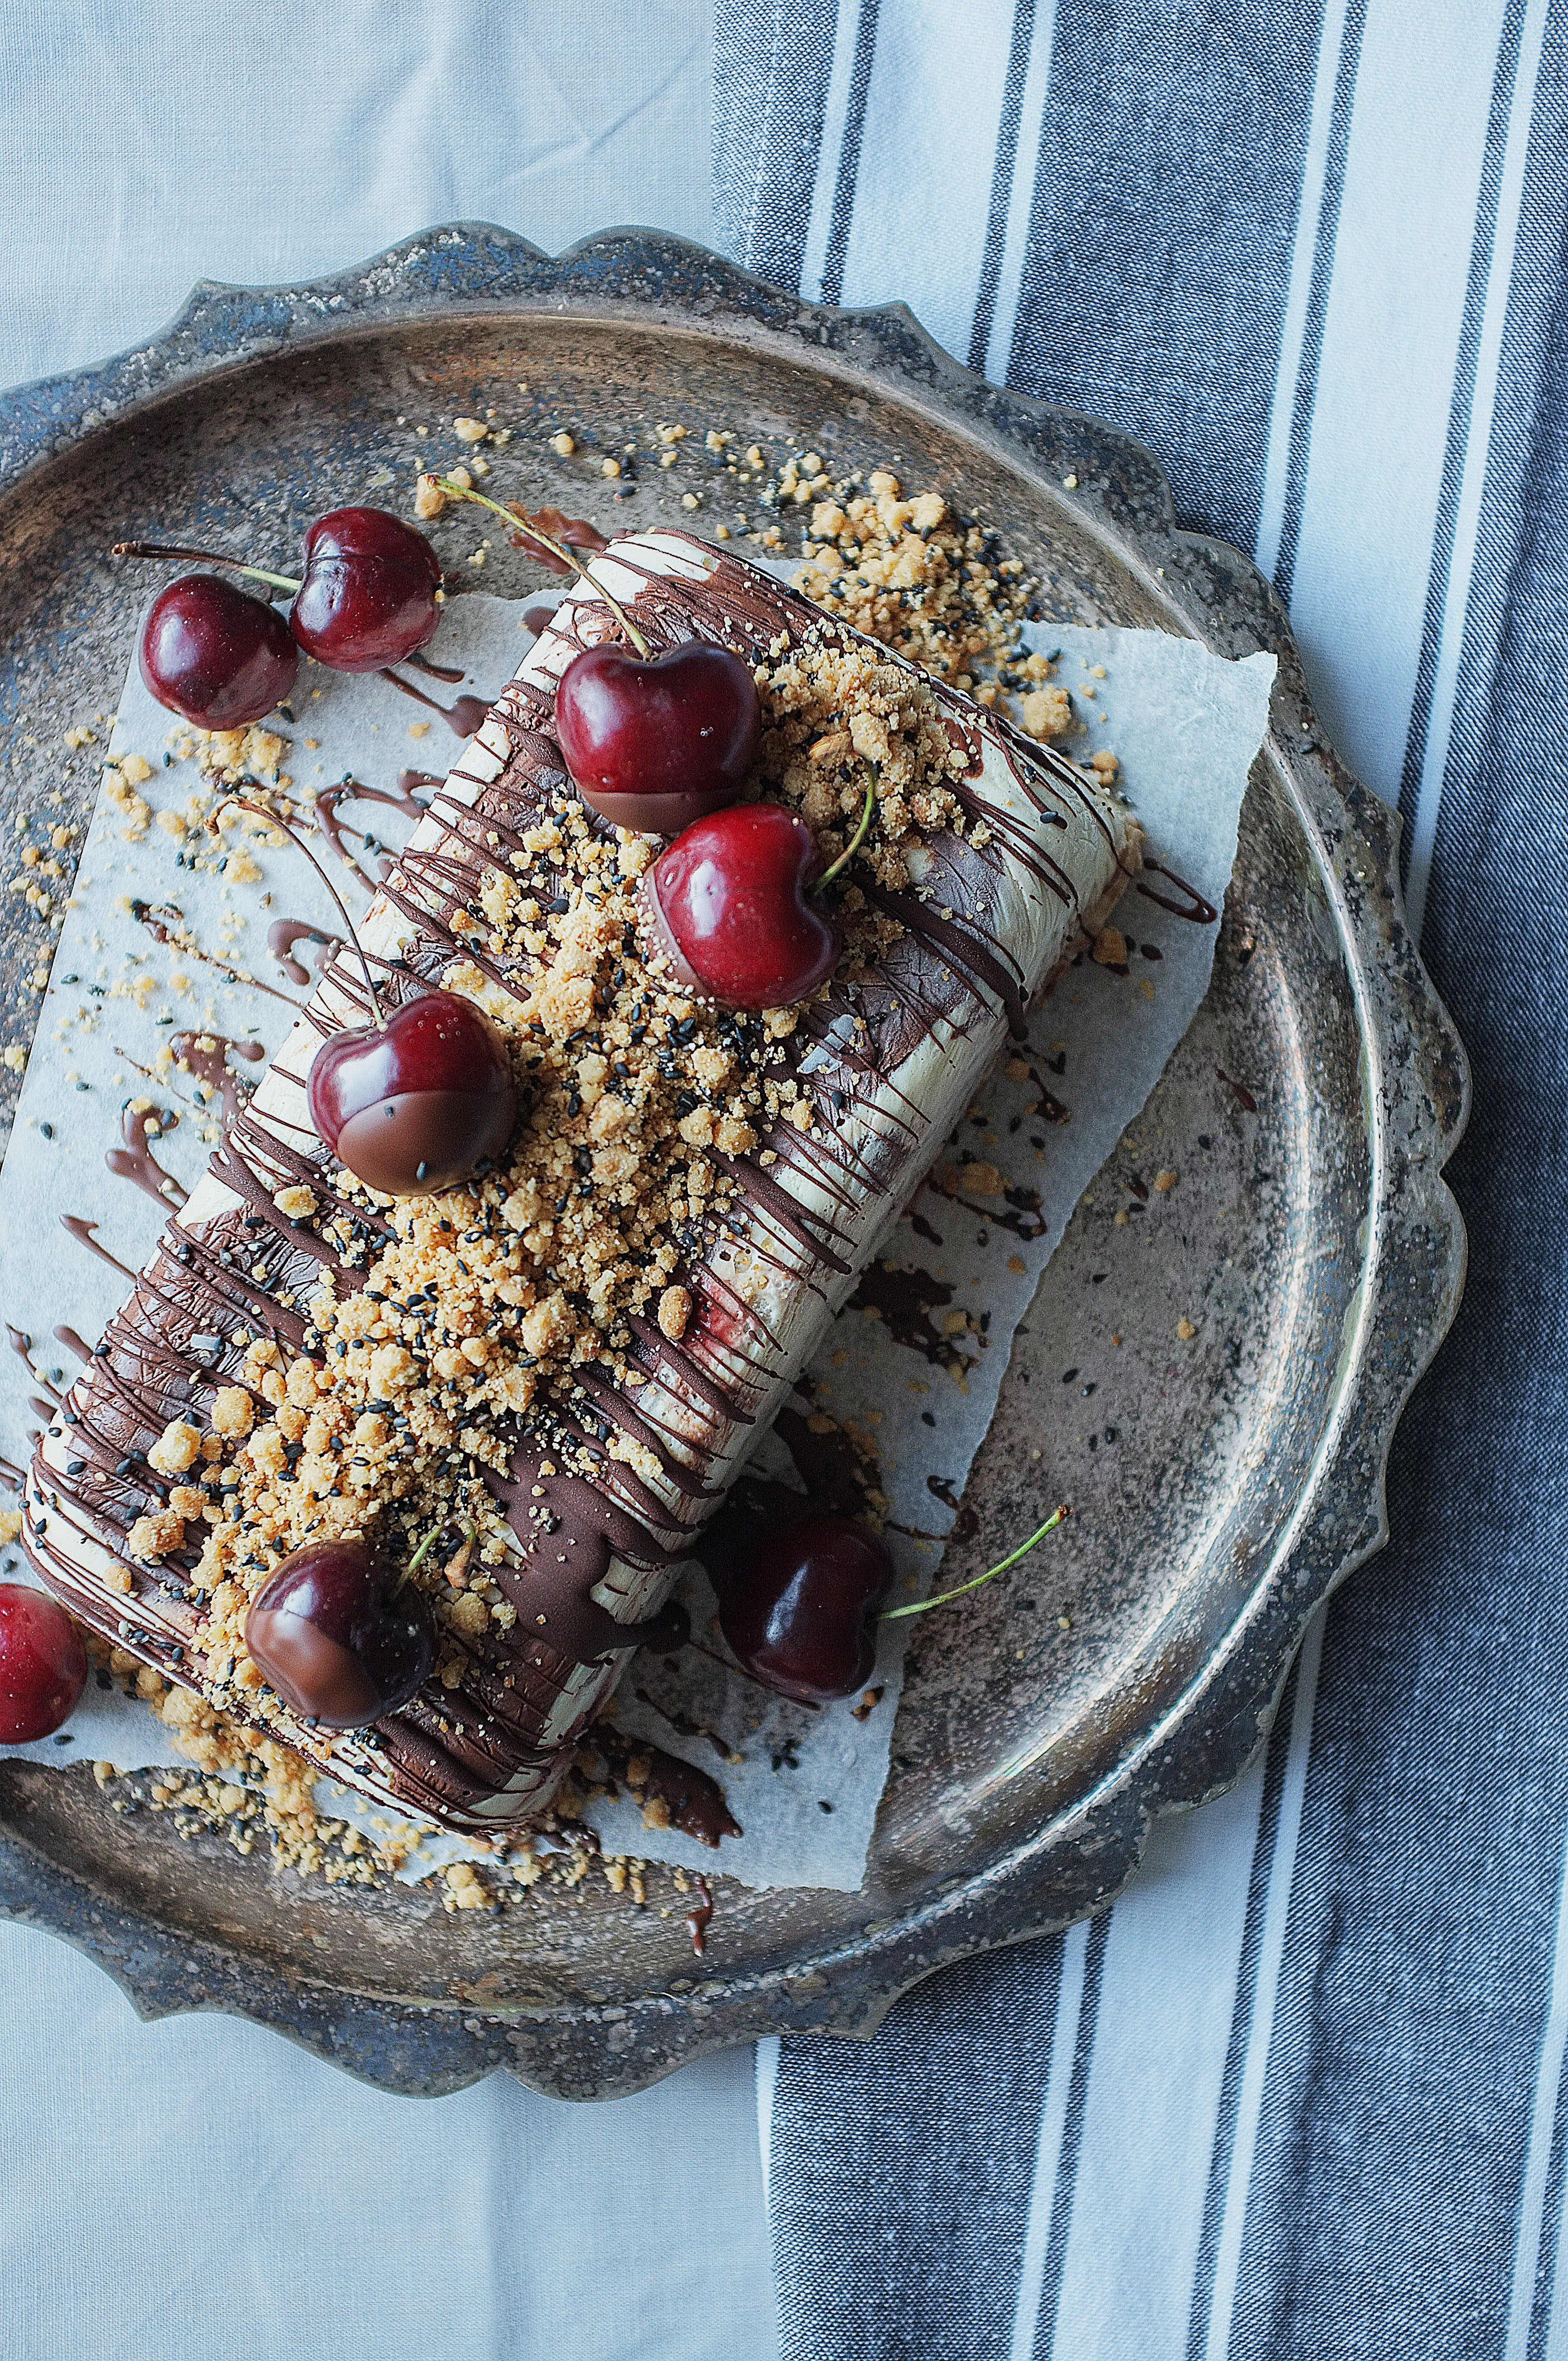
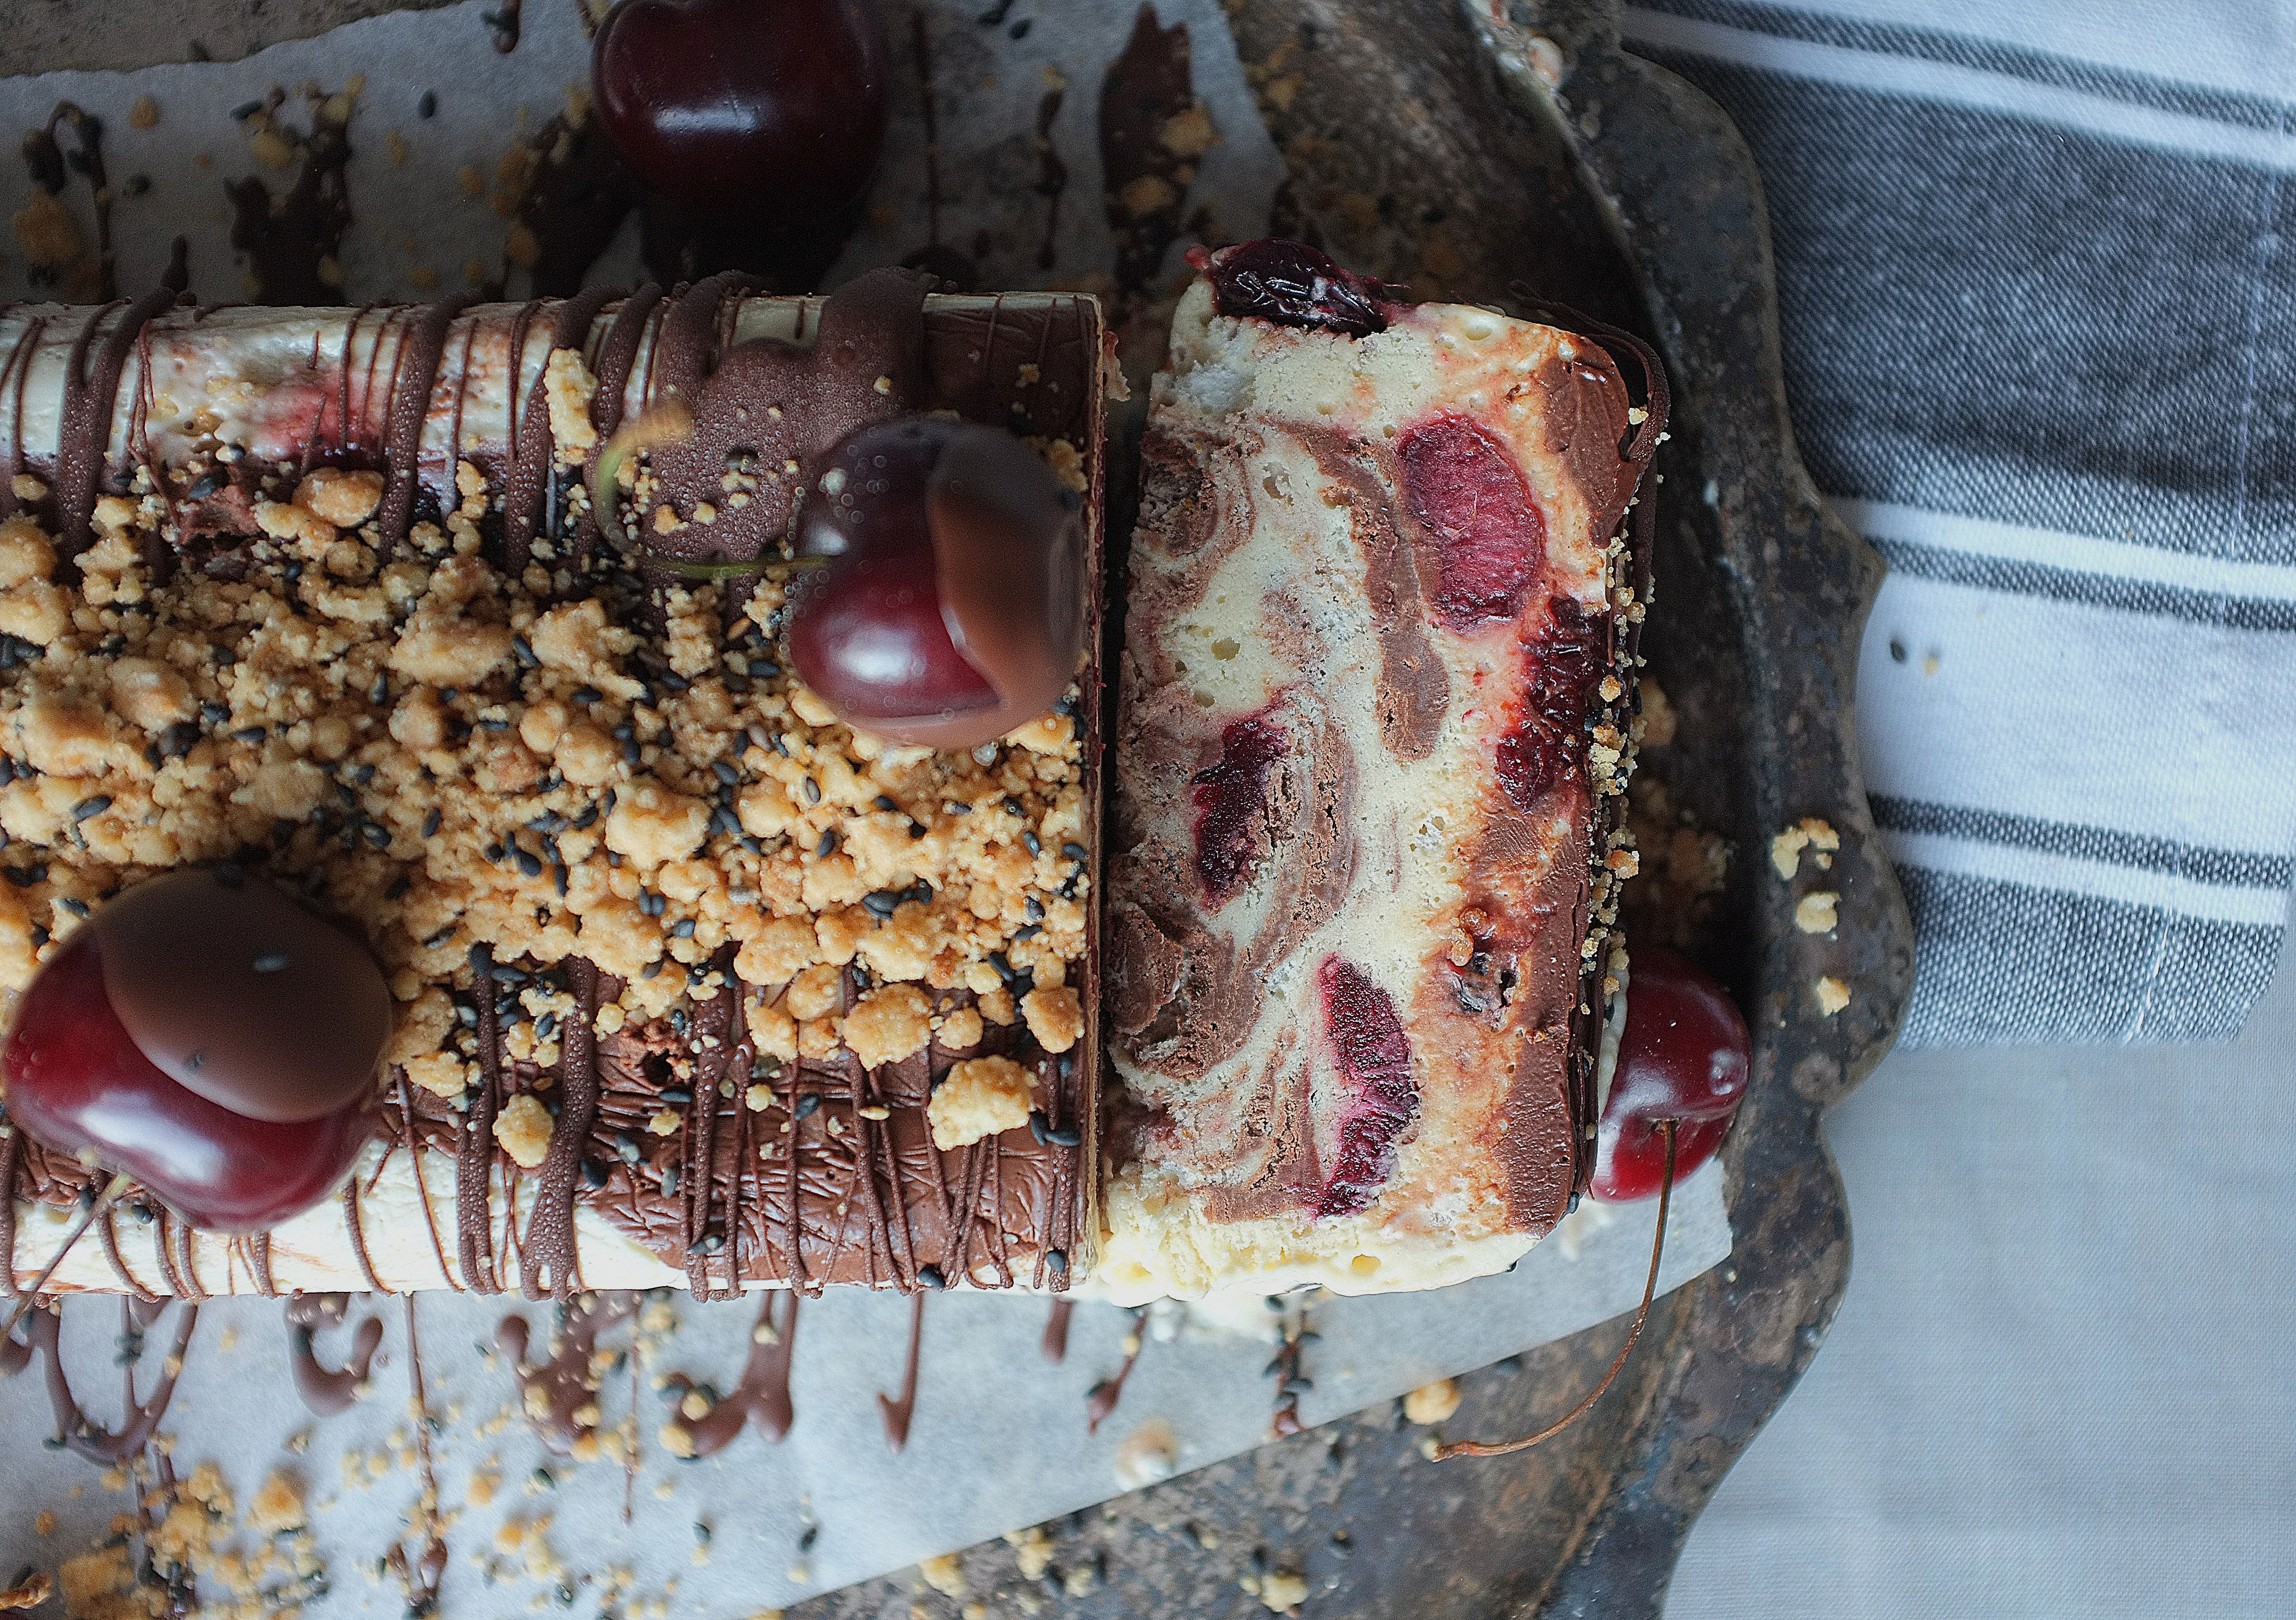
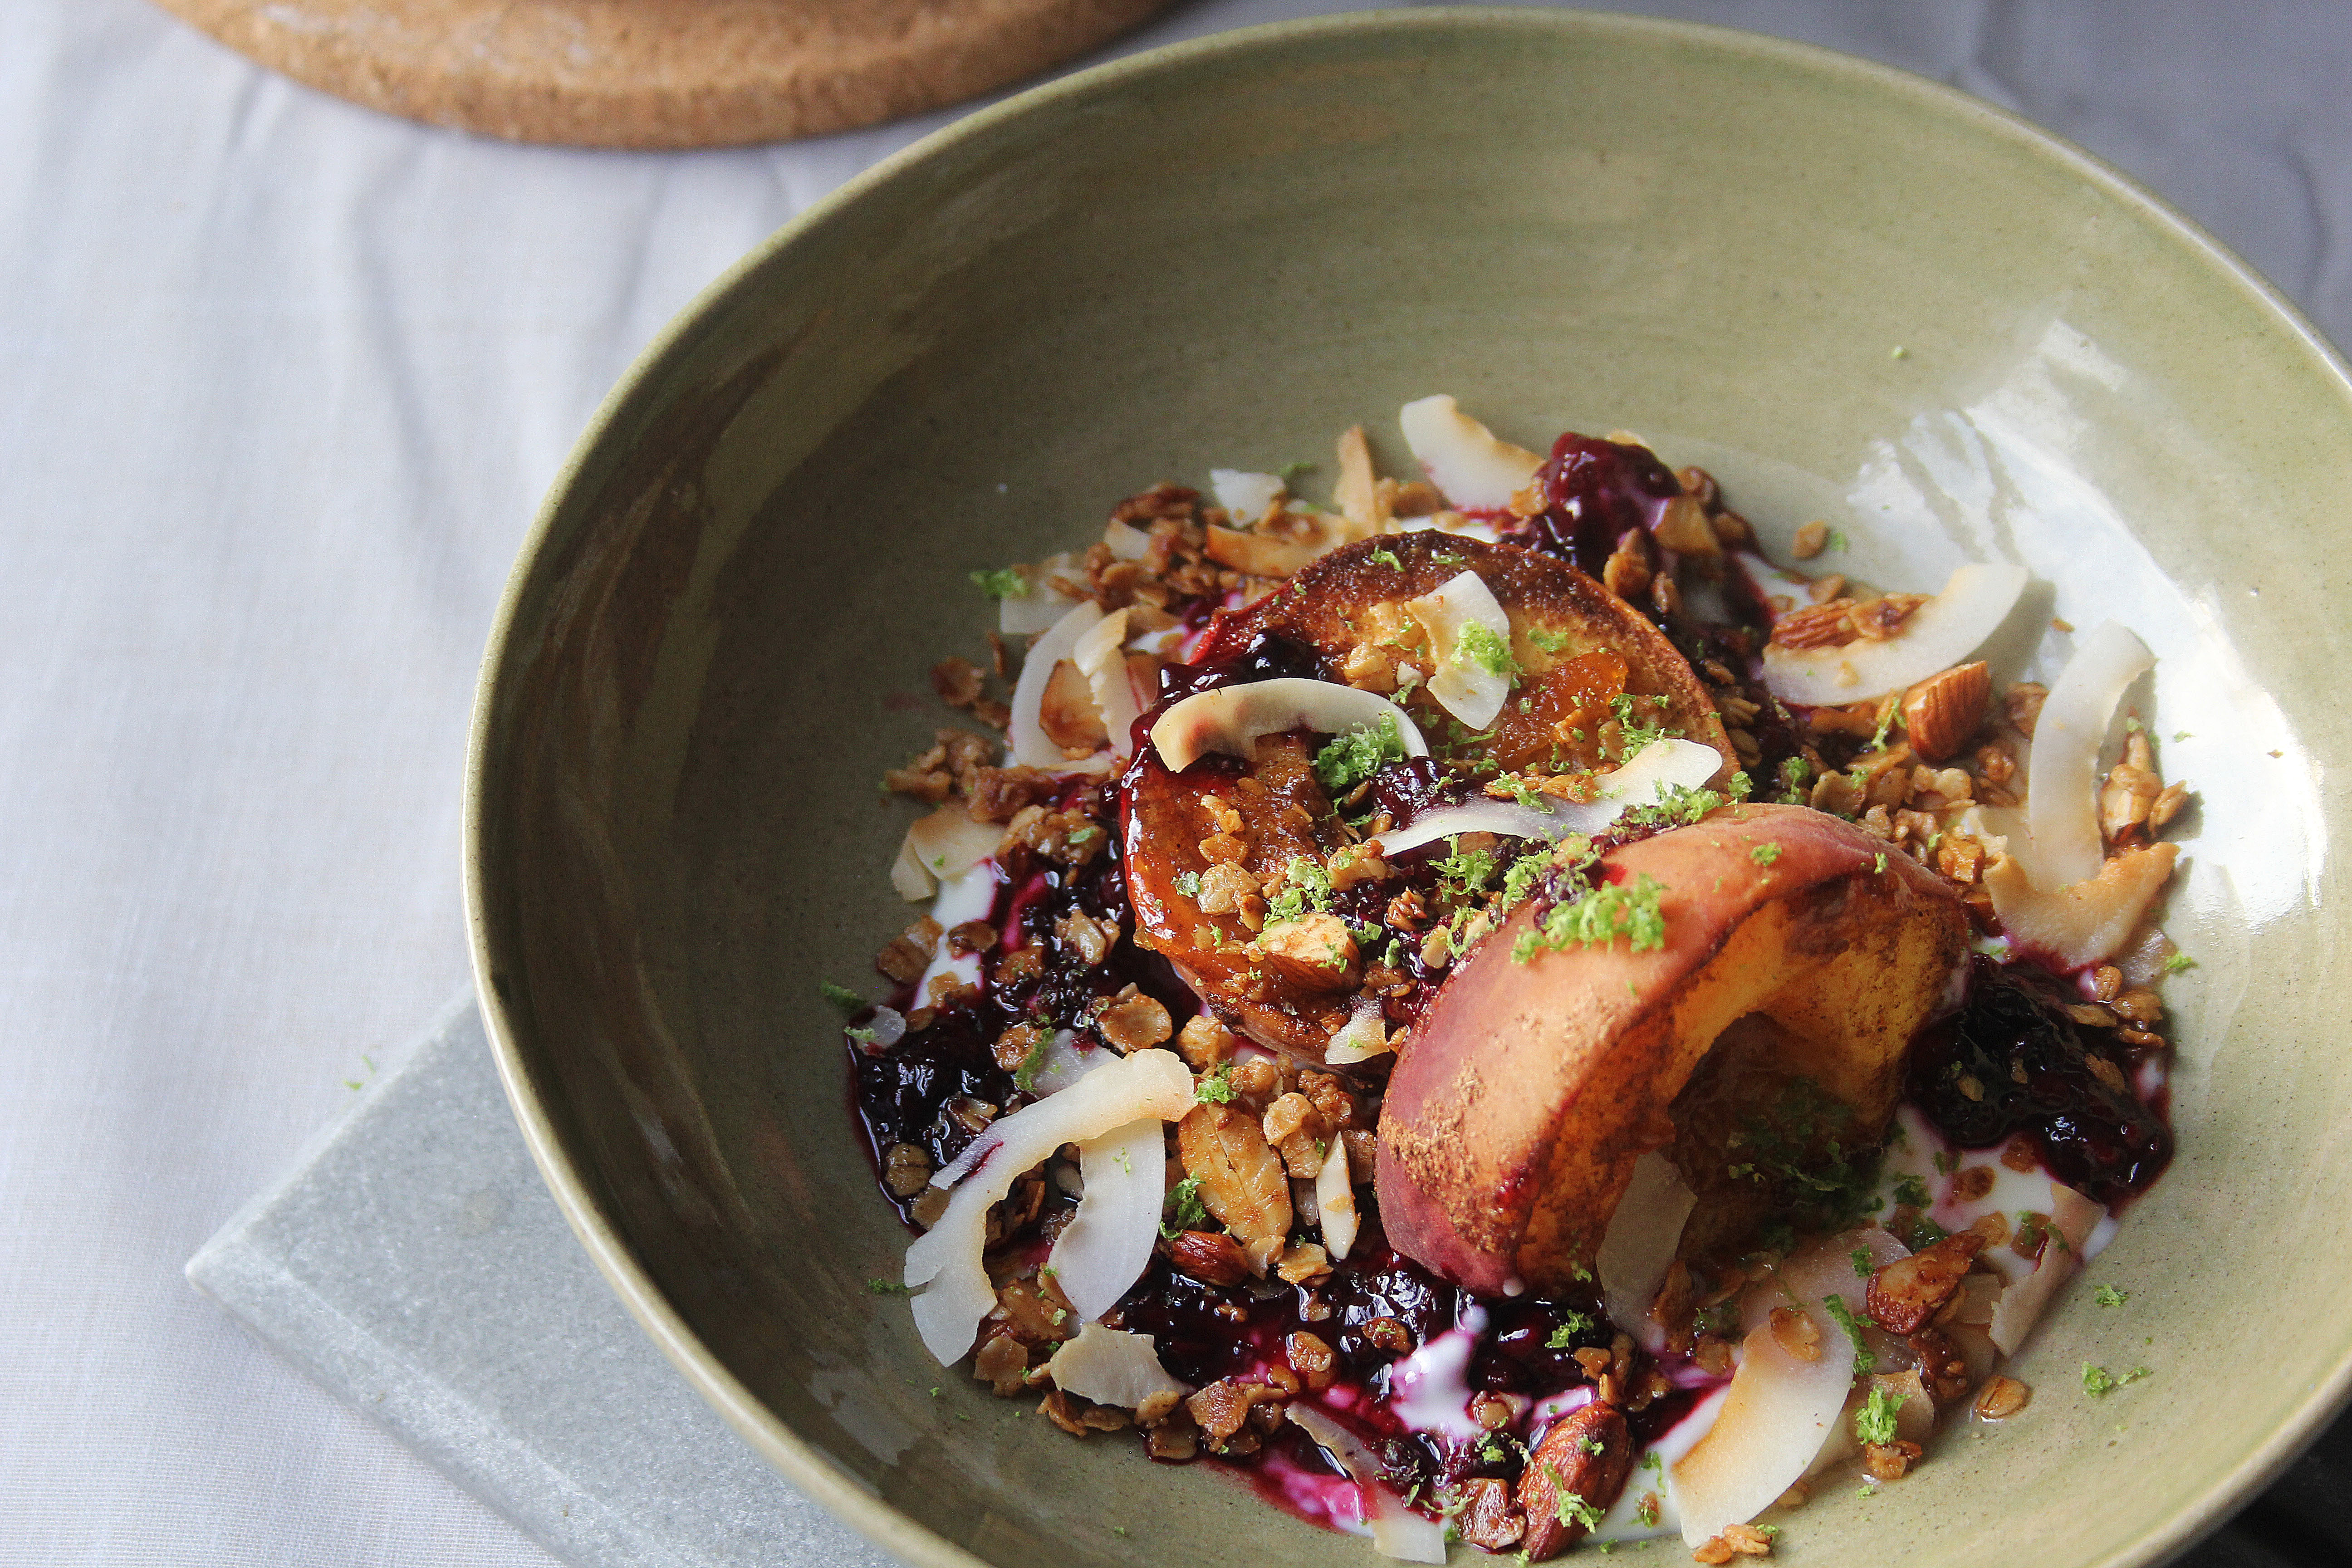
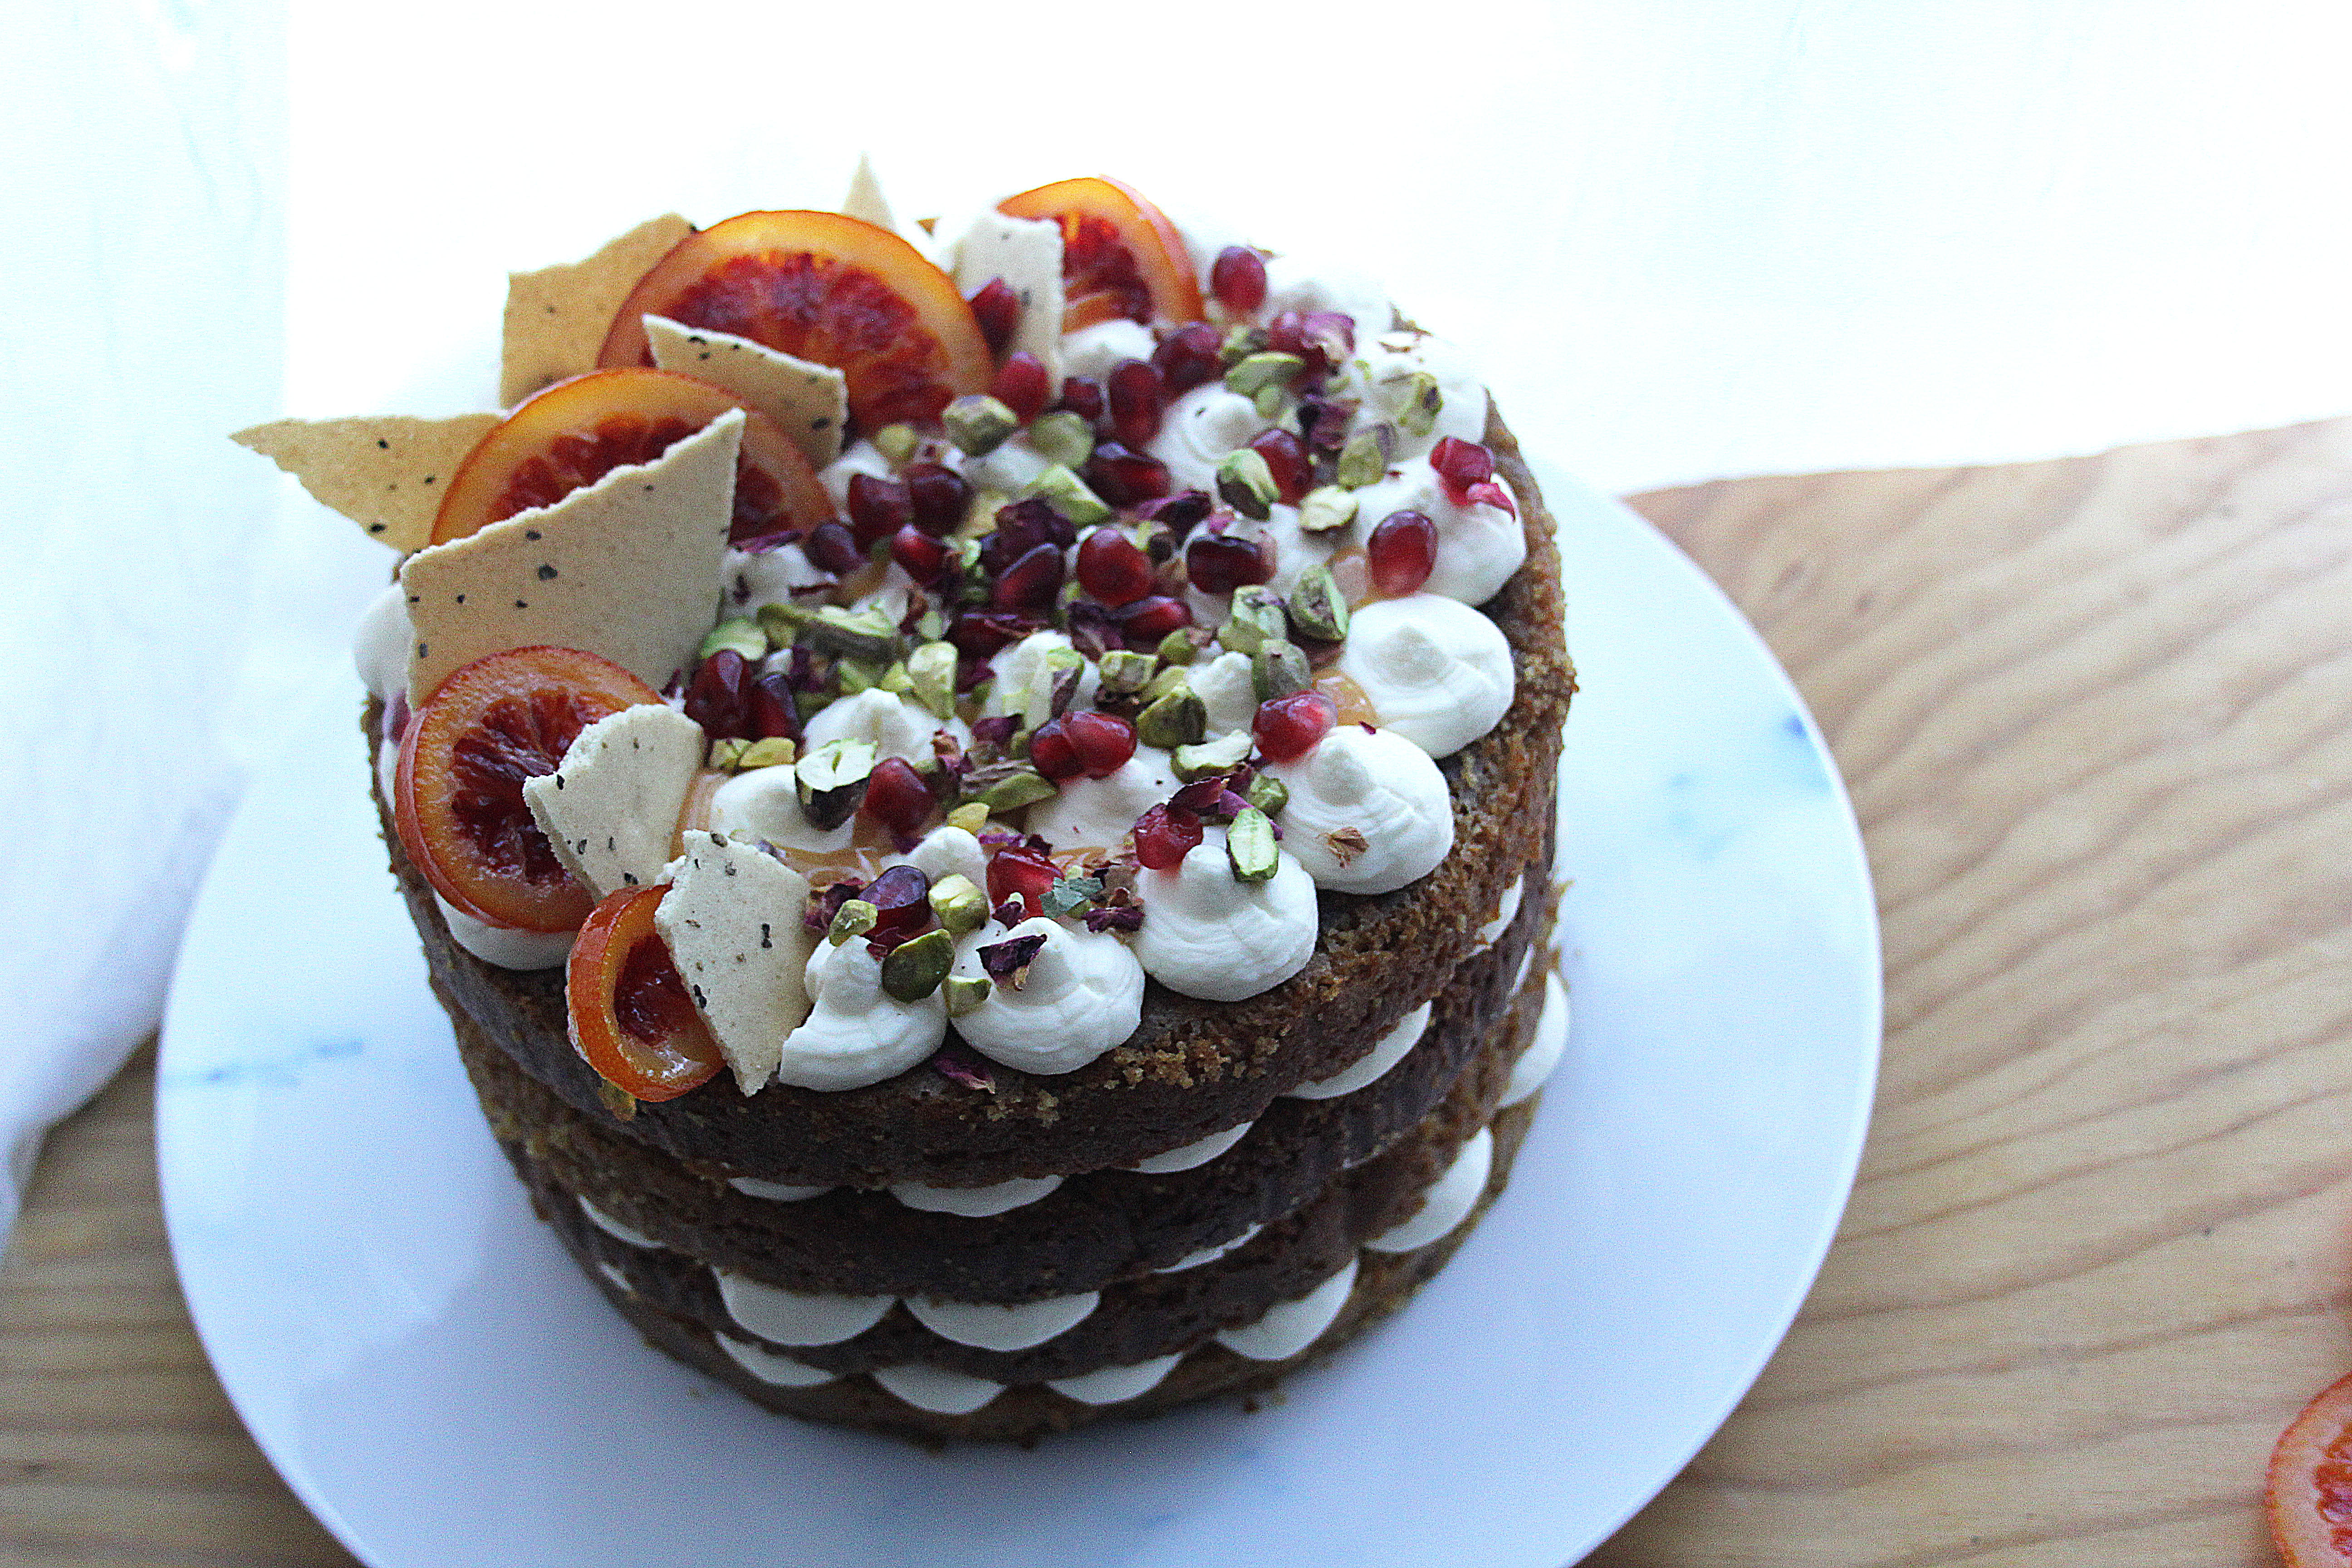
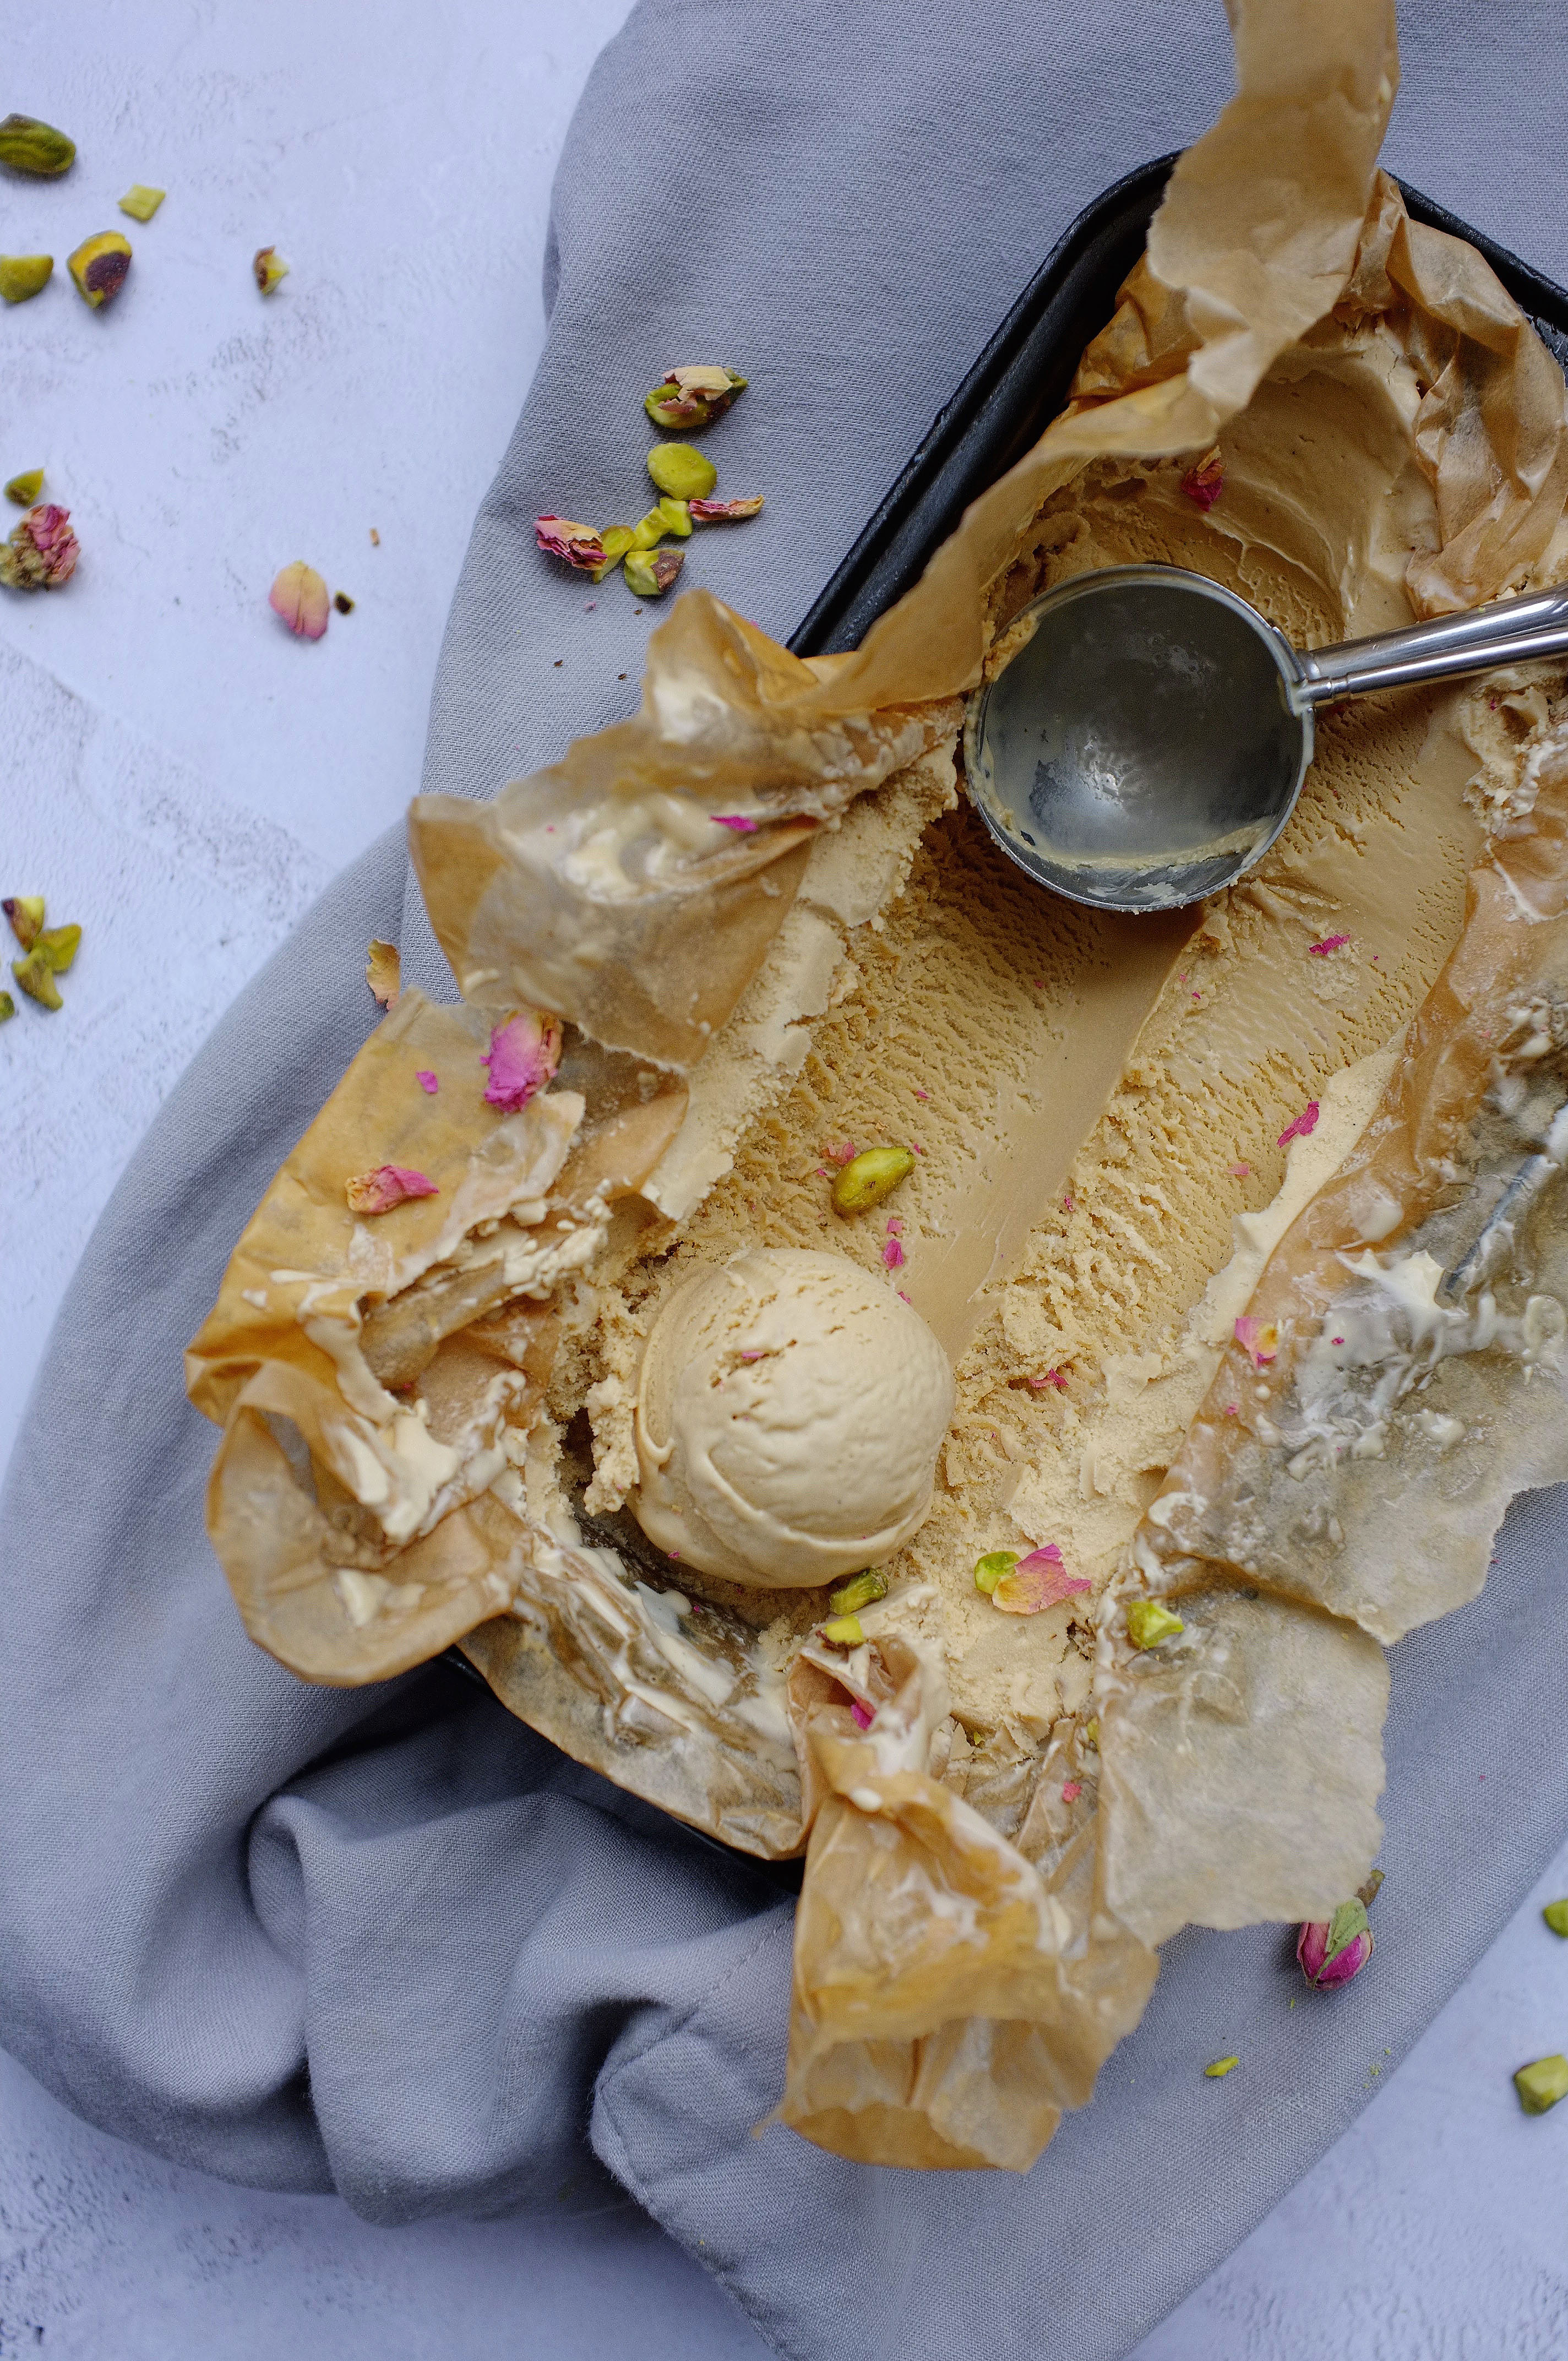
As the temperatures drop and the evenings draw in, I’m getting really into making ice cream… I know, such a maverick, what will I do next!? I jest, ice cream can be enjoyed all year round in my opinion, especially when you create flavours which feel Autumnal; this chai variety is a great example of that. It’s cold, of course, but the hint of black tea and hum of warming, peppery spice is really comforting, plus it pairs beautifully with hot puddings, rich chocolate desserts and baked fruit.

Ingredients

  • 600ml double cream
  • 600ml whole milk
  • 225g golden caster sugar
  • 5 black tea bags
  • 10 cardamom pods
  • 1 vanilla pod
  • 2 cinnamon sticks, split in two
  • 1 1/2 tsp black peppercorns, roughly crushed
  • 1tsp fennel seeds, roughly crushed
  • 2 inches fresh ginger, chopped
  • 6 egg yolks
  • pinch salt

Method

  1. Place the cream, milk and 100g of the caster sugar in a large saucepan along with the tea bags, spices, ginger and vanilla. Heat to scalding point (just before it boils) over a medium heat, stirring to ensure the sugar has dissolved, then set aside to cool to room temperature. Once cooled, chill for at least an hour or overnight to allow the flavours to develop.
  2. Drain the infused cream into a large clean saucepan and heat to scalding point once more. Meanwhile, place the egg yolks and remaining 125g caster sugar in a large bowl (or bowl of a stand mixer with whisk attachment) and whisk until pale and thick. Remove the cream mixture from the heat and allow to cool slightly for a few minutes, then pour gradually into the yolks, whisking constantly.
  3. Once the mixture is combined, return to a clean saucepan and set over a low/medium heat. Stir until it has thickened to a custard consistency  (do not be tempted to increase the heat or it will curdle) then leave to cool completely.
  4. Once cooled, churn the custard until thick and creamy (about 25 minutes) then scrape into a container, cover and chill for at least 4 hours.
Advertisement

Rhubarb & Caramelised White Chocolate Choux Nuts

Pastry

Crisp choux pastry, sharp roast rhubarb with a hint of vanilla, and butterscotch-sweet caramelised white chocolate cream; a delicious combination you’ve got to try, and a great way to celebrate seasonal British produce (and millennial pink… *sigh*).

Ingredients (makes 10-12)

For the choux

  • 85g unsalted butter
  • 220ml water
  • 100g plain flour
  • 3 eggs
  • pinch of salt

For the filling

  • 250g white chocolate (make sure it’s at least 30% cacao)
  • 300ml double cream
  • Pinch salt
  • 4 thick stems rhubarb
  • 3tbsp caster sugar
  • 2 vanilla pods or 1tsp vanilla extract
  • Juice and zest 1 lemon

For the topping

  • 100g icing sugar
  • Enough of the rhubarb syrup (leftover from roasting the rhubarb) to create an icing with a drizzle-consistency
  • Dried rose petals (optional)
  • Candied rhubarb ribbons (optional) (I make these by creating ribbons of rhubarb with a peeler, which I then simmer in a simple 2 parts sugar: 1 part water syrup for 5 minutes before draining off any excess liquid and cooking at 160c for 10-15 minutes, or until dried out, on a lined baking tray)

Method

  1. To make the choux put the water, butter and salt in a saucepan set over a medium heat (do not let it boil at this stage). Meanwhile, sieve the flour to remove any lumps. When the butter has melted into the water, increase the heat and bring to a rolling boil, then tip in the flour and stir vigorously until you have a smooth paste-like mix which comes away from the edges of the pan. Continue to stir for another minute to cook out the rawness of the flour, then tip into a clean bowl and close cover with cling film (this eggless stage is known as a ‘panade’). Leave to cool to room temperature.
  2. Preheat the oven to 190c. Line 2 large baking trays with greaseproof paper.
  3. Once the panade has cooled it’s time to add the eggs; whisk in a jug to break them up then very gradually add into the panade while beating with electric beaters. Stop adding the egg (you might have a little leftover) when the smooth, lump-free mixture reluctantly drops off the end of a spoon. Pile the choux mix into a piping bag, fitted with a large round nozzle.
  4. Pipe 10-12 doughnut shapes onto the prepared baking trays, leaving room for expansion. Bake the choux for 20-25 minutes or until crisp and golden, then skewer each one and return to the oven for around 10 minutes or until the middles have completely dried out. Set aside to cool and reduce the oven temperature to 180c.
  5. Slice the rhubarb into batons and toss in the caster sugar, lemon juice and zest and vanilla. Roast for 10-15 minutes in a high sided baking tray until the pieces are tender but still retain their shape. Set aside to cool and reduce the oven temperature to 120c.
  6. Chop up the white chocolate and scatter on a lined baking tray in an even layer. Place in the oven to allow the chocolate to melt for 10 minutes, then stir/turn and return to the oven for another 10 minutes. Repeat this step 2-3 more times until the chocolate reaches a deep golden colour, then scrape into a bowl and mix in a splash of cream to loosen the consistency (it can get a little grainy at this stage so pass through a sieve if necessary). Leave to cool.
  7. Once the white chocolate has cooled, place in a bowl (or bowl of a stand mixer with whisk attachment) and add in the cream and salt. Whisk until pipe-able.
  8. Slice the cooled choux nuts in half horizontally and pipe in a generous helping of caramelised white chocolate cream. Slice the roast rhubarb pieces thinly and arrange these on top of the cream, then pop the choux lid on top.
  9. For the pink icing, pour the cooking syrup from the rhubarb tray into the icing sugar and mix to create a smooth drizzle-like consistency (add in a little water if you don’t have enough syrup). Spoon this over the filled choux-nuts and garnish with edible petals and rhubarb ribbons.
Enjoy!

Dark Chocolate and Peanut Butter Brownies (Vegan/Gluten Free)

Chocolate

I’ve tried a lot of vegan brownies which are dry, crumbly or ‘raw’. Sure, there’s a time and a place for healthy alternatives and we can’t just slob around eating sugar-laden baked goods all day, but if I want a brownie and I’m vegan (I’m not I’m just being really selfless…) I want the real thing, not a load of dates and coconut oil. With this not-very-2018 thought in mind, I’ve been attempting to put together a recipe for a completely vegan and gluten free brownie which rivals a conventional dairy/egg based one. The recipe I’ve devised delivers a fudgy core and crisp top, rich flavour and all round delicious result- give it a try, it’s a good place to start with vegan baking.

Ingredients (makes 16 small brownies, or 9 big ones!)

  • 125g smooth peanut butter, plus 50g more for the core and topping
  • 75ml vegetable oil
  • 275g dark chocolate (I used half 60% and half 80%), plus 75g roughly chopped for chocolate chips
  • large pinch salt
  • 100ml aquafaba (the starchy water you get in a can of chickpeas- you will get about 100ml from one can)
  • 1tbsp ground flaxseed mixed with 1tbsp water (this replicates an egg yolk very well!)
  • 100g dark brown soft sugar
  • 100g golden caster sugar
  • 100g gluten free plain flour (I used Doves Farm)
  • few chopped peanuts, for topping (optional)

Method

  1. Preheat the oven to 180c. Grease and line a 20x20cm square brownie tin.
  2. Mix together the flaxseed and water at this stage to give it time to thicken an form an egg-yolk consistency. Put the oil, peanut butter and 275g of the chocolate in a heatproof bowl and set it over a saucepan of gently simmering water. Allow the ingredients to melt together, stirring occasionally, then remove from the heat to cool to room temperature.
  3. Place the aquafaba in a large bowl (or bowl of a stand mixer with whisk attachment) and whisk until soft peaks just form. At this stage add in the flax mixture, sugars and salt (it’s amazing how much this looks like eggs whisked together with sugar!). Whisk again until the sugars are well incorporated then fold in the cooled chocolate mixture with a metal spoon, followed by the flour. Scrape half of the batter into the prepared tin then dot over half of the extra peanut butter and some of the chopped chocolate. Top with the remaining batter and repeat the peanut butter/chocolate stage, then finish with the peanuts (if using).
  4. Bake for 25-35 minutes or until crisp on top but very slightly wobbly in the middle. Leave to cool completely then slice up and serve.

Enjoy!

Dark Chocolate, Olive Oil and Espresso Torte

Cakes, Uncategorized

No intricate decorations, fillings or tiers here, just one humble layer of ludicrously fudgy, crinkly chocolate joy (which is, entirely by chance, dairy and gluten free). For a real depth of flavour and the perfect balance of bitter and sweet, take note of my chocolate recommendations and use a good quality olive oil (this recipe idea actually stemmed from a yearning to bake with a deliciously floral, wincingly expensive extra virgin oil I picked up in Greece last month*).

* Disclaimer: don’t judge, I was in that holiday headspace where you flash your card with the sort of cavalier attitude usually reserved for Monopoly money… sufficed to say, I could do with passing GO right now

Ingredients

  • 200g 50% dark chocolate
  • 200g 80% dark chocolate
  • 200ml good quality olive oil
  • 275g light brown soft sugar
  • 75ml strong espresso
  • 5 eggs
  • Generous pinch sea salt

Method

  1. Preheat the oven to 170c. Grease and line a 9 or 10 inch cake tin.
  2. Roughly chop all the chocolate and place it in a heatproof bowl along with the olive oil. Put the sugar and coffee in a saucepan and gently heat until the sugar has completely dissolved (avoid bringing it to the boil at this stage).
  3. Once the sugar has dissolved increase the heat and bring to the boil to form a syrup, then pour over the chocolate. Leave for a few minutes while the chocolate melts, then stir everything (chocolate, olive oil, sugar, espresso) together to form a smooth, glossy liquid. Set aside to cool to room temperature, then stir in the egg yolks.
  4. Place the egg whites in a large bowl with the salt (or bowl of a stand mixer) and whisk to stiff peaks. Carefully fold the whites into the chocolate mixture in two batches using a large metal spoon, then scrape the mixture into the prepared cake tin (make sure you don’t scrape from a height or you’ll knock out some of that air you’ve just put into the whites!).
  5. Bake for 50-60 minutes, then leave to cool completely in the tin. When cooling, the top of the cake will dip and crack- don’t worry, it’s a smooth, flourless torte, not a sponge cake! Once cool, slice up and finish with a dusting of cocoa powder. Serve with creme fraiche, if you like.


Cherry, Chocolate and Tahini Parfait with Sesame Crumble

Chocolate, Cooking, Uncategorized

We’ve been enjoying a very unusual bout of beautiful hot weather here in the UK, so today’s recipe is an iced one. I served this up for my boyfriends birthday (after he broke the news to me that he didn’t want a cake- yeah, sacrilege I know) and although it requires a little more effort to make than a simple sponge, the creamy, indulgent and slightly bittersweet (thanks to the tahini and very dark chocolate) result is well worth it.

Ingredients

For the chocolate ripple

  • 150g bitter dark chocolate
  • 150ml double cream
  • pinch sea salt

For the cherry compote

  • 200g fresh cherries (de-stoned)
  • 3tbsp honey or caster sugar
  • Zest and juice of 1 orange

For the parfait base

  • 4 eggs
  • 75g caster sugar
  • 125ml whole milk
  • 250ml double cream
  • 150g tahini

For the tahini crumble

  • 25g tahini
  • 25g demerara sugar
  • 25g butter, cubed
  • 100g plain flour
  • 1tbsp black sesame seeds

Method

  1. Start by making the chocolate ganache for the ripple. To do this simply place the chocolate, salt and cream in a heatproof bowl and set over a pan of simmering water (don’t allow the water to touch the bottom of the bowl). Stir occasionally until it melts together and forms a smooth ganache. Set aside to cool.
  2. Now prepare the cherry compote. Put the cherries, honey (or sugar), orange zest and juice in a saucepan and gently heat, stirring occasionally, until it reaches a sticky compote consistency (5-10 minutes). Transfer to a bowl and leave to cool.
  3. Now it’s time to make the parfait base. Line a loaf tin with 2 layers of cling film, leaving an overhang on all sides.
  4. Separate the eggs. Put the yolks in a large bowl along with the sugar and whisk until pale, meanwhile, heat the milk until just boiling in a saucepan. Remove the milk from the heat and pour into the egg yolks, then stir together until smooth. Return the mix to a clean pan and gently heat, stirring constantly. After a few minutes, the mix will start to thicken- once it coats the back of the spoon set aside and cool to room temperature.
  5. Once the ganache, compote and custard have cooled to room temperature, whisk the double cream to soft peaks. In a separate bowl whisk the egg whites to medium peaks. Stir the tahini into the egg yolk mixture. Fold the double cream into the egg yolk/ tahini with a large metal spoon, then do the same with the egg whites, retaining as much air as possible. Ripple through 2/3 of the chocolate ganache and 2/3 of the cherry compote.
  6. Spoon the remaining chocolate ganache and cherry compote into the bottom of the prepared tin, then spoon in the parfait mix. Cover with cling film and freeze for at least 4 hours.
  7. While the parfait is freezing, make the sesame crumble. Preheat the oven to 180c. Rub together the butter and flour until they resemble breadcrumbs. Stir through the sugar and tahini, then tip onto a lined baking tray- bake for 10 minutes then check, shake and return to the oven to 10 more minutes, or until the crumble is golden brown. Stir through the sesame seeds and set aside to cool.
  8. Take the parfait out of the oven 10 minutes before you’d like to serve it to allow it to soften slightly. Sprinkle on the sesame crumble and finish with some fresh cherries.

Enjoy!

Roast Peaches with Coconut Crumble, Blackberry Compote and Lime (VG)

Cooking

This vibrant dish works well if you’re feeling a boujee brunch, but would also make for a delicious, light summer dessert; it’s a real celebration of summer produce and the contrast of flavours, textures and colours mean it’s a guaranteed crowd pleaser (plus it’s vegan!).

Ingredients (serves 6)

For the peaches

  • 6 ripe peaches
  • 1tsp ground cinnamon
  • 1tsp ground cardamom
  • 2tbsp coconut nectar (or honey/ maple)
  • 100ml dessert wine (optional)

For the blackberry compote

  • 300g fresh blackberries
  • juice 1 lime
  • 2tbsp coconut nectar (or honey/ maple)

For the coconut crumble

  • 75g rolled oats
  • 3tbsp melted coconut oil
  • 2tbsp coconut nectar (or honey/ maple)
  • 1tsp ground cinnamon
  • 50g roughly chopped almonds
  • 50g flaked coconut

Other

  • zest 2 limes
  • 500ml coconut yoghurt

Method

  1. Preheat the oven to 180c. Line 1 baking tray and 1 high sided baking dish with greaseproof paper.
  2. Half the peaches and remove the stones, then place them in the baking dish, cut side up. In a small bowl, mix together the ground cardamom, ground cinnamon and coconut nectar. Drizzle all over the peaches (along with the dessert wine, if using).
  3. In a mixing bowl, stir together the rolled oats, coconut oil, coconut nectar, ground cinnamon and chopped almonds. Tip this mixture onto the baking tray and spread out.
  4. Pop both trays in the oven and roast the peaches for 20-25 minutes (or until very tender and sticky). Check the coconut crumble after 10 minutes and turn to prevent burning. Once the crumble starts crisping up and reaches a golden colour, add in the coconut flakes and cook for a further 5 minutes. When the peaches and crumble are ready, just leave them to cool while you make the blackberry compote.
  5. For the compote, simply place the blackberries, coconut nectar and lime juice in a saucepan and cook gently (stirring occasionally) until it reaches a loose jam-like consistency. Set aside to cool.
  6. To assemble the dish, start with the coconut yoghurt in the base of the bowl and ripple through some compote, then top with two peach halves, a generous helping of coconut crumble and a sprinkle of fresh lime zest.

Enjoy!

Gooseberry and Lemon Cake with Elderflower Mascarpone

Cakes, Uncategorized

Light, buttery sponge flavoured with lemon, tart pockets of soft, juicy gooseberries, and a generous swirl of elderflower mascarpone make up this simple summer cake and ode to the British countryside.

Ingredients

  • 225g butter, softened
  • 225g caster sugar
  • zest 2 lemons
  • 1tsp vanilla extract
  • 4 eggs
  • 225g self raising flour
  • 75g ground almonds
  • 1tsp baking powder
  • 250g gooseberries (blueberries, blackberries or raspberries would also work well)
  • 200g mascarpone
  • 3tbsp elderflower cordial
  • 1tbsp honey

Method

  1. Preheat the oven to 180c. Grease and line a 9 inch cake tin.
  2. Place the butter, sugar, lemon zest and vanilla in a large bowl (or bowl of a stand mixer with paddle attachment) and beat until very light, pale and fluffy. Add the eggs, one at a time, beating well between each addition. Add a little flour if you’re worried about curdling.
  3. Once all the eggs are well incorporated, fold in the flour, ground almonds and baking powder. Trim the tops and stalks of the gooseberries then fold them through the cake batter.
  4. Scrape the cake batter into the prepared tin and level off the top. Bake for 35-40 minutes or until the cake is springy and golden (or until a skewer comes out clean when inserted). Once baked, leave the cake to cool completely in the tin.
  5. Meanwhile, whisk together the mascarpone, elderflower and honey. When the cake is cool, swirl the mascarpone over the cake and decorate with fresh flowers.

Enjoy!

Ricotta, Raspberry and Peach Cheesecake Bars

Cooking

With a light baked ricotta filling studded with fresh raspberries, crunchy almond-oat base and griddled peach topping, these cheesecake bars pay homage to 90s peach melba, and make for the perfect summer dessert.

Ingredients (makes 12 bars)

For the base

  • 150g digestives
  • 2tsp demerara sugar
  • 1tsp cinnamon
  • 50g rolled oats
  • 50g almonds
  • 140g unsalted butter, melted

For the filling

  • 500g ricotta
  • 125g golden caster sugar
  • 30g corn flour
  • 2 eggs, plus 1 egg yolk
  • 1tsp vanilla extract
  • 100g full fat greek yoghurt
  • 200g raspberries

For the topping

  • 2 peaches, sliced
  • few extra raspberries
  • decorative herbs, almonds, edible flowers (optional)

Method

  1. Preheat the oven to 160c and grease and line a 22x22cm baking tin. Place the digestives, demerara sugar and cinnamon in a food processor and blitz into crumbs. Add in the melted butter, almonds and oats and very briefly blitz again to combine- don’t over mix here, you want a nice crunchy base. Tip this mixture into the prepared tin and pack down with the back of a spoon. Chill for 15 minutes then bake for 10 minutes to set. Once baked set aside for later.
  2. Now make the filling. To do this simply whisk together the ricotta, golden caster sugar, corn flour and vanilla until very smooth, then add in the egg and egg yolk one at a time, whisking between each addition to bring the mixture together again. Lastly, whisk in the yoghurt. Roughly break up the raspberries with the back of a fork and tip them in. Ripple them through then scrape all the filling onto the base. Place the tin into another larger roasting tin and fill with water (about half way up the sides of your baking tin). Bake for 1 hour or until the cheesecake is set but still has a uniform wobble.
  3. Once baked, leave the cheesecake to cool completely then chill for 4-6 hours to set.
  4. While the cheesecake is chilling, lightly oil a griddle pan and slice the peaches into wedges. Heat the pan and char the slices on each side, then leave to cool.
  5. When your cheesecake has set, just remove it from the tin, slice into 12 bars (use a hot knife for this and you will get a cleaner result) and top with the griddled peach slices, extra raspberries and nuts.

Enjoy!

Rose Labneh with Sumac Baked Figs

Cooking

I know I’m getting a few months ahead of myself by posting a fig recipe (usually they come into season around late July), but when I saw some particularly plump, dark looking figs in my local fresh produce shop, I couldn’t help but cook them up with some delicious accompaniments. You could recreate this super simple recipe using any seasonal fruit- rhubarb, greengage or peach would work particularly well.

Ingredients (serves 6)

  • 400ml Greek yoghurt
  • 3tbsp runny honey
  • 2tsp rose water
  • 10-12 ripe figs
  • 1-2tsp sumac
  • Few sprigs thyme
  • 1 pomegranate, seeds only
  • 75g almonds

Method

  1. Place the yoghurt, 1tbsp of the honey and the rose water in a bowl. Mix together then transfer to a muslin cloth and tie up the corners. Sit this in a sieve over a bowl for at least 24 hours (refrigerated).
  2. After 24 hours the liquid will have drained from the yoghurt, leaving you with a thick, smooth labneh.
  3. Once the labneh is ready, prepare the other elements of your dessert. Preheat the oven to 200c and line a high sided baking tray with greaseproof paper. Slice the figs into either halves or quarters (depending on your visual preference!) and spread out on the tray (cut side up). Drizzle with the remaining 2tbsp honey and sprinkle over the sumac. Roughly break the thyme into the tray too.
  4. Roast the figs for 20-25 minutes until very tender and sticky. While the figs are cooking, toast the almonds in a dry frying pan until lightly coloured, then roughly chop.
  5. To serve, spread a generous spoonful of the labneh onto your dessert plates and arrange some fig pieces on top. Sprinkle over the almonds and pomegranate seeds and lastly, garnish with some thyme, if you like.

Enjoy!

Blood Orange and Ginger Celebration Cake

Cakes

This ode to the fruits of winter will brighten any grey day with it’s sticky layers of spiced sponge, fresh ginger mascarpone cream and smooth blood orange curd. Decorate with pomegranate seeds, candied blood orange slices and chopped pistachios for a welcome explosion of colour during these colder months.

Ingredients

For the cake

  • 250g golden syrup
  • 3 tbsp ginger syrup
  • 190g butter
  • 3-4 lumps stem ginger, diced
  • 175g dark brown soft sugar
  • zest 1 orange
  • 375g self-raising flour
  • 2tsp ground ginger
  • 1tsp ground cinnamon
  • 1 1/2 tsp bicarbonate of soda
  • a pinch of salt
  • 3 eggs
  • 260ml milk

For the blood orange curd

  • juice and zest 2 blood oranges
  • juice and zest 1 lemon
  • 2 eggs
  • 2 egg yolks
  • 100g caster sugar
  • 100g butter, cubed

For the ginger mascarpone cream

  • 1tbsp icing sugar
  • 1tbsp ginger syrup
  • 300ml double cream
  • 250g mascarpone

Garnish ideas (optional)

  • pomegranate seeds
  • chopped pistachios
  • candied orange slices
  • shards of tuile or ginger biscuit

Method

  1. Start off with the ginger cake. Grease and line two 7 inch cake tins and preheat the oven to 180c.
  2. Place the golden syrup, ginger syrup, butter, diced stem ginger, dark brown sugar and orange zest in a saucepan and melt over a low/medium heat. Once the ingredients are melted bring to the boil and leave to bubble for about a minute, then set aside to cool a little.
  3. Meanwhile, in a large bowl stir together the flour, ginger, cinnamon, bicarbonate of soda and salt. Make a large well in the centre and tip in the melted butter mixture. Whisk the wet and dry ingredients together until smooth and flour lump free. In a jug whisk the eggs and milk together with a fork and add those into the mixing bowl. Whisk once more to combine then split the batter between the prepared cake tins.
  4. Bake for 30-35 minutes or until a skewer comes out clean when inserted.
  5. While the cakes are baking make the blood orange curd. To do this simply place the blood orange zest and juice, lemon zest and juice, eggs and egg yolks and caster sugar into a heatproof bowl. Whisk together to combine then set over a pan of simmering water (without the water touching the bowl). Add the butter cubes one at a time, constantly whisking. Once all the butter has been added and is melted, continue to whisk until the curd has thickened to a coating consistency (this will take between 5-10 minutes). Once the curd is ready, set aside to cool in a clean bowl with cling film flat across the surface (this will prevent a skin from forming).
  6. When the cakes are ready leave them to cool completely in the tins. Once cool, even the tops off if necessary then slice each horizontally (so you are left with 4 even cake layers).
  7. Now make the mascarpone cream; tip the double cream, icing sugar, ginger syrup and mascarpone into a bowl (or bowl of a stand mixer) and whisk until thickened and smooth.
  8. Once all your components are cool it’s time to assemble the cake. Place one layer on your chosen serving plate and pipe dots of mascarpone cream around the edge then fill the centre with blood orange curd. Repeat until you’ve used up the cake layers and decorate the top as desired.


Enjoy!