Melting Chocolate and Clementine Snowflakes with Salted Cardamom Honeycomb

Uncategorized

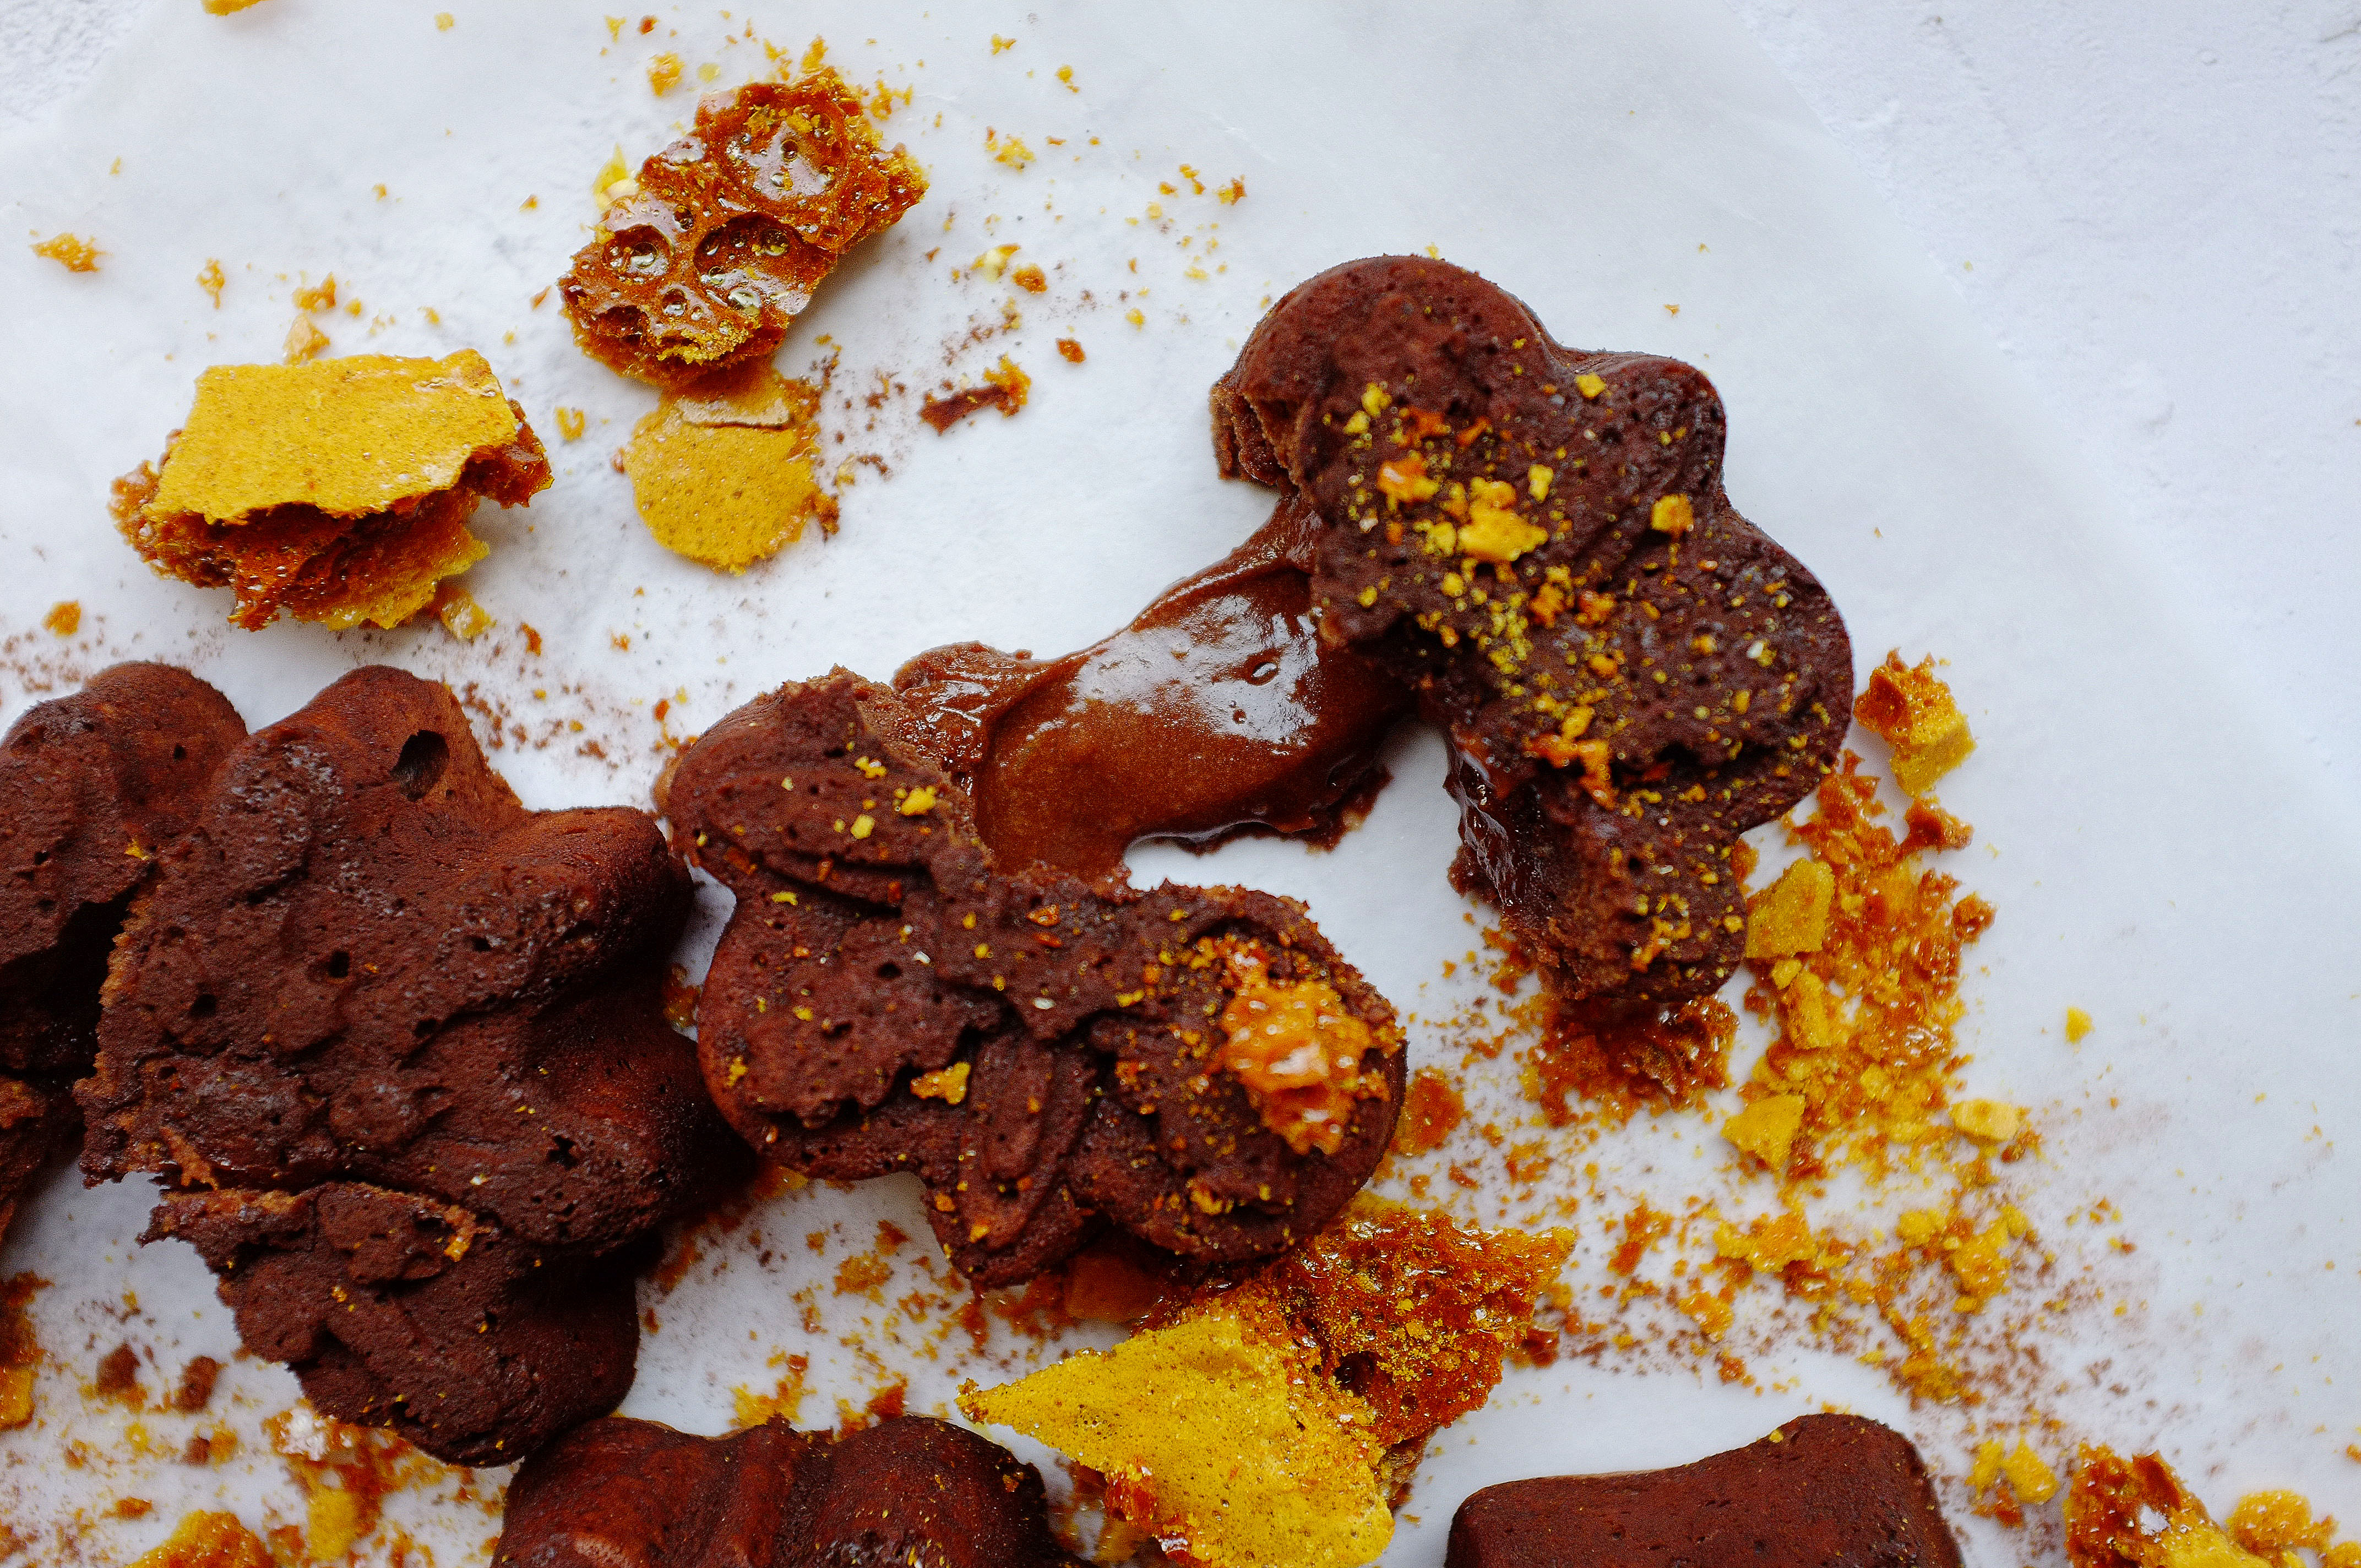
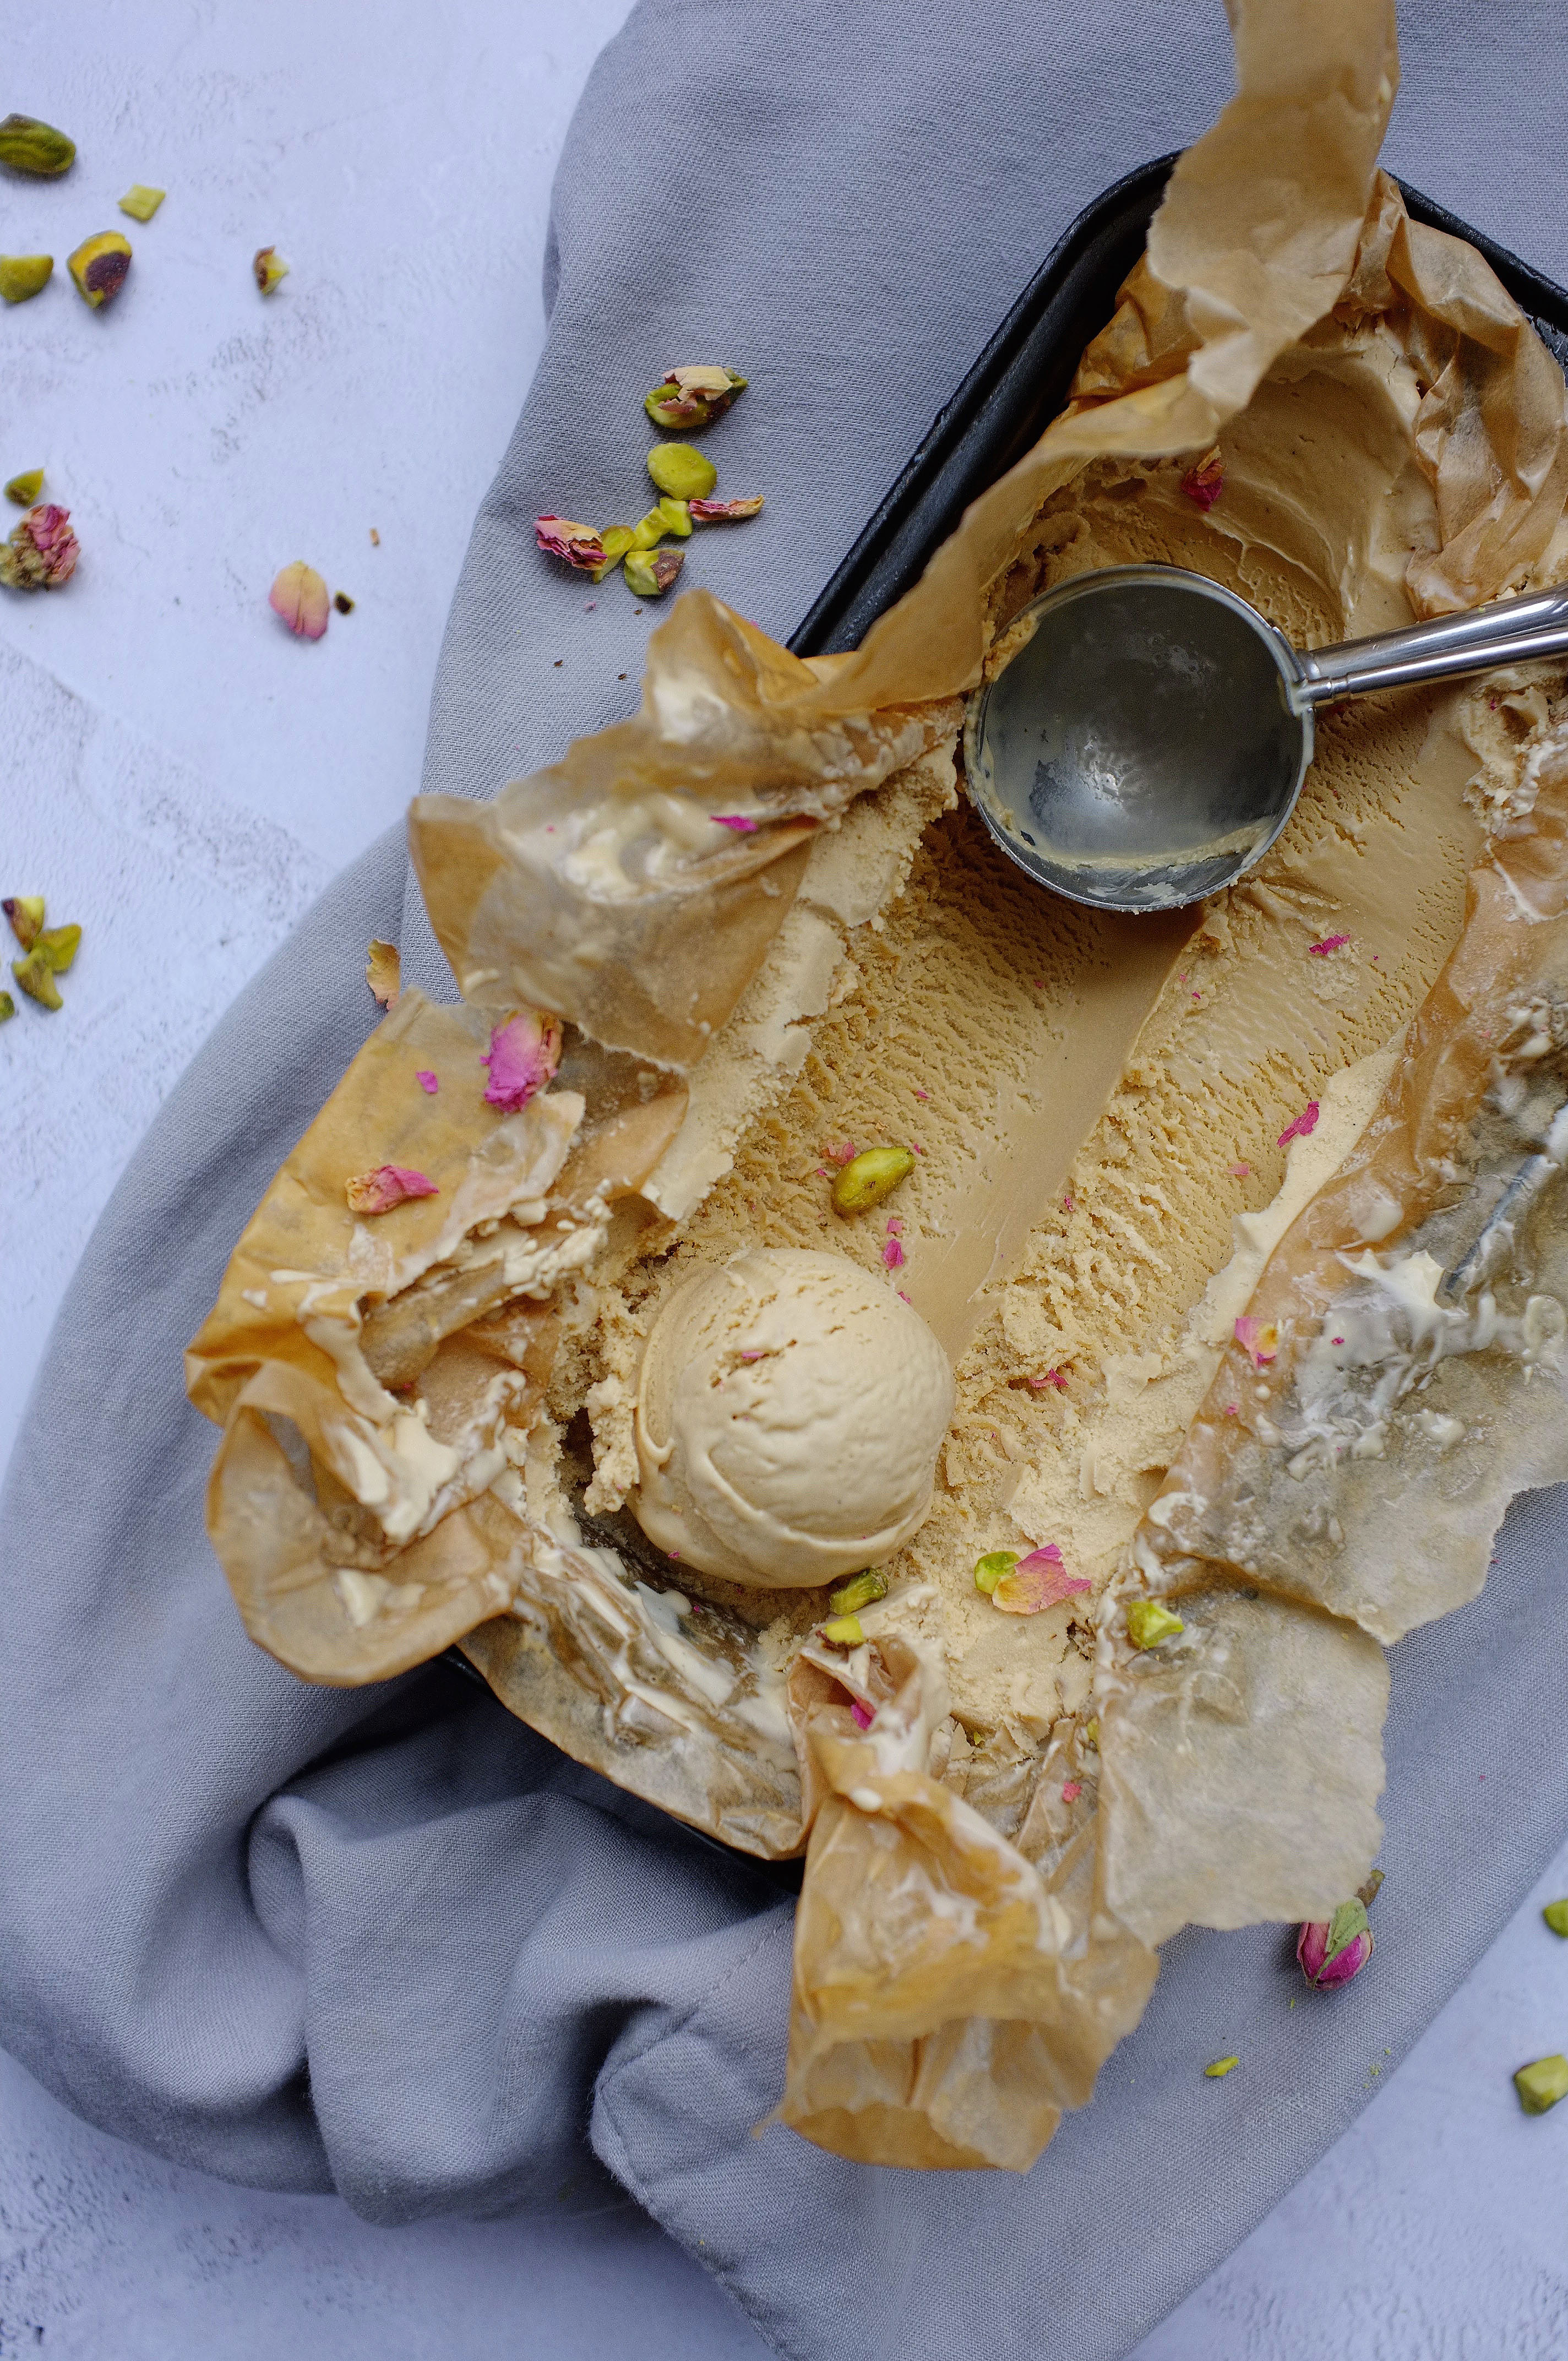
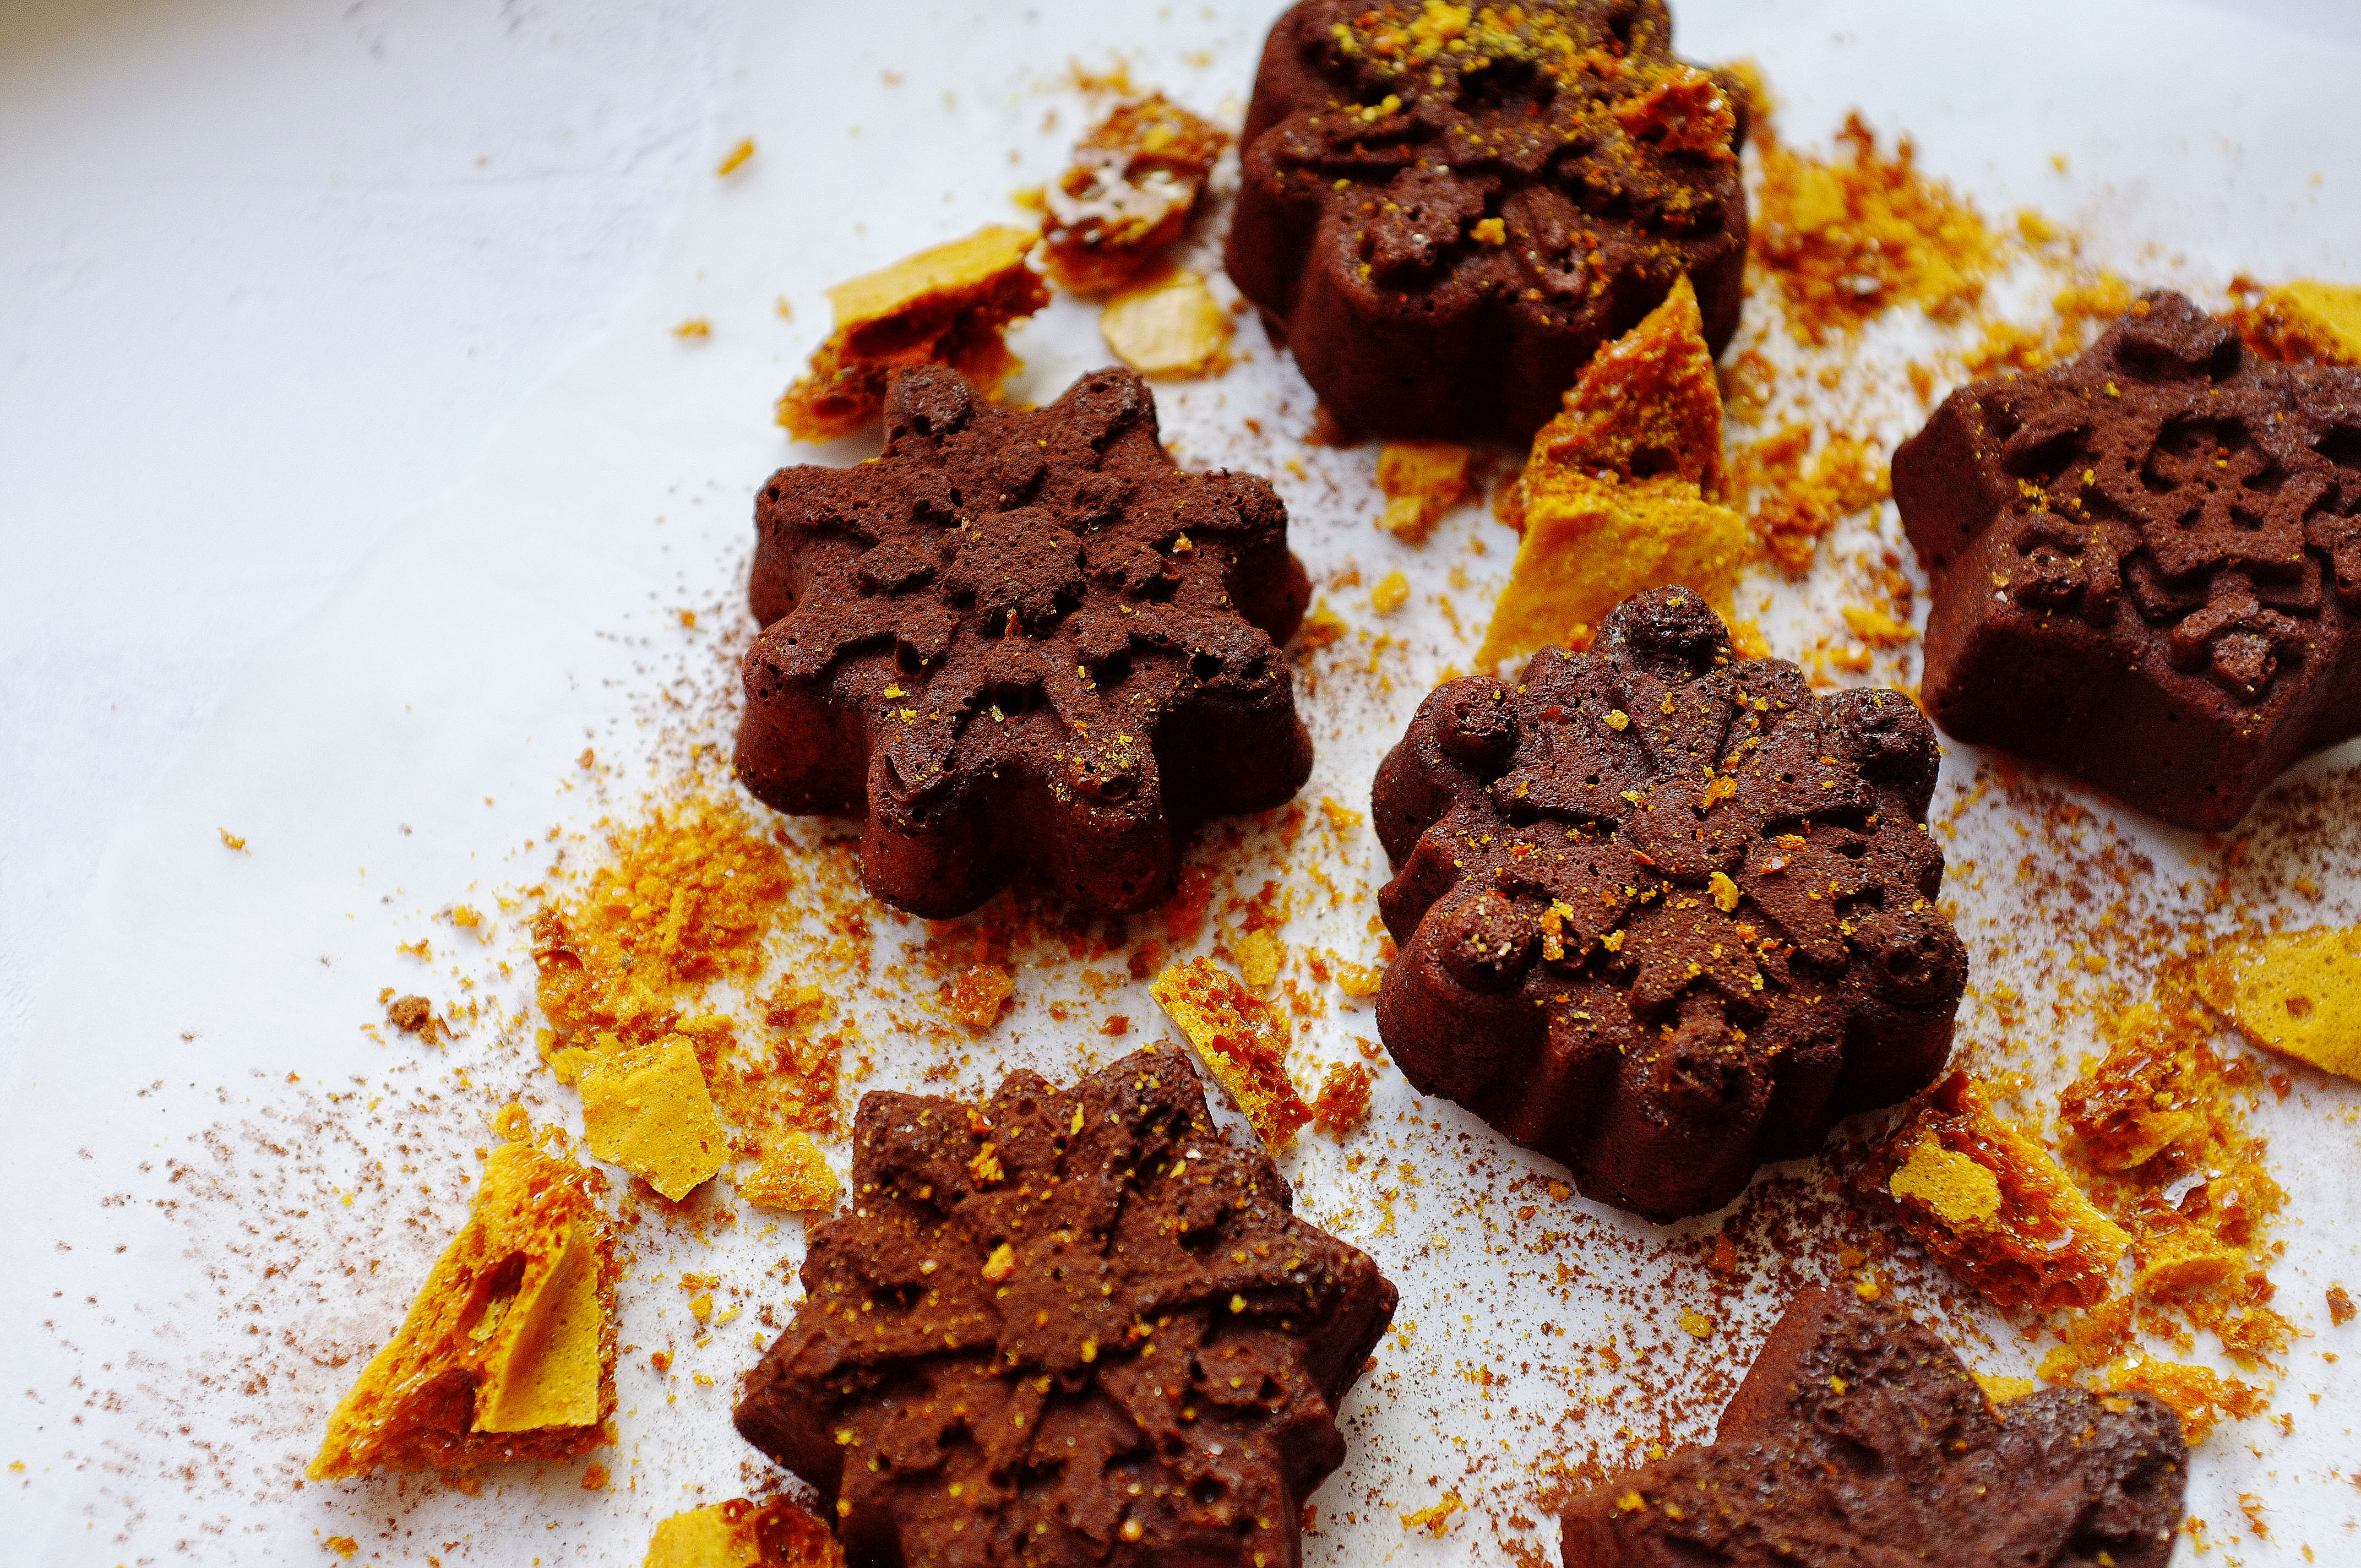
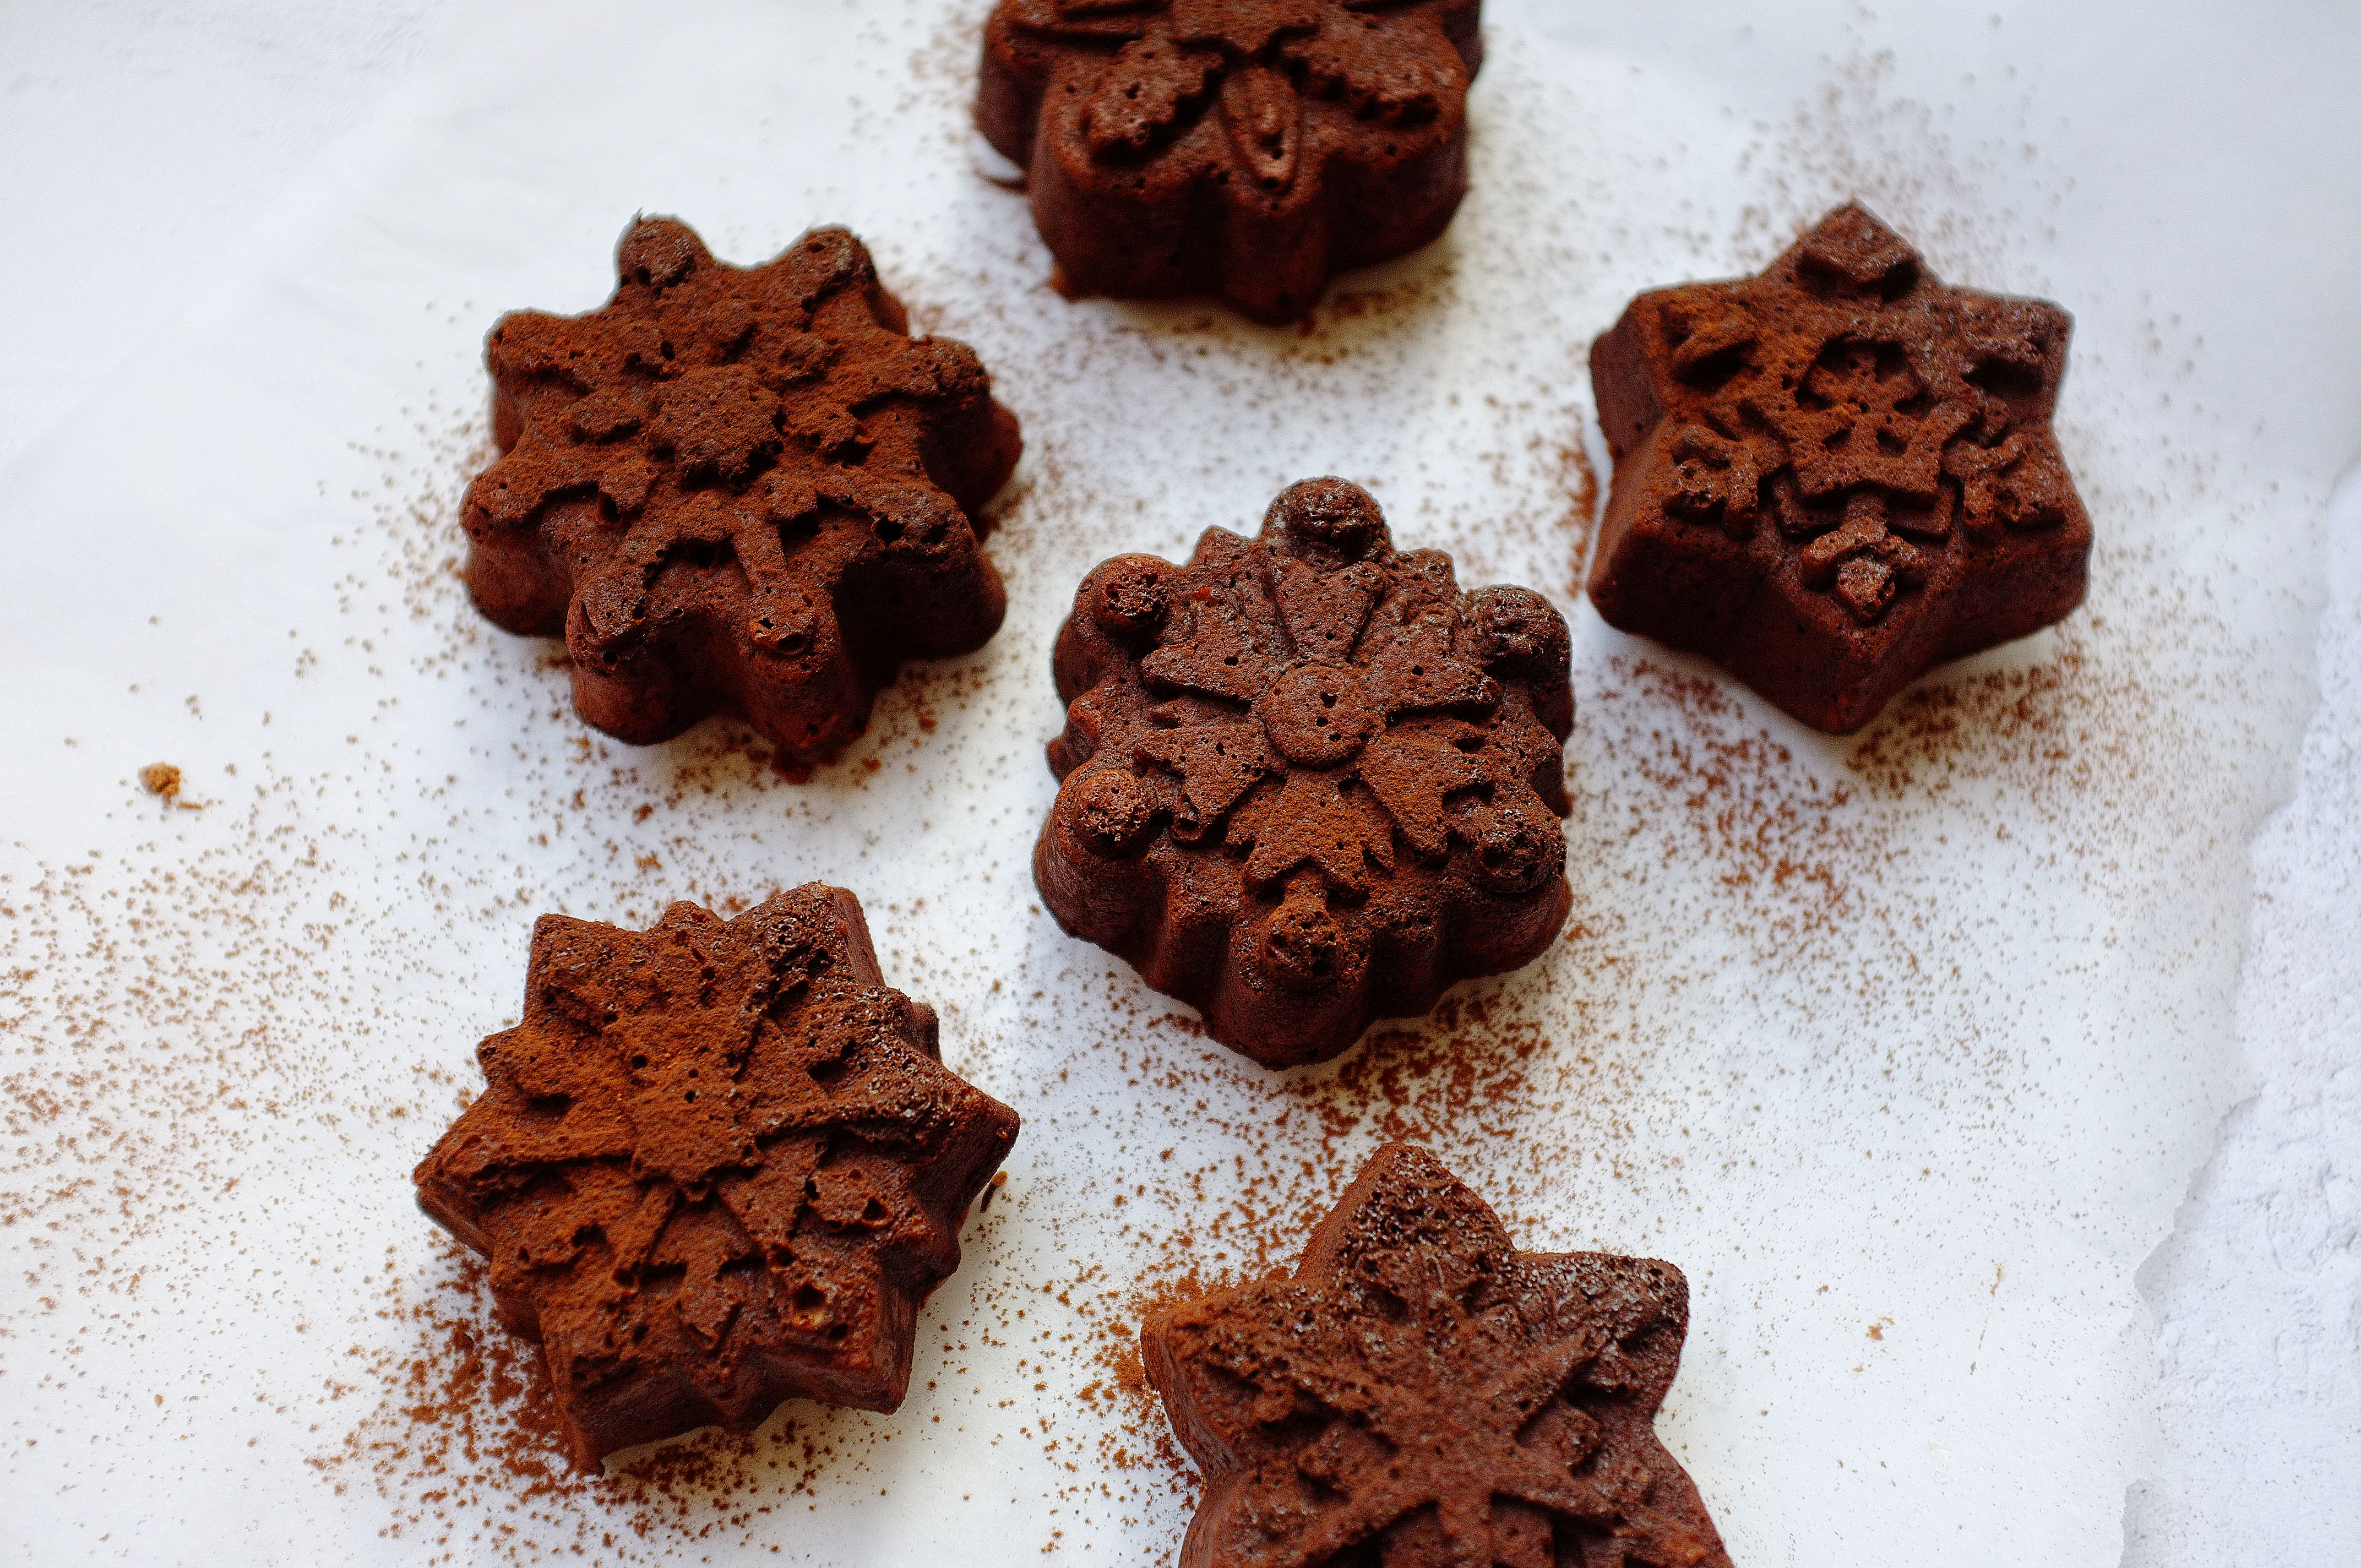
I’m not usually one for novelty shapes but when Nordic Ware sent me a six hole snowflake baking tin I couldn’t resist (it is Christmas after all). Chocolate fondants never fail to make me happy so I thought a simple festive twist on the classic melt-in-the-middle puddings was in order; the snowflakes themselves taste predominantly of dark chocolate, spiked with a little clementine zest, but the honeycomb really makes for a well rounded dessert full of flavour and texture. Add ice cream too for optimum indulgence.

Ingredients

Makes 6-8 puddings

  • 1-2tbsp cocoa powder, for dusting
  • 140g 70% dark chocolate
  • 140g butter, plus extra for greasing
  • 140g golden caster sugar
  • 3 eggs, 2 egg yolks
  • 125g plain flour
  • Zest 3 clementines

For the honeycomb

  • 100g caster sugar
  • 2 1/2 tbsp golden syrup
  • 1tsp ground cardamom
  • pinch salt
  • 1tsp bicarbonate of soda

Method

  1. Brush the moulds inside with melted butter then coat in cocoa powder, tap out any excess and set aside.
  2. Melt the chocolate and butter in a heatproof bowl set over a pan of simmering water, then leave to cool a little.
  3. Place the eggs, yolks, sugar and clementine zest in a large bowl or bowl of a stand mixer with whisk attachment and whisk until pale and thick.
  4. Add the flour and mix together briefly, then add the chocolate mix, a quarter at a time. Mix well between each addition. Split the mix between the moulds then chill for 15 minutes. Preheat the oven to 180c.
  5. Meanwhile, make the honeycomb. To do this line a medium high sided baking tray with baking paper then place the sugar, syrup, salt and ground cardamom in a small saucepan. Heat until the sugar has dissolved and you have a golden, slightly simmering liquid, then add the bicarbonate of soda, remove from the heat and mix (just a few seconds, until the bicarbonate of soda has disappeared.). It will rise up quickly and go foamy. Tip into the prepared tin and leave to set hard.
  6. Take the puddings from the fridge and bake for 9-11 minutes for the perfect saucy middle. Break up the honeycomb and serve a few shards with each pudding.


Advertisement

Cherry Molasses, Pistachio and White Chocolate Buns

Uncategorized

Cherry, super-sweet white chocolate, earthy pistachio; a pretty fool proof combination of flavours which marry together beautifully in these enriched sweet buns. I’ve added Arabica’s Cherry Molasses which they kindly gifted to me a couple of weeks back, and it brings a real tang to the overall flavour- delicious! I couldn’t resist adding cardamom to these as well; not only is it my favourite spice but it pairs really well with all three base flavours.

One thing to note before you embark on this recipe: while possible to make these by hand, it’s much easier with the help of a stand mixer and dough hook.

Ingredients

For the dough

  • 150ml milk
  • 140g room temperature unsalted butter
  • 100g plain flour
  • 150g strong white bread flour
  • ½ tsp salt
  • 50g caster sugar
  • 1 sachet fast action dried yeast (7g)
  • 1 egg

For the filling

  • 4tbsp cherry molasses
  • 50g unsalted butter
  • 60g soft light brown sugar
  • 100g white chocolate 
  • 1 1/2 tbsp ground cardamom
  • 150g pistachios, ground
  • Pinch salt

For the topping

  • 1 egg, beaten
  • Extra handful chopped pistachios (optional)

Method

  1. Place the milk and 40g of the butter in a saucepan and heat gently until the butter melts. Set aside to cool a little.
  2. Meanwhile mix the flours, salt, sugar and yeast together in the bowl of a stand mixer with dough hook attachment.
  3. Make a well in the middle of the dry ingredients and add the warm milk mixture and the egg. Mix briefly with a wooden spoon to combine then switch on the stand mixer and beat at a medium speed for about 10 minutes. Once the dough seems smooth, increase the speed and add the remaining butter in cubes, waiting for each one to be incorporated before adding the next. You should be left with an elastic, very soft dough. Transfer to a lightly oiled bowl and cover with oiled cling film. Leave to prove for 1 hour, then chill for 45 minutes (this controls the rise and allows the dough to firm up a little).
  4. For the filling, roughly chop the white chocolate and tip into a bowl. Place the butter, light brown sugar and ground cardamom in a saucepan and gently heat until the butter has melted and the sugar has almost all dissolved, then pour it over the white chocolate. Let it sit for a moment, then stir together. Set aside (don’t worry if it’s grainy).
  5. Roll the dough out into a large rectangle (about 30x50cm) and, making sure you’ve sat the dough landscape, cover 2/3 with the white chocolate mixture, leaving the right hand side bare. Sprinkle the pistachios on top and drizzle over the cherry molasses, then fold the uncovered dough over the top and the remaining left side on top of that, pressing down firmly to form another rectangle. Roll out to around 1.5 cm thick. 
  6. Using a sharp knife, slice the rectangle lengthways, into 2cm wide strips. Take each strip and twist it several times, then wind it around your fingers to form a bun shape, finally taking the end over and under to conceal it. Place each bun on a lined baking tray, leaving room for the second prove. Once all the buns are assembled, cover with a damp clean tea towel and leave to prove for 1 hour. 
  7. Preheat the oven to 170c (fan) and brush the proved buns with the beaten egg. Bake for 20-25 minutes or until cooked through and golden brown. Garnish with chopped pistachio and serve warm or cold (best enjoyed on the day or the day after, reheated to refresh).

Chai Ice Cream

Uncategorized

As the temperatures drop and the evenings draw in, I’m getting really into making ice cream… I know, such a maverick, what will I do next!? I jest, ice cream can be enjoyed all year round in my opinion, especially when you create flavours which feel Autumnal; this chai variety is a great example of that. It’s cold, of course, but the hint of black tea and hum of warming, peppery spice is really comforting, plus it pairs beautifully with hot puddings, rich chocolate desserts and baked fruit.

Ingredients

  • 600ml double cream
  • 600ml whole milk
  • 225g golden caster sugar
  • 5 black tea bags
  • 10 cardamom pods
  • 1 vanilla pod
  • 2 cinnamon sticks, split in two
  • 1 1/2 tsp black peppercorns, roughly crushed
  • 1tsp fennel seeds, roughly crushed
  • 2 inches fresh ginger, chopped
  • 6 egg yolks
  • pinch salt

Method

  1. Place the cream, milk and 100g of the caster sugar in a large saucepan along with the tea bags, spices, ginger and vanilla. Heat to scalding point (just before it boils) over a medium heat, stirring to ensure the sugar has dissolved, then set aside to cool to room temperature. Once cooled, chill for at least an hour or overnight to allow the flavours to develop.
  2. Drain the infused cream into a large clean saucepan and heat to scalding point once more. Meanwhile, place the egg yolks and remaining 125g caster sugar in a large bowl (or bowl of a stand mixer with whisk attachment) and whisk until pale and thick. Remove the cream mixture from the heat and allow to cool slightly for a few minutes, then pour gradually into the yolks, whisking constantly.
  3. Once the mixture is combined, return to a clean saucepan and set over a low/medium heat. Stir until it has thickened to a custard consistency  (do not be tempted to increase the heat or it will curdle) then leave to cool completely.
  4. Once cooled, churn the custard until thick and creamy (about 25 minutes) then scrape into a container, cover and chill for at least 4 hours.

Cardamom Carrot Cake with Honeyed Rose Cream and Figs

Cakes, Uncategorized

At last we approach fig season- one of my absolute favourite fruits, and so synonymous with Middle Eastern cuisine that it would be wrong to incorporate them into a bake which didn’t boast nuts, heady spices or sweet floral flavours; of course this cake contains all three, making it one of my favourite recipes I’ve posted on here to date. It’s not too sweet, nor is the icing too heavy, just a well balanced, flavoursome bake with flavours which work beautifully together. I hope you enjoy.

Ingredients

For the cakes

  • 100g chopped dried figs
  • zest and juice 1 orange
  • 2-3tbsp rose water
  • 250g butter, cubed
  • 200g caster sugar
  • 50g soft light brown sugar
  • 4 eggs
  • 400g grated carrot
  • 225g plain flour
  • 1tsp bicarbonate of soda
  • 2tsp baking powder
  • large pinch salt
  • 1 1/2 tsp cinnamon
  • 2 heaped tsp ground cardamom
  • 1tsp mixed spice
  • 100g pistachios, roughly chopped

For the icing

  • 300ml double cream
  • 200g cream cheese
  • 3tbsp honey
  • 2-3tbsp rose water

Optional

  • 50g chopped pistachios
  • 1tbsp dried rose petals
  • 4-5 figs

Method

  1. Preheat the oven to 180c. Grease and line two 7 inch cake tins.
  2. Roughly chop the figs and discard the stalks. Tip into a bowl and add the orange juice and rose water. Leave to soak until required.
  3. In a large bowl (or bowl of a stand mixer with paddle attachment) cream together the butter and both sugars until pale and thick. Add in the eggs one at a time, beating well between each addition (add a small amount of the flour with each egg to prevent curdling).
  4. Stir through the grated carrot and soaked figs (along with any juice the figs haven’t absorbed). Mix together the dry ingredients and pistachios and fold through the batter until no streaks of flour remain.
  5. Split the batter between the prepared tins and level off. Bake for 25-35 minutes or until a skewer comes out clean when inserted.
  6. Let the cakes sit in the tins for 10 minutes, then turn out onto a wire rack and leave to cool completely.
  7. Meanwhile, place the cream, cream cheese, honey and rose water in a large bowl (or bowl of a stand mixer with whisk attachment) and whisk until pipe-able. Adjust the levels of sweetness and rose flavour to taste.
  8. Once the cakes have cooled down, slice them in half horizontally, leaving you with 4  equal layers. Pile the rose and honey cream into a piping bag with round nozzle. Place the first layer onto a serving plate and pipe little mounds all over the surface, then top with the next layer. Repeat until all the cream mixture is used up, then sprinkle rose petals and pistachios over the top and arrange the figs in an attractive way, if using.

Coffee and Cardamom Cakes with Pistachio Praline

Cakes

Coffee cake is one of my all time favourites, but this spin on a classic is perhaps even better (I know, big claim). The cardamom hum in the sponge goes really well with the simple coffee buttercream, and the crunch of earthy pistachio praline rounds off the overall flavour and prevents it from being overly sweet. Make these for any occasion (you can fool people into thinking they’re fancy with the help of a piping bag and edible flowers) and they are sure to go down a storm.

Ingredients:

  • 200g softened butter
  • 200g soft brown sugar
  • 3 eggs
  • 200g self raising flour
  • pinch salt
  • 8 cardamom pods, emptied and ground
  • 3tbsp coffee granules mixed with 3tbsp boiling water
  • 3tbsp milk

For the buttercream:

  • 200g softened butter
  • 400g icing sugar
  • 2tbsp coffee granules mixed with 2tbsp boiling water

For the praline:

  • 100g pistachios
  • 100g caster sugar

Method:

  1. Preheat the oven to 170c. Grease and line a brownie tin (around 20x20cm).
  2. Cream together the butter and sugar until light and fluffy then add in the eggs one at a time, mixing well between each addition. Add the flour, salt and ground cardamom and fold in until well combined. Do the same with the coffee and milk.
  3. Once your straightforward batter is ready, spoon into the tin and level off. Bake for 30-35 minutes until well risen and a skewer comes out clean when inserted. Cool in the tin.
  4. While the cake is cooling, make the praline. Place the sugar and pistachios in a heavy bottom pan and allow the sugar to melt (don’t stir, just tip the pan to move the sugar around). Once it’s melted and golden, swirl the pan to coat the nuts in the caramel then tip onto some greaseproof paper and leave to set hard.
  5. Now make your buttercream. Beat the butter until light then gradually add the icing sugar, whisking until very light. Add in the coffee and whisk again to combine. Once it’s streak free and smooth, pile into a piping bag ready to decorate.
  6. Slice the cooled cake into nine squares (or larger/smaller pieces depending on your appetite!). Pipe the coffee buttercream on top in little kisses (or freestyle with rosettes/patterns using different nozzles). Break up the praline and roughly crush then sprinkle a generous helping on top of the buttercream.

Enjoy!