Miso Caramel Chocolate Fondants with Salted Cashew Crunch

Uncategorized

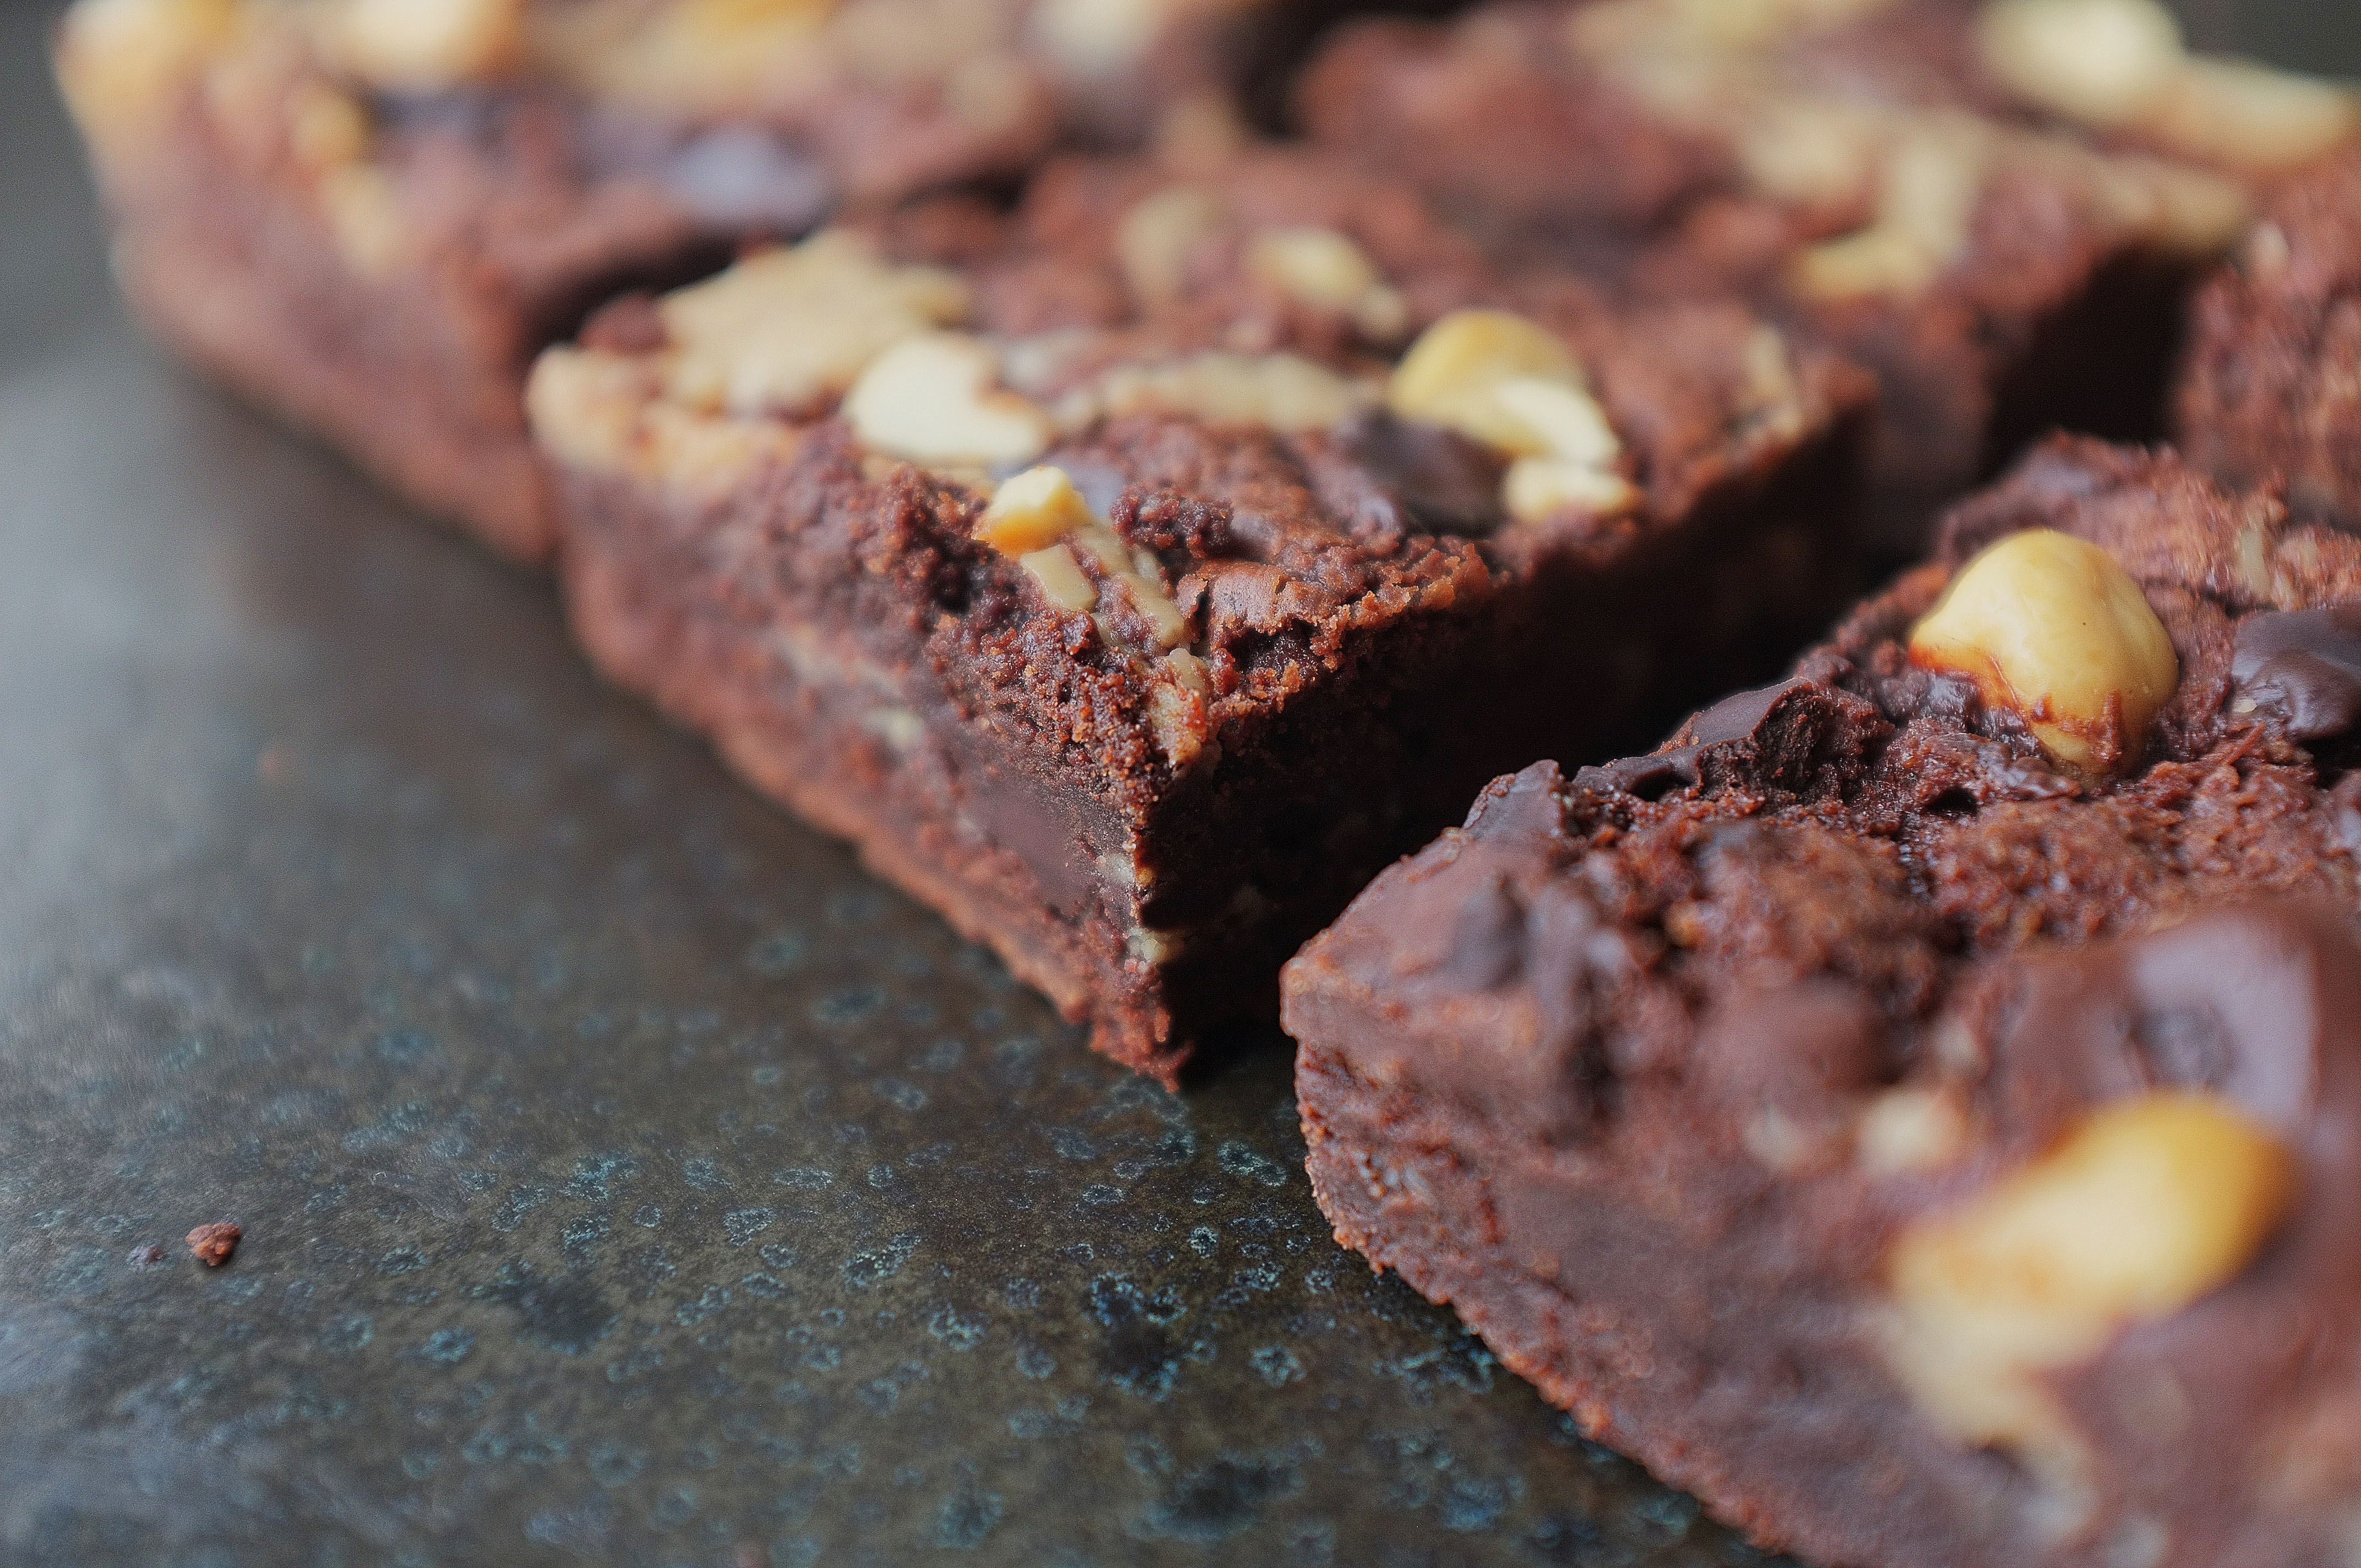
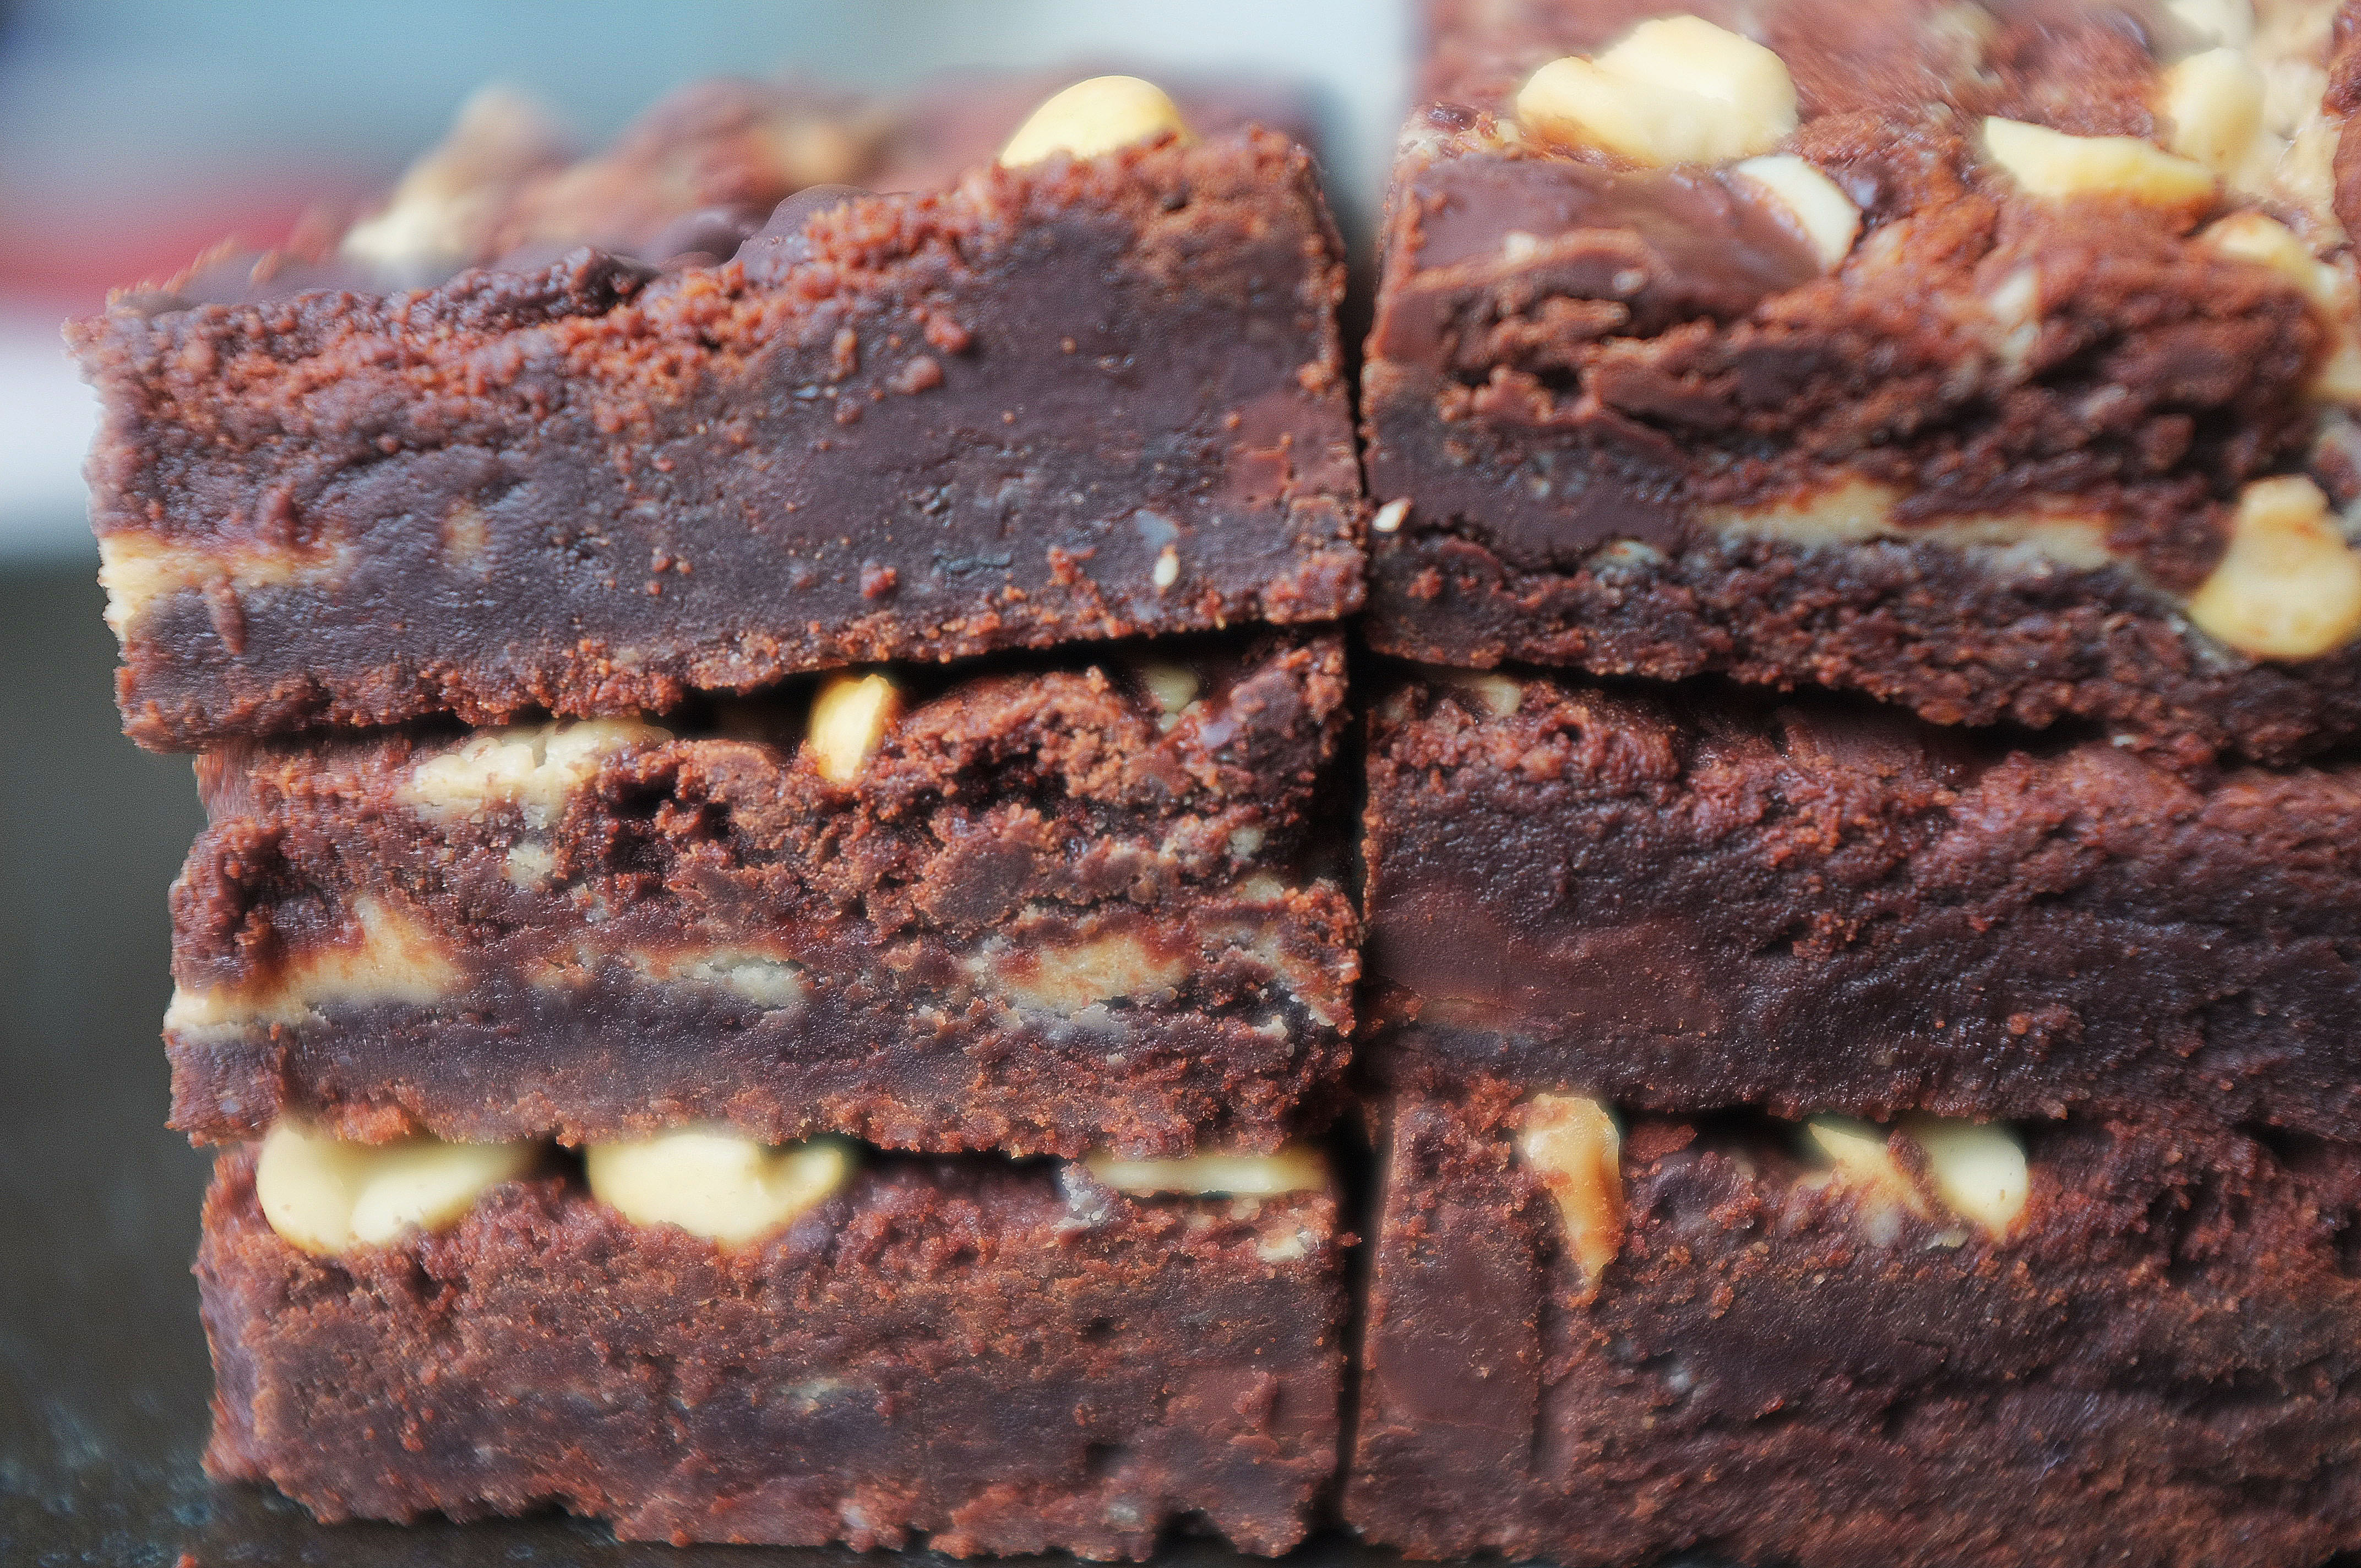
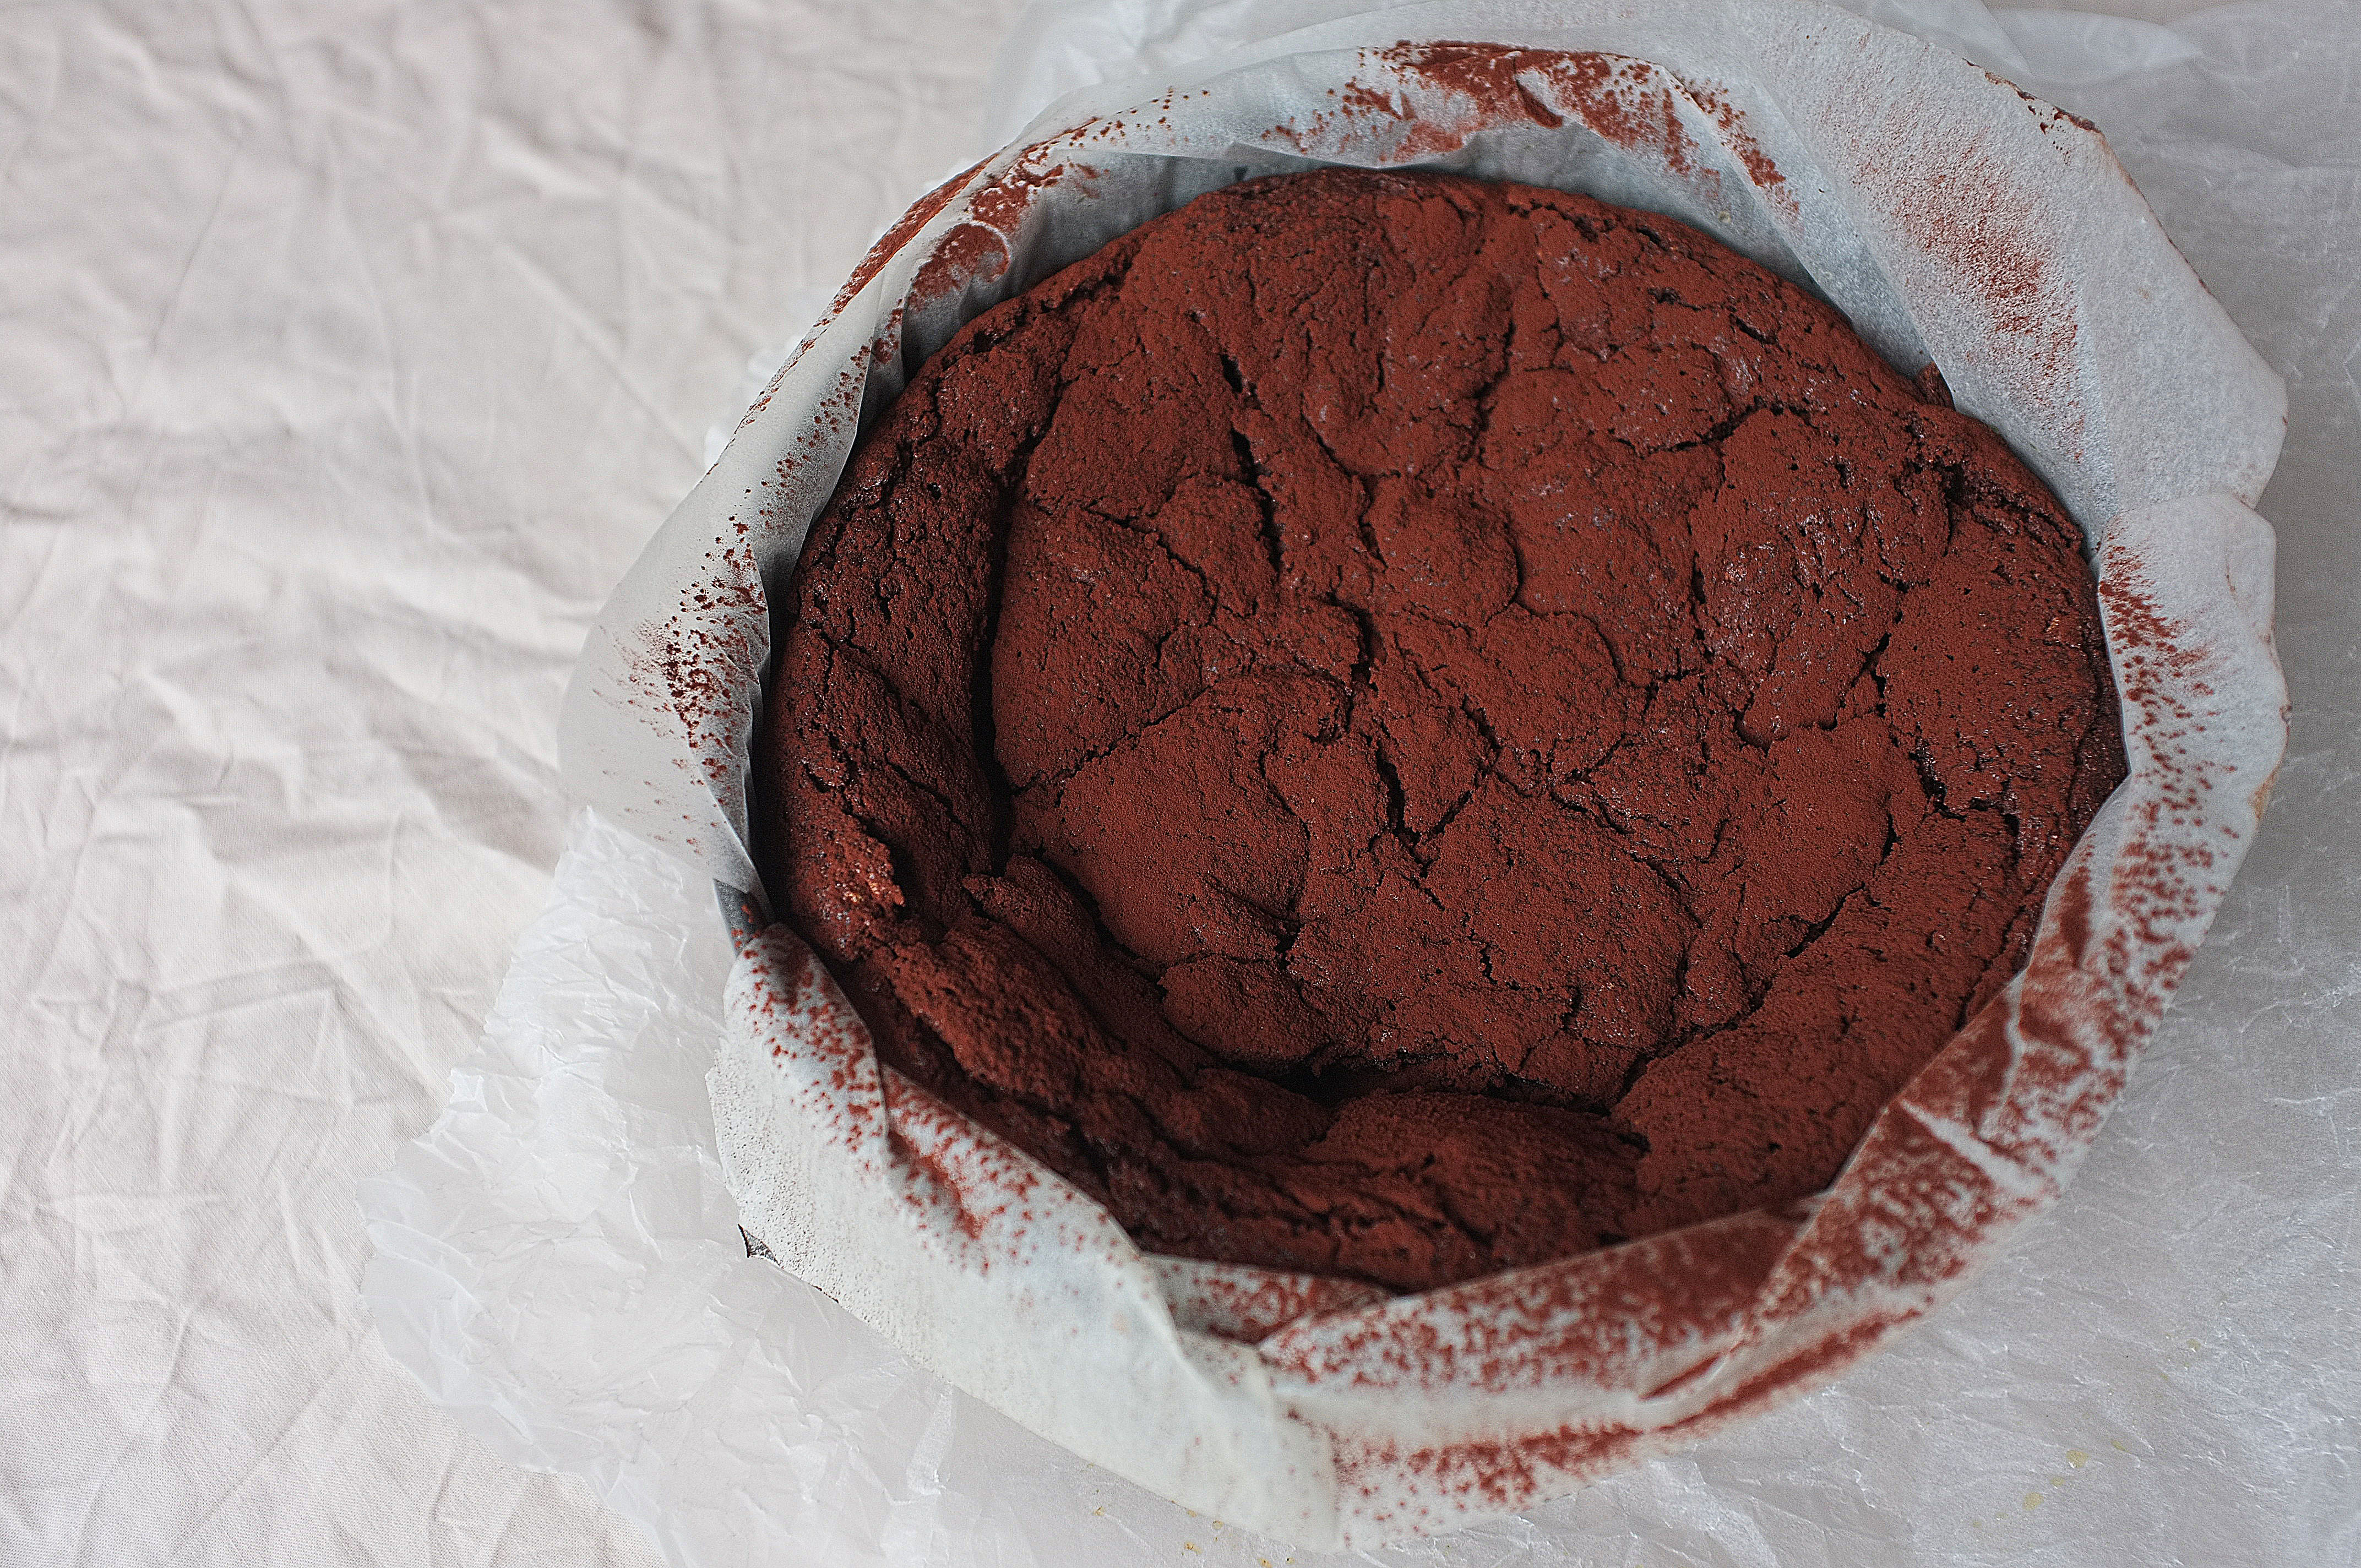
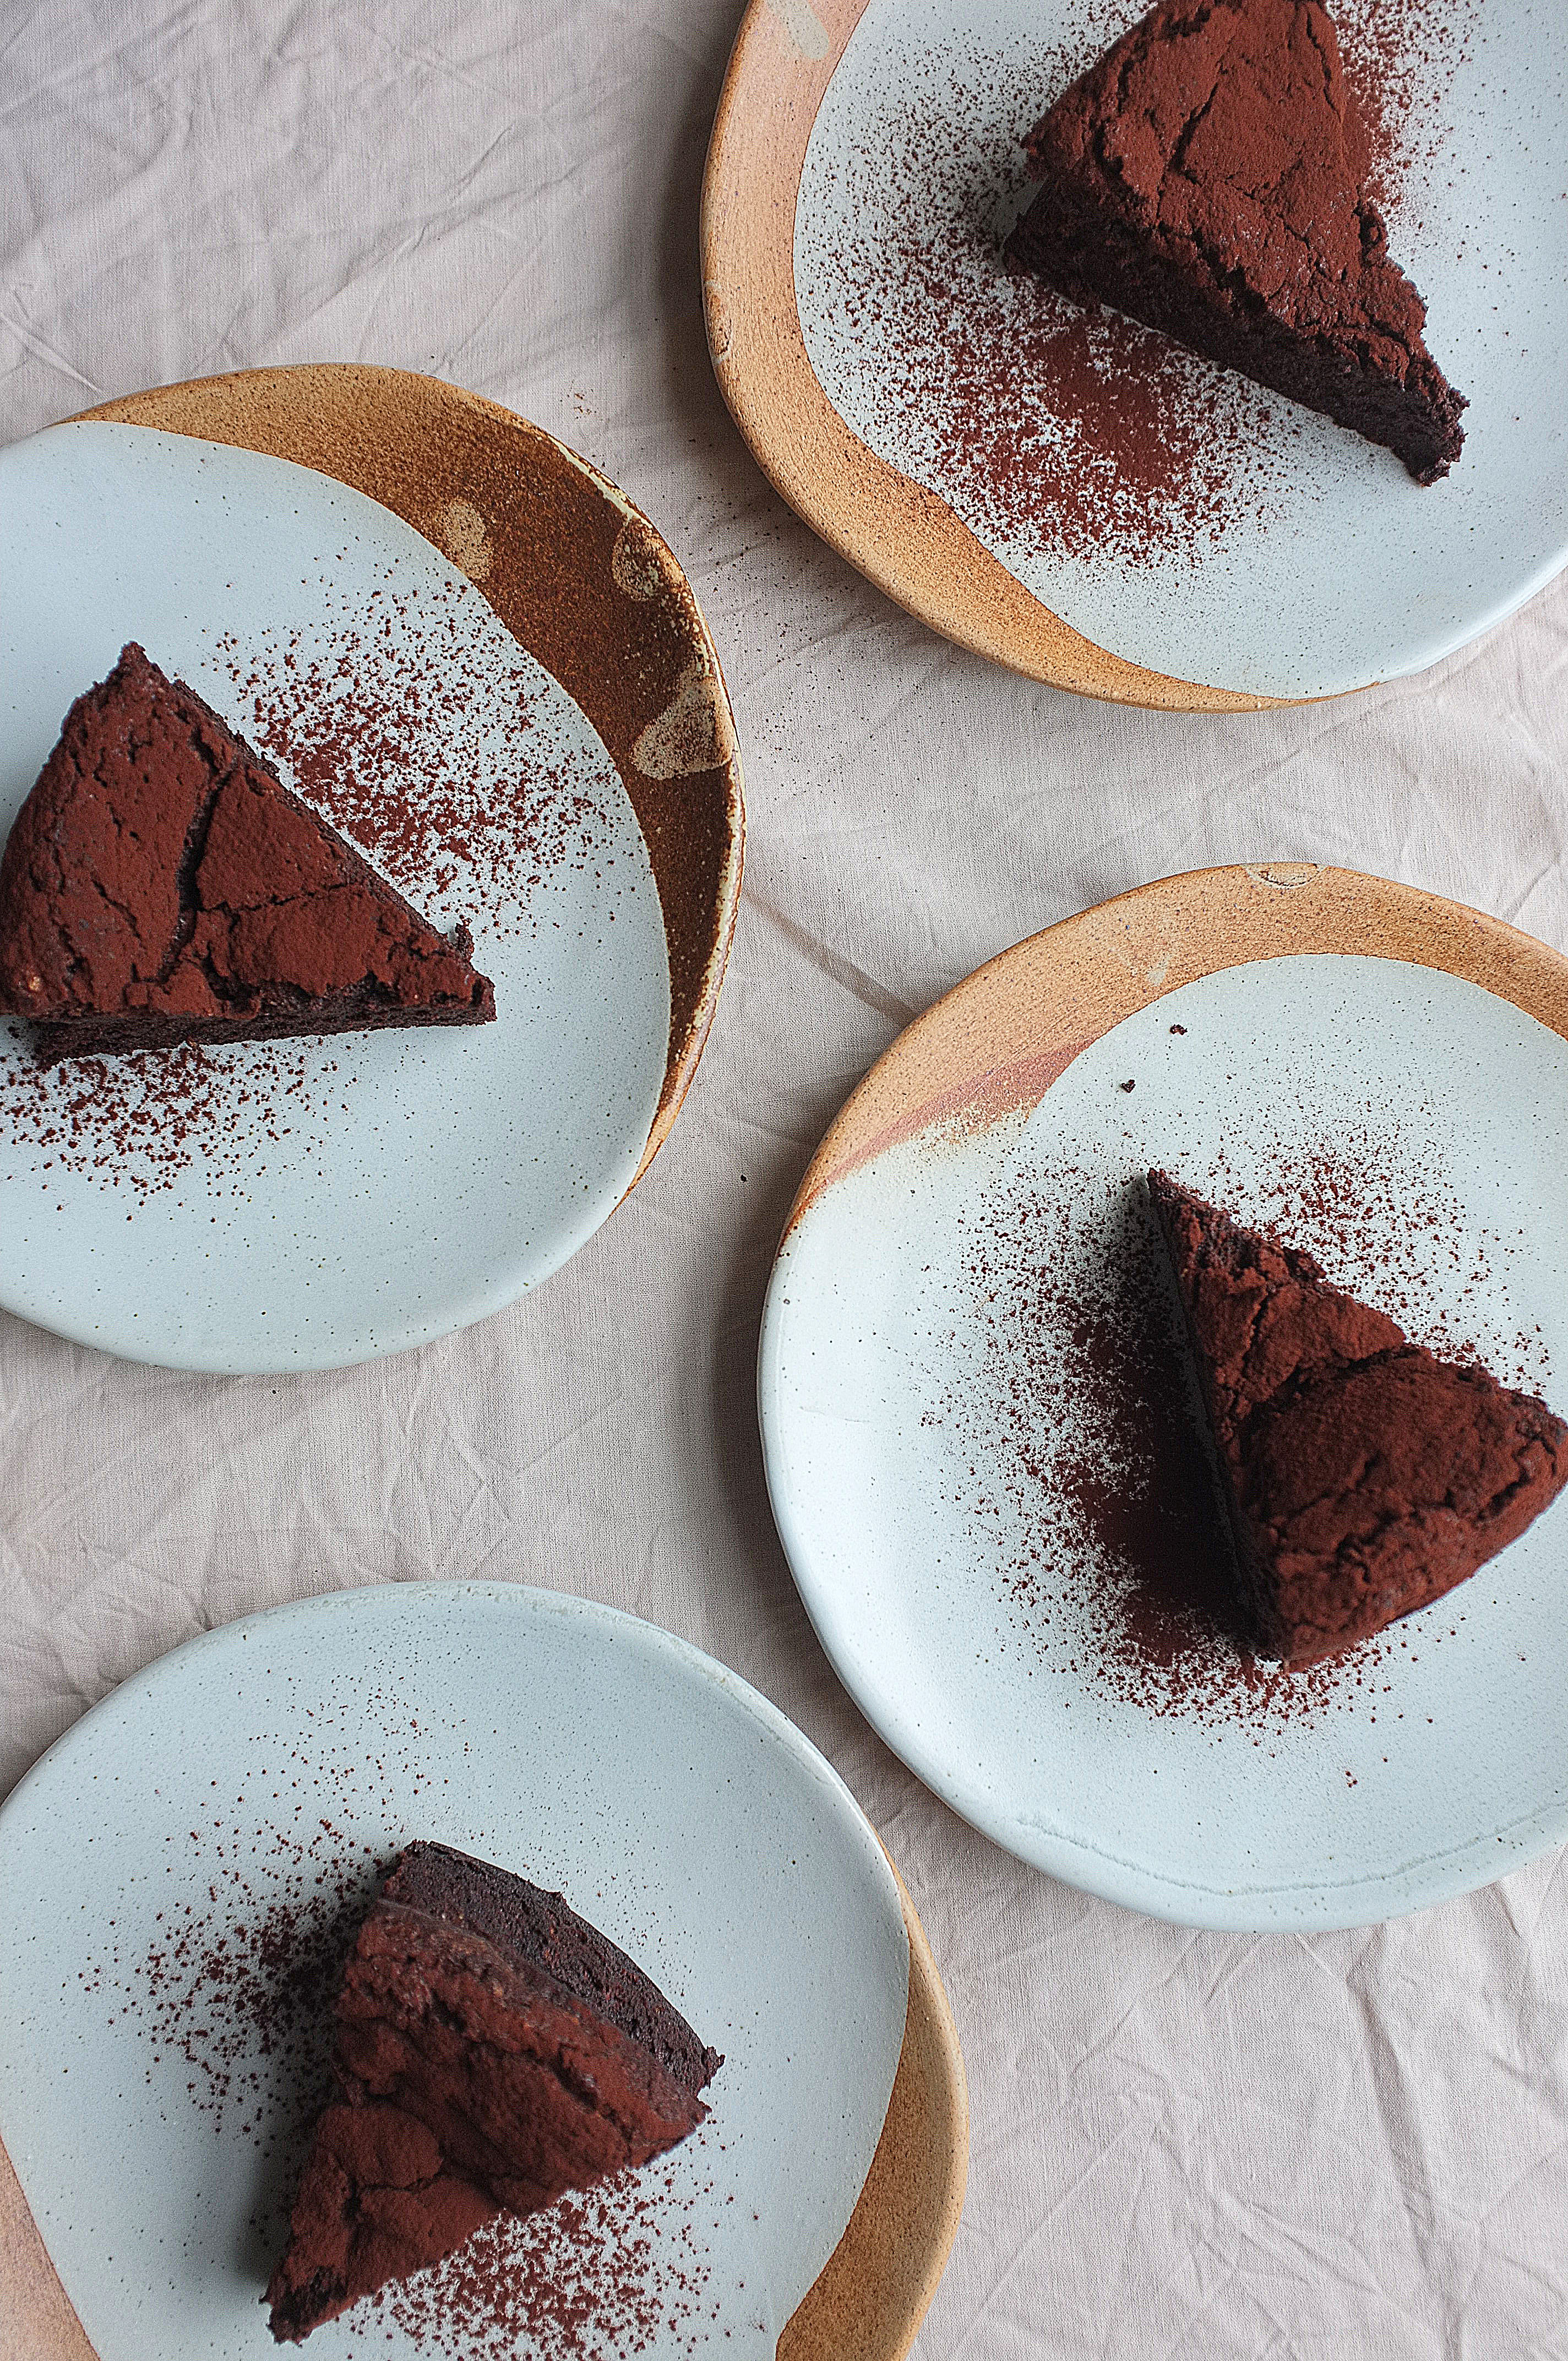
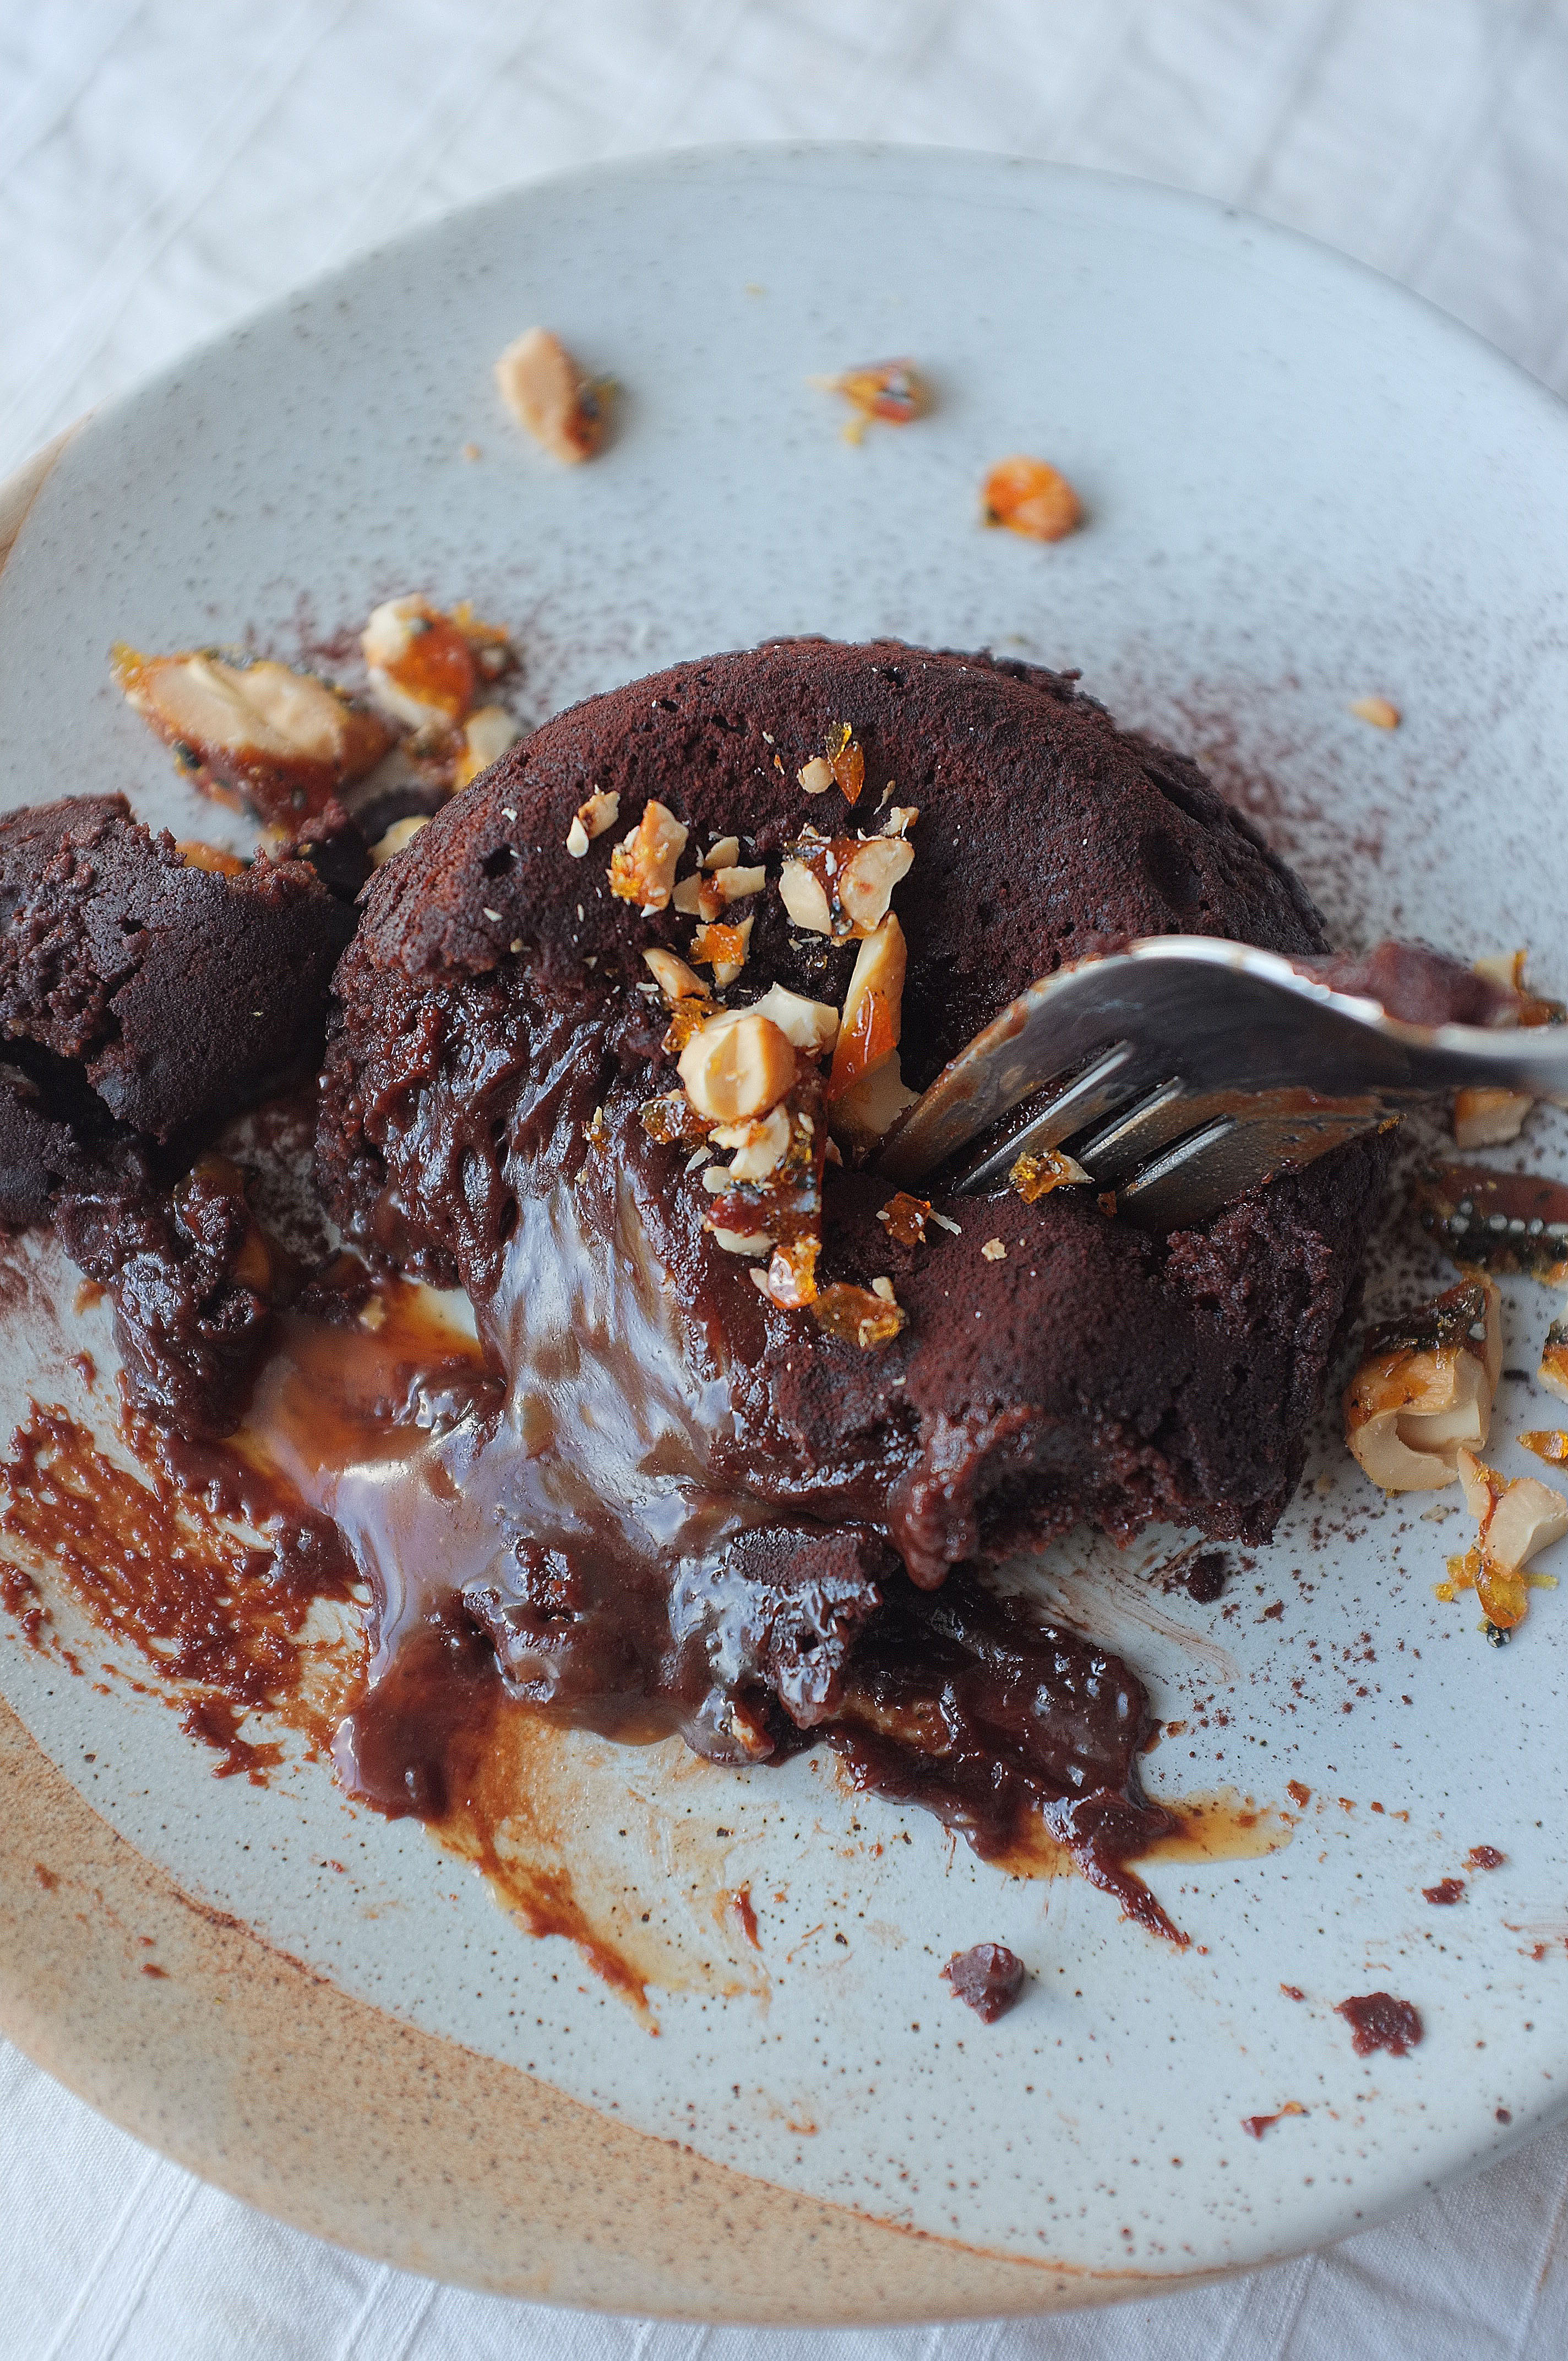
A classic, but better; think filthy dark chocolate fondant with an oozing liquid centre, then throw in the addition of pooling, hot, slightly-savoury miso caramel sauce and a salted, nutty crunch topping. Need I say more?

Ingredients (these quantities yielded 6 large fondants but would make 8 smaller ones)

For the miso caramel

  • 100g caster sugar
  • 25ml water
  • 50ml double cream
  • 2tbsp white miso
  • pinch salt

For the chocolate fondant base

  • 180g butter, plus a little more for greasing
  • A little cocoa powder, for dusting
  • 250g dark chocolate
  • 275g golden caster sugar
  • 4 eggs
  • 175g plain flour

For the salted cashew crunch

  • 75g cashews, toasted
  • 100g caster sugar
  • Generous pinch salt
  • 1tbsp sesame seeds

Method

  1. Before you make the chocolate mix, make the miso caramel. To do this place the sugar and water in a saucepan and heat gently until the sugar has completely dissolved, then increase the heat and boil until it reaches a deep golden colour. At this stage, add the double cream and stir for another minute before taking the saucepan off the heat and adding the miso paste and salt. Stir until smooth, taste and adjust the level of salt then pour into a heatproof tub and chill until firm.
  2. For the salted cashew crunch place the sugar in a pan and melt, then allow it to turn golden brown and add the cashews, sesame seeds and salt. Stir to coat the cashews with the caramel then tip onto a piece of greaseproof paper and leave to set hard, then roughly chop into a coarse crumb.
  3. Preheat the oven to 180c. Grease the insides of the fondant moulds with the extra butter, then dust with cocoa, shaking to coat. Tip out any excess then place all the moulds on a baking tray, ready to be filled.
  4. For the chocolate mix, place the chocolate and butter in a large heatproof bowl set over a pan of simmering water. Stir occasionally until smooth then set aside to cool a little. Whisk in the sugar (using a good old fashioned hand whisk will do) then the eggs, one at a time. Fold in the flour and once you’ve got a smooth mix split half of it between the moulds. Now create a little indent in the middle of the chocolate in each mould and scrape in a heaped tablespoon of your caramel. Top up with the remaining chocolate mix until each mould is filled to about 2cm below the rim.
  5. Bake the fondants for 17-22 minutes or until they are set on top and around the sides but still have a slight wobble in the middle (this time will vary from oven to oven and mould to mould so keep an eye on them- bare in mind my moulds have a 2inch wide base/3 inch wide rim/are 2 inches in height, and the fondants took 22 minutes in my old school oven!).
  6. Once the fondants are ready, leave to sit for a minute or two then run a knife around the edge of each mould. Carefully turn the fondants out onto serving plates and sprinkle with some salted cashew crunch. Serve with vanilla ice cream for added indulgence.


Enjoy!

Orange, Cardamom and White Chocolate Shortbread

Biscuits, Uncategorized

These buttery shortbreads, dipped in white chocolate and flavoured with warming cardamom and citrus, have got me feeling (dare I say it) pretty festive. The format might be a bit retro but there’s something comforting and nostalgic about bedding in with a batch of homemade biscuits and a cup of builder’s tea at this time of year. Give them a try for a quick and easy twist on a classic.

Ingredients (makes 20-24 biscuits)

  • 225g soft butter
  • 100g caster sugar
  • zest 1 orange
  • 150g plain flour
  • 1 1/2 tsp ground cardamom
  • 75g rye flour
  • 100g cornflour
  • Pinch of salt
  • 100g white chocolate
  • 50g pistachios, finely chopped (optional)

Method

  1. Place the butter, sugar and orange zest in a large bowl (or bowl of a stand mixer with paddle attachment) and beat until very light and fluffy. Add in the flours, salt and ground cardamom and beat briefly until the flour is just incorporated and the mix starts to come together in large clumps (it’s important not to over-mix here as beating for too long could result in a tough biscuit which isn’t buttery and short!).
  2. Bring the mix together with your hands and roll out on a floured surface to about 1cm thick. Stamp out biscuits using a cookie cutter (or just slice the dough into squares with a knife) and line up on a lined baking tray. Chill for at least 30 minutes, or until firm. Preheat the oven to 180c.
  3. Once your biscuits have firmed up, bake for 12-15 minutes or until the edges are golden. Leave to cool on a wire rack.
  4. Melt the white chocolate in a heatproof bowl set over a saucepan of simmering water (or melt in the microwave at 30 second increments, stirring between each) then dip each biscuit in, about half way up. Place the dipped biscuits on a piece of greaseproof paper for the chocolate to set and sprinkle with pistachios.

Enjoy!

Pumpkin and Pecan Brown Butter Cake with Bourbon Caramel Icing

Cakes

Make the most of squash season with an ode to the Autumn months; made up of heavily spiced pumpkin and brown butter layers, smooth bourbon-laced caramel cream cheese icing and a slightly salty crunch of pecan brittle, this cake is absolutely delicious and marries together some of my favourite flavours.

Ingredients (serves 10-12)

For the bourbon caramel

  • 200g caster sugar
  • 50ml water
  • 100ml double cream
  • 1-2tbsp bourbon ( spiced rum would also work, or feel free to omit the alcohol)
  • pinch sea salt

For the cake

  • 250g butter, cubed
  • 4 eggs
  • 200g caster sugar
  • 50g soft light brown sugar
  • 225g plain flour
  • 1tsp bicarbonate of soda
  • 2tsp baking powder
  • large pinch salt
  • 1tsp ground ginger
  • 1tsp cinnamon
  • 1tsp ground cardamom
  • 1tsp mixed spice
  • 450g grated pumpkin (alternatively, you could use carrot or squash)
  • 75g sultanas
  • zest 1 lemon
  • 100g pecans, roughly chopped

For the icing

  • 250g mascarpone
  • 250g full fat cream cheese
  • the bourbon caramel

For decoration (optional)

  • pecan praline (to make this melt 100g caster sugar in a pan until golden, then add 75g pecans, stir to coat and set on a piece of baking paper- once set, crush up)
  • thyme sprigs

Method

  1. Start off by making the caramel. To do this place the water and sugar in a saucepan set over a gentle heat; do not stir, but swirl the pan occasionally to encourage the sugar to dissolve. Once the sugar has dissolved and you have a clear syrup, increase the heat and boil until it turns golden brown. At this stage add the double cream and stir, then pour in the bourbon and stir again. Continue to stir on the heat for another couple of minutes, then set aside and add the salt to taste. Leave to cool completely.
  2. Preheat the oven to 170c. Grease and line two 8 inch cake tins with baking paper. Place the butter in a saucepan and leave to melt and bubble until it starts to brown and smell nutty. Set aside to cool.
  3. Once the butter has cooled put it in a large bowl (or bowl of a stand mixer with paddle attachment) along with the sugars and egg and mix until pale and thick (about 5 minutes). Beat in the flour, bicarbonate of soda, salt, baking powder and spices and stir until just combined. Stir through the pumpkin, sultanas, lemon zest and pecans. Split the batter between the cake tins and bake for 30-40 minutes or until a skewer comes out clean when inserted.
  4. Leave the cakes to cool completely in the tins. Meanwhile, make the icing by simply whisking together the mascarpone, cream cheese and caramel until smooth. Pile into a piping bag fitted with a round nozzle.
  5. Once the cakes are completely cool, remove from the tins and slice in half horizontally (leaving you with 4 layers). Pipe the icing in little mounds over the whole surface area of the first layer, then stack up the remaining layers, repeating the piping as you go. Decorate the top with pecan praline and thyme.

Enjoy!

Dark Chocolate and Peanut Butter Brownies (Vegan/Gluten Free)

Chocolate

I’ve tried a lot of vegan brownies which are dry, crumbly or ‘raw’. Sure, there’s a time and a place for healthy alternatives and we can’t just slob around eating sugar-laden baked goods all day, but if I want a brownie and I’m vegan (I’m not I’m just being really selfless…) I want the real thing, not a load of dates and coconut oil. With this not-very-2018 thought in mind, I’ve been attempting to put together a recipe for a completely vegan and gluten free brownie which rivals a conventional dairy/egg based one. The recipe I’ve devised delivers a fudgy core and crisp top, rich flavour and all round delicious result- give it a try, it’s a good place to start with vegan baking.

Ingredients (makes 16 small brownies, or 9 big ones!)

  • 125g smooth peanut butter, plus 50g more for the core and topping
  • 75ml vegetable oil
  • 275g dark chocolate (I used half 60% and half 80%), plus 75g roughly chopped for chocolate chips
  • large pinch salt
  • 100ml aquafaba (the starchy water you get in a can of chickpeas- you will get about 100ml from one can)
  • 1tbsp ground flaxseed mixed with 1tbsp water (this replicates an egg yolk very well!)
  • 100g dark brown soft sugar
  • 100g golden caster sugar
  • 100g gluten free plain flour (I used Doves Farm)
  • few chopped peanuts, for topping (optional)

Method

  1. Preheat the oven to 180c. Grease and line a 20x20cm square brownie tin.
  2. Mix together the flaxseed and water at this stage to give it time to thicken an form an egg-yolk consistency. Put the oil, peanut butter and 275g of the chocolate in a heatproof bowl and set it over a saucepan of gently simmering water. Allow the ingredients to melt together, stirring occasionally, then remove from the heat to cool to room temperature.
  3. Place the aquafaba in a large bowl (or bowl of a stand mixer with whisk attachment) and whisk until soft peaks just form. At this stage add in the flax mixture, sugars and salt (it’s amazing how much this looks like eggs whisked together with sugar!). Whisk again until the sugars are well incorporated then fold in the cooled chocolate mixture with a metal spoon, followed by the flour. Scrape half of the batter into the prepared tin then dot over half of the extra peanut butter and some of the chopped chocolate. Top with the remaining batter and repeat the peanut butter/chocolate stage, then finish with the peanuts (if using).
  4. Bake for 25-35 minutes or until crisp on top but very slightly wobbly in the middle. Leave to cool completely then slice up and serve.

Enjoy!

Dark Chocolate, Olive Oil and Espresso Torte

Cakes, Uncategorized

No intricate decorations, fillings or tiers here, just one humble layer of ludicrously fudgy, crinkly chocolate joy (which is, entirely by chance, dairy and gluten free). For a real depth of flavour and the perfect balance of bitter and sweet, take note of my chocolate recommendations and use a good quality olive oil (this recipe idea actually stemmed from a yearning to bake with a deliciously floral, wincingly expensive extra virgin oil I picked up in Greece last month*).

* Disclaimer: don’t judge, I was in that holiday headspace where you flash your card with the sort of cavalier attitude usually reserved for Monopoly money… sufficed to say, I could do with passing GO right now

Ingredients

  • 200g 50% dark chocolate
  • 200g 80% dark chocolate
  • 200ml good quality olive oil
  • 275g light brown soft sugar
  • 75ml strong espresso
  • 5 eggs
  • Generous pinch sea salt

Method

  1. Preheat the oven to 170c. Grease and line a 9 or 10 inch cake tin.
  2. Roughly chop all the chocolate and place it in a heatproof bowl along with the olive oil. Put the sugar and coffee in a saucepan and gently heat until the sugar has completely dissolved (avoid bringing it to the boil at this stage).
  3. Once the sugar has dissolved increase the heat and bring to the boil to form a syrup, then pour over the chocolate. Leave for a few minutes while the chocolate melts, then stir everything (chocolate, olive oil, sugar, espresso) together to form a smooth, glossy liquid. Set aside to cool to room temperature, then stir in the egg yolks.
  4. Place the egg whites in a large bowl with the salt (or bowl of a stand mixer) and whisk to stiff peaks. Carefully fold the whites into the chocolate mixture in two batches using a large metal spoon, then scrape the mixture into the prepared cake tin (make sure you don’t scrape from a height or you’ll knock out some of that air you’ve just put into the whites!).
  5. Bake for 50-60 minutes, then leave to cool completely in the tin. When cooling, the top of the cake will dip and crack- don’t worry, it’s a smooth, flourless torte, not a sponge cake! Once cool, slice up and finish with a dusting of cocoa powder. Serve with creme fraiche, if you like.


Pistachio and Lemon Cake with Raspberry and Rose Cream

Cakes

Bloom and Wild have just released a beautiful range of bouquets for Autumn/Winter, in collaboration with infamous London department store, Liberty. Each bouquet has been artfully designed to reflect some of the most coveted prints in the Liberty archive, from the vintage look 1910 Elysian Day, to the vibrant 60s Ciara. This week marks 5 years of letterbox flowers from Bloom & Wild, and to mark the occasion they asked me to create a very special birthday cake which encapsulates the style of the Bloom and Wild X Liberty collection.

To make this celebratory cake really striking, I’ve decorated it with meadowy blooms and wild greenery from the Rachel Deluxe bouquet, which is inspired by a 1988 Liberty print. To keep things simple but delicious, the sponge I’ve developed is light and zesty, with a hum of pistachio. For the filling I’ve gone with a raspberry and rose cream, in part because the bouquet boasts stunning quicksand roses but also because British raspberries are nearing the end of their season, so we need to make the most of them while we can. To apply the flowers, I trimmed and sealed the stems, then arranged them in as natural a way as possible, staying true to the print. I hope you all like what I came up with and enjoy the recipe- it’s perfect for late summer celebrations!

Ingredients

For the sponges

  • 350g soft unsalted butter
  • 325g golden caster sugar
  • Zest 2 lemons
  • 6 eggs
  • 200g ground pistachios (just blitz 200g shelled pistachios in a food processor until fine)
  • 150g plain flour
  • 2tsp baking powder
  • Pinch salt

For the rose and raspberry cream

  • 400g double cream
  • 200g mascarpone
  • 2-3tbsp rose water (add this in small amounts, tasting between each addition)
  • 2-3tbsp icing sugar (to taste)
  • 200g fresh raspberries, lightly crushed with a fork

To finish (optional)

  • Bloom and Wild Rachael bouquet, or pistachios and crystallised rose petals

Method

  1. Preheat the oven to 170c. Grease and line two 7 inch cake tins.
  2. Place the butter, sugar and lemon zest in a large bowl (or bowl of a stand mixer) and beat until very light, pale and fluffy (this can take about 10 minutes). Add in the eggs, one at a time, beating well between each addition (add a little bit of the flour with each egg if you’re worried about curdling). Once all the eggs are well incorporated, add the rest of the flour, ground pistachios, salt and baking powder and fold in using a large metal spoon.
  3. Once you have a light, lump free cake batter, split between the two tins and level off the tops. Bake for 35-45 minutes or until a skewer comes out clean when inserted.
  4. Once baked, leave the cakes to cool in the tins for 10 minutes, then remove and place on a wire rack to cool completely.
  5. While the cakes are cooling make the filling. To do this simply whisk together the cream, icing sugar, mascarpone and rose water until spreadable. Take 2/3 of this filling and ripple through the raspberries. Put the remaining 1/3 to the side (this is for coating the outside of the cake).
  6. When you cakes are completely cool, slice in half horizontally so that you have four even layers. Place the first layer on your serving plate and spread over 1/3 of the raspberry cream, then repeat until you’ve stacked all four.
  7. Take the remaining rose cream and spread a very thin layer over the cake to seal in any crumbs. Chill for 10 minutes to firm up a little, then cover with the last bit of rose cream (use a palette knife or cake scraper to do this). This stage is optional, you can leave the sides bare if you like.
  8. To finish the cake, arrange fresh flowers all over the top (ensuring that you seal any ends and remove them from the cake before consumption!). Alternatively, decorate with lemon zest, pistachios and rose petals.

Enjoy!


Cherry, Chocolate and Tahini Parfait with Sesame Crumble

Chocolate, Cooking, Uncategorized

We’ve been enjoying a very unusual bout of beautiful hot weather here in the UK, so today’s recipe is an iced one. I served this up for my boyfriends birthday (after he broke the news to me that he didn’t want a cake- yeah, sacrilege I know) and although it requires a little more effort to make than a simple sponge, the creamy, indulgent and slightly bittersweet (thanks to the tahini and very dark chocolate) result is well worth it.

Ingredients

For the chocolate ripple

  • 150g bitter dark chocolate
  • 150ml double cream
  • pinch sea salt

For the cherry compote

  • 200g fresh cherries (de-stoned)
  • 3tbsp honey or caster sugar
  • Zest and juice of 1 orange

For the parfait base

  • 4 eggs
  • 75g caster sugar
  • 125ml whole milk
  • 250ml double cream
  • 150g tahini

For the tahini crumble

  • 25g tahini
  • 25g demerara sugar
  • 25g butter, cubed
  • 100g plain flour
  • 1tbsp black sesame seeds

Method

  1. Start by making the chocolate ganache for the ripple. To do this simply place the chocolate, salt and cream in a heatproof bowl and set over a pan of simmering water (don’t allow the water to touch the bottom of the bowl). Stir occasionally until it melts together and forms a smooth ganache. Set aside to cool.
  2. Now prepare the cherry compote. Put the cherries, honey (or sugar), orange zest and juice in a saucepan and gently heat, stirring occasionally, until it reaches a sticky compote consistency (5-10 minutes). Transfer to a bowl and leave to cool.
  3. Now it’s time to make the parfait base. Line a loaf tin with 2 layers of cling film, leaving an overhang on all sides.
  4. Separate the eggs. Put the yolks in a large bowl along with the sugar and whisk until pale, meanwhile, heat the milk until just boiling in a saucepan. Remove the milk from the heat and pour into the egg yolks, then stir together until smooth. Return the mix to a clean pan and gently heat, stirring constantly. After a few minutes, the mix will start to thicken- once it coats the back of the spoon set aside and cool to room temperature.
  5. Once the ganache, compote and custard have cooled to room temperature, whisk the double cream to soft peaks. In a separate bowl whisk the egg whites to medium peaks. Stir the tahini into the egg yolk mixture. Fold the double cream into the egg yolk/ tahini with a large metal spoon, then do the same with the egg whites, retaining as much air as possible. Ripple through 2/3 of the chocolate ganache and 2/3 of the cherry compote.
  6. Spoon the remaining chocolate ganache and cherry compote into the bottom of the prepared tin, then spoon in the parfait mix. Cover with cling film and freeze for at least 4 hours.
  7. While the parfait is freezing, make the sesame crumble. Preheat the oven to 180c. Rub together the butter and flour until they resemble breadcrumbs. Stir through the sugar and tahini, then tip onto a lined baking tray- bake for 10 minutes then check, shake and return to the oven to 10 more minutes, or until the crumble is golden brown. Stir through the sesame seeds and set aside to cool.
  8. Take the parfait out of the oven 10 minutes before you’d like to serve it to allow it to soften slightly. Sprinkle on the sesame crumble and finish with some fresh cherries.

Enjoy!

Roast Peaches with Coconut Crumble, Blackberry Compote and Lime (VG)

Cooking

This vibrant dish works well if you’re feeling a boujee brunch, but would also make for a delicious, light summer dessert; it’s a real celebration of summer produce and the contrast of flavours, textures and colours mean it’s a guaranteed crowd pleaser (plus it’s vegan!).

Ingredients (serves 6)

For the peaches

  • 6 ripe peaches
  • 1tsp ground cinnamon
  • 1tsp ground cardamom
  • 2tbsp coconut nectar (or honey/ maple)
  • 100ml dessert wine (optional)

For the blackberry compote

  • 300g fresh blackberries
  • juice 1 lime
  • 2tbsp coconut nectar (or honey/ maple)

For the coconut crumble

  • 75g rolled oats
  • 3tbsp melted coconut oil
  • 2tbsp coconut nectar (or honey/ maple)
  • 1tsp ground cinnamon
  • 50g roughly chopped almonds
  • 50g flaked coconut

Other

  • zest 2 limes
  • 500ml coconut yoghurt

Method

  1. Preheat the oven to 180c. Line 1 baking tray and 1 high sided baking dish with greaseproof paper.
  2. Half the peaches and remove the stones, then place them in the baking dish, cut side up. In a small bowl, mix together the ground cardamom, ground cinnamon and coconut nectar. Drizzle all over the peaches (along with the dessert wine, if using).
  3. In a mixing bowl, stir together the rolled oats, coconut oil, coconut nectar, ground cinnamon and chopped almonds. Tip this mixture onto the baking tray and spread out.
  4. Pop both trays in the oven and roast the peaches for 20-25 minutes (or until very tender and sticky). Check the coconut crumble after 10 minutes and turn to prevent burning. Once the crumble starts crisping up and reaches a golden colour, add in the coconut flakes and cook for a further 5 minutes. When the peaches and crumble are ready, just leave them to cool while you make the blackberry compote.
  5. For the compote, simply place the blackberries, coconut nectar and lime juice in a saucepan and cook gently (stirring occasionally) until it reaches a loose jam-like consistency. Set aside to cool.
  6. To assemble the dish, start with the coconut yoghurt in the base of the bowl and ripple through some compote, then top with two peach halves, a generous helping of coconut crumble and a sprinkle of fresh lime zest.

Enjoy!

Ricotta, Raspberry and Peach Cheesecake Bars

Cooking

With a light baked ricotta filling studded with fresh raspberries, crunchy almond-oat base and griddled peach topping, these cheesecake bars pay homage to 90s peach melba, and make for the perfect summer dessert.

Ingredients (makes 12 bars)

For the base

  • 150g digestives
  • 2tsp demerara sugar
  • 1tsp cinnamon
  • 50g rolled oats
  • 50g almonds
  • 140g unsalted butter, melted

For the filling

  • 500g ricotta
  • 125g golden caster sugar
  • 30g corn flour
  • 2 eggs, plus 1 egg yolk
  • 1tsp vanilla extract
  • 100g full fat greek yoghurt
  • 200g raspberries

For the topping

  • 2 peaches, sliced
  • few extra raspberries
  • decorative herbs, almonds, edible flowers (optional)

Method

  1. Preheat the oven to 160c and grease and line a 22x22cm baking tin. Place the digestives, demerara sugar and cinnamon in a food processor and blitz into crumbs. Add in the melted butter, almonds and oats and very briefly blitz again to combine- don’t over mix here, you want a nice crunchy base. Tip this mixture into the prepared tin and pack down with the back of a spoon. Chill for 15 minutes then bake for 10 minutes to set. Once baked set aside for later.
  2. Now make the filling. To do this simply whisk together the ricotta, golden caster sugar, corn flour and vanilla until very smooth, then add in the egg and egg yolk one at a time, whisking between each addition to bring the mixture together again. Lastly, whisk in the yoghurt. Roughly break up the raspberries with the back of a fork and tip them in. Ripple them through then scrape all the filling onto the base. Place the tin into another larger roasting tin and fill with water (about half way up the sides of your baking tin). Bake for 1 hour or until the cheesecake is set but still has a uniform wobble.
  3. Once baked, leave the cheesecake to cool completely then chill for 4-6 hours to set.
  4. While the cheesecake is chilling, lightly oil a griddle pan and slice the peaches into wedges. Heat the pan and char the slices on each side, then leave to cool.
  5. When your cheesecake has set, just remove it from the tin, slice into 12 bars (use a hot knife for this and you will get a cleaner result) and top with the griddled peach slices, extra raspberries and nuts.

Enjoy!

Brown Butter, Pecan and White Chocolate Brownies (GF)

Chocolate, Uncategorized

If you do one thing this weekend, make these brownies; with brown butter delivering a deep nutty flavour, pecans adding a welcome crunch and dark brown sugar leaving you with a molasses hit, they 100% deliver on flavour and texture and are perhaps the most delicious brownies I’ve made to date (drops mic) (cringes).

Ingredients (makes 9-12 brownies)

  • 250g butter, cubed
  • 250g dark chocolate
  • 100g dark brown soft sugar
  • 100g golden caster sugar
  • 3 eggs, plus 1 egg yolk
  • large pinch sea salt
  • 100g gluten free plain flour (I used Doves Farm)
  • 100g chopped pecans
  • 75g chopped white chocolate
  • 75g chopped milk chocolate

Method (makes 9-12 brownies, depending on how hungry you are)

1) Preheat the oven to 180c. Grease and line a 22x22cm brownie tray.

2) Place the cubed butter in a saucepan and melt over a medium heat. Once completely melted, up the heat and allow the butter to foam until it smells nutty and reaches a deep golden colour. At this stage, remove from the heat and add in the chopped dark chocolate. Let it sit for a couple of minutes then stir briefly to create a smooth glossy mix. Set aside to cool a little.

3) While the chocolate mixture cools, place the sugars, salt, eggs and egg yolk in a stand mixer (or in a large bowl) and beat until very light and voluminous (it will pretty much double in size). This stage is well worth the effort- it will give you that classic cracked top.

4) Once the egg mixture is ready, pour the chocolate mix down the side of the bowl and fold in using a large metal spoon. Add the gluten free flour and do the same until you have a smooth, lump free batter. Now add the chocolate chunks and pecans and stir through to evenly distribute.

5) Tip the mix into the prepared tin and level off. Bake for 25-30 minutes.

6) When it’s ready, the brownie will have a flaky crisp top but will still be gooey and moist on the inside. Set aside to cool (completely) in the tin then remove, slice up and serve.