Espresso, Pecan & Dark Chocolate Ice Cream Sandwiches

Biscuits, Uncategorized

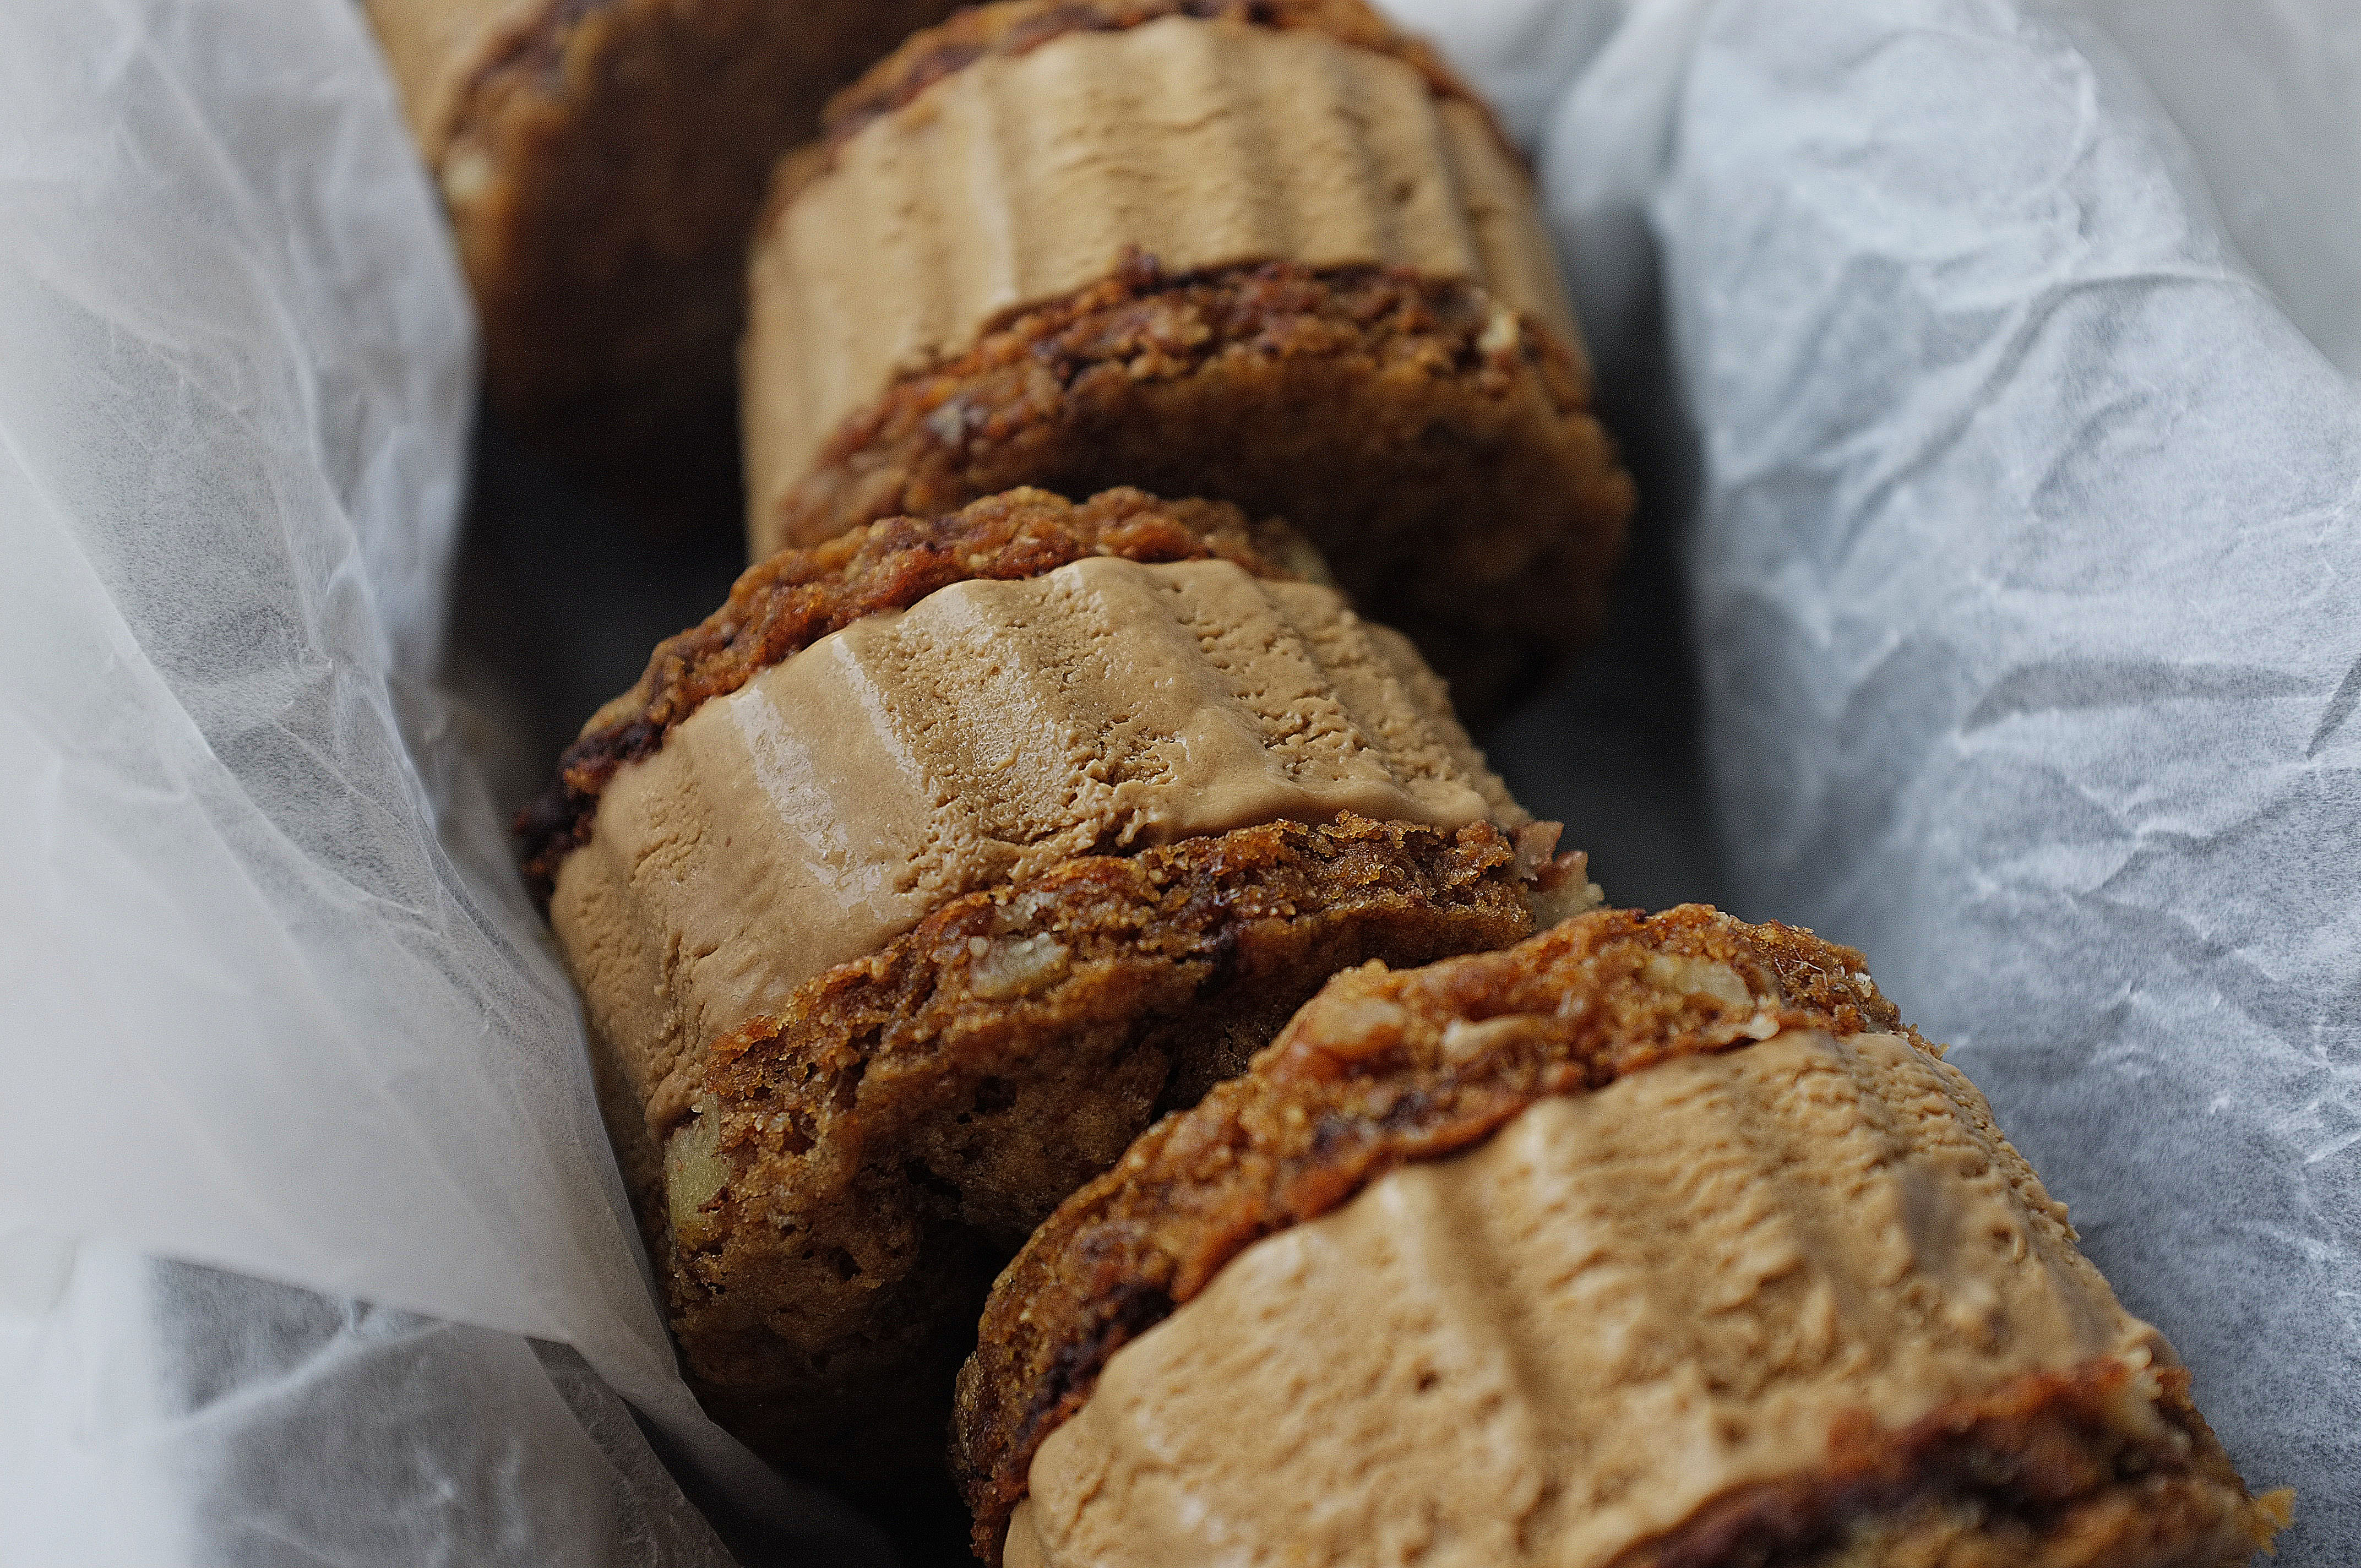
These cookie sandwiches are a culmination of my three favourite things; coffee, chocolate and ice cream. The pecans add crunch, and the bitter note of espresso prevents the result from being overly sweet. There’s not a lot else to say- other than go forth and make them (but proceed with caution, they’re like crack).

Ingredients (makes 10-12 cookie sandwiches, with a little extra cookie dough which will freeze well)

For the ice cream

  • 400ml double cream
  • 400ml whole milk
  • 8 egg yolks
  • 150g caster sugar
  • pinch salt
  • 30g good quality instant coffee

For the cookies

  • 225g soft unsalted butter
  • 125g caster sugar
  • 175g dark brown soft sugar
  • 2 eggs
  • 1tsp bicarbonate of soda
  • generous pinch salt
  • 150g plain flour
  • 125g rye flour
  • 75g roughly chopped pecans
  • 100g roughly chopped dark chocolate (70%)

Method

  1. Start off by making the ice cream. To do this, pour the double cream, milk and instant coffee into a saucepan and set over a medium heat. Meanwhile, place the egg yolks, sugar and salt in a large bowl (or bowl of a stand mixer with whisk attachment) and whisk until pale and thick. Once the instant coffee has dissolved into the cream mixture, bring it to a simmer then take off the heat and gradually add into the eggs and sugar, whisking constantly until well combined.
  2. Pass the mixture through a sieve into a clean saucepan, then heat gently, stirring until thick (make sure the custard doesn’t get too hot, or you’ll be left with something that looks a bit like scrambled eggs!). Pass the thickened custard through a sieve into a bowl, then close cover with cling film and leave to cool completely (I like to chill the custard at this point to make sure it’s as cold as possible before churning, but it’s not absolutely necessary).
  3. Once cooled, pour the custard into an ice cream maker and churn until creamy and thick. Line a shallow square/rectangular baking tin (about 2-3cm deep) with cling film and scrape the churned ice cream into it. Level off, cover with cling film and place in the freezer for at least 4 hours, until fully set. At this point you can cut the ice cream into rounds using a 3-4 inch cookie cutter, then cover and return the rounds to the freezer until required.
  4. For the cookies, place the butter and both sugars in a large bowl (or bowl of a stand mixer with paddle attachment) and beat until pale and fluffy. Add in the eggs one at a time, beating well between each addition. Add the bicarbonate of soda, salt and both flours and very briefly mix again until combined. Now stir in the pecans and chocolate with a wooden spoon. Chill the cookie dough for 10 minutes.
  5. Preheat the oven to 180c. Line a couple of baking trays with greaseproof paper and space tablespoons of cookie dough over them, allowing plenty of room for spreading. Bake for 12-15 minutes or until soft in the middle but golden in colour. At about 8-10 minutes into baking, take the baking tray and bang it on the work top in one sharp movement. This allows the cookie to spread a little and ensures the perfect thickness. Repeat the process until you’ve used up the cookie dough, then leave the cookies to cool.
  6. For a neat result, you can cut the cookies into perfect circles with the cutter you used for the ice cream, but this isn’t essential.
  7. Once the cookies have cooled, sandwich two together with a round of espresso ice cream.

Enjoy!

Rhubarb, Cardamom and White Chocolate Frangipane Tart

Pastry, Uncategorized

Tart rhubarb and sweet white chocolate is a delicious flavour pairing, and one I will keep returning to for the duration of the rhubarb season. In this bake I’ve applied the combination to a classic frangipane tart, using rhubarb compote in place of jam, and a filling studded with chocolate chunks and flavoured with cardamom. It’s a winner, and in my opinion, better than the standard strawberry variety (controversial).

Ingredients (enough for one 7.5 inch wide/ roughly 2 inch deep tart tin- serves 8)

For the pastry (there will be some leftover which will freeze well)

  • 250g plain flour
  • 140g unsalted butter
  • pinch salt
  • 30g caster sugar
  • 2 egg yolks

For the rhubarb filling

  • 400g rhubarb, sliced into 2 inch batons
  • juice and zest 1 orange
  • 30g caster sugar

For the almond frangipane

  • 120g soft unsalted butter
  • 120g caster sugar
  • 2 large eggs
  • 120g ground almonds
  • 1tsp ground cardamom
  • 100g white chocolate, roughly chopped
  • 30g roughly chopped almonds

Method

  1. Start off by making the pastry. Place the flour, butter, sugar and salt in a food processor and pulse until it resembles breadcrumbs. At this stage add the egg yolks  and pulse again until the mix comes together in large lumps (alternatively, rub the butter into the flour, salt and sugar using your fingertips then stir in the yolks using a cutlery knife). Tip the dough out and shape into a disc using your hands. Wrap in cling film and chill for 20 minutes.
  2. While the pastry is chilling start on the rhubarb compote filling. To do this simply put 300g of the rhubarb (reserve the other batons for the top of the tart), the orange juice and zest in a saucepan along with the caster sugar. Heat gently, stirring often, until the rhubarb has broken down and reduced to a thick compote consistency. Set aside to cool.
  3. Lightly grease an 7.5 (or 8) inch straight sided tart tin. Retrieve your pastry from the fridge and roll out to around 3mm thick and line the tin, pushing it right into the corners and trimming any excess. Prick the base all over with a fork and chill for 20 minutes or until firm. Preheat the oven to 190c.
  4. Line the pastry case with baking paper and fill with baking beans. Bake for 15-20 minutes or until the walls of the pastry are cooked and supporting themselves. Remove the beans and baking paper and return to the oven until the base is crisp and cooked through (about 10 minutes). Set aside to cool.
  5. While the pastry is baking, toss the reserved rhubarb batons in 1tbsp caster sugar and place on a tray- bake for 10 minutes.
  6. Now it’s time to make the frangipane. To do this simply cream together the butter and sugar until pale, light and fluffy, then add in the eggs one at a time, beating well between each addition. Finally, tip in the cardamom, salt and almonds and briefly mix once more until combined. Reduce the oven temperature to 170c.
  7. Now it’s time to assemble the tart. Spread the rhubarb compote over the base in one even layer, then add half the frangipane and sprinkle over half the chopped white chocolate pieces. Add the remaining frangipane and top with the rest of the white chocolate, chopped almonds and roasted rhubarb batons.
  8. Bake for 35-40 minutes or until golden brown and cooked through. Serve hot or cold.

Sticky Ginger Cake with Labneh Icing and Blood Orange Syrup

Cakes

As much as I love a stacked sponge showstopper, sandwiched with buttercream and impeccably preened, there’s something deeply comforting about a single layered wedge of cake, rustically finished with dollops of tangy icing and a bit of fruit. This cake undoubtedly falls into the comfort category, and it’s now one of my favourites; ginger cake itself feels nostalgic to me*, but the slightly tangy labneh icing and citrus syrup topping make this one feel a little more modern.

*I don’t know why, I have no emotive family story to share about a recipe passed down through a long line of bakers- my Granny used to feed me M&S sandwich cakes straight from the freezer. I’ll bank that as character building.

Ingredients

For the labneh icing

  • 500ml Greek yoghurt
  • 3tbsp icing sugar
  • 1tsp vanilla extract

For the cake

  • 250g self-raising flour
  • 2tsp ground ginger
  • 1tsp ground cinnamon
  • 1tsp bicarbonate of soda
  • pinch salt
  • 175g golden syrup
  • 3tbsp ginger syrup (from a stem ginger jar)
  • 125g butter
  • 4 balls stem ginger, diced
  • 125g light soft brown sugar
  • 2 eggs
  • 250ml milk

For the blood orange compote

  • 90ml blood-orange juice
  • 50g caster sugar
  • 2tbsp water
  • 1 vanilla pod
  • 2 additional blood oranges

Method

  1. Line a sieve with a muslin cloth and sit over a large bowl. Scrape the yoghurt into the sieve and loosely tie the muslin around it. Leave this in the fridge overnight for the liquid in the yoghurt to drain (this will leave you with a thickened mixture- labneh).
  2. Preheat the oven to 180c. Grease and line a high sided 9inch cake tin.
  3. Stir together the flour, ginger, cinnamon, bicarbonate of soda and salt in a large bowl. In a saucepan melt together the golden syrup, ginger syrup, butter, diced stem ginger and sugar. Bring to the boil for a minute then make a well in the dry ingredients and add the melted mixture. Stir together to eliminate any lumps then whisk the eggs and milk in a jug and add those in too and beat once more.
  4. Tip the mixture into the prepared tin and bake for 50-60 minutes or until a skewer comes out clean when inserted.
  5. Leave the cake to cool completely in the tin.
  6. Meanwhile, make the blood orange syrup. To do this simply place the juice, sugar and water in a small saucepan and gently heat until the sugar has dissolved. At this stage split the vanilla pod and add in, then simmer for 3-4 minutes or until syrupy. Set aside to cool a little, then slice the 2 blood oranges into rounds, discarding the pith and skin. Add the slices into the syrup and stir. Leave to cool completely.
  7. Tip the strained yoghurt into a bowl and add the vanilla extract. Sift in the icing sugar and stir everything together until smooth.
  8. To assemble the cake, turn it out of the tin and roughly cover with the sweet labneh. Just before serving, arrange the blood orange slices on top and drizzle the syrup over.

Enjoy!

Salted Chocolate Cake with Coffee Mascarpone & Hazelnut Praline Caramel

Cakes

I made this cake last weekend for my Dad’s birthday and it went down a storm. Granted, the flavours aren’t subtle and it’s not for the faint hearted (which neatly mirrors my Dad’s personality actually), but the punchy combination of bitter coffee, nutty hazelnut, rich but surprisingly light chocolate sponge and salted milk chocolate ganache just work (duh- that amount of cream, sugar, salt and chocolate is always going to be delicious).

Ingredients (serves 12-14)

For the hazelnut praline caramel

  • 100g blanched hazelnuts, toasted
  • 100g caster sugar
  • 100ml double cream
  • Generous pinch sea salt

For the sponges

  • 375g plain flour
  • 300g caster sugar
  • 85g cocoa powder
  • 2tsp baking powder
  • 2tsp bicarbonate of soda
  • large pinch sea salt
  • 3 eggs
  • 325ml milk
  • 175ml vegetable oil
  • 2tsp vanilla extract
  • 100g dark chocolate
  • 325ml just boiled water
  • 2tsp instant coffee

For the salted milk chocolate ganache

  • 200g milk chocolate
  • 75g dark chocolate
  • 275ml double cream
  • Generous pinch sea salt

For the coffee mascarpone filling

  • 2tbsp instant coffee
  • 2tbsp caster sugar
  • 200g mascarpone
  • 100ml double cream

  1. Start off by making the hazelnut praline caramel.To do this simply place the caster sugar in a heavy bottom pan over a medium heat and swirl the pan until it melts. Once melted, up the heat until the sugar reaches a deep golden brown. At this stage add the toasted hazelnuts, stir to coat then tip onto a baking paper lined baking tray. Leave to set hard, then blitz into a paste. Set aside. Pour the cream into a saucepan and gently heat. Once the cream is gently simmering add in the praline paste and stir to create a caramel. Cook down for a few minutes until thickened, then set aside to cool.
  2. Preheat the oven to 170c. Grease and line two 8 inch baking tins. Melt the dark chocolate in a heatproof bowl set over a pan of simmering water (or in the microwave in short stints, stirring often). Set aside.
  3. In a large bowl stir together the flour, caster sugar, cocoa powder, baking powder, bicarbonate of soda and salt. In a jug, lightly whisk the eggs, milk, vegetable oil and vanilla extract. Make a well in the dry ingredients and pour the contents of the jug into it. Stir the wet and dry ingredients together until well combined then add the melted chocolate and stir again (I just use a balloon whisk for this- nothing electric is required as you don’t need to incorporate much air).
  4. Pour your just boiled water over the instant coffee granules and once they’ve dissolved, gradually add to the chocolate batter, stirring gently with your whisk as you go. The final cake batter will be very thin but don’t worry, it bakes beautifully.
  5. Split the mix evenly between the prepared tins and bake for 45-55 minutes (until a skewer comes out clean with a few moist crumbs attached). Once baked leave to cool completely in the tins.
  6. While the cakes are cooling make the ganache. Chop the chocolate into small pieces and place in a heatproof bowl. Heat the cream in a saucepan until it meets scalding point then pour over the chocolate. Allow the cream to melt the chocolate for a few minutes then stir until smooth and glossy. Add salt to taste then set aside to cool.
  7. For the coffee mascarpone crush the coffee into a fine powder then just whisk together all the ingredients until smooth.
  8. When all the elements are cool you’re ready to assemble the cake. Your cakes will probably have a domed top, so trim these off then divide each one into two even layers (leaving you with 4 layers overall).
  9. Scrape the hazelnut praline caramel into a piping bag. Split the mascarpone into thirds. Spread one third of the mascarpone over the first sponge layer then pipe over a third of the caramel in a zigzag (so that each slice will have some caramel inside!). Repeat this step until you’ve used up the sponges, then rustically cover the whole cake in the thickened ganache.
  10. Garnish with edible dried flower petals.

Sea Salt, Dark Chocolate & Almond Butter Cookies (Vegan)

Biscuits

In the spirit of Veganuary, I thought I’d keep my recipes plant based this month. I’m not vegan myself, but am completely on board with reducing my consumption of animal products, so should probably reflect this in my baking. This week I tackled a home baking classic: the chocolate chip cookie. I’m pretty smug about the result; you would never guess they contained neither eggs nor dairy as the texture is buttery and chewy and the flavour rich, nutty and indulgent. Definitely give them a try, I’ve had great feedback from my (very willing) testers!

Ingredients

  • 150g vegan butter ( I used Naturli’s Vegan Baking Block)
  • 150g smooth almond butter
  • 75ml almond milk
  • 175g light brown soft sugar
  • 150g caster sugar
  • 1tsp vanilla extract
  • 150g rye flour
  • 200g plain flour
  • 1tsp bicarbonate of soda
  • 1/2tsp baking powder
  • 300g 70% dark chocolate, roughly chopped
  • 75g almonds, roughly chopped
  • Sea salt

Method

  1. Preheat the oven to 170c. Place the vegan butter, almond butter, almond milk, both sugars and vanilla in a heatproof bowl and set over a pan of simmering water (ensuring that the water does not touch the base of the bowl). Heat, stirring occasionally, until all the ingredients have melted to form a smooth mixture. Set aside to cool for 10 minutes.
  2. In a large mixing bowl, stir together the rye flour, plain flour, bicarbonate of soda, baking powder and a pinch of salt. Add in the wet ingredients and mix with a wooden spoon until a soft dough has formed. Now evenly distribute 3/4 of the chocolate chunks and all the almonds through the mixture.
  3. Line 2 or 3 large baking trays with greaseproof paper. Using an ice cream scoop shape even balls of dough and arrange on the trays, allowing space for spreading ( I put up to 6 cookies on each tray). Take a couple of your reserved chocolate chunks and press into the top of each ball of dough, then sprinkle with some sea salt.
  4. Bake for 10 minutes, then carefully take the trays out and bang them sharply on a worktop. Pop them back in the oven for 3 minutes then bang once more and leave to cool. This technique is favoured by lots of bakers as it stops the cookies from puffing up too much and creates that wrinkly finish (you’ll probably need to bake the cookies in batches as this recipe will make 18-22).
  5. Leave the cookies to cool on the trays or serve warm. Best enjoyed freshly baked.

Enjoy!

Chocolate Tahini Tiffin with Orange and Fig (Vegan)

Chocolate, Uncategorized

It’s January. It’s bloody freezing. I’ve hit a new level of pale, the Christmas tree has gone to festive heaven and everyone appears to be chasing a dry January (with varying levels of success) or hitting the gym. With these bleak facts in mind, I’m not going to share a protein-5cal-superfood recipe (that would be off brand anyway); instead, here’s a delicious way to use up any old dried fruit and nuts you have lying around after Christmas. It’s not an energy ball but it’s not the worst thing you could be eating. Enjoy!

Ingredients

  • 200g 70% dark chocolate
  • 50g coconut oil
  • 100g tahini
  • 1tbsp maple syrup
  • generous pinch sea salt
  • zest 1 orange
  • 150g mixed nuts (I used pistachios, almonds and pecans), roughly chopped
  • 120g dried figs, roughly chopped (I love figs with orange and tahini, but you could use any dried fruit)
  • 2tbsp sesame seeds, lightly toasted

Method

  1. Place the chocolate, coconut oil, tahini, maple syrup, seas salt and orange zest in a large heatproof bowl. Set the bowl over a pan of simmering water (ensuring that the water doesn’t touch the bottom of the bowl) and melt gently, stirring occasionally.
  2. Once the contents of the bowl have melted, mix briefly to form a smooth, glossy liquid. Set aside to cool a little.
  3. Once the chocolate mix has cooled, stir through the mixed nuts, dried figs and most of the sesame seeds. Tip into a lined tin/mould (mine was roughly 20x12cm) and level out with the back of a spoon. Sprinkle over the remaining sesame seeds, then leave in the fridge to set for at least 2 hours.
  4. Once set, slice up and serve (keep refrigerated).

Sticky Date Pudding with Masala Chai Inspired Toffee Sauce

Cakes, Uncategorized

This striking but deeply comforting dessert is perfect for Christmas if you’re after something a little bit different to your bog standard figgy pudding; it’s essentially a twist on the nostalgic sticky toffee pud, but is lifted with ginger, cinnamon, black pepper and orange then drenched in a sauce which I’ve infused with classic chai spices (black peppercorn, cardamom, cinnamon, anise, cloves and fennel seeds). I’m going to be serving this up on Christmas day with vanilla ice cream (though it would be amazing with a rose or pistachio variety!).

Ingredients

  • 225g butter
  • 225g soft dark brown sugar
  • 70g black treacle
  • 135g golden syrup
  • 200g pitted dates, roughly chopped
  • 200ml boiling water
  • 100ml milk
  • 350g plain flour
  • 2tsp bicarbonate of soda
  • 2tsp ground ginger
  • 1tsp ground cinnamon
  • 1/2 tsp ground black pepper
  • zest 1 orange
  • 2 eggs

For the sauce

  • 100g dark brown sugar
  • 75g butter
  • 50ml maple syrup
  • 125ml double cream
  • 1 cinnamon stick
  • 1 star anise
  • 2 cloves
  • 1/2tsp mixed spice
  • 5 black peppercorns
  • pinch fennel seeds
  • 4 green cardamom pods, cracked
  • pinch sea salt

Method

  1. Preheat the oven to 170c. Grease your bundt tin generously with butter then coat with plain flour, tipping out any excess.
  2. Before starting on the pudding mix, infuse the cream for the toffee sauce. To do this pour the cream into a small saucepan and add the cinnamon stick, star anise, cloves, mixed spice, peppercorns, fennel seeds and cardamom pods. Heat gently until just boiling then set aside until required.
  3. Place the dates in a small bowl then pour over the boiling water. While the dates are soaking, melt the butter, sugar, treacle and syrup in a large saucepan. Once the contents of the pan have melted add the milk, orange zest, soaked dates and water. Stir together until well combined. Set aside to cool a little.
  4. Sift the plain flour, bicarbonate of soda, ginger, cinnamon and black pepper into a large mixing bowl. Make a well in the middle and break in the eggs. Briefly mix the eggs to break them up then gradually add the contents of the saucepan. Stir together with a wooden spoon until you have a smooth, lump-free batter.
  5. Pour the batter into the prepared tin (ensuring that you leave a 1.5 inch gap at the top of the tin for rising) and bake for 40-50 minutes (or until a skewer comes out with a few moist crumbs attached when inserted).
  6. While the pudding is cooking, finish the sauce. To do this simply place the sugar, butter and maple in a small saucepan and melt together until gently bubbling, then remove from the heat and strain in the flavoured cream and salt.
  7. Serve the pudding warm with a generous helping of sauce and vanilla ice cream.

Merry Christmas!

Spiced Pistachio and Sour Cherry Brownies

Chocolate, Uncategorized

No matter how many elaborate desserts or multi-step bakes I make, I will always have time for the humble brownie; there is something deeply satisfying about that fudgy melt-in-the-mouth core and crackly top, plus they are incredibly versatile- throw anything in (within reason) and you can guarantee a delicious result. These festive brownies are studded with orange-soaked sour cherries, pistachios and milk chocolate chunks, and hum with cardamom, cinnamon and mixed spice.

Ingredients

  • Juice of 1 orange
  • 100g roughly chopped sour cherries
  • 250g butter, cubed
  • 100g 80% dark chocolate
  • 150g 70% dark chocolate
  • 100g dark brown soft sugar
  • 100g golden caster sugar
  • 3 eggs, plus 1 egg yolk
  • large pinch sea salt
  • 1tsp ground cardamom
  • 1tsp ground mixed spice
  • 1/2tsp ground cinnamon
  • 100g plain flour
  • 75g roughly chopped pistachios
  • 150g roughly chopped milk chocolate

Method

  1. Preheat the oven to 180c. Grease and line a 22x22cm baking tin. Soak the sour cherries in the orange juice and set aside until required.
  2. Put the dark chocolate and butter in a heatproof bowl and set over a pan of gently simmering water. Leave to melt, stirring occasionally, then set aside to cool a little.
  3. Meanwhile beat together the sugars, salt, eggs and egg yolk in a stand mixer (or a large bowl) until very light and voluminous (it will pretty much double in size). This stage is well worth the effort- it will give you that classic cracked top.
  4. Once the egg mixture is ready, pour the chocolate mix down the side of the bowl and fold in using a large metal spoon. Add the flour, salt and spices and do the same until you have a smooth, lump free batter. Now add the pistachios, chocolate chunks and cherries (strain away the orange juice) and stir through to evenly distribute.
  5. Tip the mix into the prepared tin and level off then bake for 25-30 minutes. When it’s ready, the brownie will have a flaky crisp top but will still be gooey and moist on the inside. Set aside to cool in the tin then remove, slice up and serve.

Enjoy!

Spiced Christmas Buns with Cranberry and White Chocolate

Bread, Uncategorized

In the words of Jez (Peep Show reference, sorry if you don’t watch it), ‘I am a Christmassist’. I love everything associated this time of year; heady spices, mulled anything, twinkling lights, the smell of fir, infinite chocolate, roll necks and nostalgic films. With that in mind, I’ve got lots of festive recipes lined up for December, kicking off with these spiced buns, packed full of orange-soaked fruit and white chocolate- delicious warm from the oven with a strong coffee.

Ingredients

For the dough

  • 75g butter, plus extra for greasing
  • 220ml milk
  • 50g caster sugar
  • 1tsp sea salt
  • 500g strong white bread flour
  • 2 sachets fast action dried yeast (14g)
  • 2 eggs (1 for the dough and 1 for glazing)

For the filling

  • 75g dried cranberries, roughly chopped
  • 50g sultanas, roughly chopped
  • Zest and juice 2 oranges
  • 125g butter, softened
  • 125g dark brown soft sugar
  • 1tsp ground cinnamon
  • 1tsp ground ginger
  • 1/2 tsp mixed spice
  • 100g white chocolate, roughly chopped

For the topping

  • The reserved orange juice, plus 3tbsp caster sugar
  • A few extra cranberries, roughly chopped (optional)
  • 75g white chocolate, melted (optional)

Method

  1. Start off by making the dough. Put the butter and milk into a saucepan and very gently heat until the butter melts, then set aside until lukewarm. Stir together the sugar, salt, yeast and flour in a large bowl (or bowl of a stand mixer with dough hook attached) then make a well and add in the lukewarm milk/butter and one of the eggs. Mix the wet ingredients into the dry, first using a wooden spoon to bring everything together, then using your hands to form a soft dough (alternatively, do this by setting your dough hook to a low speed).
  2. Once you have a soft dough, turn it out onto a very lightly floured surface and knead for about 10 minutes (or just keep the dough in your stand mixer bowl and increase the speed of your dough hook for 6-8 minutes) or until your dough is smooth, stretchy and elastic.
  3. Now tip the dough into an oiled bowl, cover with oiled cling film and leave to prove for about an hour and a half, or until doubled in size.
  4. For the bun filling, place the cranberries, sultanas, orange zest and orange juice in a bowl and leave to soak for half an hour. Meanwhile, beat together the butter, sugar, cinnamon, ginger and mixed spice until smooth. Grease a high sided 20x30cm rectangular tin or 25x25cm square tin and line with greaseproof paper.
  5. Once the dough has proved, tip out onto a lightly floured surface and roll into a rectangle, about 5mm thick. Spread the cinnamon butter mixture across the surface of the rectangle in an even layer, ensuring that you go all the way to the edges. Now strain the orange juice away from the dried fruits into a saucepan (save this for later). Sprinkle the fruits over the cinnamon butter then lastly distribute the chopped white chocolate.
  6. Now, with the long side facing you, roll the rectangle up like a roulade. Slice into 12 even slices if you’re using a rectangular tin (about 2cm wide) or 9 even slices if you’re using a square (about 2.5cm wide). Arrange the pieces, swirl side up, in the prepared tin and cover with a piece of lightly oiled cling film. Leave to prove for 30-40 minutes or until well risen and springy (before this prove there will be little gaps between the buns, but they should be just touching when ready to bake). Preheat the oven to 180c.
  7. Once risen, whisk the remaining egg and brush all over the tops of the buns. Bake for 40-45 minutes or until golden and cooked through. Meanwhile, place the reserved orange juice and caster sugar in a saucepan and heat gently, until the sugar dissolves and the mixture is syrupy. When the buns are baked, brush the syrup all over the tops, then drizzle on the white chocolate and finish with chopped cranberries, if you like.

Pecan Pie Cheesecake with Brown Butter Pastry and a Caramel Core

Uncategorized

I’m under no illusion that this bake is a bit of a project and should probably come with a health warning, but I can honestly say that the the result it delivers is well worth the effort and extra 4539 calories (joking about the calories… although probably not far off). I’ve gone for a brown butter rye pastry in place of a biscuit base here, which might sound controversial (maverick), but it matches up to the nutty pecan topping really well and acts as a great textural contrast to the smooth, caramel-cored cheesecake filling. Give it a go, but be warned, it’s been described as ‘like crack’ by my eloquent taste-testers (who aren’t and never have been ‘on crack’, for the record).

Ingredients

For the base

  • 150g butter
  • 175g plain flour
  • 75g rye flour
  • 1tsp cinnamon
  • 50g icing sugar
  • 2 egg yolks
  • 2tbsp milk

For the caramel core

  • 100g caster sugar
  • 25ml water
  • 50ml double cream
  • pinch sea salt
  • 2tbsp rum or bourbon (optional)

For the filling

  • 600g full fat cream cheese
  • 150g caster sugar
  • 2tbsp corn flour
  • 2 eggs
  • 180ml soured cream
  • pinch salt

For the topping

  • 1 egg
  • 50g dark brown soft sugar
  • 3tbsp golden syrup or honey
  • 1tbsp butter, melted
  • 1tbsp plain flour
  • 100g pecan halves, lightly toasted

Method

  1. Start off by browning the butter for the pastry. To do this simply melt it in a pan until it’s gently foaming, smells nutty and is a light golden brown colour. At this stage pour the butter in a heatproof bowl and pop in the fridge or freezer to set hard.
  2. While the butter is firming up, make the caramel core. Place the sugar and water in a pan and gently heat until the sugar has completely dissolved and you are left with a clear syrup, then increase the heat and boil until it reaches a deep golden brown. Add in the cream (be careful as it will spit!) and stir for a further two minutes on the heat, then remove from the heat and add the salt and rum to taste. Set aside until needed.
  3. Back to the pastry; once your butter has firmed up, chop into cubes and tip into a food processor along with the flours, cinnamon and sugar. Pulse until it resembles breadcrumbs, then add in the milk and egg yolks. Pulse again a few times until the mix comes together in large lumps, then tip out onto your work surface and shape into a disc. Wrap in cling film and chill for 10 minutes. Preheat the oven to 180c. Grease a 2.5inch tall/ 8inch wide spring form cake tin with butter and place a disc of greaseproof paper in the base.
  4. Roll out the pastry to about 3mm thick on a floured work surface then line the prepared tin, pushing the pastry into the corners as you go (I actually find it easier to cut out a circle of pastry for the base and 2 long rectangles for the walls when I’m using a cake tin for pies and tarts- just make sure you blend the joins between the pieces together and don’t leave any gaps). Trim away any excess from the top of the tin, prick a fork all over the base (not all the way through) to prevent air bubbles, then chill for 10 minutes, or until very firm. If you like you can cut out some leaves for decoration at this stage.
  5. Once firm, line the pastry case with baking paper and fill with baking beans (ensuring that they come all the way to the top of the walls), then blind bake for about 15 minutes, or until the walls are supporting themselves. At this stage, remove the paper and beans and return to the oven for another 10-15 minutes, or until the pastry is cooked through and golden. Set aside. Reduce the oven temperature to 120c.
  6. For the cheesecake filling simply whisk together the cream cheese, sugar and corn flour until smooth, then add in the eggs one at a time, beating well between each addition. Lastly, whisk in the soured cream and salt. Tip half of this mixture into the pastry case then drizzle over the caramel. Top with the remaining cheesecake mix (this should come to about an inch below the rim of the pastry case). Bake for 50-55 minutes, or until the middle retains a little wobble. Set aside and allow to settle and cool down slightly. Increase the oven temperature to 170c.
  7. While the cheesecake is baking, mix together all the topping ingredients, except the pecans,until smooth. Once your cheesecake has cooled to a point where it’s no longer hot to the touch, arrange the pecan halves across the surface, then pour over the syrupy mixture. Return to the oven for 10-15 minutes until the topping has thickened slightly. Set aside to cool then chill to set up for at least 4 hours (ideally overnight). When you’re ready to serve, run a knife around the edge of the tin and gently release the cheesecake, then slice up and enjoy!